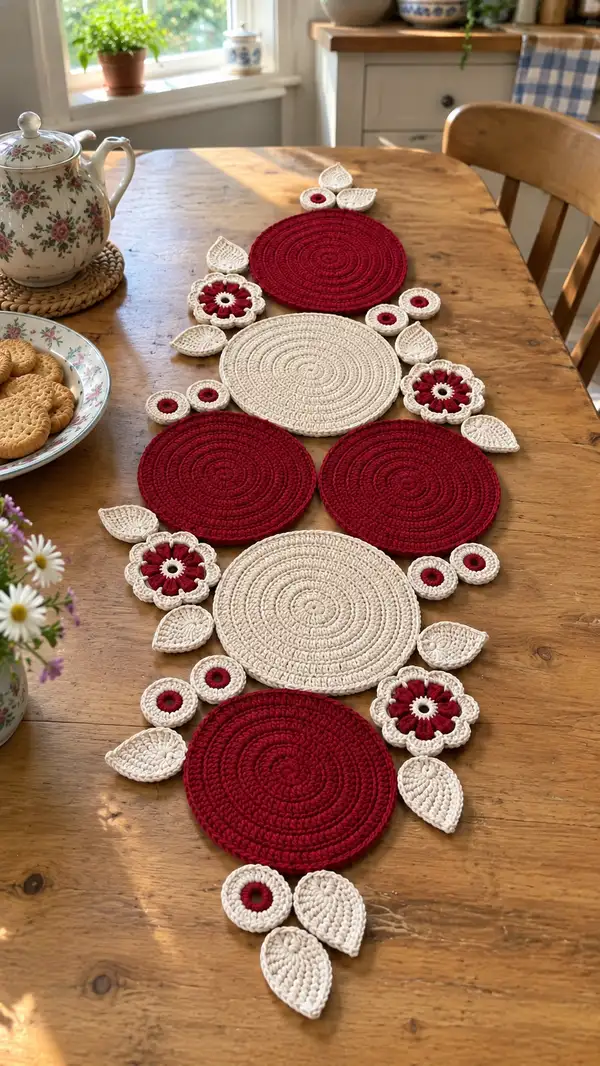
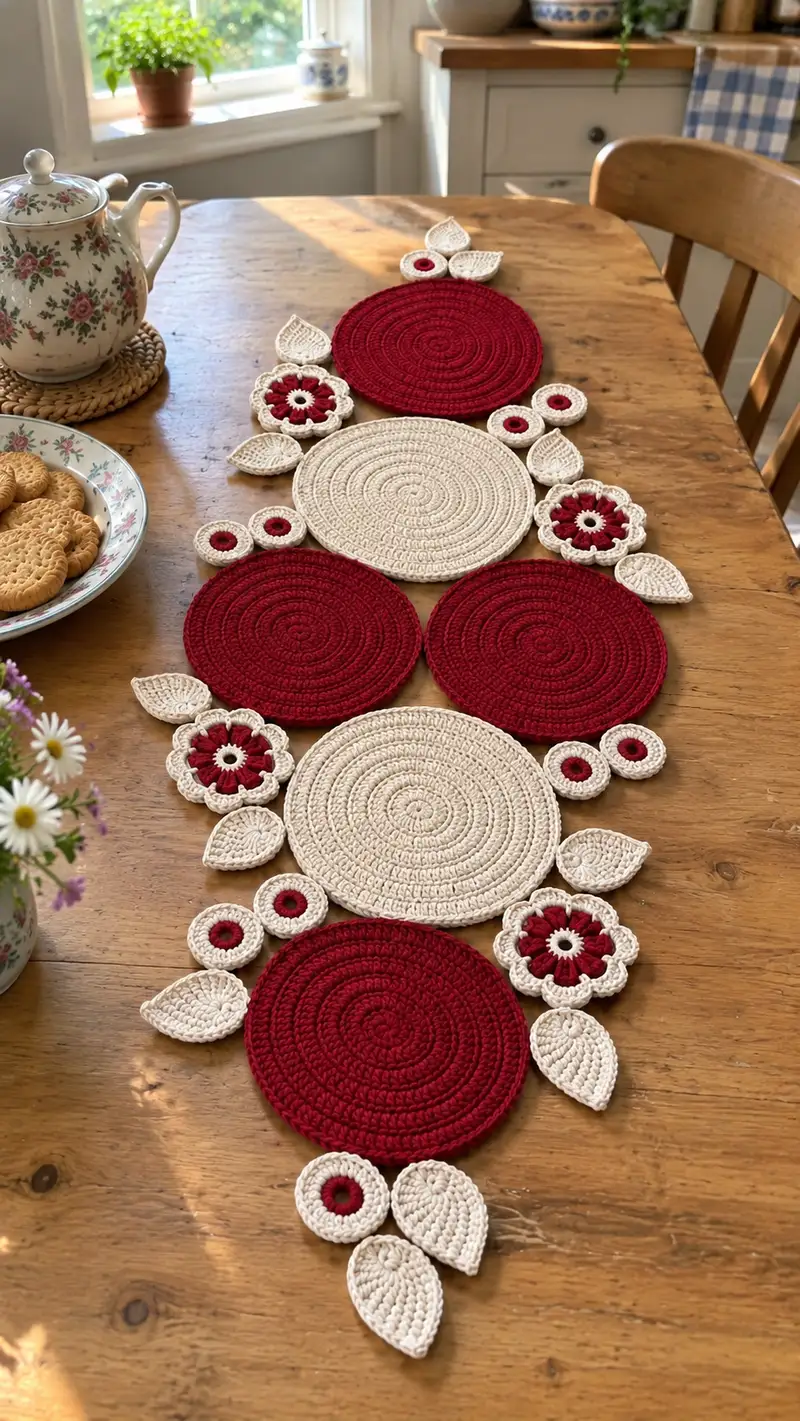
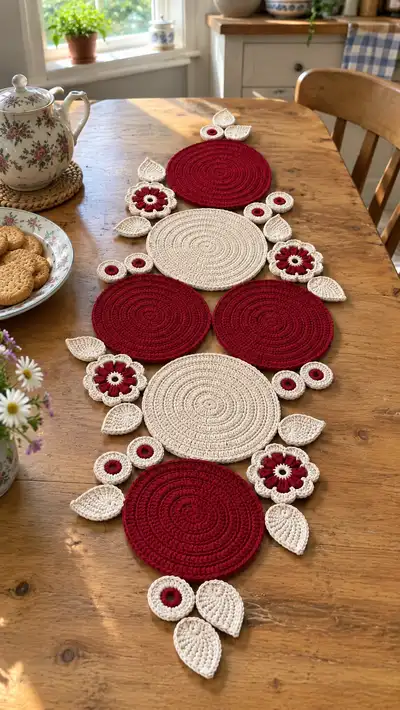
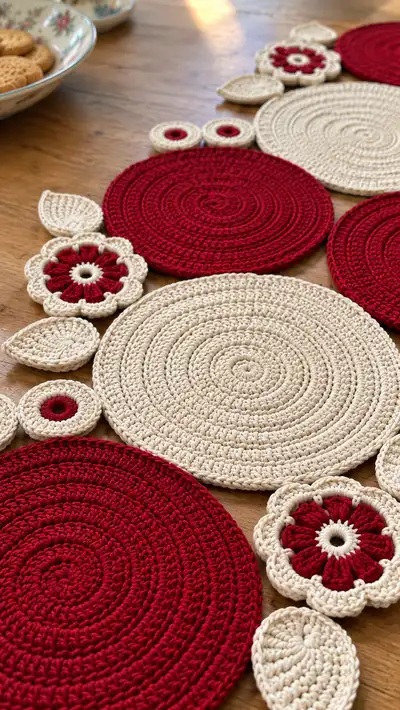
Create a warm, elegant table runner made from crocheted concentric circles, decorative flowers and teardrop leaves in deep red and natural cream. This modular design is made from joined round placemat-style motifs and delicate floral trims, perfect for holiday tables or a year-round centerpiece. The pattern includes step-by-step instructions for every circle, flower, leaf, and the joining technique to assemble a polished runner.
Progress Tracker
0% Complete
— Materials & Gauge :
Info :
Gauge is not critical for motif assembly but affects final size. With worsted cotton and a 4.0mm hook, a large 96-st round (96 sc) measures approximately 12" (30cm) across flat. Adjust hook to match desired diameter.
— Large Circle (Make 4 in alternating colors: 2 deep red, 2 natural cream) :
Round 1 :
6 sc in magic ring (6)
Round 3 :
(1 sc, 1 inc) x 6 (18)
Round 4 :
(2 sc, 1 inc) x 6 (24)
Round 5 :
(3 sc, 1 inc) x 6 (30)
Info :
Keep first three rounds slightly looser to avoid a tight puckered center; after this you can tighten tension. Use a stitch marker at the first stitch to track round starts in spiral work.
Round 6 :
(4 sc, 1 inc) x 6 (36)
Round 7 :
(5 sc, 1 inc) x 6 (42)
Round 8 :
(6 sc, 1 inc) x 6 (48)
Round 9 :
(7 sc, 1 inc) x 6 (54)
Round 10 :
(8 sc, 1 inc) x 6 (60)
Info :
From now on counts increase by 6 each round because we maintain 6 increase points. If you prefer a shallower mat, stop increasing earlier and work more even rounds instead.
Round 11 :
(9 sc, 1 inc) x 6 (66)
Round 12 :
(10 sc, 1 inc) x 6 (72)
Round 13 :
(11 sc, 1 inc) x 6 (78)
Round 14 :
(12 sc, 1 inc) x 6 (84)
Round 15 :
(13 sc, 1 inc) x 6 (90)
Round 16 :
(14 sc, 1 inc) x 6 (96)
Info :
At 96 sts you should have a large circle roughly 11.5-13" depending on yarn. Check flatness: if the circle ruffles, remove one increase round; if it cups, add one more even round followed by an even round of hdc in BLO to flatten.
Round 17-22 :
1 sc in each st (96)
Round 23 :
1 sc in each st BLO (96)
Round 24 :
1 sc in each st FLO (96)
Info :
Using BLO or FLO for a single round adds a concentric ridge for texture and helps the motif sit flat. On cotton this creates a subtle decorative ring that reads nicely when joined with other motifs.
Round 25-30 :
1 sc in each st (96)
Round 31 :
Sl st, fasten off. Weave in ends invisibly to the wrong side.
Info :
Make 4 total. Two deep red and two natural cream in alternating order looks like the photos. Block each circle flat while damp for a crisp tabletop appearance.
— Medium Circle (Make 3 in alternating colors) :
Round 1 :
6 sc in magic ring (6)
Round 3 :
(1 sc, 1 inc) x 6 (18)
Round 4 :
(2 sc, 1 inc) x 6 (24)
Round 5 :
(3 sc, 1 inc) x 6 (30)
Round 6 :
(4 sc, 1 inc) x 6 (36)
Round 7 :
(5 sc, 1 inc) x 6 (42)
Round 8 :
(6 sc, 1 inc) x 6 (48)
Round 9 :
(7 sc, 1 inc) x 6 (54)
Round 10 :
(8 sc, 1 inc) x 6 (60)
Info :
This medium circle reaches 60 sts at round 10 and is a nice companion size to the large circle. For a more compact mat, stop increases at round 9 (54 sts) and proceed to even rounds.
Round 11-18 :
1 sc in each st (60)
Round 19 :
1 sc in each st BLO (60)
Round 20-22 :
1 sc in each st (60)
Round 23 :
Sl st, fasten off. Weave in ends and block flat.
Info :
Make 3 medium circles. Use a 4.0mm hook for consistent appearance with large circles; a 3.5mm hook will tighten the fabric slightly if you prefer firmer mats.
— Small Donut Circle (Make 8 small decorative donuts in cream with red centers) :
Round 1 :
Ch 4, join with sl st to form ring. Ch 1 (do not count as st).
Round 2 :
8 sc into ring (8)
Round 4 :
(1 sc, 1 inc) x 8 (24)
Round 5 :
1 sc in each st (24)
Round 6 :
1 sc in each st BLO (24) - creates a slightly raised outer ring
Round 7 :
Sl st, fasten off cream. Rejoin a short length of red yarn to the center back and work 6 sc into the central hole across from the wrong side to create a red center ring if desired. Fasten off and weave ends.
Info :
These small donuts are used as tiny spacer motifs between circles; they are light-weight and help the runner read as a single organic line rather than separate placemats.
— Flower Motif (Make 4 flowers: red center with cream petals) :
Round 1 :
Ch 6, sl st to first ch to form ring. Ch 1 (center ring).
Round 2 :
Work 12 sc into ring (12)
Round 3 :
Change to contrasting petal color (if using). (1 sc, ch 3, skip 1) x 12 around to create base loops for petals (12 loops)
Info :
Use a stitch marker to mark the first loop — you'll work petals into these loops. Make sure loops are evenly tensioned to create uniform petals.
Round 4 :
Into each ch-3 loop: (3 tr, ch 1, 3 tr) sl st into next sc to anchor petal. Repeat around creating 12 full petals (12 petals)
Round 5 :
Sl st into the base of the first petal, ch 1, sc evenly around the backs of the petals (24 sc) to tidy the back and secure petals. Sl st, fasten off if desired.
Round 6 :
Rejoin cream and work a scallop round: (sl st, 5 dc in next st, sl st) x 12 to outline petals with a neat scallop edge. Fasten off and weave in ends.
Info :
The flower in the photo has 8 rounded petals larger in scale; if you prefer 8 petals instead of 12, work 8 ch-4 loops in round 3 and adjust petal clusters accordingly. The count above gives a more delicate 12-petal flower.
— Small Centered Petal Flower (Alternative smaller flower - Make 3) :
Round 1 :
Ch 4, join to ring. Work 8 sc into ring (8)
Round 2 :
Ch 2, (2 dc, ch 1, 2 dc) into next st, sl st to next sc; rep around for 8 small petals (8 petals)
Round 3 :
Sl st into base, sc around back to tidy (16 sc). Fasten off and weave ends.
Info :
Use these smaller flowerlets to fill gaps and balance the composition along the runner edge.
— Leaf (Make 10 teardrop leaves in cream) :
Round 1 :
Ch 6. Sc in 2nd ch from hook, hdc in next, dc in next, tr in next, dc in next, hdc in next, sc in last. Slip to first to shape point (this is a short base row to begin leaf shaping)
Round 2 :
Working along one long edge: sc, hdc, 2 dc, tr, 2 dc, hdc, sc. Turn and work along the opposite edge: sc in same foundation ch base back toward start to create symmetrical edge. (18 sts total around the leaf)
Round 3 :
Increase shaping: (sc, inc, hdc, 2 dc, tr, 2 dc, hdc, inc, sc) across - symmetrical increases at the widest points. (approx 22 sts)
Round 4 :
Work 1 sc in each st around to even the edge (22)
Round 5 :
Work a fine ridge: 1 sc in BLO around to create a spine and slightly cupped texture (22)
Round 6-8 :
Optional: repeat a gentle decrease shaping back toward tip with (sc, dec, hdc) sequences if you want a more pointed leaf; otherwise keep rounds even for a plump teardrop. Fasten off and block leaf flat with slight curve toward the center to mimic natural leaf cupping.
Info :
Make 10 leaves. To match the photo, stagger leaves in orientation (some pointing outward, some inward) and slightly fold them at the central spine before pin-blocking to hold shape.
— Joining Motifs & Decorative Edging :
Info :
Lay out your circles, flowers, donuts and leaves on a large flat surface following the photo or your preferred arrangement. Pin motifs in place. The sequence shown alternates large red, medium cream, medium red, large cream, etc. Small donuts and flowers sit between circles and leaves fill the outer edges.
Round 1 (Joining Preparation) :
With cream yarn and 4.0mm hook, join at a point where two motifs meet. Work 1 sc in the outer round of the first motif, ch 1, 1 sc in corresponding st of second motif; continue working alternating sc and sl st joins every 4-6 sts depending on how firmly you want motifs connected. This first pass temporarily anchors pieces together.
Round 2 (Secure Join) :
Turn and work through both motif edges: (sl st in next st of motif A, sl st in next st of motif B) x around the contact area creating a flat seam. Where motifs overlap across a long seam, work 1 sc in each paired st for a slightly raised seam that reads like a decorative ridge.
Info :
If you prefer an almost-invisible join, use mattress stitch with a yarn needle, catching the back loops of each motif. For a visible crochet join, slip-stitch or single-crochet through both edges for the length of the seam.
Round 3 (Edge Finishing) :
Once all motifs are joined into the runner layout, work a unifying outer border: with cream yarn, join to the outermost round of any edge motif, ch 1, sc evenly around the outer perimeter of the entire runner, placing (sc, ch 1) in corners and points to maintain a non-rippled edge. Keep edge stitches even; total count will vary with layout.
Round 4 :
Optional decorative scallop: (skip 2 st, 5 dc in next st, skip 2 st, sl st) around the entire outer edge; where stitches don't line up exactly, work scallops into every 3rd or 4th stitch to maintain spacing and appearance. Fasten off and weave in ends neatly on the back of the runner.
Info :
When joining round-to-round, always match round heights: join the outermost rounds of both motifs together rather than joining a round 20 of one to round 18 of the other. This prevents waves and ensures the outer border sits neatly.
— Alternative Joining (Slip-Stitch Seam) :
Round 1 :
Work motifs in a connected crocheting method where you complete one motif and slip-stitch into the next motif's outer round as you make it. For example, complete a circle to its final round, ch 1, sl st into the planned neighbor motif's outer round and join both pieces with sl st across X stitches, completing the next motif directly from that join.
Info :
Connected crocheting reduces sewing at the end, but requires careful layout and orientation so motifs fall into the correct positions. This method is faster but less forgiving if you want to modify layout later.
— Finishing Touches :
Info :
When all pieces are joined and ends woven in, pin the whole runner on a blocking mat and lightly steam or wet-block cotton motifs to even the fabric. Gently stretch to shape and allow to dry overnight. If you prefer a firmer placemat, use a light starch spray while blocking.
Round 1 :
Trim and weave ends through a few motifs rather than knotting at the surface; tie-off inside the seam line to avoid visible tails.
Info :
Check the underside for any loose joins. If any seams feel weak, reinforce with a few hidden whip-stitches using a yarn needle and matching yarn for longevity.
— Optional: Weighted Center Inserts (for stable placemats) :
Info :
If you want small weighted inserts to help the runner lay flatter, cut circles of thin felt matching motif size and glue to the back center of each large circle with fabric glue, or slip a small flat washer into the back seam when sewing. Ensure adhesive is safe for textiles if you choose glue.
— Notes on Colorwork and Variations :
Info :
To replicate the photo look, make the three largest motifs alternating red and cream; use cream for leaves and scalloped edges. For seasonal variations substitute greens and golds or pastel shades for spring arrangements. You can lengthen or shorten the runner by adding or removing medium circles and small filler motifs.
Info :
If you wish to create individual placemats instead of a runner, simply finish each large circle at round 30 and weave in ends—no joining necessary. Add a slip-stitch border for a neat finish.
Finishing this runner is a joyful, tactile process—watching individual circles and flowers come together into a flowing table centerpiece is so satisfying. The red and cream palette reads festive yet timeless, and the modular construction means you can adapt the length or color in minutes. 🧶 This piece will brighten your table and make every meal feel a little more special. Happy stitching, and enjoy arranging your motifs just the way you like! 🎀