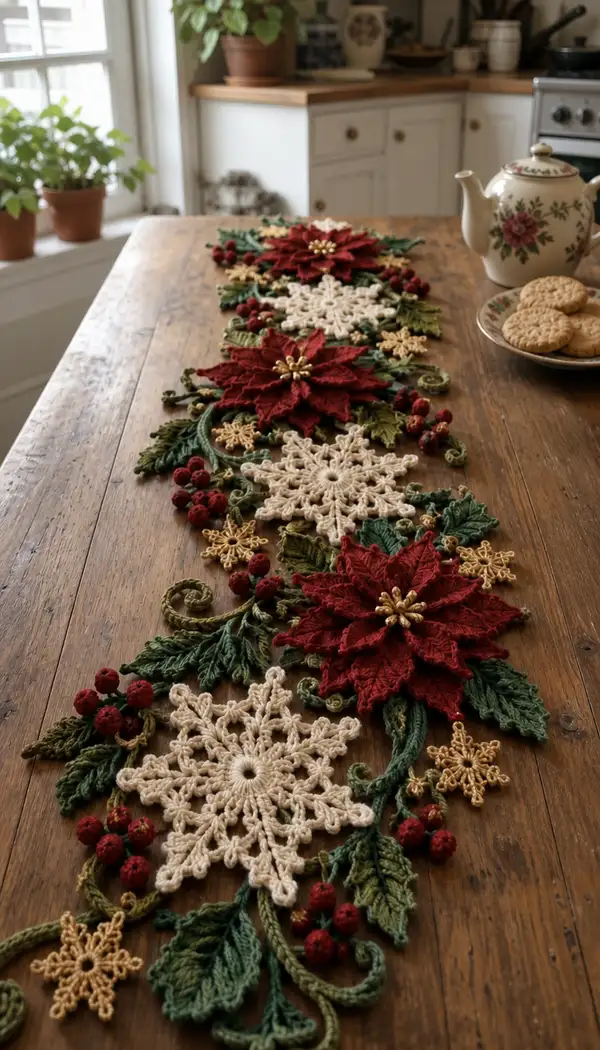
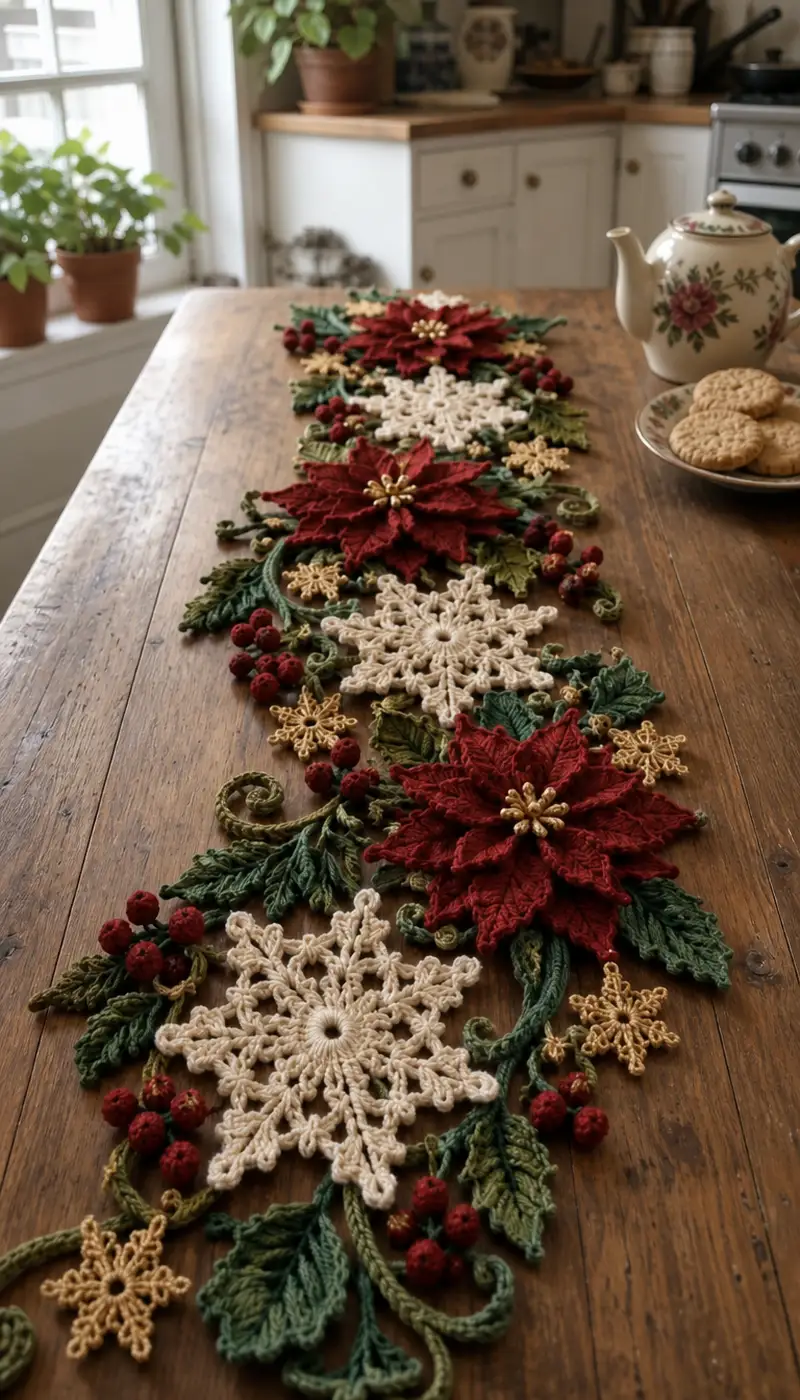
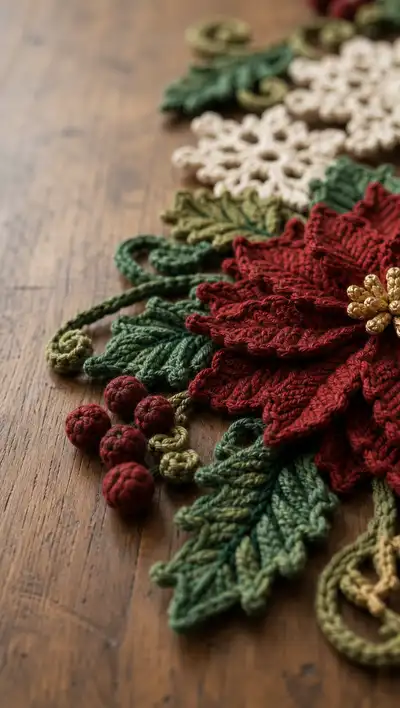
Create a stunning holiday table runner featuring layered poinsettias, lacy snowflakes, textured leaves, curled vines and clustered berries. This richly textured centerpiece uses worsted weight yarn in deep red, cream, olive and gold to produce a warm, vintage holiday look. The pattern breaks each motif into clear sections for petals, leaves, snowflakes and berries and includes detailed assembly and finishing notes to help you join motifs into a long, flowing runner.
Progress Tracker
0% Complete
— Notes & Preparation :
Info :
Read entire pattern before starting. This runner is constructed of separate motifs: large poinsettia petals (three layered sizes), a clustered center, large lacy snowflakes, small gold snowflakes, textured leaves, curled vines and small stuffed berries. Make motifs separately and lay them out to arrange composition before sewing. Block flat motifs where noted for best results.
Info :
All petals and snowflakes are worked in continuous rounds unless otherwise stated. Use a stitch marker to mark the first stitch of each round. When pattern says 'Make X', work X identical motifs.
— Large Poinsettia Petal (Make 8 petals per flower; make 3 layered flowers) :
Round 3 :
(1 sc, inc) x 6 (18)
Round 4 :
(2 sc, inc) x 6 (24)
Round 5 :
(3 sc, inc) x 6 (30)
Info :
At this point the motif is a small disk. We will build height and form one petal per repeat by working elongated front-post clusters and chain loops to create a pointed petal shape. Keep gauge consistent.
Round 6 :
1 sc in each st (30)
Round 7 :
(2 sc, fpdc around next st, ch3, sl st into next st) x 10 (30)
Round 8 :
Working into each ch3 loop: (sl st, ch2, 3 dc, ch2, sl st) into each petal loop around, securing a pointed tip (10 petals formed)
Info :
These clusters build a pronounced pointed petal. If you prefer fewer petals per flower, work petals into groups of 3 stitches to make 8 petals instead (adjust repeats accordingly). For pictured look we will make 10 petal points then layer smaller petals on top.
Round 9 :
In each petal: ch1 from base, 1 sc into base st, fpdc around next 3 stitches (to form a raised vein), 1 sc into tip sl st to secure (30 total base sc evenly distributed)
Round 10 :
1 sc in each base st BLO to create a crisp outer ridge (30)
Round 11 :
Working around petal edges: *(ch3, sl st at base of petal; ch3, 5 dc cluster into ch3 space, ch3, sl st at opposite base)* repeat for each petal to enlarge and create layered ridged edge (10 petal clusters)
Round 12 :
1 sc evenly around entire motif in both loops (include petal edge stitches) — approximate count 60 (depends on tension)
Info :
After Round 12 each large petal motif is a pronounced pointed petal cluster around a small central disk. Fasten off with long tail for sewing into flower center. Block lightly to open petals and set shape.
— Medium Poinsettia Petal (Make 8 petals per flower; medium layer) :
Round 3 :
(1 sc, inc) x 6 (18)
Round 4 :
(2 sc, inc) x 6 (24)
Round 5 :
1 sc in each st (24)
Info :
Medium petals are slightly narrower than large; use fewer post-stitch clusters and smaller tip clusters to allow the large petals to sit beneath them.
Round 6 :
(1 sc, fpdc around next st, ch2, sl st) x 8 (24)
Round 7 :
Into each ch2 loop: sl st, ch2, 3 dc, sl st — forming 8 rounded petals
Round 8 :
1 sc in each st around BLO to create petal base ridge (24)
Round 9 :
Edge round: *ch2, 3 sc into petal tip, ch2, sl st into petal base* repeat for each petal producing small scallops (8 small scalloped tips)
Info :
Fasten off leaving long tail for sewing to large petal layer. Slightly curve petals upward with blocking for a natural layered bloom.
— Small Poinsettia Petal (Make 8 petals per flower; top layer) :
Round 3 :
(1 sc, inc) x 6 (18)
Round 4 :
1 sc in each st (18)
Round 5 :
(fpdc around next st, ch1, sl st) x 6 forming 6 small raised petal pockets
Round 6 :
Into each ch1 loop: ch2, 3 dc, sl st (6 small petals)
Info :
Small petals form the inner-most layer. Fasten off with long tail for stacking and sewing together with the medium and large layers. Block lightly to cup petals slightly upward.
— Poinsettia Center (Make 3 clusters per flower) :
Round 3 :
(1 sc, inc) x 6 (18)
Round 4 :
1 sc in each st (18)
Round 5 :
Work 6 small popcorns around center: *(ch2, 5 dc in next st, sl st into same st)* x 6 (visual popcorn petal cluster)
Round 6 :
Weave in gold beads or sew three small metallic beads into the center with yarn tail; fasten off leaving long tail for sewing into the layered petals
Info :
Centers are decorative: you can sew on small gold beads or crochet tiny bead-like bumps. Using actual metallic beads creates a realistic poinsettia stamen cluster.
— Textured Leaf (Large) (Make 12-16 leaves) :
Round 1 :
ch12, sc in 2nd ch from hook, sc across (11)
Round 2 :
ch1, turn, sc across (11)
Round 3 :
ch2 (counts as hdc), hdc across to end (11 hdc)
Round 4 :
Working along one long edge: *fpdc around next st, ch1* across to create raised vein ridge along center (11 fpdc)
Round 5 :
Turn and repeat hdc back along opposite edge, sl st at base to form pointed tip; begin shaping leaf with increases on widest row — at central third, (2 hdc in same st) twice to create widest point
Round 6 :
Work symmetrical decreases past the widest point: when you see previous increases, work (hdc dec) to taper leaf back toward base until base row count returns to 11 stitches
Round 7 :
With right side facing, 1 sc around entire leaf edge working (3 sc at tip) to smooth corners — approximate count 30; leave long tail for sewing
Info :
Use FLO or FP post stitches to accent veins: work a series of fpdc then bpdc running diagonally from center to edge for realistic vein pattern. Block and gently steam to hold shape. Make varying sizes by chaining 10–16 initially.
— Textured Leaf (Small) (Make 12-18 small leaves) :
Round 1 :
ch8, sc in 2nd ch from hook, sc across (7)
Round 2 :
ch1, sc across (7)
Round 3 :
ch2, hdc across (7)
Round 4 :
Along one edge: fpdc in next 3 sts, ch1, sl st across to form small raised vein
Round 5 :
1 sc around leaf edge to finish, turn and fasten off leaving tail for sewing (approx 18 sc around)
Info :
Small leaves accent berry clusters and snowflake edges; vary green yarns (olive, moss) to create natural depth.
— Curled Vine (Make several long vines to layout runner flow) :
Round 1 :
ch40 (or desired vine length), sc in 2nd ch from hook and each ch across (39)
Round 2 :
Turn, ch1, 1 sc in each st across (39)
Round 3 :
To create curl: *(sc in next 3 sts, 3 sc in next st)* repeat across. This will cause the vine to curl automatically (approx 48–52 depending on length)
Info :
Alternatively, work a spiral vine: ch20, sl st into base to create coil; when assembled, slightly wet and pin into spirals to dry for permanent curl. For stronger vines, run thin wire through center before crocheting or slipwire inside chain space.
Round 4 :
Fasten off leaving long tail for sewing; make vines in two tones (dark and pale olive) for visual interest
— Berry Sphere (Make clusters of 3–6 berries per bunch; make 12–20 berries) :
Round 3 :
(1 sc, inc) x 6 (18)
Round 4 :
1 sc in each st (18)
Round 5 :
(1 sc, dec) x 6 (12)
Info :
Stuff lightly (a little fiberfill) after Round 4 so sphere fills out but remains soft. Use small amounts at a time for an even shape. Fasten off leaving long tail, sew opening closed and embroider a tiny green stitch for stem connection. Make clustered groups by sewing 3–6 berries on a short stem of chained stitches.
— Large Lacy Snowflake (Make 4–5) :
Round 1 :
ch6, sl st to first ch to form ring, ch3 (counts as dc), 11 dc into ring, sl st to top of ch3 (12 dc) (12)
Round 2 :
ch4 (counts as tr), *1 tr in next st, ch2* repeat around to create 12 tr and 12 ch2 spaces; sl st to top of starting tr (12 tr + 12 ch spaces)
Round 3 :
Into each ch2 space: *(ch3, 2 dc, ch3, sl st into space)* to form petal arms (12 arms)
Round 4 :
Working into peak of each petal: ch1, sc around peak, into ch3 loops work (ch3, 5 dc, ch3) to enlarge lacy tip (12 larger tips)
Round 5 :
1 sc in each stitch around entire snowflake and into spaces as needed to create final lacy shape — approximate count 120 (depends on tension)
Info :
Pin and block snowflakes to exact measurement while damp; spray starch lightly for a crisp finish. Make cream colored large snowflakes for contrast between red flowers.
— Small Gold Snowflake (Make 6–10) :
Round 1 :
mr, ch3, 10 dc into ring, sl st to top of ch3 (11)
Round 2 :
ch4, *sl st in next st, ch3* repeat to build 6 small points (approx 6–8 points depending on spacing)
Round 3 :
In each ch3 loop: (sl st, ch2, 3 dc, ch2, sl st) to create tiny lacy tips; sl st and fasten off (small star-like snowflake)
Info :
Use metallic gold or warm yellow yarn for these to add sparkle. They act as small connectors and bright accent pieces in the runner.
— Joining Motifs Preparation :
Info :
Before sewing, block all snowflakes flat and shape petals and leaves. Lay out your runner on a large flat surface (blocking mat or table). Arrange large poinsettia flower groups (each flower = 8 large petals + 8 medium + 8 small + 3 center clusters) spaced evenly down the center with snowflakes staggered between them. Add leaves, berries and vines to create a flowing composition. Take a photo for reference before sewing.
Info :
Decide if you prefer a sparse runner (flowers separated by longer vines) or dense garland-like clusters. The pictured runner alternates poinsettia and snowflake focal points with leaves and berries filling the gaps.
— Assembly & Sewing Motifs Together :
Round 1 :
Stack one large petal layer (8 petals) on the table with right side up. Place medium layer petals offset so each medium petal sits between two large petals. Use long tails to sew medium to large with small whip stitches through the base of each petal (8 attachment points).
Round 2 :
Place small petal layer on top centered and sew through bases aligning into the central disk. Add center cluster by sewing through cluster base into base of layers, securing beads or crochet center firmly. Repeat to make 3 fully layered poinsettia flowers.
Round 3 :
Arrange a poinsettia and a snowflake alternating down the runner length. Pin leaves around each focal point, placing small leaves near the base of petals and larger leaves radiating outward. Use the long tails to stitch leaves through their center back to the underside of the runner so seams are hidden.
Round 4 :
Sew vines into gaps: overlap vine ends with leaf bases and secure with a few tight stitches through both pieces. Sew berry clusters at vine ends or tucked under petal layers. Use extra stitches through overlapping layers to secure for table use (not intended for heavy wear).
Info :
Keep stitching shallow into motifs to avoid creating bulky seams. Use small, neat stitches and test stability by gently lifting the runner by a central motif to ensure secure seams. Reinforce points that will see stress (vine ends, outer leaves) with two rows of stitching if necessary.
Round 5 :
Once sewn, carefully weave in and bury all tails on the underside. Trim yarn ends closely. If using beads for centers, secure them with extra thread and a dot of fabric glue on the underside for permanence if desired.
— Finishing & Blocking :
Info :
Block the fully assembled runner lightly: lay flat on blocking mat, pin points of petals and snowflakes to keep shape, mist lightly, and allow to dry. For a stiffer runner, spray starch lightly before setting. Remove pins when completely dry.
Info :
Optional: For table protection, apply a thin felt backing to underside by sewing a lightweight backing fabric to edges of runner, catching a few stitches under motifs to keep underside neat. This also helps the runner lay flat.
— Alternative Sizes & Customization :
Info :
To scale runner larger: make additional focal motifs and lengthen vines. To make a shorter centerpiece, use 2-3 focal motifs. Color variations are straightforward: swap red for pink or burgundy or cream for icy blue snowflakes for a winter palette variation.
Info :
To add extra texture, add tassel-like fringe at runner ends by attaching short bundles of chain loops and trimming to even length; or add wired stems to flower centers for a dimensional arrangement.
— Tools & Techniques Reminders :
Info :
Use a blunt darning needle to pull yarn tails to the underside, and a small crochet hook to pick up hidden loops while sewing. For neat joins, use invisible ladder-like stitches and sew from the underside when possible to keep top clean. Save a photo of your layout to help replicate placement when making more than one runner.
This festive floral table runner brings heirloom warmth to your holiday table with layered poinsettias, lacy snowflakes and textured foliage 🌿. Each motif is made separately and arranged like a floral collage for a beautiful, customizable centerpiece. Make it your own with color swaps, bead centers or a felt backing for longevity. Enjoy the slow, rewarding process and the joyful result — a handmade runner to treasure year after year! 🎄✨