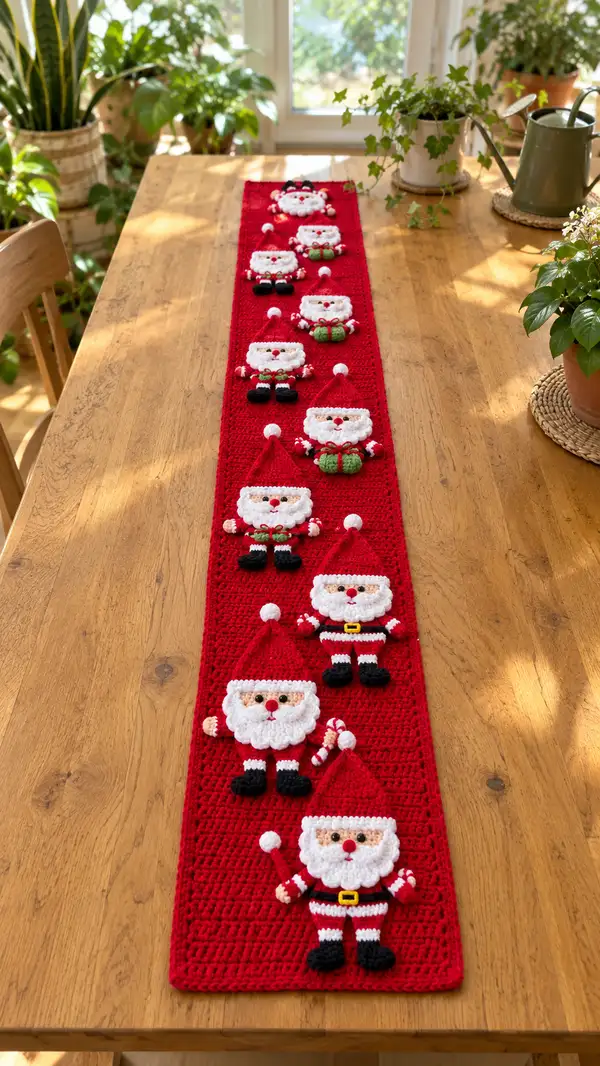
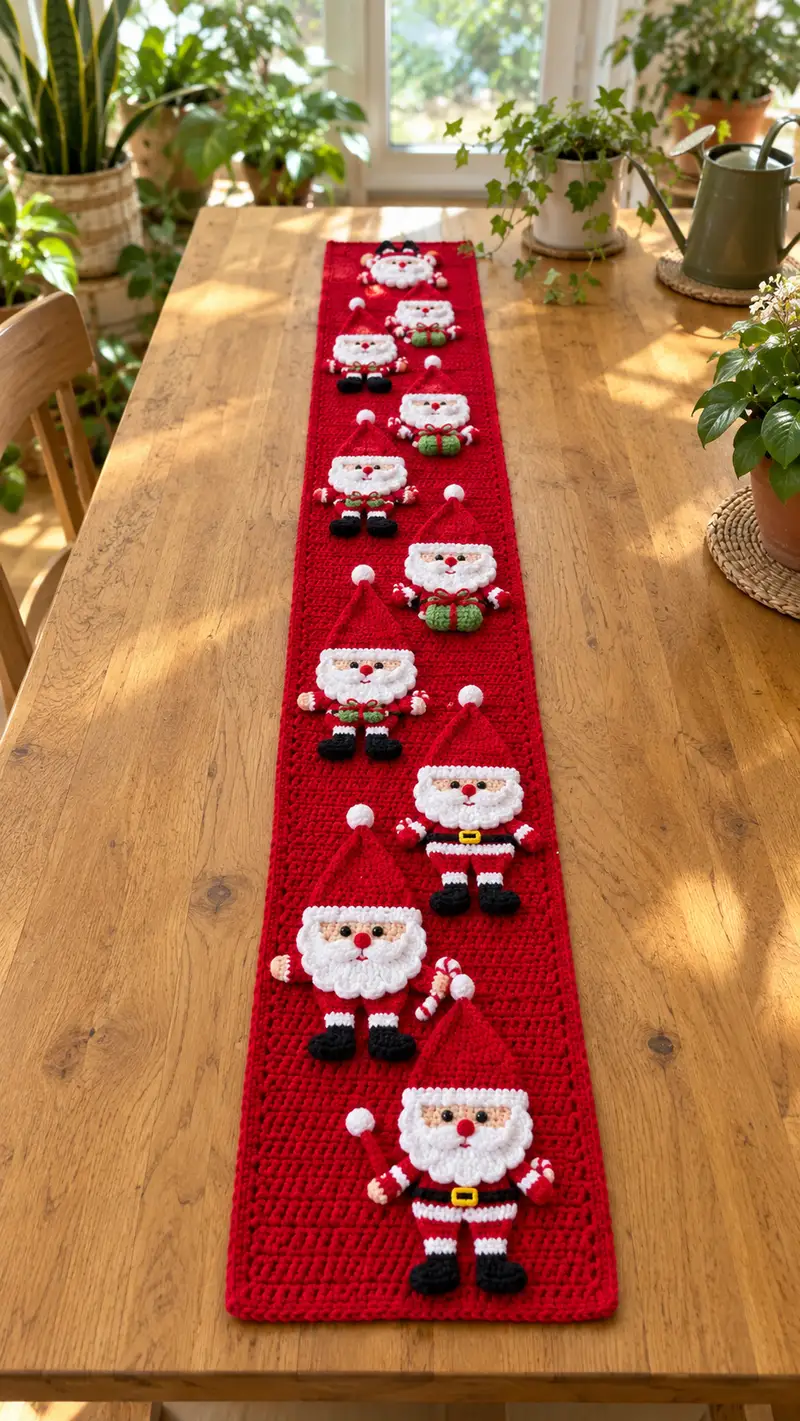
Make a long, cheerful holiday table runner decorated with a row of charming 3D Santa appliques. The runner features a solid red textured base and eight playful Santas, each with puff-beard, hat, boots and tiny accessories. This pattern breaks the project into a simple rectangular base plus modular amigurumi-style Santa pieces you sew on. Great for holiday tables, mantel displays or as a seasonal gift.
Progress Tracker
0% Complete
— Runner Base :
Round 1 :
Chain 84. (This chain determines the width of your runner approximately 18-20 cm depending on gauge. Use chain 84 to start; add or subtract multiples of 2 if you want a slightly different width.)
Round 2 :
Row 1: Dc in 4th ch from hook (counts as dc), dc in each ch across to end (82 dc). Turn. (82)
Round 3 :
Row 2: Ch 3 (counts as dc), dc in each st across to end. Turn. (82)
Info :
Place a stitch marker into the first stitch of each row if you find it helpful to keep track of 82 stitches. Keep tension consistent—dc rows create flat fabric quickly.
Round 4-13 :
Repeat Row 2 for 10 more rows (total rows so far 12). (82)
Info :
These first blocks form a short border before the first Santa; you can block them flat later. If you prefer a textured background, substitute alternating rows of hdc and dc as desired.
Round 14-125 :
Continue working dc rows until you have worked a total of 124 rows (including the initial rows) or until the runner reaches your desired length (approx 160-180 cm for an eight-Santa runner). Turn at the end of each row. (82)
Info :
Every 10 rows check that your edges remain square. If one edge is turning, tighten or loosen the turning chain slightly to compensate. Weave in ends from color joins on the wrong side as you go to keep the wrong side tidy.
Round 126 :
Last Row: Ch 3, dc in each st across, fasten off and weave in ends. Block the runner to measurements and allow to dry; blocking will help Santas sit evenly.
Info :
Before attaching Santas, lay the runner flat and mark placement points for eight Santas. Recommended spacing: start 8 rows from one short edge and place Santas every 14 rows vertically, with 8 rows before the final short edge for symmetry. Adjust spacing to suit your table length.
— Santa Head (Make 8) :
Round 1 :
6 sc in magic ring (6)
Round 3 :
(1 sc, 1 inc) x 6 (18)
Round 4 :
(2 sc, 1 inc) x 6 (24)
Round 5 :
(3 sc, 1 inc) x 6 (30)
Round 6 :
(4 sc, 1 inc) x 6 (36)
Round 7 :
1 sc in each st around (36)
Info :
Optional: change to skin/flesh tone yarn now if starting head in a different color; this pattern assumes the face is a flesh tone and beard is worked separately in white. Place safety eyes between rounds 10-11, approximately 6 stitches apart for a friendly expression.
Round 8 :
1 sc in each st around (36)
Round 9 :
1 sc in each st around (36)
Round 10 :
1 sc in each st around (36)
Info :
Place safety eyes between rounds 10 and 11, leaving 6 stitches between centers. If embroidering eyes instead, mark placement with a removable marker and embroider after stuffing the head slightly.
Round 11 :
1 sc in each st around (36)
Round 12 :
1 sc in each st around (36)
Round 13 :
1 sc in each st around (36)
Info :
Now is a good time to embroider a small nose: use a small pompom or stitch a French knot with red yarn centered between the eyes. If using a small pompom, sew it securely from the inside before closing.
Round 14 :
(4 sc, 1 dec) x 6 (30)
Round 15 :
(3 sc, 1 dec) x 6 (24)
Round 16 :
(2 sc, 1 dec) x 6 (18)
Info :
Begin stuffing head lightly at this point. Use small amounts of filling and press evenly to maintain a round face shape. Don’t overstuff—the beard will add volume visually.
Round 17 :
(1 sc, 1 dec) x 6 (12)
Round 18 :
6 dec (6) - Fasten off leaving a long tail for sewing. Finish stuffing and close the hole by weaving yarn through remaining 6 sts and pulling tight. Secure and weave end into the head.
Info :
Make 8 heads. Keep heads small and firm but slightly soft to allow the beard and hat to sit nicely. Mark the top stitch to know where the hat will align later.
— Santa Beard (Make 8) :
Round 1 :
Using white yarn, mr, 6 sc in mr (6)
Round 3 :
(1 sc, 1 inc) x 6 (18)
Round 4 :
1 sc in each st around (18)
Round 5 :
Working scallops: *skip 1 st, (sc, hdc, 3 dc, hdc, sc) in next st; skip 1 st; sl st in next st* repeat across to create 6 small scallops for a curly beard edge. Fasten off leaving long tail for sewing. (Approx 6 scallops)
Info :
The scalloped edge uses a small cluster of dc bobbles to create a fluffy beard. Adjust number of scallops to fit the face width if your tension differs. Sew the beard to the lower front of the head covering rounds 14-16 of the head for best visual balance.
— Santa Hat (Make 8) :
Round 1 :
With red yarn, ch 12.
Round 2 :
Row 1: Sc in 2nd ch from hook and across (11 sc). Turn.
Round 3 :
Row 2: Ch 1, sc2tog, sc across until 2 sts remain, sc2tog at end. (9 sc)
Round 4 :
Row 3: Ch 1, sc2tog, sc across until 2 sts remain, sc2tog. (7 sc)
Round 5 :
Row 4: Ch 1, sc2tog, sc across until 2 sts remain, sc2tog. (5 sc)
Round 6 :
Row 5: Ch 1, sc2tog, sc across until 2 sts remain, sc2tog. (3 sc)
Round 7 :
Row 6: Ch 1, sc2tog, sc across until 2 sts remain, sc2tog. (1 sc) Fasten off leaving long tail for sewing. Create a small white pompom or make a little mr 4-6 sc white puff to sew to the hat tip.
Info :
For taller hats, start with ch 14 or 16 and work additional decrease rows. Block the hat lightly so it sits neatly on the head before attaching the pompom.
— Santa Body / Torso (Make 8) :
Round 1 :
mr, 6 sc in mr (6)
Round 3 :
(1 sc, 1 inc) x 6 (18)
Round 4 :
(2 sc, 1 inc) x 6 (24)
Round 5 :
1 sc in each st around (24)
Round 6 :
1 sc in each st around (24)
Info :
Work two rounds in black at rounds 7-8 for the lower belt area if you prefer a visible belt area; here we will continue in red and add a yellow buckle later.
Round 7 :
1 sc in each st around (24)
Round 8 :
1 sc in each st around (24)
Round 9 :
(3 sc, 1 dec) x 6 (18)
Round 10 :
(2 sc, 1 dec) x 6 (12)
Round 11 :
1 sc in each st around (12) - Fasten off leaving long tail for sewing. Stuff lightly; torso should be slightly flat to sit on the runner.
Info :
Embroider or sew a small yellow square at the center of round 5-6 to make a belt buckle. You can substitute a tiny button if you prefer – sew securely before attaching to runner.
— Arms (Make 16: 8 left + 8 right) :
Round 1 :
mr, 6 sc in mr (6)
Round 3 :
(1 sc, 1 inc) x 6 (18)
Round 4 :
1 sc in each st around (18)
Round 5 :
Change to white for cuff: 1 sc in each st around (18)
Round 6 :
Change back to red: 1 sc in each st around (18)
Round 7 :
(4 sc, 1 dec) x 3 (15)
Round 8 :
(3 sc, 1 dec) x 3 (12)
Round 9 :
1 sc in each st around (12) - Fasten off leaving long tail for sewing. Lightly stuff the hand end only; arms should be lightly filled to be flexible.
Info :
Sew one arm on each side of the torso positioning the seam at rounds 3-5 of the arm to align with the torso top edge. Slight forward tilt of the arm looks more natural.
— Hands / Mittens (Make 16) :
Round 1 :
Using skin color, mr, 6 sc in mr (6)
Round 3 :
1 sc in each st around (12) - Fasten off and sew to end of arm. Place small embroidered cuff as needed with white yarn.
Info :
Make slightly smaller hands if you want daintier Santas - reduce initial magic ring to 5 sc and adjust increases accordingly.
— Legs (Make 16: 8 pairs) :
Round 1 :
mr, 6 sc in mr (6)
Round 3 :
(1 sc, 1 inc) x 6 (18)
Round 4 :
1 sc in each st around (18)
Round 5 :
1 sc in each st around (18)
Round 6 :
Change to black for boot: 1 sc in each st around (18)
Round 7 :
(4 sc, 1 dec) x 3 (15)
Round 8 :
(3 sc, 1 dec) x 3 (12)
Round 9 :
1 sc in each st around (12) - Flatten slightly and fasten off leaving tail for sewing. Stuff foot firmly but keep leg above boots lightly filled.
Info :
Sew legs slightly apart to create a standing effect on the runner. For security, when sewing, pass yarn through the runner fabric plus several rounds of the leg to anchor firmly.
— Boots (Make 16) :
Round 1 :
With black yarn, mr, 6 sc in mr (6)
Round 3 :
(1 sc, 1 inc) x 6 (18)
Round 4 :
1 sc in each st around (18)
Round 5 :
(4 sc, 1 dec) x 3 (15)
Round 6 :
(3 sc, 1 dec) x 3 (12)
Round 7 :
1 sc in each st around (12) - Flatten sole slightly, fasten off leaving long tail for sewing. Attach to bottom of leg using ladder stitch for an invisible join.
Info :
Make boots slightly wider if you want Santas to look more stout. If your boots become too small visually, begin with mr 8 instead of 6 for a larger sole.
— Gift Applique (Make 3 optional) :
Round 1 :
With green yarn, ch 6, join to form a ring.
Round 2 :
Round 1: 12 sc in ring (12)
Round 3 :
Round 2: (1 sc, 1 inc) x 6 (18)
Round 4 :
Fasten off and sew a red chain cross over the top to make a ribbon. Sew gift to Santa torso or holding hand as a small extra applique.
Info :
Alternate colors for the gift or use a contrasting yarn for a brighter look. Make 3 gifts to match the photo placement along the runner.
— Candy Cane Applique (Make 1-2 optional) :
Round 1 :
Using white yarn, ch 7.
Round 2 :
Row 1: Sc in 2nd ch from hook and across (6 sc). Turn.
Round 3 :
Row 2: Change to red, sc across (6 sc). Turn.
Round 4 :
Repeat alternating white/red for 6 rows then bend the short strip into a hook shape and sew edges together to form a candy cane. Fasten off and sew in place.
Info :
For a more dimensional cane, use a thicker yarn or make a double strip and sew together. Attach to one Santa hand for variety.
— Pom Pom (Make 8) :
Round 1 :
Make small white pompom about 1.0 cm diameter or use small mr with 4-6 sc in white and pull tight to form a bobble. Sew to tip of each hat securely.
Info :
Secure pompoms with several stitches through the hat point into the head to prevent loss. If using glue, allow to dry fully before rough handling.
— Assembly & Attachment :
Info :
Before sewing any pieces to the runner, block the runner flat and mark the eight placement centers. Use pins to position heads first, then place beards, hats and bodies to confirm spacing visually.
Round 1 :
Pin each Santa head onto the runner at your marked points with the top of the head aligned to the row you prefer. Sew the head to the base using the long tail from the head closing; whip stitch around the base of the head into the runner fabric catching both runner stitches and head rounds 11-12. Secure and weave in tail.
Round 2 :
Sew beard to the lower front of the head covering the lower third of the face. Use small hidden stitches to hold scalloped edge flat against the runner surface without pulling the head forward.
Round 3 :
Attach hats by placing them over the top of the head and sewing around the base of the hat down through head stitches; secure the pompom to the tip last. For a slightly 3D look, sew only the hat base and let the tip lean back lightly.
Round 4 :
Sew torso beneath the head by matching the neck round to the top of the torso. Sew arms to torso rounds 3-6. Position legs under torso and secure through runner fabric for stability. Check symmetry of feet and adjust before final knots.
Round 5 :
Sew accessories (gifts, candy cane) onto hands or adjacent runner squares. Use small stitches to catch both accessory and runner stitches. Hide knots inside appliques where possible and weave ends through several stitches for security.
Info :
Attach small decorative items like a tiny yellow belt buckle with a few embroidery stitches or a sewn-on tiny button. Test placement with pins before committing to stitches.
— Finishing Touches :
Round 1 :
Check all applique edges from the wrong side to ensure no loose stitches are visible. Reinforce any areas that look floppy with extra sewing passes.
Round 2 :
Weave in all remaining tails and trim close. Lightly steam block the entire runner and Santas into position (avoid direct contact with synthetic yarn if heat-sensitive). Let cool and dry completely.
Info :
Hand wash gently or spot clean as needed. Avoid machine washing to preserve appliques; if necessary, place runner in a laundry bag and wash on gentle cold cycle, then reshape while damp.
Your festive table runner will be a standout holiday piece full of handmade charm and personality. Each little Santa brings a smile and the modular approach means you can tailor the length and spacing as you like. Decorating with this runner becomes an annual tradition you’ll look forward to setting out. Enjoy the cozy vibe and the little details — they’re the heart of holiday crochet. 🧶🎄