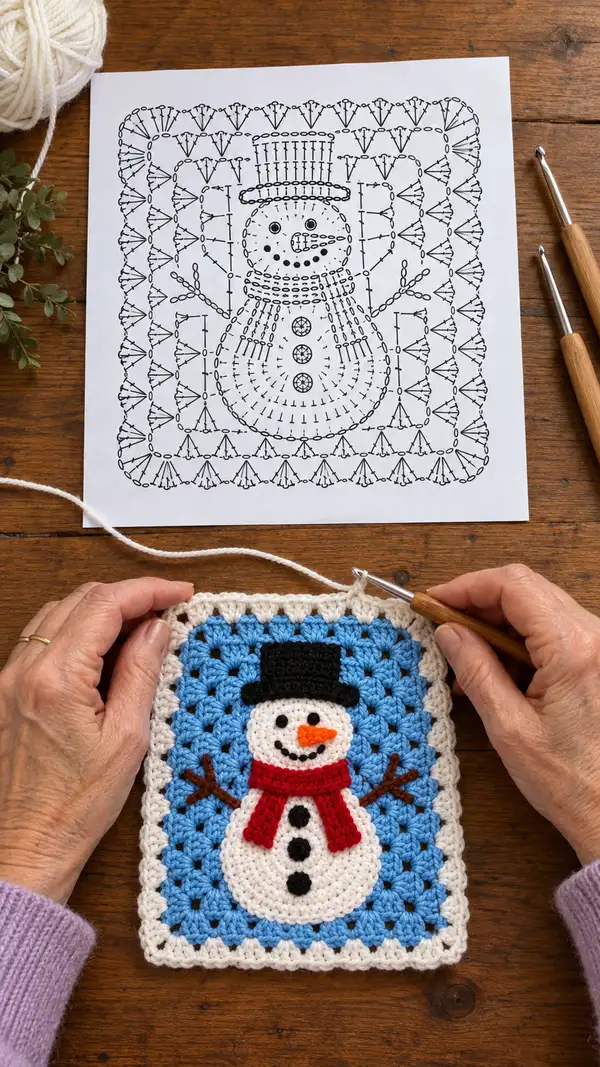
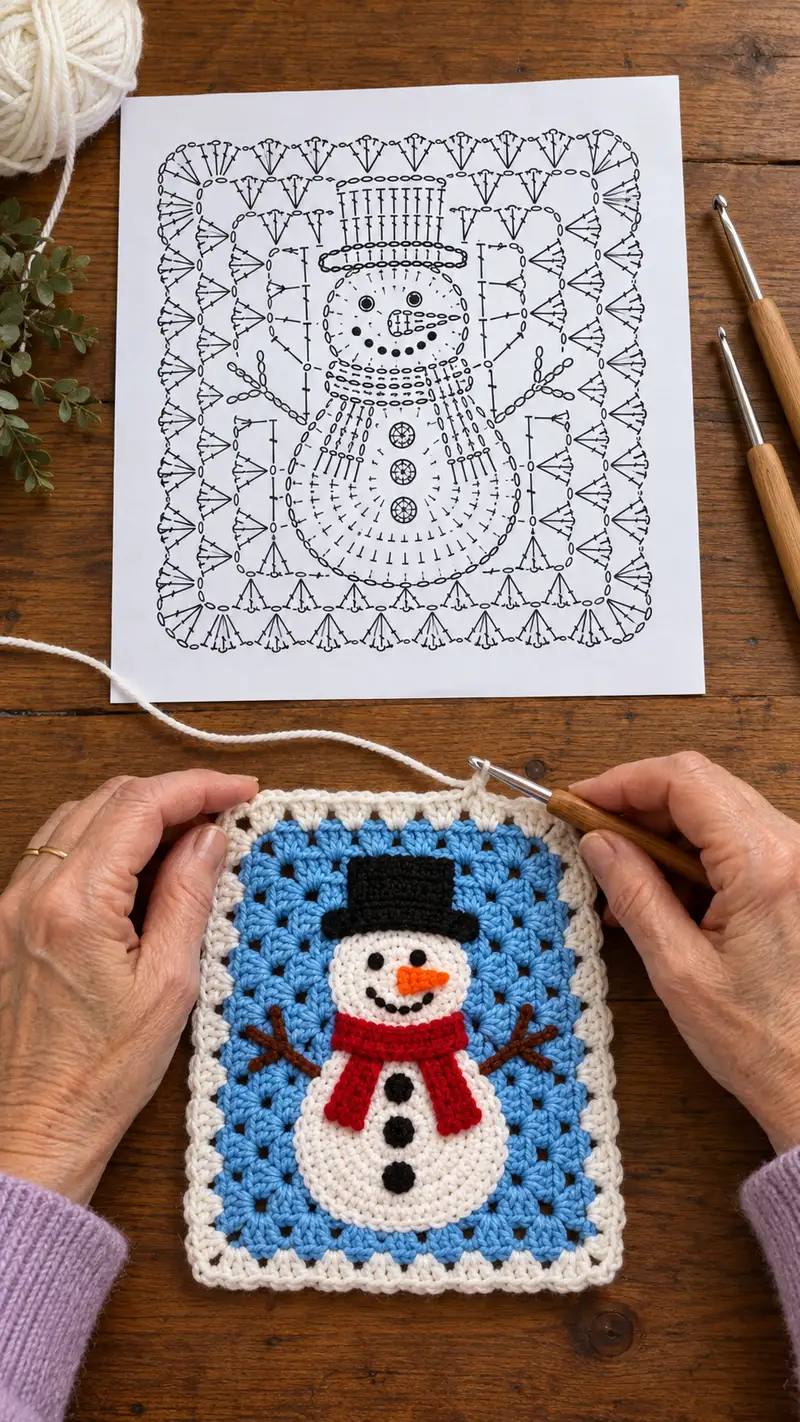
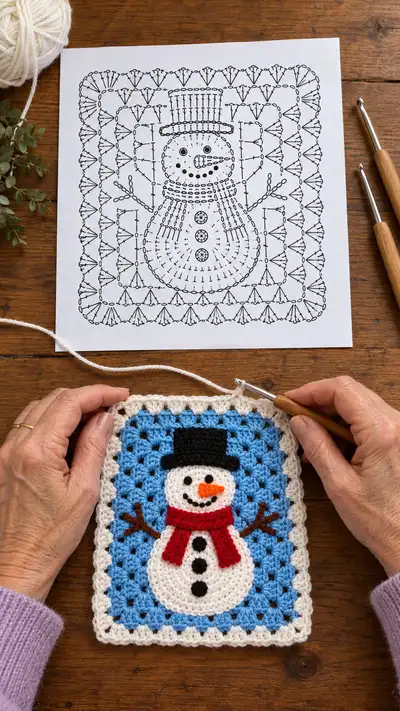
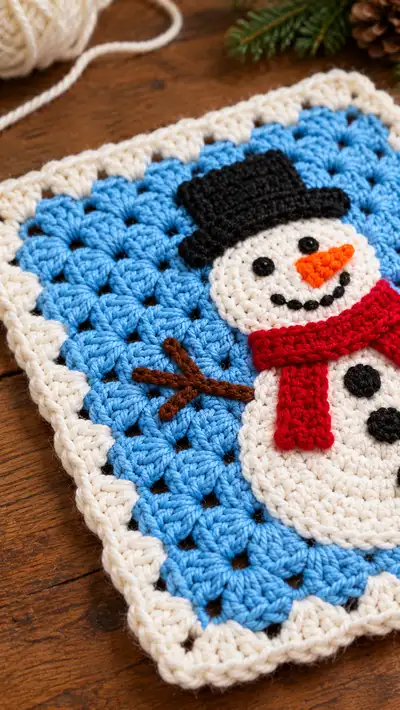
Create a cheerful winter panel featuring a cuddly snowman applique worked on a classic granny-square background. This pattern combines simple granny clusters, a shaped snowman applique, and fun embroidered details like a carrot nose, twig arms and a cozy scarf. Worked in worsted-weight yarn, it makes a lovely seasonal square for blankets, wall hangings, or holiday decorations. Clear step-by-step rounds and plenty of assembly tips make this an enjoyable afternoon project.
Progress Tracker
0% Complete
— Materials & Gauge :
Info :
Gauge is not critical for this decorative square but for reference: 10 cm (4 in) = 12 dc x 6 rows in worsted yarn with 4.5mm hook. Finished square (as photographed) is approximately 18 cm x 23 cm (7 x 9 in). Adjust hook size to match gauge or desired size.
— Background Granny - Rounded Rectangle Basic :
Round 1 :
Using sky blue, ch 4, sl st to first ch to form a ring. Ch 3 (counts as first dc), work 11 dc into ring. Join with sl st to top of starting ch-3 (12 dc)
Round 2 :
Ch 3, dc in same st, *ch 1, 2 dc in next dc; rep from * around to create pairs separated by ch-1 spaces. You will have 12 groups of 2 dc with 12 ch-1 sps. Join with sl st to top of ch-3
Round 3 :
Ch 3, dc in same st, *in ch-1 sp work (2 dc, ch 1, 2 dc); skip next 2 dc, rep from * around placing cluster into each ch-1 sp. Join (12 corner clusters)
Round 4 :
Ch 3, dc in same st, *(2 dc, ch 1, 2 dc) in each corner ch-1 sp; between corner clusters work 3 dc clusters (3 dc into space) to begin forming a rectangular shape. Join. You should have expanded each side by clusters to create a softly rounded rectangle.
Info :
At this stage the fabric is transitioning from a square to a rounded rectangle. Count clusters per side to maintain even growth. Adjust slightly if your rectangle seems skewed.
Round 5 :
Ch 3, 2 dc in same st, *ch 1, (3 dc, ch 1, 3 dc) into next corner ch-1 sp; along each longer side work (3 dc) into each space between clusters to form rows; continue around, join to top of ch-3
Round 6 :
Ch 3, dc in same st, *work 3 dc clusters into each side gap and (3 dc, ch 1, 3 dc) into each corner as before to expand rectangle to desired size. Join
Round 7 :
Ch 3, (3 dc cluster pattern) maintain cluster placement so the center area remains an even field of clusters. Work a total of 8 clusters around each short side and 12 clusters around each long side (your counts will vary slightly depending on tension). Join
Round 8 :
Ch 3, dc in each cluster top (work 3 dc into each cluster top space) continuing the rounded rectangle shaping. Join
Info :
If at any point the rectangle skews, block now to square it gently. This background will be the canvas for the applique so keep it flat and even.
Round 9 :
Ch 3, dc in each st around maintaining the cluster pattern; this round creates a stable background for stitching appliques. Join
Round 10 :
Ch 3, dc evenly around to build height for the panel until the fabric measures approximately 12 cm tall from center (or as desired), usually 10-12 rounds total in this pattern. Join
Info :
Measure your background: the center should comfortably accommodate the snowman body (about 7-8 cm tall). If yours is smaller, add an extra round of dc clusters before starting edging.
— Snowman Lower Body (Large Oval Applique) :
Round 1 :
With cream, mr, 6 sc into ring (6)
Round 3 :
(1 sc, 1 inc) x 6 (18)
Round 4 :
(2 sc, 1 inc) x 6 (24)
Round 5 :
(3 sc, 1 inc) x 6 (30)
Round 6 :
(4 sc, 1 inc) x 6 (36)
Round 7 :
(5 sc, 1 inc) x 6 (42)
Round 8 :
(6 sc, 1 inc) x 6 (48)
Info :
Rounds 1-8 form a neat circle that will be the lower body's widest point. Keep tension consistent. Join each round with a sl st if you prefer distinct rounds or use spiral continuous rounds if you prefer an invisible join (keep a stitch count marker).
Round 9 :
1 sc in each st around (48)
Round 10 :
1 sc in each st around (48)
Round 11 :
1 sc in first 12 sts, inc, 1 sc in next 11 sts, inc, 1 sc in next 12 sts, inc, 1 sc in next 11 sts, inc (52)
Round 12 :
1 sc around (52)
Round 13 :
1 sc in first 13 sts, inc, 1 sc in next 12 sts, inc, 1 sc in next 13 sts, inc, 1 sc in next 12 sts, inc (56)
Info :
Rounds 11-13 introduce increases at four points (roughly at compass points) to begin elongating the circle into a rounded oval. These increases create the subtle bulge needed for the snowman base when attached to the upper body.
Round 14 :
1 sc around (56)
Round 15 :
Work 1 sc in first 14 sts, inc, 1 sc in next 13 sts, inc, 1 sc in next 14 sts, inc, 1 sc in next 13 sts, inc (60)
Round 16 :
1 sc around (60)
Round 17 :
1 sc in each st for 6 rounds maintaining 60 sts (60)
Info :
These even rounds create the sandwiched fullness for the lower body. If you want a slightly taller snowman torso, add 1-3 more even rounds here before starting the waist decrease.
Round 18 :
(8 sc, dec) x 6 (54)
Round 19 :
(7 sc, dec) x 6 (48)
Round 20 :
(6 sc, dec) x 6 (42)
Round 21 :
(5 sc, dec) x 6 (36)
Round 22 :
1 sc in each st for 2 rounds (36)
Round 23 :
Change to cream if not already, 1 sc around to form the waist join to head later (36)
Info :
Fasten off leaving a long tail for sewing to the head. Weave in or leave the tail to sew. Keep the lower body flat; avoid doming by not stuffing—this is a flat applique.
— Snowman Upper Body / Head Applique :
Round 1 :
With cream, mr, 6 sc into ring (6)
Round 3 :
(1 sc, inc) x 6 (18)
Round 4 :
(2 sc, inc) x 6 (24)
Round 5 :
(3 sc, inc) x 6 (30)
Round 6 :
1 sc around (30)
Info :
Rounds 1-6 form the head circle. Keep stitches even. The head applique is slightly smaller than the body so it visually sits atop it when assembled. If you prefer a flatter head edge, do sl st joins at the end of each round.
Round 7 :
1 sc around (30)
Round 8 :
(3 sc, dec) x 6 (24)
Round 9 :
1 sc around (24)
Round 10 :
Fasten off leaving long tail for sewing (24)
Info :
Do not stuff; this is a flat applique. Place head centered above lower body overlapping by 2-3 stitches so it appears connected; pin before sewing. Embroider facial features after sewing the head to the body for accurate placement.
— Hat (Make 1) :
Round 1 :
With black, mr, 6 sc in ring (6)
Round 3 :
(1 sc, inc) x 6 (18)
Round 4 :
1 sc around (18)
Round 5 :
Change to 3.5mm hook for firmer brim if desired, 1 sc around (18)
Round 6 :
For hat top height, work 4 rounds of 1 sc around (18)
Info :
Hat top is a small cylinder; keep stitches tight by switching to a 3.5mm hook for rounds 5-8 for a crisp edge. Finish off leaving a long tail to sew to head.
Round 7 :
Make a flat brim: join additional yarn at desired brim round and work around edge: *(ch 1, sc) in next 6 sts, make 12 sc evenly around to create a slight overhang. Fasten off leaving long tail (18-24 depending on how much overhang you make)
Info :
Sew the hat to the head so it sits slightly tilted for personality. Secure tightly and weave away tails.
— Scarf (Make 1) :
Round 1 :
With red and 3.5mm hook, ch 21. Row 1: sc in 2nd ch from hook and across (20 sc)
Round 2 :
Ch 1, turn, sc in each st across (20)
Round 3 :
Repeat Round 2 for 6 rows total or until scarf measures approximately 3 cm wide (20)
Round 4 :
Fasten off leaving a 25 cm tail for sewing. Fold scarf around head/body seam and sew edges together creating a wrapped look with one end hanging down. Optionally add fringe by knotting short lengths at the ends.
Info :
Make sure one scarf end extends farther than the other to match the photo's hanging scarf look. Use small whip stitches to attach firmly to the applique so scarf will not shift in use.
— Twig Arms (Make 2) :
Round 1 :
With brown and 3.5mm hook, ch 10, sc in 2nd ch from hook and across (9 sc)
Round 2 :
Ch 1, turn, sc in each st across (9)
Round 3 :
Change to thinner yarn or carry brown yarn and create tiny branches: ch 3, sl st in 3rd ch from hook to create small branch, skip 2 sts, sc in next 2 sts; repeat branch once more along arm. Fasten off leaving tail for sewing (9)
Info :
Sew twig arms so they extend from the upper body's sides at the seam between head and body. Angle them slightly upward or outward for a natural look and sew through several stitches for stability.
— Carrot Nose (Make 1) :
Round 1 :
With orange and 3.5mm hook, mr, 4 sc in ring (4)
Round 2 :
(1 sc, inc) x 2 (6)
Round 4 :
Dec twice evenly to shape a tapered nose: (2 sc, dec) x 2 (4)
Round 5 :
Fasten off leaving a long tail for sewing. Stuff slightly with a tiny sliver of fiber if you want a little dimension.
Info :
Sew the carrot nose to the head applique center approximately between rounds 3 and 4 of the head (counting from starting center) so it sits slightly outward. Use the tail to secure firmly through multiple stitches.
— Buttons (Make 3) :
Round 1 :
With black and 3.5mm hook, mr, 6 sc (6)
Round 2 :
1 sc around (6). Fasten off leaving long tail to sew. Make 3 buttons and sew vertically on lower body centerline
Info :
Sew buttons to lower body in a straight vertical line. Pin in place and ensure spacing is even—approximately 6-8 sts apart depending on your body width.
— Eyes & Mouth Embroidery :
Info :
Use black yarn and yarn needle for embroidery. For eyes, embroider French knots or small sewn circles 3-4 sts apart centered on the head's face area. For the mouth, use 5-7 tiny French knots or a chain of small sl st stitches to produce a smiling mouth curve under the carrot. Place eyes between rounds 4-5 of the head and nose centered between them.
Round 1 :
Embroider two French knots for eyes, spaced evenly—approx 4 stitches apart on head row 4
Round 2 :
Embroider 5-7 small French knots in an arc for the mouth under nose. Secure yarn ends at the back with several stitches and trim short
Info :
If you prefer safety eyes, attach them before sewing head to the body and before embroidering the mouth. Safety eyes require firm backing and cannot be sewn later.
— Assembly Prep :
Info :
Block both background and applique pieces flat if needed. Position lower body slightly below center of background with upper body overlapping lower body by approximately 2-3 stitches so the snowman looks connected. Pin all pieces before sewing.
Info :
Use the long tails left from each applique to whip stitch pieces to the background through the DC cluster tops to hold them securely. Make sure to sew through both layers and maintain even tension. Hide tails by weaving them several times into the back of the square.
— Border / Scalloped Edge :
Round 1 :
Join cream to any corner ch-1 space. Ch 3 (counts as dc), (2 dc, ch 1, 3 dc) in same corner ch-1 sp, *skip along side placing 3 dc clusters separated by ch 1s into each space between clusters; at next corner work (3 dc, ch 1, 3 dc); rep around. Join
Round 2 :
Ch 1, sc evenly around the outer edge to tidy and slightly tighten the border, placing 2 sc in corner ch-1 sps. Join
Round 3 :
For scalloped finish, *(ch 3, skip next st, sl st in next st) repeat around to form gentle scallops; adjust frequency so scallops land centered on clusters. Fasten off and weave in ends
Info :
Blocking the finished square after sewing appliques in place makes the scalloped border neat. Use pins and a spray of water or a steam block on a blocking mat and allow to dry fully.
— Finishing Touches & Alternative Techniques :
Info :
If you want a raised applique look, sew the applique with a few slip stitches leaving a small gap so it sits slightly lifted from the background. To make the hat brim sturdier, crochet a second narrow strip and sew beneath the brim for thickness. For younger children, replace embroidered eyes with embroidered stitched eyes rather than French knots to avoid small parts.
Info :
For a more modern flat-motif technique you can instead surface crochet the snowman using chain outlines and sc surface stitches onto the background rather than making separate appliques—this produces a different look but can be just as charming.
Putting all the pieces together is such a joyful moment—seeing the snowman pop on the granny background really brings this little panel to life! The scalloped cream border frames the scene beautifully and the tiny details like the carrot nose and twig arms make it irresistibly charming. Whether you make one as a seasonal ornament or dozens for a holiday blanket, this square is bound to spread cozy winter cheer. ❄️🧶