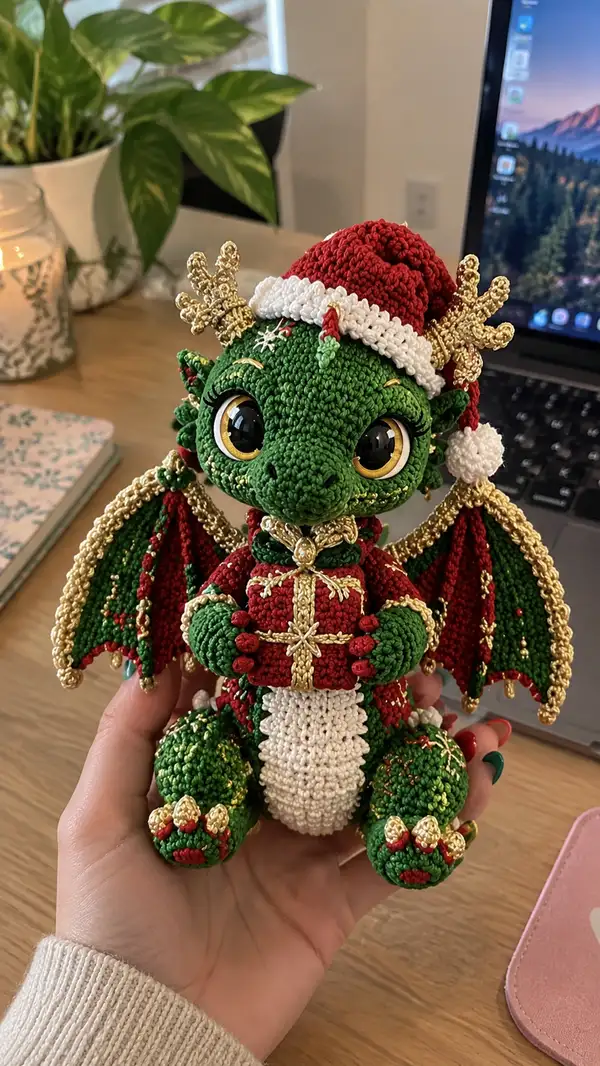
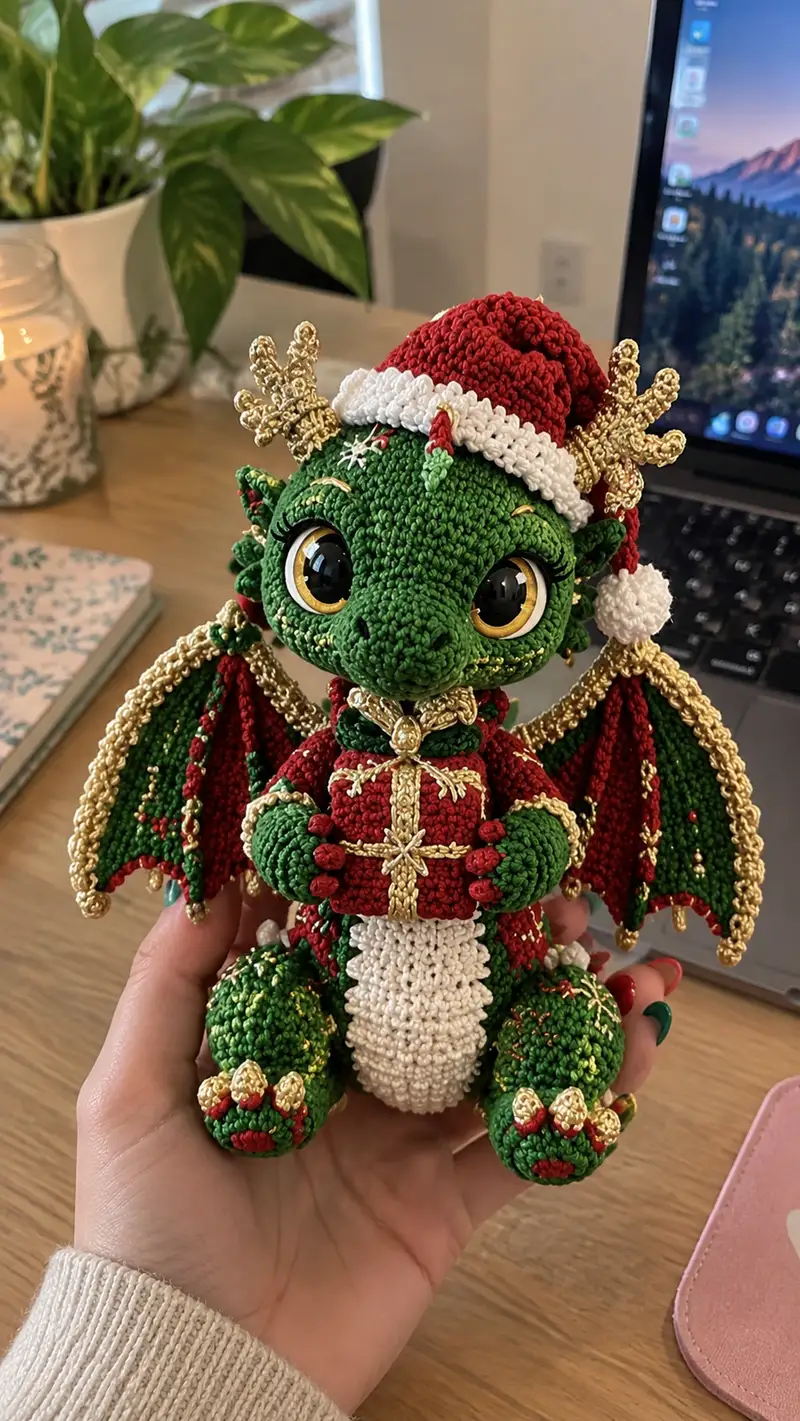
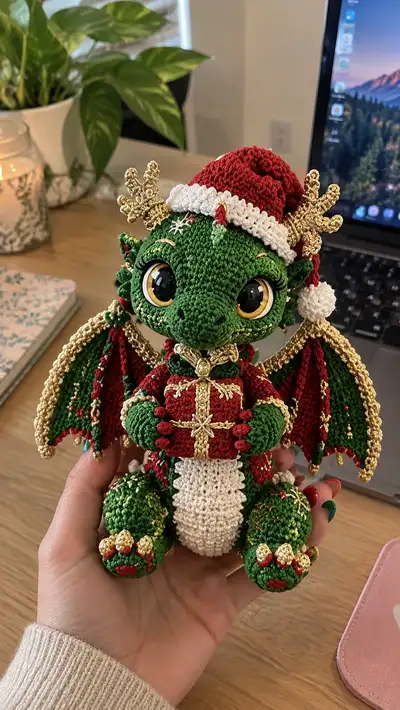
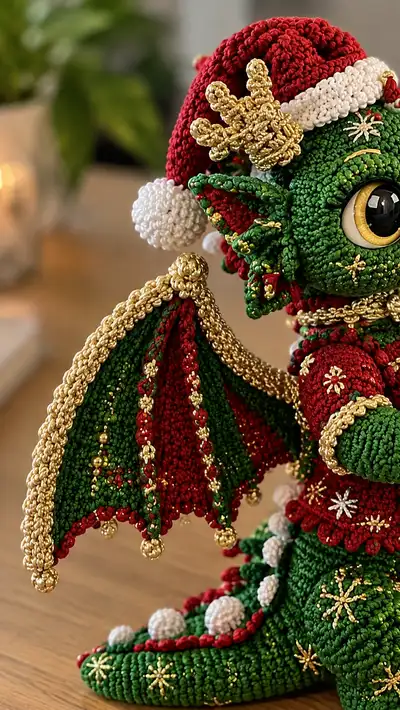
Create a charming, holiday-themed baby dragon with big expressive eyes, detailed gold-trimmed wings, a cozy Santa hat, and a tiny wrapped present. This pattern recreates the richly decorated, green-and-red dragon with metallic gold accents and textured belly. Includes step-by-step rounds for head, body, limbs, wings, tail, hat, antlers, clothing trims and embroidered decorations.
Progress Tracker
0% Complete
— Head :
Round 1 :
6 sc in magic ring (6)
Round 3 :
(1 sc, inc) x 6 (18)
Round 4 :
(2 sc, inc) x 6 (24)
Round 5 :
(3 sc, inc) x 6 (30)
Round 6 :
(4 sc, inc) x 6 (36)
Round 7 :
(5 sc, inc) x 6 (42)
Round 8 :
(6 sc, inc) x 6 (48)
Round 9 :
(7 sc, inc) x 6 (54)
Round 10 :
(8 sc, inc) x 6 (60)
Info :
Switch to main green yarn if not already. Use a tight hook for plush amigurumi texture. Place a stitch marker for round starts and keep it moved every round.
Round 11-14 :
1 sc in each st (60)
Info :
Place safety eyes between rounds 13 and 14 (or 12-13 depending on desired placement). Position eyes approximately 14-16 stitches apart center-to-center for the expressive look pictured. Insert eyes and secure washers before further stuffing.
Round 15-18 :
1 sc in each st (60)
Info :
Begin to create slight muzzle shaping: on the front-most section (define center) add a subtle shaping by working tighter tension on those stitches or place small increases later to puff out snout.
Round 19 :
(8 sc, dec) x 6 (54)
Round 20 :
(7 sc, dec) x 6 (48)
Round 21 :
(6 sc, dec) x 6 (42)
Info :
Begin stuffing head firmly with fiberfill. Add small amounts at a time to maintain even shape, focusing more fill around the forehead and eye area for the round, friendly face.
Round 22 :
(5 sc, dec) x 6 (36)
Round 23 :
(4 sc, dec) x 6 (30)
Round 24 :
(3 sc, dec) x 6 (24)
Round 25 :
(2 sc, dec) x 6 (18)
Round 26 :
(1 sc, dec) x 6 (12)
Info :
At round 26 you should have a neat neck opening of 12 sts. Stuff remaining head firmly but avoid overstuffing as the neck will require some give for sewing to the body. Weave in any yarn color change tail inside but leave a long tail for sewing.
Round 27 :
1 sc in each st around to build neck length (12)
Round 28 :
1 sc in each st (12)
Round 29 :
1 sc in each st (12)
Info :
If you plan to embroider eyebrows or decorative forehead snowflake, mark positions now. Use short surface embroidery with metallic gold thread later. Keep a long tail for sewing head to body.
— Snout / Muzzle :
Round 1 :
Using same green, 6 sc in magic ring (6)
Round 3 :
(1 sc, inc) x 6 (18)
Round 4 :
1 sc in each st (18)
Round 5 :
(2 sc, dec) x 6 (12)
Info :
Leave long tail and stuff lightly. Position snout centered beneath eyes and sew using ladder stitch. Use small black embroidery to add nostrils (2 small vertical stitches) between rounds 2-3 of the snout.
— Body :
Round 1 :
6 sc in magic ring (6)
Round 3 :
(1 sc, inc) x 6 (18)
Round 4 :
(2 sc, inc) x 6 (24)
Round 5 :
(3 sc, inc) x 6 (30)
Round 6 :
(4 sc, inc) x 6 (36)
Round 7 :
(5 sc, inc) x 6 (42)
Round 8 :
(6 sc, inc) x 6 (48)
Round 9-12 :
1 sc in each st (48)
Info :
If you plan the red bodice decoration (as pictured), change to red yarn at round 13. Work next rounds in BLO to create a ridge for the decorative collar edge.
Round 13 :
Change to red yarn. 1 sc in each st BLO (48)
Round 14-16 :
1 sc in each st (48)
Info :
Begin stuffing body firmly but leave bottom area loose for leg attachment. The body is fairly stout to support the head and plush limbs.
Round 17 :
(6 sc, dec) x 6 (42)
Round 18 :
(5 sc, dec) x 6 (36)
Round 19 :
(4 sc, dec) x 6 (30)
Round 20 :
(3 sc, dec) x 6 (24)
Round 21 :
(2 sc, dec) x 6 (18)
Round 22 :
(1 sc, dec) x 6 (12)
Round 23-24 :
1 sc in each st (12)
Info :
Leave an extended tail for sewing head to body. Fasten off and finish stuffing so the body is slightly firmer than the limbs for stable sitting position.
— Belly Panel (White) :
Round 1 :
Using white yarn, 6 sc in magic ring (6)
Round 3 :
(1 sc, inc) x 6 (18)
Round 4 :
(2 sc, inc) x 6 (24)
Round 5-10 :
1 sc in each st (24)
Info :
This narrow white oval is worked flat in rounds to create the ribbed textured belly. Once length is sufficient (approx 10 rounds), flatten and slip stitch the sides slightly to oval shape then sew to front of body centered from round 6-12 of body.
— Arms (Make 2) :
Round 1 :
6 sc in magic ring (6)
Round 3 :
(1 sc, inc) x 6 (18)
Round 4-6 :
1 sc in each st (18)
Info :
Work the palm here: start with red fingernails later. Stuff the hand firmly to retain shape. Leave a long tail for sewing to body.
Round 7 :
(2 sc, dec) x 6 (12)
Round 8-10 :
1 sc in each st (12)
Info :
Change to green or continue green depending on visual. If you see red cuffs, change to red at round 11 to create a cuff while working in BLO to create a ridge.
Round 11 :
Change to green. 1 sc in each st (12)
Round 12-15 :
1 sc in each st (12)
Round 16 :
(1 sc, inc) x 6 (18)
Round 17-18 :
1 sc in each st (18)
Info :
Stuff arms lightly so they remain flexible. Sew arms to body at side positions roughly between body rounds 10-14. For natural placement, pin first before sewing.
— Hands Claws (Make 6 small claws for both hands) :
Round 1 :
4 sc in magic ring (4)
Round 2 :
1 sc in each st (4)
Info :
Make small red claws (use red yarn) and sew three per hand spaced evenly. Add tiny gold caps with bullion or metallic thread as pictured by embroidering a small knot at the tip.
— Legs (Make 2) :
Round 1 :
6 sc in magic ring (6)
Round 3 :
(1 sc, inc) x 6 (18)
Round 4 :
(2 sc, inc) x 6 (24)
Round 5-7 :
1 sc in each st (24)
Info :
Work foot shaping in rounds 5-9. Add textured top-of-foot with surface slip stitches or small bobbles later to mimic raised scales and decoration.
Round 8 :
(3 sc, inc) x 6 (30)
Round 9-12 :
1 sc in each st (30)
Round 13 :
(3 sc, dec) x 6 (24)
Round 14 :
(2 sc, dec) x 6 (18)
Round 15 :
(1 sc, dec) x 6 (12)
Round 16-18 :
1 sc in each st (12)
Info :
Stuff feet firmly. Add three golden claw points to each foot by embroidering small teardrop shapes with metallic yarn or by crocheting tiny cones (3 rounds per cone) and sewing them on at toes.
— Tail :
Round 1 :
6 sc in magic ring (6)
Round 3-6 :
1 sc in each st (12)
Round 7 :
(1 sc, dec) x 4 (8)
Round 8-12 :
1 sc in each st (8)
Info :
Create tail spikes: make small white bobbles (6-8) by crocheting 6 sc in magic ring, fasten off leaving tail and sew along tail center from base to end. Add red picot edging along tail ridge by slip stitching red around base of bobbles.
— Ears / Fin Frills (Make 2) :
Round 1 :
6 sc in magic ring (6)
Round 3 :
(2 sc, inc) x 4 + 2 sc at end to shape oval (16)
Round 4-6 :
1 sc in each st (16)
Info :
Add red inner ear detail by embroidering a triangle of red sc stitches or by crocheting a small red lining oval and sewing into ear. Add metallic gold bead along ear outer edge to mirror picture decoration.
— Wings (Make 2) :
Round 1 :
Using red or green for interior panel, 6 sc in magic ring (6)
Round 3 :
(1 sc, inc) x 6 (18)
Round 4 :
(2 sc, inc) x 6 (24)
Round 5 :
(3 sc, inc) x 6 (30)
Round 6-8 :
1 sc in each st (30)
Info :
The wings are worked as a semi-flat, scalloped panel. Alternate red and green wedges: after round 8, create vertical ridges by working 6 to 8 rounds of sc in a single wedge color, then switch color to next wedge to create the striped effect visible. Use tight tension for crisp panels.
Round 9 :
Begin shaping wing scallop edge: *sc in next 3 sts, 3 sc in next st (shell)* repeat across to create scallops (30)
Round 10 :
1 sc in each st (30)
Round 11-16 :
1 sc in each st (30)
Info :
Edge binding: use metallic gold cord or yarn and 2.25mm hook. Work slip stitches around outer wing edge then single crochet tightly in gold to create firm rim. Insert a thin wire along rim if you want poseable wings—tuck into the gold binding and sew securely.
Round 17 :
With gold yarn, sc around outer rim tightly (30)
Round 18 :
1 sc in each st BLO with gold to reinforce edge (30)
Round 19 :
Add bead points: along vertical ribs of wing sew small gold beads and secure with matching thread. Add small picot edge red beads at scallop points using red thread.
Info :
For the vertical ridges visible, create 4-6 raised cords by chaining small lengths and slip stitching them vertically down the wing then securing with stitches and sewing beads onto these cords for the festive dangling balls shown.
— Hat (Santa Slouchy) :
Round 1 :
Using red yarn, 6 sc in magic ring (6)
Round 3 :
(1 sc, inc) x 6 (18)
Round 4 :
(2 sc, inc) x 6 (24)
Round 5-12 :
1 sc in each st (24)
Info :
Create slouchiness by folding crown down and sewing some stitches from the inside so it droops. For the white brim, switch to white and work 2 rounds of 1 sc in each st BLO for a fluffy brim effect.
Round 13 :
Change to white. 1 sc in each st BLO (24)
Round 14 :
1 sc in each st (24)
Round 15 :
Create pom-pom by making 12 sc in magic ring with white, fasten off leaving tail and stuff pom-pom slightly then sew to hat tip
Info :
Attach hat to head by sewing the brim around head rounds 10-14. Pin before sewing to achieve the slouch and align the pom-pom over one ear for the same whimsical tilt.
— Antlers / Crown Pieces (Make 2 small branching antlers) :
Round 1 :
Using metallic gold yarn, ch 3, sl st to form a small loop, 6 sc into loop (6)
Round 2 :
3 sc along one chain to make first prong, turn and sc back then create second prong by working 4 sc down other side, finish base with sl st to center (approx total 12)
Round 3 :
Work tiny picots at branch tips: *ch2, sl st into tip* making 3-4 points
Info :
Sew gold antler pieces to head sides above eyes, tacking at three points for stability. Reinforce with a tiny dab of fabric glue if necessary. These are delicate so keep tension tight and use small stitches when attaching.
— Collar & Chest Bow :
Round 1 :
Using gold yarn, ch 28, join sl st to form loop to fit around neck (or adjust to fit neck circumference)
Round 2-4 :
1 sc in each ch around creating dense gold collar (28)
Round 5 :
Create decorative bow by using red yarn and making 10 sc in magic ring, flatten and sew to center with a small gold knot (fasten off)
Info :
Sew collar around neck under head attachment. Add a gold button or bead to front for the jewel detail pictured. Use metallic embroidery to stitch star shapes on chest.
— Present Accessory (Dragon holds a tiny box) :
Round 1 :
Using red, 6 sc in magic ring (6)
Round 3 :
(1 sc, inc) x 6 (18)
Round 4-6 :
1 sc in each st (18)
Round 7 :
Change to gold. 1 sc in each st to simulate ribbon loop (18)
Info :
Stuff lightly and sew present into dragon hands. Embroider a small cross ribbon with gold yarn across the gift and secure with a central bead to mimic a bow knot.
— Decorative Embroidery and Beading :
Info :
Using metallic gold thread and small beads, stitch snowflake motifs across body and wings. For snowflakes: bring needle from inside out, make 6 spokes with chain-stitched gold thread, knot at center and add a small bead. Place motifs symmetrically on each arm and leg as shown.
Info :
Add tiny red glass beads to wing scallops and tail points. Secure all beads by stitching through beads and tying small knots several times, then weave tails into fabric to hide them.
— Final Finishing :
Info :
Weave in all ends, add subtle surface embroidery for eyebrows and nostrils with black or dark green. Use a light spray of fabric stiffener on gold trims to keep them crisp. Attach all parts securely following assembly notes.
Info :
Brush safety eye rims gently with a damp cloth to remove any stray yarn fibers and ensure the eyes are clean and centered. If you used wire in wings, fold and tape wire ends before closing the seam to prevent pokes.
This festive baby dragon brings together playful proportions and luxe holiday details for a truly special handmade companion. Every stitch adds character — from the sparkling gold wing trim to the tiny wrapped present in its paws. It's the perfect seasonal keepsake or gift that will delight both makers and recipients. 🎁🧶✨