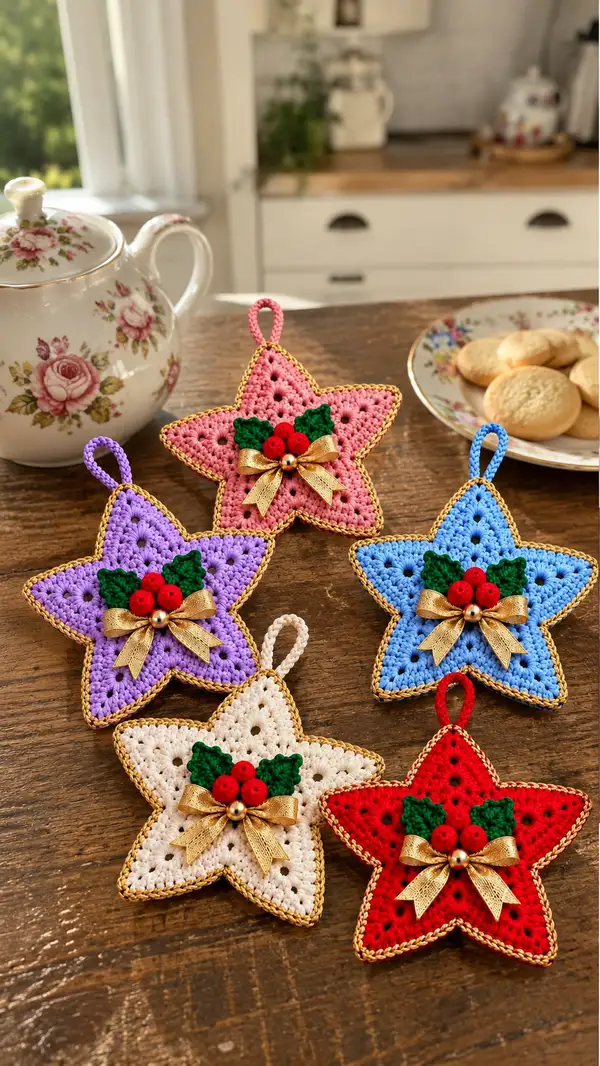
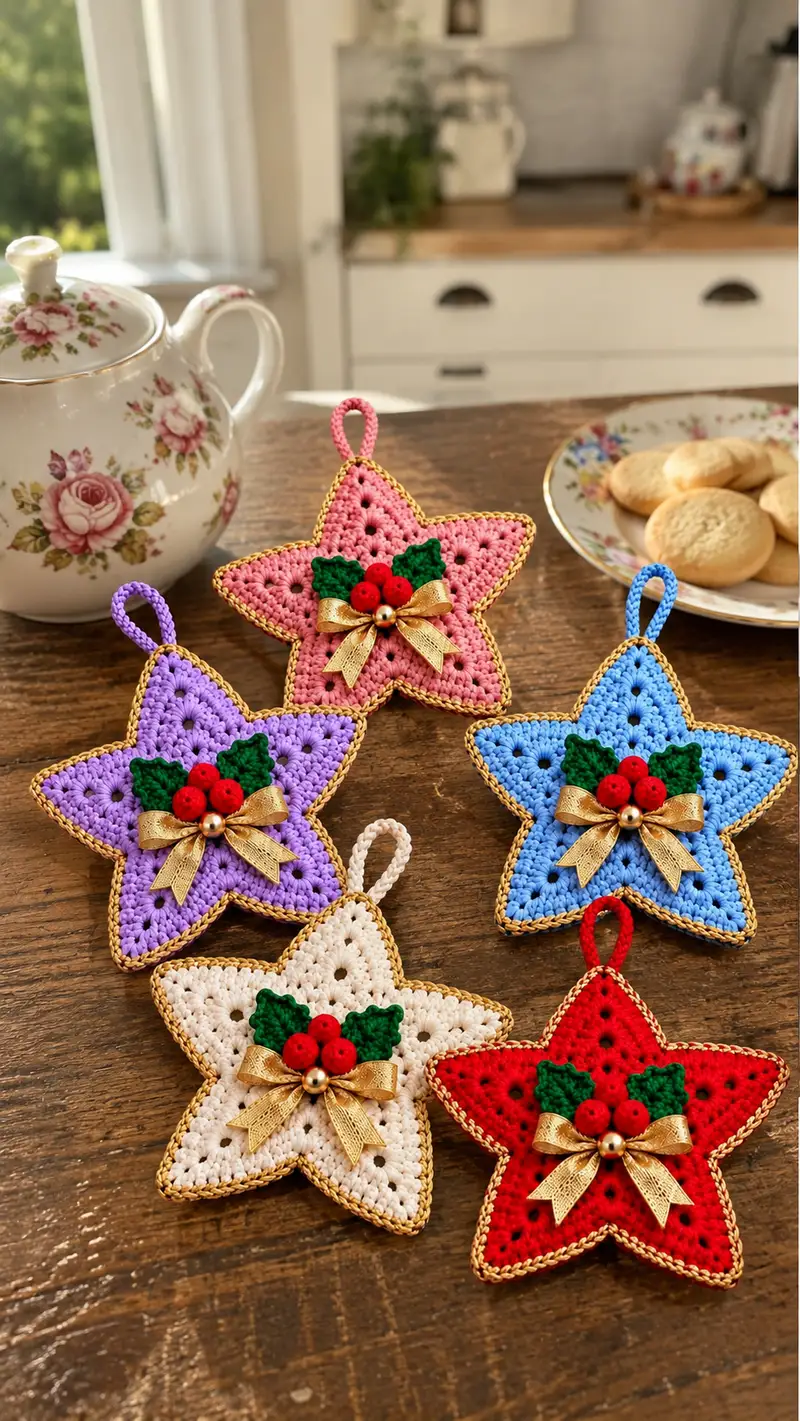
Create a set of five-point star ornaments with a vintage holiday charm. These padded, double-layered stars feature a decorative gold braid edge, a hanging loop, and sweet holly embellishments with small crocheted berries and leaves. The pattern includes step-by-step instructions for front and back panels, trim, hanging loop, holly leaves and berries, and assembly tips for a neat, professional finish — perfect for gift-giving or tree decorating.
Progress Tracker
0% Complete
— Notes & Gauge :
Info :
This ornament is designed to finish approximately 10–12 cm/4–4.7 in across from tip-to-tip when worked with DK/light-worsted yarn and a 3.5 mm hook. Gauge isn't critical but consistent tension is essential for matching pairs. Work tightly enough so stuffing does not show through the stitches. The pattern is modular: make two matching star panels, add trim, a hanging loop, and center embellishments (holly leaves, berries and bow). All rounds below are worked in continuous rounds unless otherwise noted; use stitch marker to mark the beginning of each round.
— Star Panel (Make 2 identical panels per ornament) :
Round 1 :
5 sc in magic ring (5)
Round 2 :
5 inc (10) — work 2 sc in each st around (10)
Round 3 :
(1 sc, inc) x5 (15)
Round 4 :
(2 sc, inc) x5 (20)
Round 5 :
(3 sc, inc) x5 (25)
Info :
By working in repeats of 5 we establish five radial segments that correspond to the star points. Keep a stitch marker at the first stitch of each round to track where segment boundaries fall. If your tension is loose, switch to a 3.25 mm hook for the following rounds to keep the fabric firm.
Round 6 :
(4 sc, inc) x5 (30)
Round 7 :
(5 sc, inc) x5 (35)
Round 8 :
1 sc in each st around (35)
Info :
Round 8 creates a stable base before we shift into shaping star points. Count your stitches: you should have 35 stitches total — five segments of seven stitches. If your stitch count differs, adjust by adding or skipping a stitch evenly across segments so there are equal segment counts (this keeps the star symmetrical).
Round 9 :
(6 sc, inc) x5 (40)
Round 10 :
1 sc in each st around (40)
Round 11 :
(7 sc, inc) x5 (45)
Round 12 :
1 sc in each st around (45)
Info :
At rounds 9–12 we're broadening the body of the star to give enough fabric for pronounced points. Keep all increases evenly distributed: perform the inc at the same relative position inside each of the five segments — this is the future valley between points. Use stitch markers if needed to mark these valley stitches.
Round 13 :
(8 sc, inc) x5 (50)
Round 14 :
1 sc in each st around (50)
Round 15 :
(9 sc, inc) x5 (55)
Round 16 :
1 sc in each st around (55)
Info :
We now have enough fabric to define the five points by localising additional increases at each point. In the next rounds we will create raised point zones by working short fans that extend the stitch height at those locations. Fans are worked into a single stitch that sits in the middle of each segment — this will push fabric outward creating the point tips.
Round 17 :
*In next st work: 1 sc, 1 hdc, 3 dc, ch 2, sl st into same st as base of fan (this creates a short fan). Then 6 sc across the remainder of the segment; rep from * around (55 total)
Info :
Round 17 uses taller stitches (hdc/dc) to create the bulk of each point. Each fan uses multiple stitches but is anchored to a single base stitch. After you complete a fan in the segment's center, work the remaining sc to complete that 11-stitch segment. Make sure each of the five fans is placed in the same relative position inside its segment; this is what forms five evenly spaced star points.
Round 18 :
1 sc in each st around (55)
Round 19 :
*Work 3 sc, into the centre stitch of the fan work (the ch-2 space) work (1 sc, ch 2, 1 sc) to make a little eyelet at the centre of each point, then 7 sc across the remainder of segment; rep from * around (55)
Info :
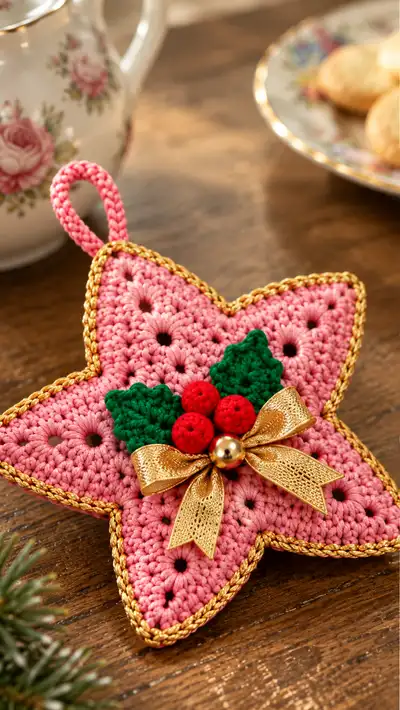
Round 19 deliberately places small eyelets inside each point so the finished ornament has the pretty cluster holes visible in the photos. These eyelets are decorative and also let the stuffing breathe slightly; make sure you keep them consistent in position across all five points so they look identical on both panels.
Round 20 :
1 sc in each st around (55)
Round 21 :
(5 sc, inc) x5 (60)
Round 22 :
1 sc in each st around (60)
Round 23 :
(6 sc, inc) x5 (65)
Round 24 :
1 sc in each st around (65)
Info :
Rounds 21–24 add a final peripheral round to broaden the points slightly and to create a neat edge for joining the two panels together. At the end of Round 24 fasten off leaving a long tail (~30–40 cm) for sewing the panels together. Make sure you have two identical panels — if they differ, frog and rework the smaller until both match carefully.
— Back Panel :
Round 1 :
Work same as Star Panel rounds 1–24 to make an identical second panel (follow steps above for exact stitch counts and eyelet placement) (65)
Info :
The back panel should match the front exactly in stitch count, eyelet placement and point shape. If you prefer the ornament to lie flat without visible eyelets on the outside, you can reverse the eyelet rounds on the back so the decorative holes face the interior; otherwise make an exact replica.
— Hanging Loop (Make 1) :
Round 1 :
ch 21, sl st in 2nd ch from hook and each ch back down to form a 20 sc cord (20)
Info :
This simple chain-and-slipcord produces a neat, rope-like loop. For a firmer loop, use a 3.0 mm hook and tighter tension or fold the chain in half and stitch the two sides together with sc to make a thicker cord. Leave long tails for sewing to the star’s top point.
Round 2 :
Fold cord into a loop and sew ends to the inside top point of one star panel, leaving ends ready to be hidden when joining panels
— Gold Braided Edge (Trim) :
Info :
The gold braided edge in the photo is a narrow decorative cord or metallic braid sewn around the points. You can mimic this effect with metallic thread crocheted along the edge or with a small cord being slip-stitched to the perimeter. Below are two options — crochet-on braid (option A) or sewn decorative braid (option B).
Option A - Round 1 :
Using metallic yarn and 3.0 mm hook, join at any tip. *sc evenly around the outermost stitches working 2 sc in the valley between points to keep the braid sitting smoothly; sl st to join at end. Work 1 round of sc around exterior (approx 65–70 sc depending on your tension)
Info :
When crocheting the braid on, count your outer stitches — if you have 65 sts plus where you added extra sc in valleys you may end with 68–70 sts. That is fine; the important part is even placement and smoothing corners by working 2 sc in valleys between points so the braid doesn’t pull the points inward.
Option B - Round 1 :
If using a decorative gold cord, pin the cord around the edge, keeping tension even, and tack it at 6–8 regular intervals with small invisible stitches. Use a matching metallic thread to make tiny stitches that are hidden on the cord side.
— Holly Leaf (Make 2) :
Round 1 :
With green yarn, ch 6, sl st in 2nd ch from hook, sc, hdc, 3 dc in next ch, hdc, sc, sl st into last ch; turn to work along the opposite side of foundation chain: sc, hdc, 3 dc, hdc, sc, sl st into starting st. Fasten off and weave ends (shape leaf with a little blocking). (approx 18 stitches total)
Info :
The little holly leaves in the picture are slightly scalloped. The pattern above creates a small symmetrical leaf with two sets of three double crochets at the widest part. If you prefer a sharper holly look, add an extra 3 dc cluster on the tip and use a small dab of fabric glue to fold the leaf into three lobes.
Alternative Round 1 :
Work as: ch 5, (sc, hdc, 3 dc, hdc, sc) across, sl st to join – fasten off. Slight variations in chain length give you slightly larger or smaller leaves; match two leaves to the center berries.
— Berries (Make 3) :
Round 1 :
6 sc in magic ring (6)
Round 3 :
1 sc in each st around (12)
Round 4 :
6 dec evenly spaced (6) — shape into tiny ball and fasten off leaving long tail for sewing into cluster
Info :
Sewing three small berries together in a triangular cluster and anchoring them to the center of the star makes the focal point. Use densely stuffed berries for a round look: add a tiny pinch of fiberfill into the magic ring before closing. Use a matching red yarn tail to stitch berries to each other and then to the star front.
— Decorative Bow :
Round 1 :
Cut a 16 cm length of thin gold ribbon and make a small bow (or use pre-made ribbon bow). If crocheting a bow instead: ch 12, sc across, fold center and secure with a few wraps of metallic thread to form a bow shape (fasten and weave in ends)
Info :
The bow in the photo is a small gold ribbon bow with a single gold bead in the center. If you prefer a crocheted bow, keep it smaller than the berry cluster so it sits elegantly beneath rather than overpowering the holly.
— Finishing & Joining Panels :
Info :
Pin both star panels with right sides facing out (so right sides show when completed). Position the hanging loop at the top point between the panels so its raw ends are sandwiched inside. If using a gold cord for the trim, pin that in place as well so you can stitch through both the braid and the panels at the same time for a neat finish.
Round 1 (Join) :
Using the long tail left from one panel and working through both panels' outermost rounds, whip stitch (or mattress stitch) around the entire perimeter, inserting small stitches through the edge stitches of both panels. Sew about 75–85% of the way leaving an opening for stuffing (this will be roughly 4–5 cm depending on the size of your star)
Info :
When joining, keep your stitches small and evenly spaced. Pin every few stitches to maintain shape and check that points align. If your panels have slightly different stitch counts, ease the fullness by slightly adjusting the spacing of joining stitches so points remain uniform.
Round 2 (Stuffing) :
Lightly stuff the star through the opening using small amounts of fiberfill at a time until points are filled but not overstuffed; you want crisp points, not rounded, puffy tips. Use a stuffing tool (back of crochet hook) or a pencil to push fiberfill out into each point tip.
Info :
Stuff gently and evenly: too much stuffing will round the points and create a bulky appearance. Aim for a gentle plumpness that gives the star presence without making seams pull. If you want the star to be very flat, use minimal stuffing, just enough to give a little depth for the decorative cluster.
Round 3 (Finish Join) :
Continue whip stitching the remaining edge closed, pulling stitches snug but not tight to avoid puckering. When the seam is closed, weave the yarn tail inside through several stitches to secure and trim close to the work.
Info :
Check the points and adjust stuffing through small needle holes with a darning needle and extra fiberfill as needed. If you added a sewn gold braid, tack it down on the inside every 4–6 stitches with tiny invisible stitches to keep it permanently in place.
— Attaching Holly, Berries & Bow :
Info :
Arrange two holly leaves symmetrically across the star center. Place three berries in a triangular cluster between leaves and stitch them firmly into place using long tails from the berries and matching red yarn. Add the gold ribbon bow beneath the berry cluster and secure with small stitches through the knot. Add a small gold bead at the bow center and attach with thread or glue for added shine.
Step :
Sew leaves first: position leaves with the pointed ends directed slightly upward toward one another so the berries nestle in the center. Tack leaves down through the center vein only so edges keep a 3D lift.
Step :
Stitch the three berries together into a tight triangle using their tails; then sew the triangle to the star through the base of each berry, catching a few stitches of the panels to ensure security.
Step :
Attach the bow beneath the berry cluster. If using a wired ribbon bow, hide the wire ends internally or snip the wire and wrap the ends in thread before sewing to avoid pokes. Sew the central bead over the bow knot to finish the centre neatly.
Info :
For extra security if ornaments are gifts or to be handled, apply a tiny dab of fabric glue under the bow and bead after sewing, allow to dry, then reinforce with a couple of small stitches through the bead hole. Trim all visible ends and gently steam-press the star face if your yarn allows (cotton tolerates a light steam) to relax any bumps.
— Optional Weighted Base for Hanging Stability :
Info :
If you want the star to hang facing forward (not flop to one side), insert a small flat washer or coin wrapped in fabric at the center of the star before closing the final seam. Wrap metal in a small bit of felt to prevent rattling and to cushion the inside surface. This addition keeps ornaments hanging nicely on a tree.
Info :
Last check: give the star a gentle shake to ensure no stuffing shifts and all embellishments are secure. Re-tighten any loose stitches and weave all ends well inside the body for a clean finish.
These festive star ornaments are a delightful combination of stitching technique and special finishing touches — perfect for holiday gift-giving or adding instant charm to your tree! Each star is made of two identical panels joined and lightly stuffed for a plush, polished look, then finished with holly leaves, tiny berries and a gold bow for classic holiday style. Enjoy making a whole set in coordinating colors — they stitch up quickly and make memorable, handmade treasures. 🎀✨