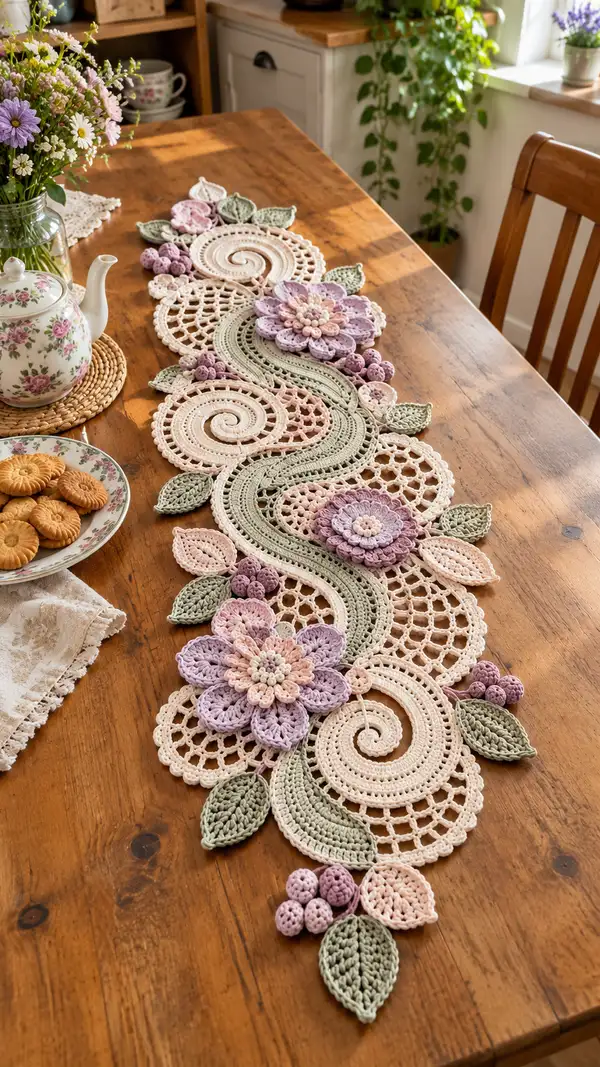
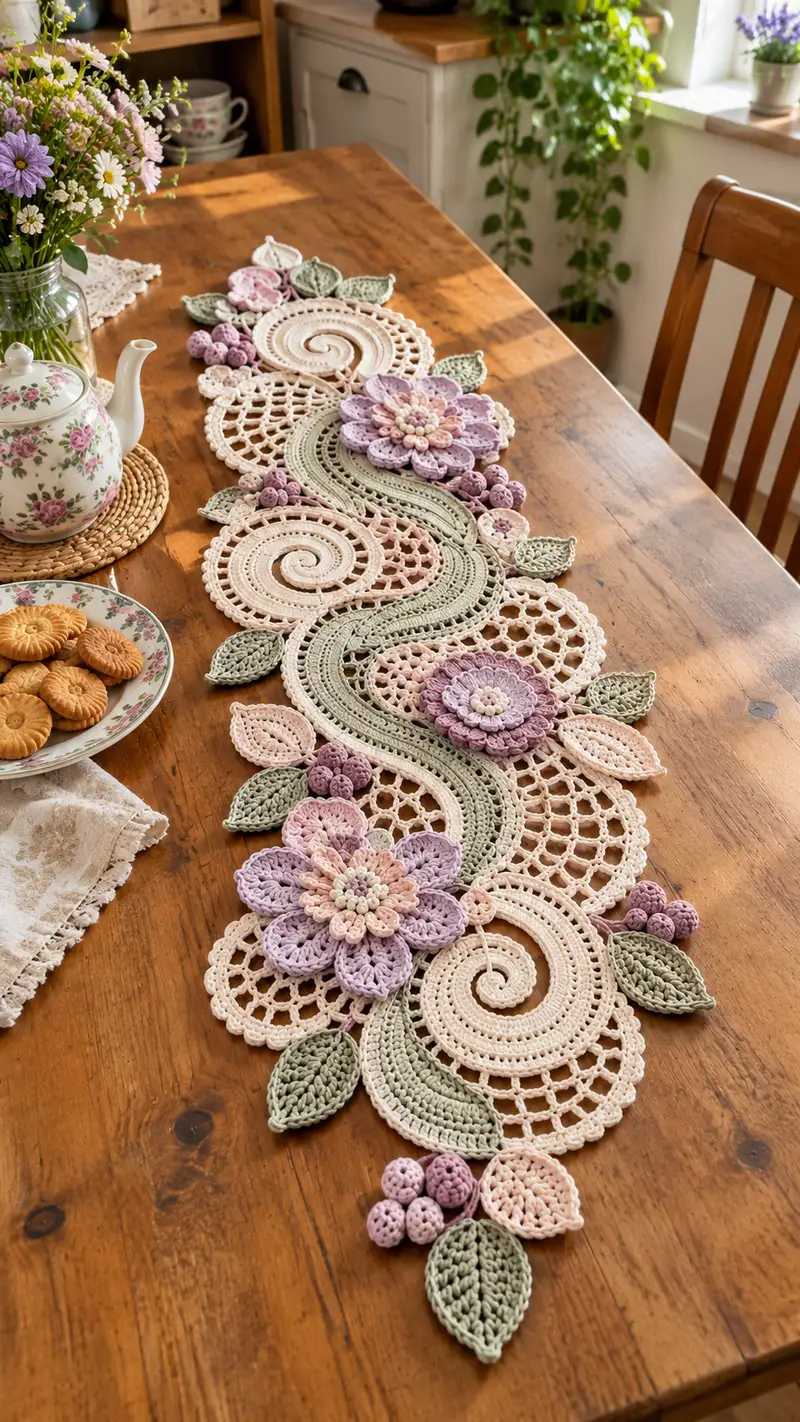
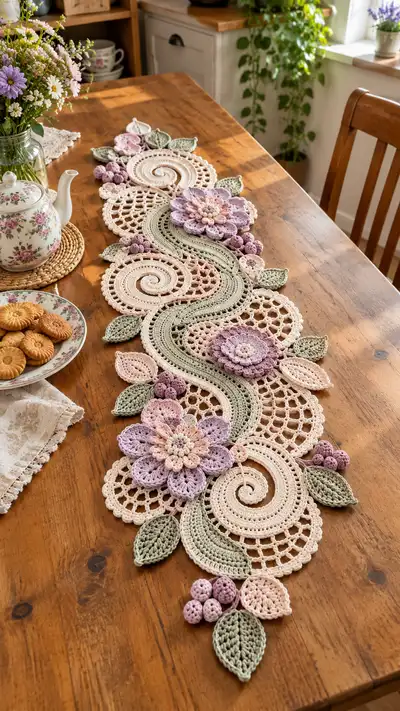
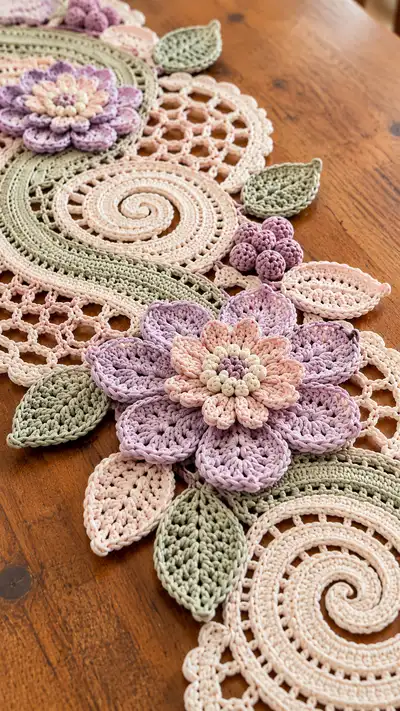
A delicate, romantic lace table runner made from layered crochet motifs — spirals, lacy doilies, scalloped leaves and dimensional flowers. Pastel palette of cream, blush, lilac and sage gives an elegant vintage look. The pattern uses join-as-you-go assembly to create a flowing, serpentine runner perfect for a dining table or sideboard. Detailed stitch counts and step-by-step rounds let you recreate the motifs, clusters and edging with confidence.
Progress Tracker
0% Complete
— Spiral Motif (Make 4) :
Round 1 :
6 sc in magic ring (6)
Round 3 :
(1 sc, inc) x 6 (18)
Round 4 :
(2 sc, inc) x 6 (24)
Round 5 :
(3 sc, inc) x 6 (30)
Info :
These spiral motifs are built as wide flat discs initially. Use consistent tension and a slightly smaller hook if cotton is springy to keep the spiral tidy.
Round 6 :
(4 sc, inc) x 6 (36)
Round 7 :
(5 sc, inc) x 6 (42)
Round 8 :
(6 sc, inc) x 6 (48)
Round 9 :
1 sc in each st (48)
Round 10 :
1 sc in each st (48)
Round 11 :
(7 sc, inc) x 6 (54)
Round 12 :
1 sc in each st (54)
Round 13 :
(8 sc, inc) x 6 (60)
Info :
At this stage your spiral disc is growing; to create a visible spiral coil work a contrasting slip-stitch spiral along the rounds after finishing when assembling — this helps emphasize the coil and deepen the spiral look.
Round 14 :
1 sc in each st (60)
Round 15 :
Working toward the coil, start a decorative round: *ch 2, skip 1 st, sc in next st* repeat around to create light openwork (60 ch-2 sps)
Round 16 :
1 sc in each st (60)
Round 17 :
To begin shaping a shallow spiral rim: (4 sc, dec) x 10 (50)
Round 18 :
(3 sc, dec) x 10 (40)
Round 19 :
(2 sc, dec) x 10 (30)
Round 20 :
(1 sc, dec) x 10 (20)
Round 21 :
10 dec across (10)
Info :
Fasten off leaving long tail for sewing. Lightly block disc flat, then coil the central area inward and tack with small stitches to form the visual spiral; sew securely before joining to other motifs.
— Lacy Doily Disc (Make 6) :
Round 1 :
6 sc in magic ring (6)
Round 3 :
(1 sc, inc) x 6 (18)
Round 4 :
(2 sc, inc) x 6 (24)
Round 5 :
(3 sc, inc) x 6 (30)
Info :
Begin open lacy pattern. Keep small marker at round joins to ensure accuracy because the lacy chain spaces must align for later mesh rounds.
Round 6 :
*sc 2, ch 3, sk 2* around, join (10 ch-3 sps, 30 sc total excluding ch sps)
Round 7 :
In each ch-3 space: (sc, ch2, 3 dc, ch2, sc) to create shell clusters (10 shells)
Round 8 :
Slip to first dc, ch 1, *ch 4, sl st into center of next shell* repeat to make ringed lacy arches (10 arches)
Round 9 :
Round of sc around the edge: sc in each st and into each ch-4 loop 2 sc, (total ~60 sc depending on tension)
Round 10 :
*ch 5, sl st into next sc* around to make airy mesh loops; adjust to maintain even spacing (approx 12-15 loops)
Round 11 :
Work 1 sc in each ch-5 loop, 2 sc in the top of each shell base; finish round maintaining count (approx 60 sc)
Info :
Block each doily flat to open the lace before joining. Use light spray starch if you want a crisp, table-ready finish.
Round 12 :
Decorative picot scallop: *(sc, ch3, sl st in 3rd ch)* around edge into each loop to form delicate scalloped rim
Round 13 :
Fasten off leaving long tail for joining. Weave in tail partly to secure before pressing flat.
— Wave Connecting Band (Make 1 long band) :
Info :
This sinuous band is worked in the round from a long foundation chain that forms a double-layered strip with shaping increases on alternating sides to create the waving curve.
Round 1 :
Make a foundation chain of 120 ch (or desired runner length proportionally shorter for samples). Turn, sc in 2nd ch from hook and across (119 sc)
Round 2 :
Ch 1, turn, 1 sc in each st across (119)
Round 3 :
Ch 2 (counts as hdc), turn, hdc across (119 hdc)
Round 4 :
Ch 1, turn, 1 sc in each st BLO across to form subtle ridge (119 sc)
Round 5 :
To create first curve increase on right edge: sc in first 6 sts, (inc) in next st, repeat across the side edge only by turning extra sc near ends to add 8 extra sts across width (127)
Round 6 :
1 sc in each st (127)
Round 7 :
On opposite edge increase to create alternating curve: sc across until last 6 sts, (inc) in next st, sc last 6 sts (135)
Round 8 :
1 sc in each st (135)
Round 9 :
Repeat shaping sequence: every 4th round increase along the desired side by working (2 sc, inc) clusters spaced to produce gradual curve; add 8 sts per shaping to maintain smooth wave contour (add numbers as required)
Info :
Measure against your planned runner layout. You can shorten the foundation chain or work fewer shaping repeats for a smaller runner. Pin the band flat as you shape to control the curve uniformity.
Round 10 :
Continue 1 sc in each st across (maintain growing stitch count)
Round 11 :
Work 2 rounds of sc then one decorative round: *ch 3, sk 1, sc* across to provide a textured stripe (maintain count)
Round 12 :
Work 1 sc in each st BLO to accent ridge line along the center where you will later attach doily edges (same stitch count)
Round 13 :
Insert small picot edging along both long sides to receive joins: *sc 3, (ch 3, sl st in 3rd ch) repeat across* maintain placement for later join points
Round 14 :
Fasten off leaving long tails at intervals for joining. Lightly block curved band; the blocking will help the joining points lie flat when you attach doilies and flowers.
— Large Layered Flower (Make 3) :
Round 1 :
6 sc in magic ring (6)
Round 3 :
In each st: (puff, ch1) across to form a tight puff center — use 3-loop puff stitch: *yo, insert, pull loop* x3, yo and draw through all loops, ch1 between puff clusters (12 puff clusters)
Round 4 :
Sl st into space, ch 3, (2 dc, ch1, 3 dc) into each ch-1 space around to make small petal bases (12 petals)
Round 5 :
Working behind first petal round, ch 1, *sc in base, ch2, 5 dc in next ch1 space, ch2, sc in base* repeat to form larger petals (12 larger petals)
Info :
Make sure petals are layered: the first puff center and small petals remain slightly raised; the second petal round is worked behind to create a natural layered bloom. Block the petals gently to shape them.
Round 6 :
Slip to back of a petal, ch 1, 1 sc in same place, (ch 4, 1 sc in tip of next petal) repeat around forming connecting arches (12 arches)
Round 7 :
For extra depth work a third petal layer: ch 1, *sc in petal base, ch 2, (hdc, dc, tr, dc, hdc) in arch space, ch2, sc in base* repeat (12 petals)
Round 8 :
Edge each outer petal with sl st picots: *sc across petal, ch3, sl st in 3rd ch* for refined edging
Round 9 :
Fasten off leaving long tail for sewing. Use contrasting center bead or small cluster of pale beige puffs sewn densely into the center for a realistic look.
Info :
Sew a small disk of lightweight interfacing to the back of each layered flower if you want added stability when attaching to the runner. This keeps petals from drooping with use.
— Small Rosette (Make 3) :
Round 1 :
6 sc in magic ring (6)
Round 3 :
*ch 2, sl st into next st* around to form tiny loops (12 loops)
Round 4 :
Work 3-loop puff into each loop to build a bumpy rosette surface (12 puffs). Fasten off and leave tail for attaching as small accent flowers or berry bases.
Info :
These little rosettes form the bases for berry clusters or secondary flower centers. Make them tight and small for texture contrast.
— Leaf (Make 18) :
Round 1 :
Ch 10, sc in 2nd ch from hook and next 3 ch (4 sc), 3 sc in last ch, rotate and work down opposite side of chain: sc next 3 ch, 2 sc in last ch; join to base with sl st (16)
Round 2 :
Ch 1, sc in each st around, at tip work (sc, hdc, dc, hdc, sc) to shape point, continue sc in each st (total 20 sc approx depending on increases)
Round 3 :
Working in BLO on round 2 only: ch1, sc in each st BLO to create a defined vein ridge (same count)
Round 4 :
Decorative vein row: with contrasting sage, sl st to center seam, ch 1, work surface slip stitches to draw a midrib from base to tip and back; end with sl st and fasten off.
Info :
Leaves should be lightly starched or blocked to lie flat. Use slightly smaller hook or tighter tension for the leaf to be more sculptural.
Round 5 :
Fasten off leaving a long tail for sewing. Make multiple leaves in alternating sizes by reducing chain foundation (e.g., 8 ch for small, 12 ch for large).
— Berry Cluster (Make 6 clusters, each cluster 5 berries) :
Round 1 :
Magic ring, 6 sc in mr (6) – makes a single berry (small cherry-sized bobble)
Round 2 :
Inc in each st (12)
Round 3 :
Round of sc (12)
Round 4 :
(sc, inc) x 6 (18)
Round 5 :
Sc around (18). Stuff very lightly with polyester fill — these are small and should be soft but not overfilled.
Round 6 :
Sl st to close top slightly, fasten off leaving tail. Make five berries and sew them together into a small cluster using tails, arrange as small cluster and secure to runner.
Info :
Use mauve or deeper lilac for berries to provide dimensional contrast. Sew clusters on with a few sturdy stitches and hide tails inside nearby motifs.
— Small Leaf and Petal Accents (Make many) :
Round 1 :
Ch 6, sc in 2nd ch from hook and next 3 chs (4 sc), 3 sc in last ch, sc back down opposite side, sl st to join (14)
Round 2 :
Ch1, sc around, add small picot at tip for a delicate point (14)
Info :
These tiny accents fill gaps and soften transitions between larger motifs. Make them in mixed pastel colors and pin them into place before permanent attaching.
— Joining and Assembly :
Info :
Layout the runner on a large blocking mat or table in the planned S-shaped arrangement. Position spiral motifs, doilies, wave band and layered flowers so edges overlap slightly. Pin each piece in place with rust-proof pins prior to sewing.
Step 1 :
Begin by joining the spiral motifs to the wave band using join-as-you-go: align a spiral edge to the band picot row, working from the band side, sl st through both layers every 6-8 sts to attach. Space stitches evenly for a smooth seam.
Step 2 :
Attach lacy doilies into the broader gaps by matching open mesh points to the band ch-loops: use a small tapestry needle and mattress/whip stitch through adjacent loops to create a nearly invisible join.
Info :
Sewing technique: use a length of matching yarn doubled for strength, take small stitches through both motif backs and knot securely on the wrong side. Hide knots under motifs or weave into seam allowances.
Step 3 :
Sew layered flowers on top of intersections where a spiral meets a doily and the band for a natural focal point. Use the long tail left when fastening off the flower for neat attachment and additional reinforcement stitches through the interfacing disk if used.
Step 4 :
Position leaf clusters and small petals along the runner edges into gaps and sew through base stitches only to avoid visible top stitching. Alternate sizes and colors to create a natural look.
Step 5 :
Sew berry clusters into nooks near flower bases using multiple passes of thread to secure them firmly. Tuck berry tails under a leaf to anchor and hide ends.
Step 6 :
After all pieces are attached, carefully trim loose tails and weave ends into the back of the runner with a yarn needle for a clean finish.
Info :
Use blocking to bring the entire runner flat: pin all edges to blocking mats and use a light steam or spray starch to set shape. This step unifies motifs and evens the joins.
— Edging and Final Scallop :
Round 1 :
With cream, work sc around the entire runner edge, placing 3 sc in each point or corner and 1 sc per 0.5 cm along long edges to even out shape — count as you go to maintain rhythm.
Round 2 :
Sc in each sc, when you reach a dip between motifs work *(sc, ch3, sc)* to form a small scallop. Repeat around to produce a gentle scalloped border.
Round 3 :
Optional decorative picot: *sc, ch3, sl st in 3rd ch* into each scallop tip to create refined picot edging.
Info :
Fasten off and weave in all ends carefully. Mist the runner lightly with water and gently press with a cool iron through a pressing cloth if needed to set the edge. Avoid hot iron directly on cotton to prevent shine.
— Final Touches and Blocking :
Step 1 :
Lay runner flat and pin every seam and outer edge to blocking board using rust-proof pins. Adjust gentle curves so that spirals are open and petals lie flat.
Step 2 :
Lightly spray with a mixture of 50% water and 50% fabric starch or use steam from a steamer held 10-15 cm above. Allow to dry fully overnight while pinned.
Info :
Blocking will dramatically improve the final look — open lace, flatten petals and ensure scalloped edges are even. Unpin carefully and trim any remaining stray fibers.
This floral lace table runner brings a touch of handmade elegance to any table setting — perfect for special dinners or daily charm. The layered flowers and spiral motifs create lively texture, while the soft pastel palette keeps the look romantic and refined. Blocking and careful joining are the final acts that transform many little pieces into a cohesive, beautiful runner you'll be proud to display. Enjoy the peaceful rhythm of stitching this heirloom piece — and share it as a heartfelt gift or keep it to brighten your own home. 🧶🌸