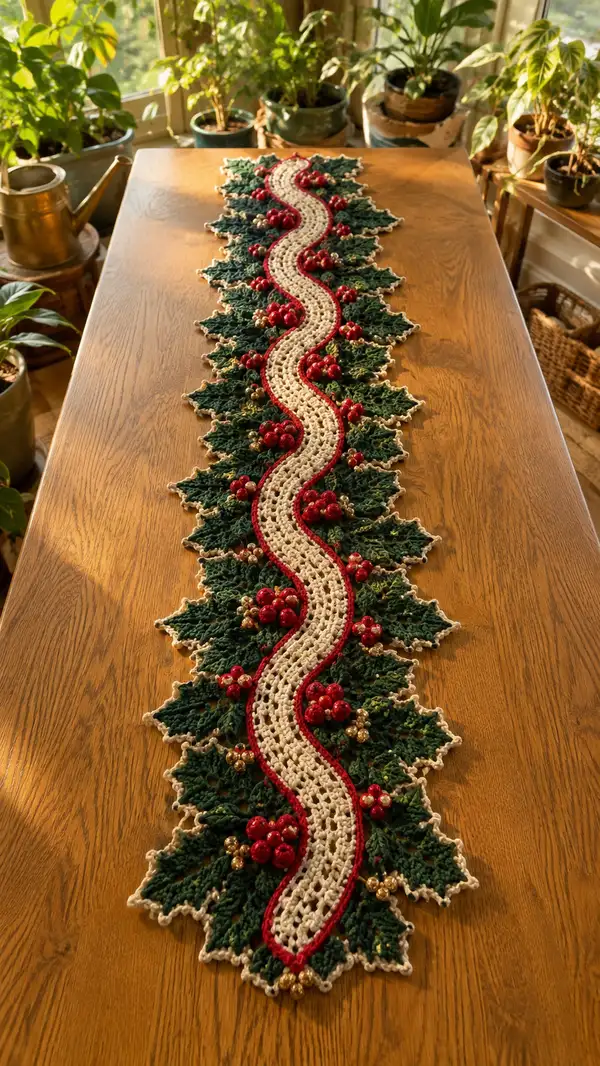
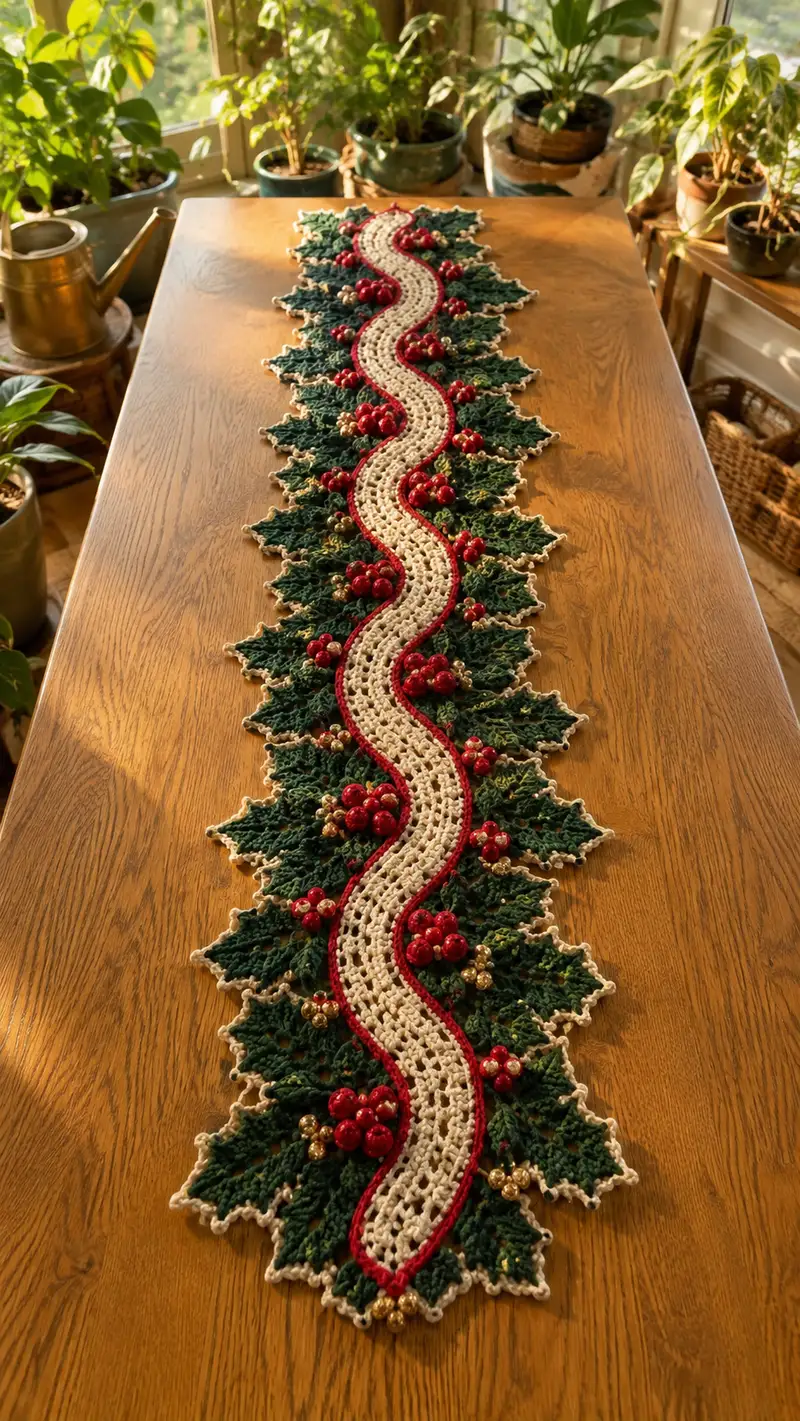
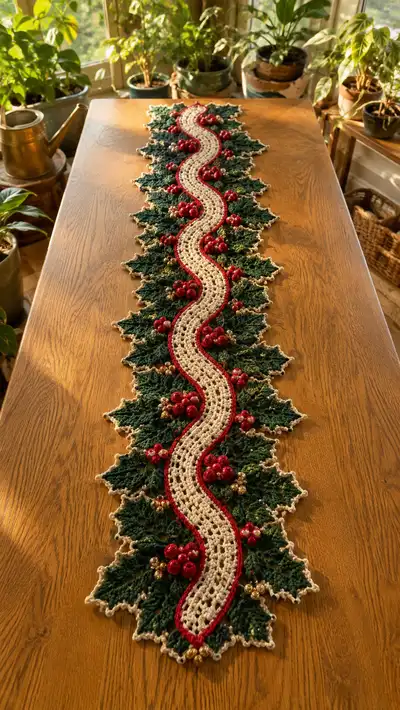
Create a festive, hand-crocheted table runner inspired by traditional holly sprigs and berries. This long runner features a wavy cream lace spine edged in crimson, framed by layered forest-green holly leaves and clusters of glossy red and metallic gold berries. The pattern uses textured stitches, picots, and strategic colorwork for a heirloom-quality holiday accent that drapes beautifully down the center of a dining table.
Progress Tracker
0% Complete
— Materials, Gauge & Notes :
Info :
Gauge is flexible for a decorative table runner. With worsted cotton and 3.5mm hook, 12 dc x 8 rows = 4 inches in solid fabric; however the lace spine is open so size will vary. The pattern is modular: make more or fewer leaf/cluster repeats to reach desired length. Work tightly enough so beads and picots sit neatly without large gaps.
Info :
Join motifs as you go where instructed to minimize post-sewing. Block leaves and spine sections flat and steam lightly if using cotton to open stitch definition. Use stitch markers to mark the beginning of rounds when working continuous rounds.
— Center Lace Spine (work 1 long piece) :
Round 1 :
6 sc in magic ring (6)
Round 3 :
(1 sc, 1 inc) x 6 (18)
Round 4 :
(2 sc, 1 inc) x 6 (24)
Round 5 :
(3 sc, 1 inc) x 6 (30)
Round 6 :
(4 sc, 1 inc) x 6 (36)
Round 7 :
(5 sc, 1 inc) x 6 (42)
Round 8 :
(6 sc, 1 inc) x 6 (48)
Info :
At this point you have a narrow oval. From Round 9 onward we will build an openwork lace mesh that becomes the spine. The stated stitch counts assume you keep the same number of base stitches around the oval (48). Use a spare stitch marker to denote the start of each round.
Round 9 :
Ch3 (counts as first dc), *skip 1 st, dc in next st, ch1; rep from * around to last st, dc in last st, join with sl st to top of ch3 (24 dc, 24 ch-1 sps counted as mesh)
Round 10 :
Ch3, dc in same st, *ch1, dc in next dc, ch1; rep from * around into each dc, join with sl st to top of ch3 (48 working points including ch-1 sps)
Round 11 :
Ch3, dc in same st, *dc between next ch-1 sp and next dc (work into turning chain space if needed), ch1; rep from * around, join (mesh stays even)
Info :
Work Rounds 9-20 in the same mesh pattern to build length. Keep turning chains and ch-1 spaces aligned to form a consistent openwork. This center will be the foundation for attaching the crimson outline and for aligning the holly leaf placement.
Round 12-20 :
Repeat Round 11 (mesh pattern) (48)
Round 21 :
(1 sc in each st) around working into dc and ch-1 sps to convert mesh into a firm row for outlining (48)
Round 22 :
Ch1, *sc in next 3 sts, ch3, skip 1 st; rep from * around to create small scallop spaces along the center (total stitches remain 48 but with 12 ch-3 spaces)
Info :
These ch-3 scallop spaces form the inward wave that the crimson outline will emphasize. Mark the top and bottom edges where leaf clusters will attach—approximately every 6-8 scallop spaces depending on runner length.
Round 23-30 :
Work even in sc around, inserting sc into ch-3 spaces as needed to maintain 48 st count and secure the mesh into a stable foundation (48)
Round 31 :
To create the begin of the wavy shaping for the S-curve, work (6 sc, 1 inc) x 6 (54)
Round 32 :
1 sc in each st (54)
Round 33 :
(7 sc, 1 dec) x 6 (48)
Info :
Alternate small increases and decreases every 6-8 rounds on opposite sides to produce a gentle S-shape when laying flat. Use blocking pins to shape curves as you add leaves so everything sits naturally.
Round 34-40 :
Work rounds as mesh pattern from Round 11 to continue length (48)
Round 41 :
(6 sc, 1 inc) x 6 (54)
Round 42 :
1 sc in each st (54)
Round 43 :
(7 sc, 1 dec) x 6 (48)
Round 44-48 :
Repeat mesh rounds (48)
Round 49 :
Begin taper for the opposite end by (5 sc, 1 dec) x 6 (42)
Round 50 :
(4 sc, 1 dec) x 6 (36)
Round 51 :
(3 sc, 1 dec) x 6 (30)
Round 52 :
(2 sc, 1 dec) x 6 (24)
Round 53 :
(1 sc, 1 dec) x 6 (18)
Info :
Fasten off leaving long tail for weaving. Block the center spine flat, using pins to emphasize the S-curve. Measure the length and mark positions for leaf motifs—standard layout is a repeat every 6-8 mesh scallops down each side.
— Crimson Outline (worked onto center spine) :
Info :
Attach crimson yarn at one end of the spine. This outline is worked in rows/rounds of sc following the inner and outer edge to create a raised red ridge that follows the S-curve. It is worked in continuous rounds along the center piece, with increases at curve bulges.
Round 1 :
Attach crimson at edge, sc evenly around outer edge for approximately 6-8 sts, sl st to join—adjust to follow curvature (work 1 sc in each available edge st) (variable count, follows spine)
Round 2 :
Work 1 sc in each sc around; when you reach a bulge add (sc, inc, sc) in one stitch to push the outline outward by 1 st. Continue (sc) to end and join (variable)
Info :
The crimson outline is intentionally narrow (1–2 rows) to create a vivid contrast. If you prefer a bolder ridge, work a second round of sc in crimson and finish with a reverse single crochet (crab stitch) to add a rope-like edge.
Round 3 :
Optional second row: sc in each st around, finish with sl st and fasten off (variable)
— Holly Leaf Motif (Make 20–24 leaf motifs; each leaf is worked flat and finished as a pointed serrated leaf) :
Info :
Each leaf is worked in rounds but flattened into a symmetrical shape. Leaves are worked in forest green. Work slightly firmer tension so leaves hold shape. Each 'leaf' measured after blocking is about 10–12 cm across tip to tip and 6–8 cm tall; adjust hook for desired density.
Round 1 :
mr, ch1, 6 sc in mr; pull to close (6)
Round 3 :
(1 sc, inc) x 6 (18)
Round 4 :
(2 sc, inc) x 6 (24)
Round 5 :
(3 sc, inc) x 6 (30)
Info :
We will now shape the leaf by working elongated stitches and picots around the perimeter to create the holly serrations. Work with a slightly smaller hook (3.25mm) if you prefer crisp points.
Round 6 :
Ch1, sc in next 4 sts, *hdc, dc, tr, picot (ch3, sl st to base) to form a point, tr, dc, hdc, sc in next 4 sts; rep from * around to create alternating serrations. End with sc to join (30 but now with formed points around)
Round 7 :
Work along edge: sc in each short edge and in base of each picot work (sc, ch2, sc) to accentuate points; join (same visual stitch count)
Round 8 :
Working in BLO, sc in each st around to create a raised ridge for leaf vein attachment (same)
Round 9 :
FLO: work chain 1, *sc, skip 1, sc in next, rep to end to create slight scallop texture on top layer; join
Round 10 :
Fasten off leaving long tail for sewing (or join to next leaf if working continuous). Block leaf flat, pinning points to crisp shape.
Info :
To create prominent raised veins, use a tapestry needle and chain-stitch embroidery with matching green yarn: run a chain stitch from base to tip, then add two smaller veins on either side. Work embroidery before blocking or after lightly steaming for permanence.
— Large Holly Leaf Alternative (Make fewer if you prefer larger leaves) :
Round 1 :
mr, 8 sc in mr (8)
Round 3 :
(1 sc, inc) x 8 (24)
Round 4 :
(2 sc, inc) x 8 (32)
Round 5 :
(3 sc, inc) x 8 (40)
Round 6-10 :
Shape the leaf with shells and picots as in main leaf section, using larger clusters: (hdc, dc2tog, tr, picot, tr, dc2tog, hdc) placement; block to shape
Info :
Use a larger leaf sparingly to create visual variety. Position large leaves where runner curves outward to balance silhouette.
— Berry Cluster (Make 14–18 clusters of 3–6 berries) :
Info :
Berry clusters are small spherical elements crocheted around beads (if using) or made wholly with yarn to form tight balls. Make clusters of varying sizes (3–6 berries) and combine with gold micro-berries for sparkle.
Berry Round 1 :
With red yarn: mr, 6 sc in mr (6)
Berry Round 2 :
(inc) x 6 (12)
Berry Round 3 :
1 sc in each st (12)
Berry Round 4 :
(1 sc, dec) x 4 (8) — make this small sphere for tight berries
Berry Round 5 :
6 sc (6) - stuff lightly if not covering a bead
Berry Round 6 :
6 dec to close slightly if desired or use bead insertion: open to attach bead or sew closed; fasten off and leave long tail for sewing and grouping
Info :
For a glossy finished berry, slide a 10–12mm red bead on to the yarn tail before closing and cover the bead with the crochet rounds, or simply sew the crocheted berry over a bead. For metallic berries, use gold yarn or tiny gold beads clustered in 3s.
— Attaching Leaves & Clusters to Center Spine (Repeat steps down both edges) :
Info :
Layout: Place the center spine flat and pin. Mark positions for leaf motifs on each side—standard spacing is one leaf every 6–8 mesh scallops. The leaves are staggered so that their tips interlock with the neighboring leaf on the opposite side to create continuous foliage.
Step 1 :
Using long tails left on leaves, position each leaf on the spine with the base of the leaf slightly overlapping the crimson outline. Sew base to the crimson ridge and to the mesh using small whip stitches through both layers. Use a tapestry needle and matching yarn to make invisible stitches.
Info :
When pinning leaves, angle them slightly so the serrated points alternate direction. This gives the natural, layered look. Attach leaves so that the tip points outward by 0.5–1 cm from the crimson ridge for visual depth.
Step 2 :
Sew the next leaf adjacent to the previous, overlapping the base by about 0.5 cm; continue down one side of the spine then repeat symmetrically on the opposite side. For added stability, work a few invisible mattress stitches through the center spine (through the sc rounds) and leaf base (through first 2–3 rounds of leaf).
Info :
Work leaves in mirrored pairs so runner remains balanced. If you made larger leaves for variety, place them at outward curves to accent the S-shape.
— Joining Leaf Pairs with Berry Clusters :
Round 1 :
Group 3–5 small crocheted berries (or bead-wrapped berries) into a cluster by stacking them on the yarn tail and sewing through centers with strong thread. Use a short length of thin yarn or beading thread to wrap and secure the cluster tightly.
Round 2 :
Sew cluster to runner where two leaves meet near the crimson ridge. Secure by passing the needle through the center of the cluster and into mesh, then back through cluster several times. Tie off and weave tail through underside of runner.
Info :
Add one gold micro-cluster adjacent to larger red clusters to mimic the photo’s gold accents. Vary cluster sizes to create natural-looking groupings. Keep spacing consistent—roughly every other leaf junction should have a berry cluster.
— Outer Cream Picot Scallop Edge :
Info :
After leaves and clusters are attached and runner is fully pinned and blocked, work the outer cream scallop across the outermost serrated points to create a delicate frame. This final round is decorative and hides small assembly stitches.
Round 1 :
Attach cream yarn at one end of the runner. Working around the outer edge of leaves, place 1 sc in the base of each outer leaf point and in every 2nd sc between points; where space allows make (sc, picot, sc) into the tip of each leaf to form a neat pointer. Continue around full perimeter (stitch count variable)
Round 2 :
Work 1 sc into each sc from previous round; where you made picots, work sl st into picot and ch2 to accent; join and fasten off
Info :
If gaps appear between leaf tips and cream scallops, add an extra sc or small invisible stitch through the leaf tip and cream scallop to pull them together. The cream scallop should be light and lacy, not heavy.
— Final Finishing & Embellishments :
Info :
Weave in all ends carefully along the back. Trim any stray fibers. Lightly steam-block the entire runner to encourage the lace and leaves to sit flat—avoid saturating. If beads are loose, secure with a drop of fabric glue on the knot (optional) and conceal glue with a little yarn wrap.
Step :
Optional metallic thread: add a few tiny embroidered seeds or short metallic embellishments near berry clusters to echo the gold beads in the photo. Keep metallic use minimal for elegant shimmer.
Info :
When storing, roll the runner loosely around a tube or place flat in a drawer to avoid creases. If making more than one runner, change the color palette for different seasons (ivory & green for winter, cream & orange for autumn accents).
This holly-inspired table runner blends lace and textured leaves into a timeless holiday accent. The layered leaves, crimson ridge, and clustered berries create a classic festive statement perfect for your dining table or mantel. Each stitch adds depth and charm—enjoy the meditative process of building this heirloom piece. 🎄🧶✨