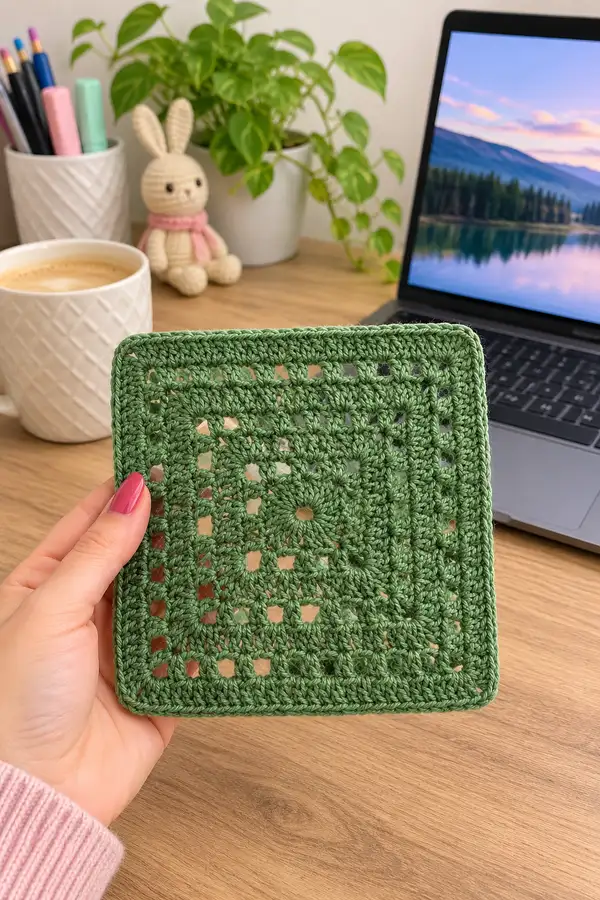
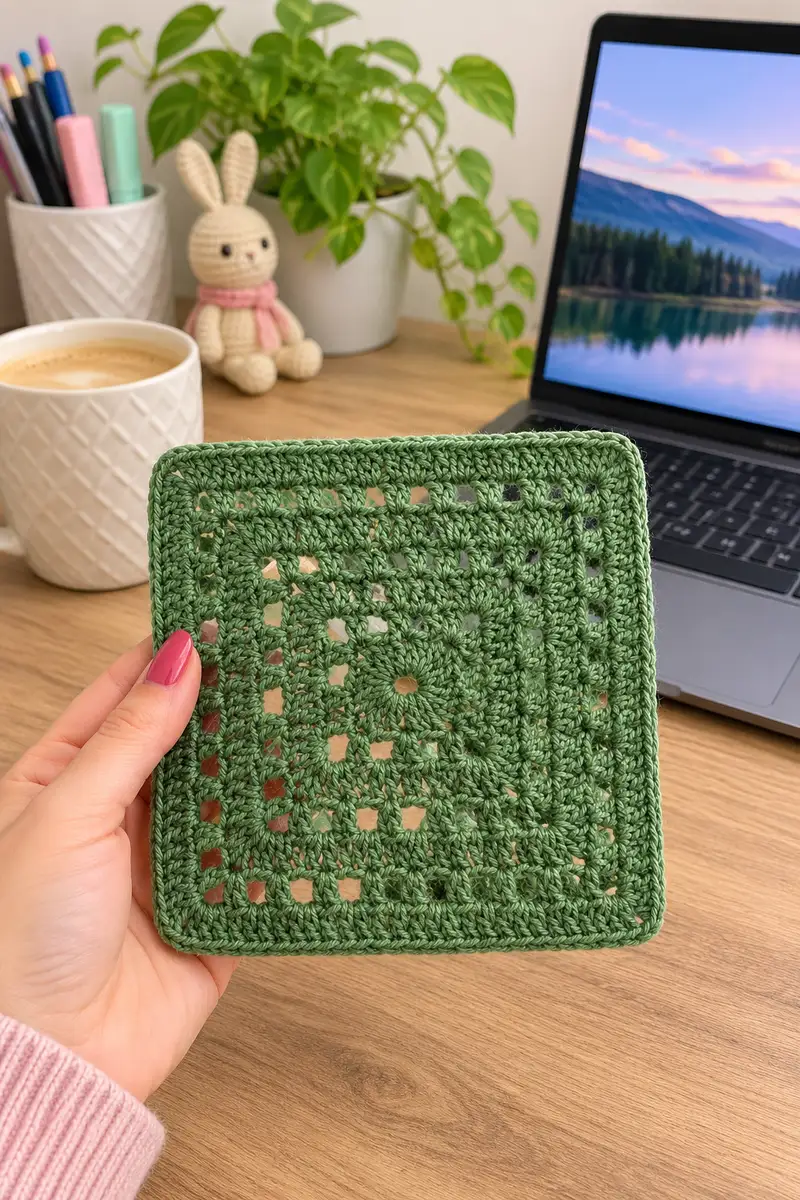
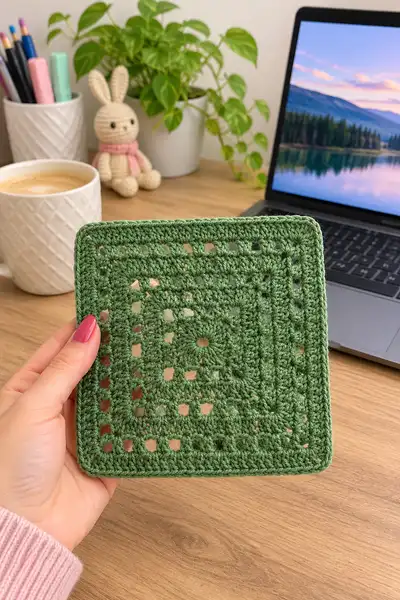
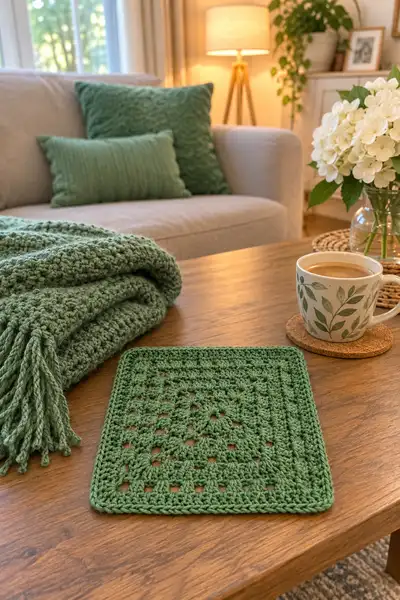
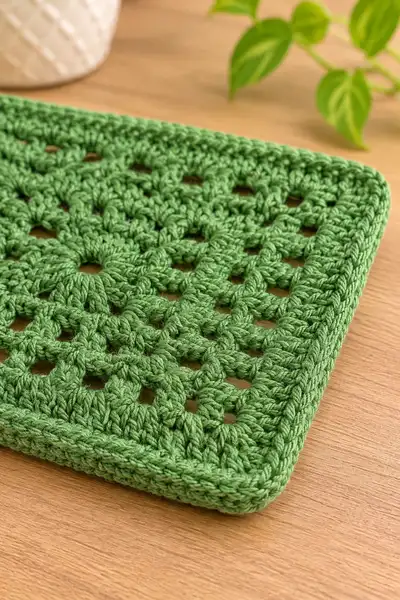
A cozy, forest-green windowpane lace granny square bedspread made of neatly joined square motifs and a clean, rounded border. This pattern recreates the classic textured granny with delicate openwork, worked in worsted-weight yarn for a dense, warm finish. The finished spread gives a timeless, handcrafted look for bedrooms or as a large throw.
Progress Tracker
0% Complete
— Overview :
Info :
This pattern will guide you through creating the single windowpane lace granny square motif, step-by-step finishing rounds for a clean, rounded border, a method to join squares invisibly, and a multi-round outer border for a bedspread-sized project. The motif is worked in the round from a tight center outwards using cluster groups and chain spaces; final rounds are worked to square the motif and create a dense outer edge that sits flat when joined. Sample finished square measures approximately 6" (15cm) when using worsted weight yarn and a 4.0mm hook. Work tension consistently and block each square prior to joining to get the best finished result.
— Granny Windowpane Lace Motif (Make 144 for a Queen-sized bedspread; adjust number for smaller projects) :
Round 1 :
Make a magic ring. Ch 3 (counts as first dc), 11 dc into ring, pull ring tight and join with sl st to top of ch-3. (12 dc)
Info :
Keep this round snug so the ring closes well; this forms the solid center of the motif. Counting dc in this round gives us the base 12 to begin building cluster groups.
Round 2 :
Ch 3 (counts as dc), dc in same st, ch 1, *2 dc in next st, ch 1* rpt around. Join with sl st to top of ch-3. (12 groups of 2 dc, 12 ch-1 sps — total 24 dc)
Round 3 :
Ch 3 (counts as dc), 1 dc in same st, ch 2, *[2 dc in next st, ch 1, 2 dc in next st], ch 2* rpt 3 more times to form four corners. Join with sl st to top of ch-3. (This round creates 4 corner ch-2 spaces and short side segments — count: 16 dc total distributed into corner clusters and side clusters.)
Info :
Round 3 establishes the four corner spaces (ch-2). These ch-2 corners will be the anchor points for all subsequent rounds to keep the work square-shaped. Keep contrast between ch-1 and ch-2 spaces tidy; pull even tension on chains.
Round 4 :
Slip to nearest ch-2 corner. Ch 3 (counts as dc), (2 dc, ch 2, 3 dc) into same ch-2 corner (corner made), *ch 1, skip next side cluster(s) and on each side work (3 dc in next ch-1 sp, ch 1) until reaching next corner ch-2, then (3 dc, ch 2, 3 dc) into the corner ch-2* rpt around. Join with sl st to top of ch-3. (4 corner groups of 6 dc each, plus side clusters; total dc approximately 48 — mathematically: each side between corners has 3-dc clusters: there are 4 sides and at this stage 3 clusters per side including corners, so 16 clusters *3 dc = 48 dc)
Round 5 :
Slip to next ch-1 sp along side. Ch 3 (counts as dc), (2 dc) in same ch-1 sp to form new cluster, *ch 1, 3 dc in next ch-1 sp* across side until reaching corner (3-dc, ch2, 3-dc). At corner work (3 dc, ch 2, 3 dc) as before. Join with sl st. (This increases each side by one 3-dc cluster; expected total clusters now 4 sides * (previous clusters per side + 1) — approx 24 clusters x3 dc = ~72 dc)
Info :
Rounds 4-7 will expand the square; count clusters and ch-spaces to keep symmetry. If a side has 4 clusters, count 4 clusters x 3 dc = 12 dc per side, multiply by 4 sides = 48 dc, plus corner dc included above. Use a stitch marker at one corner to track round starts.
Round 6 :
Ch 3, 2 dc in same space to complete cluster, *ch 1, 3 dc in next ch-1 sp* across sides, at each corner work (3 dc, ch 2, 3 dc). Join. (Expect total clusters to have increased by 4 clusters vs previous round. Approx total dc ~96)
Round 7 :
Repeat Round 6 pattern: build 3-dc clusters into each ch-1 side space, keep ch-2 corners (3 dc, ch2, 3 dc). Join to top of ch-3. (Square continues to expand; approximate dc total ~120; square now showing clear windowpane holes along sides.)
Info :
By the end of Round 7 your square should be visibly square with even spacing of side chain-1 spaces between 3-dc clusters. If one side appears longer, check for skipped ch-1 spaces or extra clusters and correct before continuing.
Round 8 :
Ch 3, 2 dc in same st to form first cluster, *ch 1, 3 dc in next ch-1 sp* across, (3 dc, ch 2, 3 dc) in corners. Join. (This round is a standard expansion: approximate dc count ~144)
Round 9 :
Ch 3, 2 dc in same st, *ch 1, 3 dc in next ch-1 sp* across side until corner; at each corner work (3 dc, ch 2, 3 dc). Join. (Approx total dc ~168)
Info :
At this stage you have an open lace of clusters and small windows formed by ch-1 spaces. For the windowpane look, ensure ch-1 gaps remain consistent. You may count clusters per side: if you have N clusters per side, total clusters = 4N, and total dc = 3 x total clusters.
Round 10 :
Repeat expansion: Ch 3 (counts as dc), 2 dc in same space, *ch 1, 3 dc in next ch-1 sp* across. At corners do (3 dc, ch 2, 3 dc). Join. (Approx dc total ~192)
Round 11 :
Ch 3, 2 dc in same st, *ch 1, 3 dc in next ch-1 sp* across, working corners as (3 dc, ch 2, 3 dc). Join. (Approx dc total ~216)
Info :
If you want a smaller square, stop here and finish with border rounds. For bedspread-size squares targeted at 6", the approximate number of expansion rounds will typically be 10–11 depending on yarn and tension. Measure a blocked square and adjust as necessary — you want roughly 6" finished motif before final edging.
Round 12 :
Ch 3, 2 dc in same st, *ch 1, 3 dc in next ch-1 sp* across. Corners remain (3 dc, ch 2, 3 dc). Join. (Approx dc total ~240)
Round 13 :
Ch 1, sc in same st, sc in next 2 dc, *(skip ch-1 sp, sc in next 3 dc across cluster), continue across side; at corners sc in 3 dc, ch 2, sc in 3 dc to begin squaring edge.* This round introduces a solid sc line across cluster bodies to reduce the open look and begin squaring the edges. Join with sl st. (Total sc count = number of side clusters times 3 plus corner scs — approximate sc total ~120 sc across the entire square.)
Info :
Round 13 adds structure and flattens the surface prior to the finishing rounds. Work sc evenly in cluster stitches (into the middle dc of each 3-dc cluster) for a tidy look. This helps create the windowpane banded texture in the finished motif.
Round 14 :
Ch 2 (counts as hdc), hdc in next sc and across each sc around, work 2 hdc in the corner ch-2 space (hdc is used to create a slightly lower ridge than dc), join with sl st. (This produces a thickening round; expected hdc total equals the sc count from previous round plus corner increases — approx 128–140 hdc)
Round 15 :
Ch 3, dc in next hdc across for one round of taller stitches, working 3 dc into each corner ch-2 to maintain squared corners. Join. (Approx dc total ~192 depending on count of hdc from prior round.)
Info :
These finishing rounds build up a flat, slightly raised edge that helps squares sit neatly when joined. If your square measures smaller than desired, add an extra round of (ch1, 3 dc in ch-1 sps) around before moving into the structured sc/hdc rounds above.
Round 16 :
Change to working 1 sc in each dc around in BLO to create a subtle ridge on the outermost clusters: Ch 1, 1 sc in first dc BLO, continue around, at corners work (sc, ch 2, sc) into the corner space. Join. (sc total equals last round dc count, approximate ~192)
Round 17 :
Ch 2, 1 hdc in each sc around, working (hdc, ch2, hdc) at corners to keep a defined corner. Join. (approx hdc total ~192)
Round 18 :
Final tidy round: Ch 1, sc in each hdc around; in corners work (sc, ch 1, sc, ch 1, sc) to round off the corner into a softer square with rounded edges. Join and fasten off; weave in ends. (Final sc total approx ~200)
Info :
After Round 18 fasten off and block your motif flat. Use pins to square corners and a steam-block or wet-block to set shape. Blocking is critical to ensure uniform sizes when joining multiple squares into a bedspread. Make required number of motifs (example: 144 for a 72"x72" queen square layout at 6" per motif).
— Alternative Motif Size & Notes :
Info :
If you prefer a larger motif, add additional rounds repeating the expansion pattern (ch 1, 3-dc clusters in ch-1 sps and maintaining (3 dc, ch2, 3 dc) at corners) until you reach desired blocked measurement. Each added expansion round will increase the motif approximately 3/4" depending on yarn and tension.
— Joining Motifs (Invisible Join by Single Crochet / Mattress Stitch Alternative) :
Info :
Arrange your blocked motifs on a large flat surface in the exact layout. For a queen-size bedspread the pictured layout consists of 12 motifs across by 12 motifs down (144 total). You may build rows and join them as you go or join all motifs after blocking. Two common methods: 1) Whip-stitch mattress-seam joining for invisible seams or 2) Single crochet join worked along motif edges to produce a decorative raised ridge. Below are step-by-step instructions for both joins.
Joining method A - Mattress stitch (seam invisible) :
With right sides facing up, place two motifs face-to-face along a seam. Use a yarn needle with a doubled strand of yarn. Insert needle under the outermost horizontal bar of the edge stitch on motif A then go into the corresponding bar on motif B and pull yarn through. Alternate sides in a mattress-stitch fashion pulling gently to bring edges together. Work across entire seam; tie off and weave in ends. Repeat for all seams to assemble rows, then join rows together using the same technique. (Info: mattress stitch sits flat and is nearly invisible once motifs are arranged on the bedspread.)
Joining method B - Single Crochet Join (visible ridge) :
Position motifs with right sides up. Join yarn at corner of first motif, sc evenly through both loops of edge stitches of the two motifs across the side; at the corner work (sc, ch 2, sc) to match motif corner and continue along. This creates a raised ridge that defines motif boundaries and produces the look shown on the bedspread photos. Work single crochet joins along all seams. For stronger seams (bedspread use) single crochet gives durable joints that withstand washing and handling.
Info :
When joining, keep tension looser than you would for a garment seam to avoid pulling squares into waves. Pin squares first to ensure straight join lines. If your squares are not identical in size, adjust by adding or removing a couple of sc/join stitches evenly across the seam to accommodate difference.
— Constructing the Bedspread Layout :
Round 1-Info :
Plan your layout: For a queen-style spread use a 12 x 12 layout (144 motifs). For a smaller throw use 10 x 10 (100 motifs). Layout and block all squares before joining. Working row-by-row helps reduce ends and allows you to keep consistent join tension (join each motif to its left neighbor and the row above as you add it).
Step :
Start in a corner: join the first motif to the second motif in the same row using chosen join method. Continue until row is complete. Join next row under the first by aligning motifs and joining across the row seam (each motif in the new row will be joined to the motif above and to the previous motif in its row). Repeat to build entire panel. Press lightly or steam-block once rows are joined to ease any tension.
Info :
Optional - Strengthen seams :
For bedspreads that will be used often, consider a second pass of whipstitch across seam interior using spare yarn to minimize strain on surface joins. This is invisible if done through inner bars and helps for heavy blankets.
— Outer Border & Rounds to Complete Bedspread (Work around entire joined panel) :
Border Round 1 :
Attach yarn to a corner of the joined spread. Ch 1, sc evenly into each outer edge stitch around the entire spread. When you reach a corner, work (sc, ch 2, sc) in the corner join to keep it square. Join with sl st to first sc. (sc total depends on bedspread perimeter; estimate center: for 12x12 layout at ~6" squares perimeter ~288"; sc per inch ~6 sc = ~1728 sc total around — this is a rough estimate; work sc evenly.)
Info :
One dense sc round helps even the outer edge and provides a neat base for subsequent decorative rounds. Work firmly but not tight to avoid puckering the entire panel.
Border Round 2 :
Ch 2 (counts as hdc), hdc in each sc around, working (hdc, ch 2, hdc) at corners. Join with sl st. This builds a slightly taller border and helps the blanket sit flat. (hdc total = sc total from previous round)
Border Round 3 :
Ch 3 (counts as dc), dc in each hdc around. At corners work (2 dc, ch 2, 2 dc). Join. (dc total equals last round hdc total)
Info :
At this point measure the edge. You can continue building the border with alternating rounds of dc and sc if you want a thicker, rolled border. For the photos a 6-8 round outer border gives the neat rounded thickness that frames the bedspread. If adding multiple outer rounds, use the following sequence to create the rounded thick border seen in pictures: sc round (BLO), hdc round, dc round, final sc round for neat finish.
Border Round 4 (BLO ridge) :
Ch 1, 1 sc in BLO in each dc around to create a ridge. At corners work (sc, ch 2, sc). Join and fasten off. This creates a subtle ridge that mirrors the raised edges of each motif and produces the uniform, cushioned look in the images.
Border Round 5 (final tidy edge) :
Optional final round: join yarn, ch 1, work 1 sc evenly around working two sc at corner stitches for smoothing; slip stitch to join, weave in ends. Block entire spread flat if needed.
Info :
If you plan to add a fringe or tassel border, add them after the final sc rounds. For the pictured bedspread the rounded edge was kept neat and simple without fringe to maintain a structured bedspread drape.
— Finishing & Care :
Info :
Weave in all ends securely. Steam or wet block the full spread, pinning the border to straighten and encourage the squares to lay flat. Machine wash gentle cycle using a mild detergent and tumble dry low or lay flat to dry depending on yarn fiber recommendations. Always consult the yarn label for washing instructions. Re-block if necessary to restore shape after washing.
Info :
Store folded in a cool, dry place. If storing for a long time, place acid-free tissue between folds or store the spread flat to reduce creasing.
You did it — a beautiful windowpane lace granny bedspread that brings warmth and timeless texture to your home! Each square becomes a small act of calm and the final joined spread is a stunning, cozy centerpiece for any bedroom. Enjoy the process of repeating motifs and the satisfying moment when the completed border frames your handiwork. 🧶🌿 Share a photo — your handmade bedspread will be a treasured piece for years to come! 😊