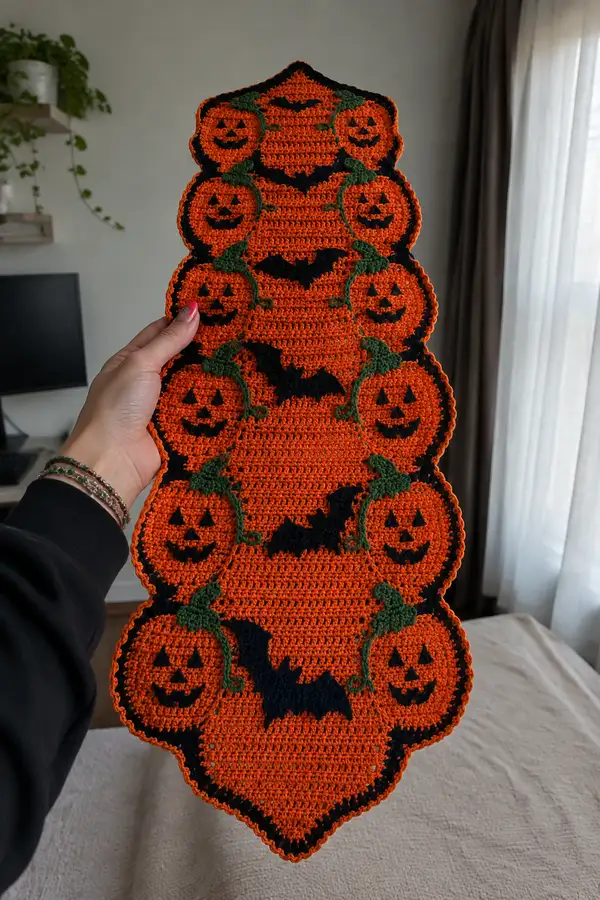
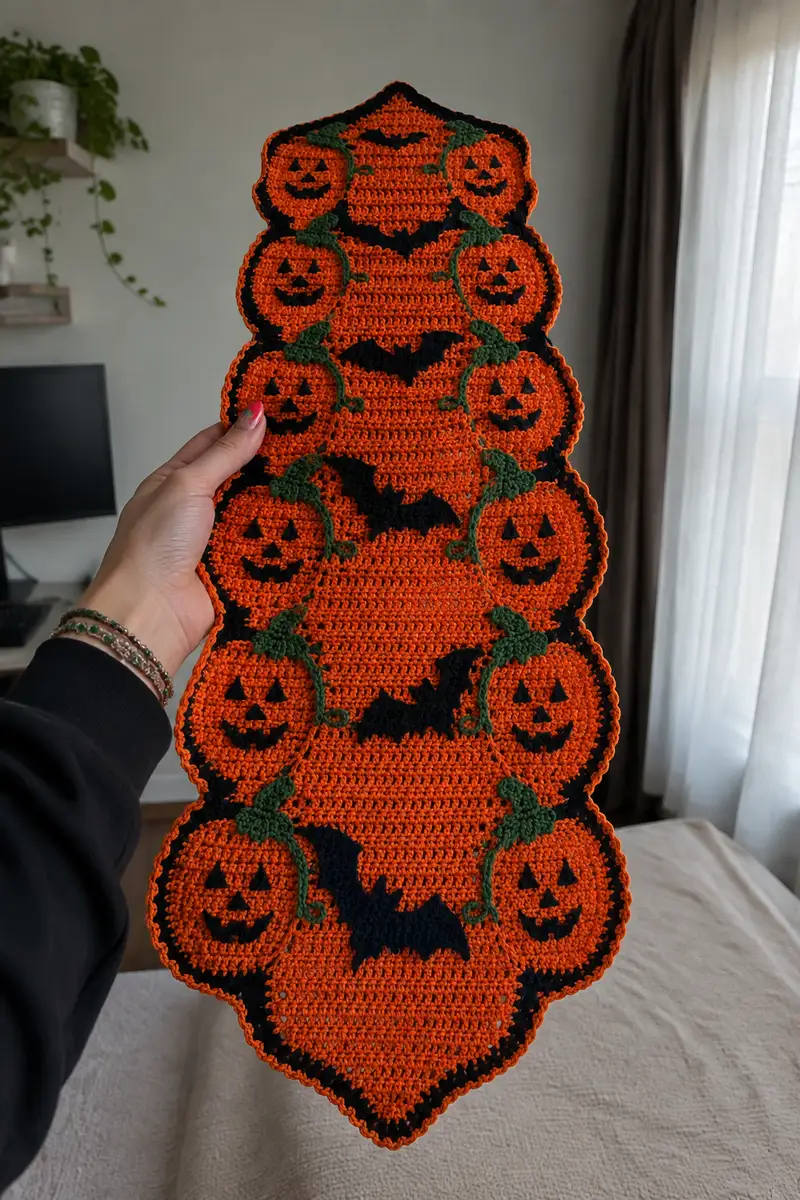
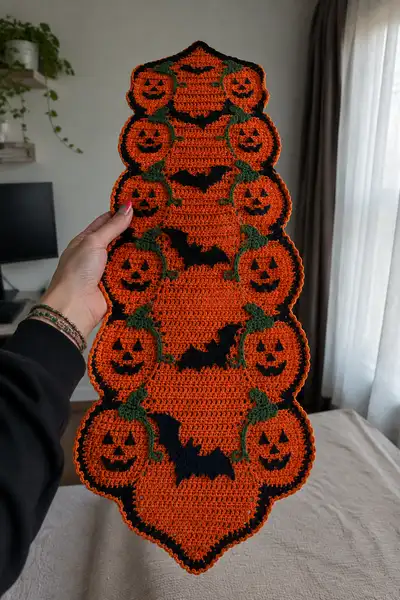
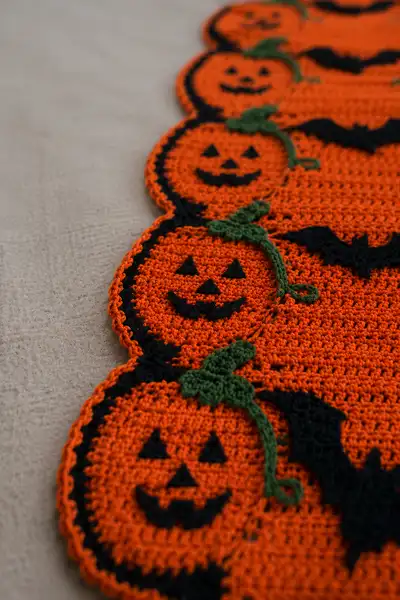
This Halloween table runner features stacked pumpkin motifs with carved jack-o-lantern faces, black bat appliques, and leafy green vines on a bright orange background. The runner is edged with a black scalloped border and small picot-like trims for a finished festive look. Worked in worsted-weight yarn with simple stitches and applique details, it makes a dramatic seasonal centerpiece. Designed to be worked as a central orange panel with separate pumpkin, bat and leaf motifs joined and sewn in place.
Progress Tracker
0% Complete
— Materials & Gauge :
Info :
Use worsted weight yarn and a 3.5mm hook for a dense, flat fabric. Gauge is not strict for this project but aim for approximately 20 sts x 24 rows = 10cm square in sc to keep motif proportions close to photos
— Base Panel (Central Orange Panel) :
Foundation :
Make a foundation chain of 80 chains (or adjust for desired runner width). This will form the width of the central panel. Turning chain counts as first sc of row throughout.
Round 1 (Row 1) :
1 sc in 2nd ch from hook and in each ch across, turn. (79 sc)
Round 2 :
ch1, 1 sc in each st across, turn. (79 sc)
Round 3 :
Repeat Round 2. (79 sc)
Info :
Use a stitch marker to mark the first stitch of each row so the panel remains an even rectangle. Repeat rows in continuous turns rather than joining to avoid visible seams and ridges.
Round 4-12 :
ch1, 1 sc in each st across, turn. (79 sc) — Work 9 more rows to build a base that will accept pumpkins; this establishes a solid, even fabric.
Info :
Measure the height after Round 12 — this is the first horizontal band where pumpkins will be aligned adjacent to the edge. You will create several such bands to match the layout of the photos.
Round 13-22 :
Continue 1 sc in each st across, turn. (79 sc) — Work 10 rows to extend the central area. Keep tension consistent.
Info :
If your runner is narrower or wider, increase or decrease your foundation chain by multiples of 2 to keep pumpkin mount spacing even. Always keep the same number of rows per band so motifs align.
Round 23-32 :
1 sc in each st across, turn. (79 sc) — This creates the central portion between pumpkin rows; you will later attach circular pumpkins along both long edges and the tapered ends.
Round 33-42 :
1 sc in each st across, turn. (79 sc) — Continue building to reach the full length determined by motif placement. The photographed runner used roughly 70 rows total for the base; continue until you have 68-72 rows total depending on how densely you place pumpkins.
Info :
Count rows and plan band centers for pumpkin placement: mark the center rows where each circular pumpkin will meet the edge. For the photographed layout, there are seven stacked pumpkin zones from top to bottom; leave even spacing between centers.
— Pumpkin Motif (Make 8; adjust count to fit your runner) :
Info :
Each pumpkin is worked in the round, starting in orange. After creating the orange disc, you'll add a thin black border and surface-embroider a face with black yarn. Make 8 pumpkins of the same size for uniform scallops.
Round 1 :
6 sc in magic ring (6)
Round 3 :
(1 sc, 1 inc) x 6 (18)
Round 4 :
(2 sc, 1 inc) x 6 (24)
Round 5 :
(3 sc, 1 inc) x 6 (30)
Round 6 :
(4 sc, 1 inc) x 6 (36)
Round 7 :
(5 sc, 1 inc) x 6 (42)
Round 8 :
(6 sc, 1 inc) x 6 (48)
Info :
At this point the pumpkin disc is a smooth circle about the size you see in the photo. If you want a slightly larger pumpkin, add one more increase round: (7 sc, 1 inc) x6 to reach 54 sts.
Round 9-11 :
1 sc in each st around (48) — Work 3 rounds even to build the face area and to create a flange for edging and applique placement
Round 12 :
Change to black yarn. 1 sc in BLO in each st around (48)
Info :
Working the black round in BLO leaves a slight raised orange ridge on the outer edge which matches the photographed look. Fasten off black and weave ends. We will add face details with black yarn using surface crochet or small appliques.
Round 13 :
Return to orange. 1 sc in each st around (48) — This evens the back and readies the piece to be sewn onto the base panel.
Info :
Make 8 identical discs. Lightly block discs flat. Place them along the panel edges so the black rounds form the scalloped outline. When sewn, these discs give the scalloped outer edge effect seen in the photos.
Face Placement :
Using black yarn, embroider 3 small triangular eyes and a smile using duplicate stitch or small surface slip stitch. Each eye is roughly 3-4 stitches wide. Place eyes centered on each disc's face area: count down two rows from Round 9 center and center across three stitches for each eye.
Info :
Alternative: crochet small triangular appliques: ch4, sc back across decreases to form triangle, fasten off and sew in place. This gives a slightly raised, graphic look similar to the photo.
— Bat Applique (Make 3-4) :
Info :
Bats are worked flat as small silhouettes in black and sewn onto the central orange panel between pumpkin rows. Pattern below yields a medium bat approximately matching the photographed proportions; adjust by adding more rows if you want larger bats.
Row 1 :
With black, ch20. Turn. (20 ch)
Row 2 :
sc in 2nd ch from hook and next 3 sts, dec, sc across next 6 sts, dec, sc last 6 sts — shape a shallow wing. (18 sc)
Row 3 :
ch1, turn, sc across decreasing at wing points: sc2tog at positions to create wing scallop. (16 sc)
Row 4 :
ch1, turn, sc across, add two small scallop points by (sc, ch2, sc) in designated stitches to form central ear peak, sc across. (16 sc plus 2 small ch2 picots)
Row 5 :
ch1, turn, sc across to narrow center then finish with pointed tail by decreasing last 4 sts together into a small tip. Fasten off leaving long tail for sewing.
Info :
Block bat flat and shape scallops with a steam iron at low setting if necessary. Make as many bats as your layout requires; in the photo there are three large bats spaced evenly.
— Vine & Leaf (Make multiple for connection) :
Info :
Vines are left long and flexible, made with a simple chain cord and accent leaves crocheted separately as tiny motifs. Leaves are sewn at top of each pumpkin where the vine attaches.
Vine Cord :
With green yarn, ch60 (or desired vine length between pumpkins). Sl st back along chain to create a twisted cord (or sc along chain for a firmer stem). Fasten off leaving long tail for sewing loops at ends.
Leaf Motif :
Make leaf: ch6, sc in 2nd ch from hook, hdc in next, dc in next 2, tr in last ch, working on opposite side of chain: dc, dc, hdc, sc. Sl st to join at base. Fasten off leaving long tail to sew to pumpkin edge. Make 8 leaves.
Info :
Sew leaf base to top of pumpkin disc where black round is visible, and attach the vine cord under the leaf so the vine appears to emerge from the stem area. You can twine the vine into little tendrils by forming small chain loops and sewing them down.
— Attaching Pumpkin Motifs to Base Panel :
Info :
Pin the pumpkin discs around the long edges of your base panel so that their centers align with the band rows you prepared. The black rounds should sit slightly overlapping the panel edge forming scallops.
Step 1 :
Place the first pumpkin so its edge aligns exactly with the outermost edge of the panel band. Pin in place at four equidistant points to prevent shifting.
Step 2 :
Using orange yarn and a yarn needle, whip stitch through the edge of the pumpkin and into the panel at regular intervals (every 3-4 sts) to create a secure seam. Make sure the black border remains visible as the scallop outline.
Info :
Sew each pumpkin this way, spacing centers evenly. For symmetry, work from center outwards on the runner so you can maintain even spacing along both long edges.
— Sewing Bats & Vines :
Step 1 :
Position bat appliques on the central panel between pumpkin rows. Pin to check placement and symmetry. The bats in the photo are centered horizontally in the central panel bands; align them with the nearest pumpkin centers above and below.
Step 2 :
Sew bats in place using the long tail and small whip stitch passes. Sew along the silhouette edge so stitches are hidden on the reverse. Reinforce wing tips with an extra stitch to prevent lifting.
Step 3 :
Lay vine cords from the top of each pumpkin to the next pumpkin above or below and tack in place with small stitches of green. Add leaf motifs at stems, sewing securely through base where it meets black round for a realistic look.
Info :
Tack vines with small stitches every 1-2 cm so they curve naturally along the runner; avoid pulling the cord too tight, keep gentle curves to mimic pictured tendrils.
— Border & Scalloped Edge :
Info :
The scalloped outer edge is defined by the black round of each pumpkin and finished with a continuous black bordering that joins pumpkins visually. Work border after all pumpkins are sewn and all appliques are in place.
Round 1 (Border Attachment) :
With black yarn, pick up stitches evenly around the entire runner edge including the sides of pumpkin discs and panel edge: sl st roughly every 3 stitches to create a base for scallops. Fasten on and join in continuous rounds if desired.
Round 2 (Scallop Row) :
Work into each picked-up space: (sc, hdc, 3 dc, hdc, sc) in spaces that correspond to each pumpkin curve to form a scallop. In panel edge sections between pumpkins work (sc, 2 dc, sc) to form smaller scallops. Fasten off and weave ends.
Round 3 (Picot Edge) :
Return with orange yarn if desired and add small picot-like loops: sc across black scallops, then *ch3, sl st into base of ch3 to form picot, sc into next space* repeat around for visual pop of orange on black border.
Info :
The picot loop is optional but creates the fine orange trim you see in the photos; use a narrow tension for these to keep them small and even. Block the runner after finishing the border to set scallops.
— Finishing Touches :
Info :
Weave in all loose ends thoroughly on the reverse, especially behind applique shapes where they might show through. Trim ends close after weaving at least 4-5 cm into the fabric.
Step :
Block the fully assembled runner by pinning it to a mat in the correct shape and misting lightly, or use a damp cloth to press with an iron at low heat if yarn permits. Let dry completely before use.
Info :
Optional: For added stability for tabletop use, lightly iron-on a thin layer of interfacing or sew a backing fabric in matching orange to the underside using a whip stitch. This will make it easier to wash and keep it flat.
— Variations & Sizing :
Info :
To make a shorter or longer runner, adjust the number of base panel rows and the number of pumpkin motifs. For a wider runner, increase foundation chain in multiples of 4 and add more stitches to each pumpkin round to keep scale even.
Final Tips :
Work evenly spaced stitches when joining motifs so the scallops look consistent. Take time to pin and check placement often; a well-pinned, well-sewn runner will look professional and sit flat on your table.
This Halloween pumpkin and bat runner is a wonderful seasonal project that turns simple stitches into a dramatic centerpiece. Each pumpkin and bat applique brings character and charm, while the scalloped black border gives a polished, finished look. Blocking and careful sewing are the final touches that make this piece table-ready and durable. I hope you enjoy stitching each glowing pumpkin and mischievous bat — it's a fun way to celebrate the season! 🎃🍁