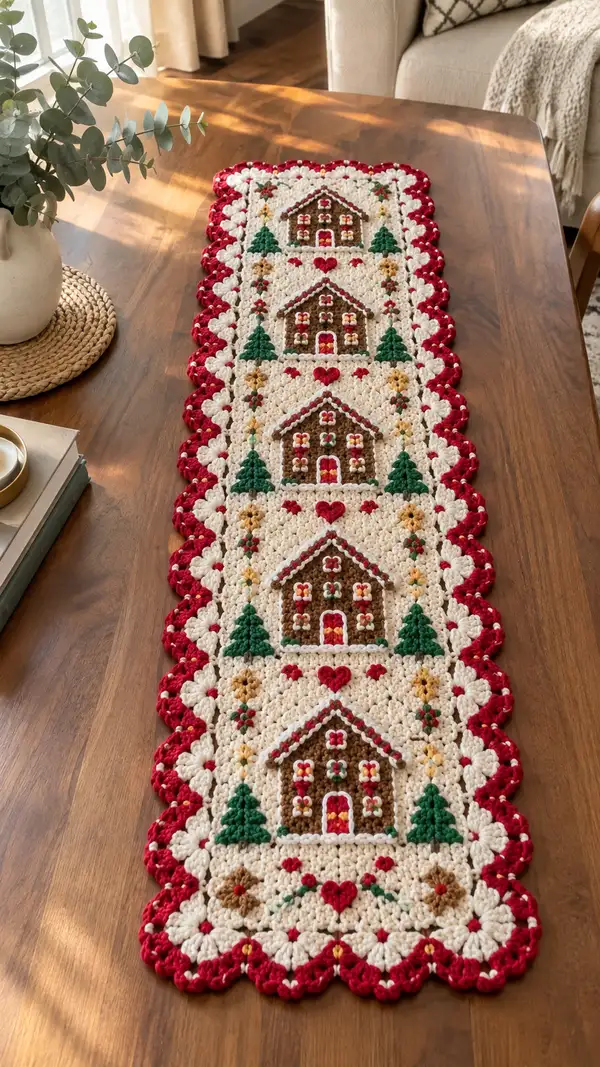
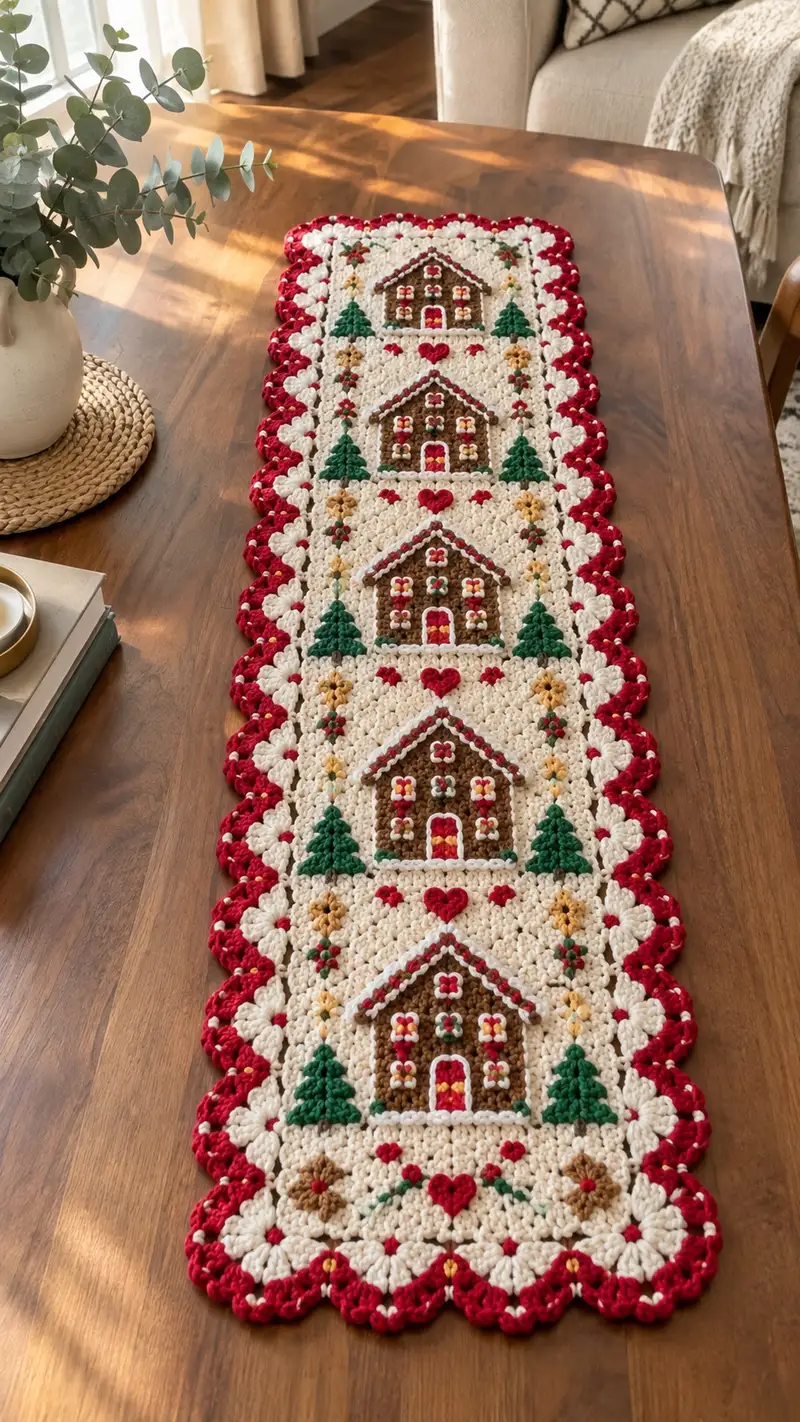
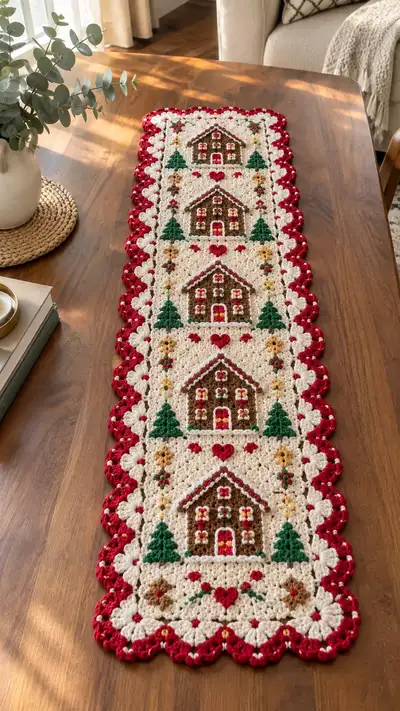
A charming holiday table runner featuring four cozy gingerbread house panels, evergreen tree appliques, tiny hearts and floral accents framed by a scalloped red border. Worked in cream, warm brown, evergreen and red, this runner brings vintage seasonal charm to any table. Perfect for holiday decorating or gifting, the pattern uses modular squares joined together and detailed surface embroidery for classic handmade appeal.
Progress Tracker
0% Complete
— Project Notes :
Info :
This table runner is built from four identical rectangular panels (called panels A) worked in cream, each featuring a gingerbread house applique, two trees and small embroidered accents. Panels are joined vertically and finished with a scalloped red border. Work tightly to avoid gaps around appliques. Gauge will vary with hook and yarn. Final size approximately 40-46in (102-117cm) long by 9-11in (23-28cm) wide depending on blocking.
Info :
PC (puff cluster) used here: yarn over, insert hook, pull up a loop (3 times) until you have 7 loops on hook, yarn over and pull through all 7 loops, ch1 to close the puff (counts as one puff cluster). Use consistent puff height to maintain an even surface.
— Panel Base (Make 4 identical panels) :
Round 1 :
Ch 4, join with sl st to form a ring. Ch 2 (counts as first hdc), work 11 hdc into ring (12 hdc) - or alternatively 6 sc mag ring inc to 12 if you prefer single crochet base. (12)
Round 2 :
(1 hdc, inc) x 6 (18)
Round 3 :
(2 hdc, inc) x 6 (24)
Round 4 :
(3 hdc, inc) x 6 (30)
Round 5 :
(4 hdc, inc) x 6 (36)
Info :
These first rounds create a small circular base that will be squared up into a rectangular panel. Switching from hdc to dc in early rounds yields a slightly looser fabric but is optional. Keep tension even.
Round 6 :
Change to cream if not already. 1 hdc in each st around (36)
Round 7 :
1 hdc in each st around (36)
Round 8 :
Begin shaping to rectangle: (hdc in next 5 sts, 3 hdc in next st) x 6 - this creates gentle corners and expands width where the 3-hdc clusters fall (42)
Round 9 :
1 hdc in each st around (42)
Round 10 :
(hdc in next 6 sts, 3 hdc in next st) x 6 (48)
Info :
At this stage the panel is growing. Use a stitch marker on the first stitch of each round to keep your rounds aligned for later applique placement. Measure the panel: after Round 10 width should be approximately 4.5-5in across - your gauge may vary.
Round 11 :
1 hdc in each st around (48)
Round 12 :
Change to a cluster row to create warmer texture: *(pc in next st, ch1, skip next st)* repeat around; if stitch count odd, adjust so last cluster sits neatly at corner (48 clusters = 48)
Round 13 :
1 hdc in each st around working into top loops of clusters and hdc rows (48)
Round 14 :
Work 1 sc in each st across next 6 sts, then work a small shell to mark panel corner: (dc, ch1, dc) in next st. Repeat around to begin forming rectangular edging (48)
Info :
Panel height is now taking shape. Place temporary pins to note center points where appliques (house and trees) will be placed: mark a vertical center line and horizontal midline at approximately rounds 7 and 11 for house base alignment.
Round 15 :
1 hdc in each st around (48)
Round 16 :
*(pc in next st, sc in next st)* around to create a staggered puff field for the background texture (48 pcs + 48 sc alternations)
Round 17 :
1 hdc in each st around (48)
Round 18 :
Switch to sc for a neat frame: 1 sc in each st around; do not fasten off (48)
Info :
Leave panel open for appliques. You will position and stitch house, trees and small motifs onto the flat panel. Blocking the panel at this stage will help align appliques more easily. Make 4 panels identical.
— Gingerbread House Applique (Make 4) :
Round 1 :
Using Brown: ch 8, sc in 2nd ch from hook, sc across to end (7 sc). Turn to form a small rectangle body base. (7)
Round 2 :
Ch1, sc in each st across 7 (7)
Round 3 :
Ch1, (sc in next 2, inc) x 2, sc in last st (9)
Round 4 :
Ch1, sc in each st across (9)
Round 5 :
Ch1, (sc in next 3, inc) x 2, sc in last st (11)
Round 6 :
Ch1, sc in each st across. Fasten off brown. (11)
Info :
House body is a small rectangle roughly 1.25x1.5in. Keep edges straight; if using a smaller hook (4.0mm) for firmer fabric, you will get a neater applique.
Round 7 :
Using White for roof trim: join yarn to top edge of brown rectangle, ch1, sc evenly across top edge (11). Turn and work 2 rows of sc to create a roof ledge (11)
Round 8 :
With White continue: ch2, dc in next 3 sts, dec over next 2 sts, dc in next 3 sts, ch2 to mark peak; fasten off (approx roof peak shaping)
Round 9 :
Using Red for door: Cut a small 5-ch loop, join, sc 4 in loop (4) then on opposite side ch1 and sc 4 to form a squat U; fasten off and leave long tail for sewing to house center
Round 10 :
Using White and Yellow for windows: embroider or small double crochet squares - ch3, 3 dc in 2nd ch from hook to form tiny window. Make two windows and a small round window under roof using a 4-ch loop with sc. Fasten off.
Info :
Arrange the door centered at lower edge of the brown rectangle. Windows evenly spaced either side and a small centered window under the roof. Use pins to secure placement before sewing with matching yarn.
Round 11 :
Sew house body to panel: position centered on panel vertical axis approximately 3-4 rounds up from lower panel edge (use previously marked midline). Whip stitch around rectangle edges with brown yarn, catching panel stitches but avoiding stretching panel fabric. Fasten and weave ends.
Round 12 :
Sew roof trim and attach white peak above house using small whip stitch. Embroider window crosses with yellow and door trim with white. Secure all ends on the wrong side. (Info)
Info :
Make 4 houses identical. Placement: each panel receives a house centered vertically in the upper half of the panel so that two decorative trees and floral sprigs can flank the house symmetrically.
— Evergreen Tree Applique (Make 8 total, 2 per panel) :
Round 1 :
Using Green: ch6, sc in 2nd ch from hook, sc across (5)
Round 2 :
Ch1, sc across (5)
Round 3 :
Ch1, (sc in next 1, inc) x 2, sc in last st (7)
Round 4 :
Ch1, sc across (7)
Round 5 :
Shape triangle: ch1, sc2tog, sc in next 3, sc2tog (5)
Round 6 :
Ch1, sc2tog, sc in next st, sc2tog (3)
Round 7 :
Ch1, sc3tog to close tip (1). Fasten off leaving tail to sew.
Round 8 :
Using Brown make tiny trunk: ch3, sc2 in 2nd ch and next (2). Fasten off with long tail for sewing.
Info :
Assemble tree by sewing trunk centered under tree triangle, then whip-stitch tree to panel on each side of house at roughly rounds 9-11 positions. Trees should be spaced approximately 6-8 stitches from house edges for balanced composition.
— Small Heart Motif (Make 4 or as needed) :
Round 1 :
Using Red: ch 5, join to form ring. Work 3 dc in ring, ch2, 3 dc in ring, ch2, sl st to join. (two small lobes)
Round 2 :
Work sc evenly around to form heart base and shape point: sc across back loops of foundation and slip-stitch to finish; leave long tail and stitch heart onto panel center between adjacent panels or in the center band as shown.
Info :
Make small hearts for the top and bottom of each panel pair, and one center heart between each panel join. Placement is aesthetic—use photo as guide. Embroider a tiny highlight on heart with white if desired.
— Little Flower Sprigs (Make 8) :
Round 1 :
Using Gold/Yellow: ch 3, 5 dc in 3rd ch from hook to make a tiny rosette. Fasten off leaving tail to stitch to panel. (1 tiny flower)
Round 2 :
Using Green embroider two small leaves either side of flower with stem stitch using embroidery floss or yarn. Fasten off.
Info :
Tuck flowers into corner motifs around house—one on each side at middle panel height. Use tiny French knots with red or gold floss for centers if desired.
— Panel Assembly & Surface Embroidery (per panel) :
Round 1 :
Position house at panel center as directed earlier and sew in place using matching yarn. Place two trees equidistant left and right of the house and sew them. Attach door and windows with embroidery details (white door trim, yellow window panes).
Round 2 :
Add hearts above and below house by sewing small hearts in place using the tail left from heart motif. Add small golden flowers along side vertical edges to mimic garland shown in photo.
Info :
Surface embroidery: use back stitch for vines, French knots for berry accents, and split-stitch for small stems. Work slowly and anchor ends cleanly on the wrong side. If you prefer less embroidery, use small appliques only.
— Joining Panels (Join panels A to create runner) :
Round 1 :
Lay two panels right sides together aligning edges and motif centers. Using cream yarn and a yarn needle, seam with whip stitch along the long edge leaving the outer scallop edge free. Repeat to join all four panels into a single long strip. Press seams flat.
Round 2 :
Alternative join-as-you-go method: on final round of panel 2, slip-stitch into corresponding stitches of panel 1 as you work the round to join with a continuous seam. This produces a neater join on the wrong side.
Info :
Ensure seams are flat and motifs are aligned vertically so that the houses read in a continuous column. Pinning panels before sewing will help keep edges from puckering.
— Seamed Reinforcement Rounds (after joining) :
Round 1 :
With cream, sc evenly along both joined seams on the right side to reinforce joins, working through both layers where joined. Keep count: approximately 48 sc for each seam length per panel (adjust for your gauge).
Round 2 :
Repeat a second round of sc over seam to stabilize fabric (48)
Info :
If you see slight overlap or a gap at joins, a third reinforcement round can be added. Do not over-tighten stitches as this will cause the runner to ripple.
— Scalloped Border (Main Decorative Border in Red) :
Round 1 :
With Red join at lower corner sc of runner edge. Work 1 sc in each st along the long sides and short ends to create a neat foundation edge. Count stitches and divide by 6 to plan scallops (approx 48 sts per panel edge). (total depends on panels joined)
Round 2 :
Ch3 (counts as dc), *skip 2 sts, work 5 dc in next st (shell), skip 2 sts, dc in next st* Repeat along entire edge to create shells approximately every 6 stitches. At corners work a larger shell of 7 dc to round the corner and continue. (shells x N)
Round 3 :
Working into the center dc of each shell: *(sl st, ch2, 3 tr, ch2, sl st) to form a fuller scallop* Repeat across shells and corners for a pronounced scallop (this creates a 3D edge). Fasten off as needed and continue along next side.
Info :
Spacing is key: measure evenly so scallops are uniform. If your count does not divide neatly, adjust the initial foundation by adding or skipping a sc to keep shell spacing even across entire perimeter.
Round 4 :
With White, place small trim: join to the center of each shell and work a small picot detail: (sc, ch3, sl st into base) then sc to secure. This creates the white accent dotted around red scallops as seen in the photo. Fasten off and weave ends.
Round 5 :
Optional accent row: Using gold/yellow work tiny slip-stitch dots at scallop spaces to mimic pom-poms. Join color, sl st into chosen stitches and fasten off immediately to leave small contrasting dots.
Info :
Blocking the runner after the scalloped border will open the scallops and straighten the runner. Pin scallops to desired curve and lightly steam or wet block as yarn permits. Ensure colors are fast enough for blocking method used.
— Finishing Touches & Final Embroidery :
Round 1 :
With embroidery floss or stranded yarn, add small garland details along vertical spaces between panels: use back stitch green vines and French knot red berries. Add a tiny white highlight to house windows with a small cross stitch.
Round 2 :
Secure all loose ends by weaving them into the wrong side at least 2 inches before trimming. Use small neat knots only if necessary; otherwise weave ends thoroughly for stability.
Round 3 :
Gently block the completed runner to measurements: approximately 40-46in long by 9-11in wide. Pin scallops to open shape and steam or wet block per yarn instructions. Allow to dry completely before use.
Info :
If you plan to gift or store the runner, press lightly and fold carefully with tissue to preserve scallops. Spot-clean only if yarn care requires it; avoid harsh detergents on embroidered motifs.
This cozy gingerbread house table runner brings handcrafted holiday charm to your home, stitch by stitch. Each panel is a miniature scene filled with warm browns, cheerful greens and a festive red scalloped edge. The modular construction makes it so satisfying—work one panel at a time and watch the runner grow into a beautiful centerpiece. 🧶❤️ Perfect for gifting or dressing your table for the season. Happy stitching and enjoy the seasonal cheer you create! ✨