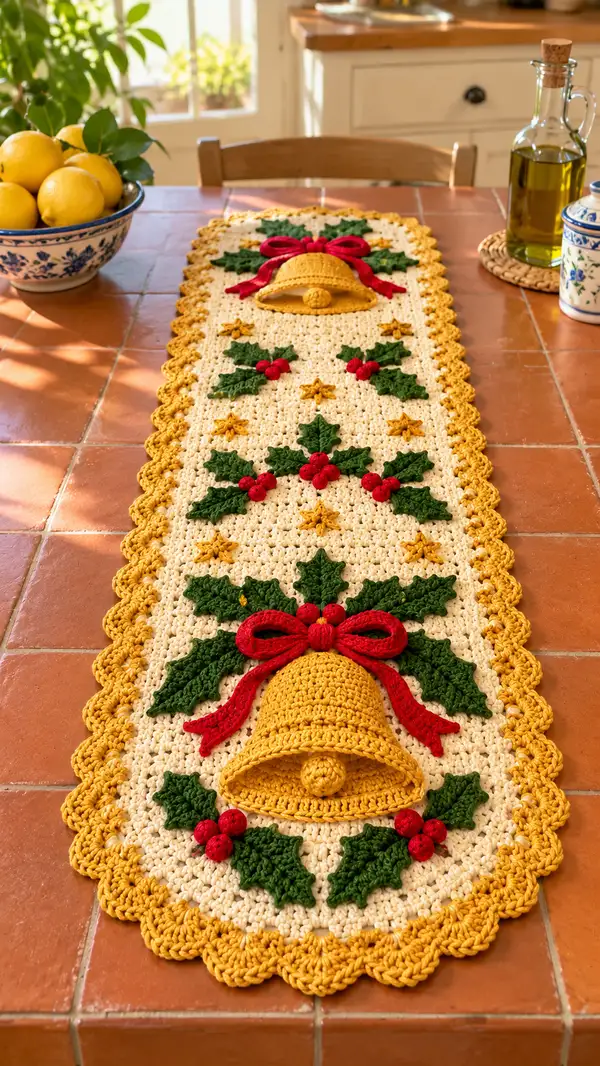
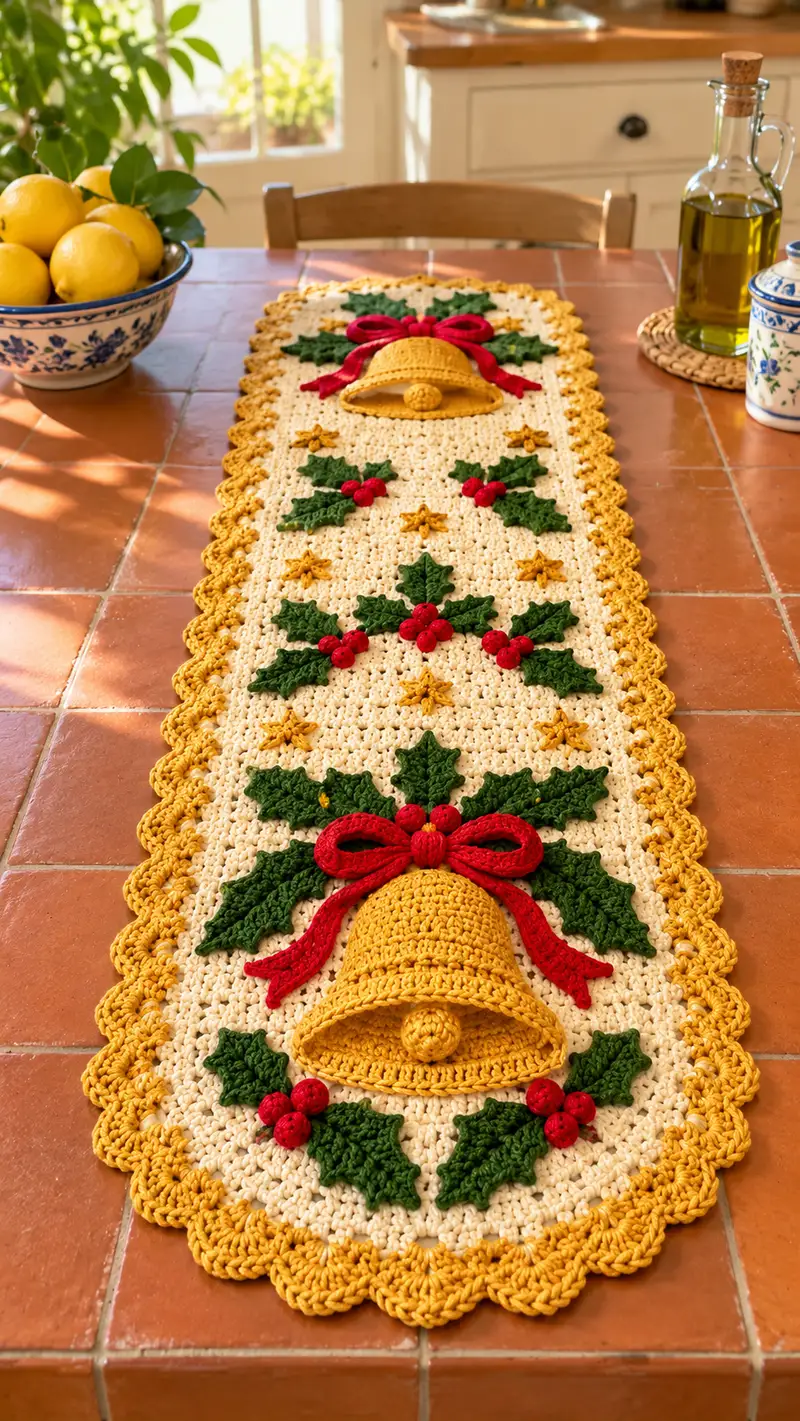
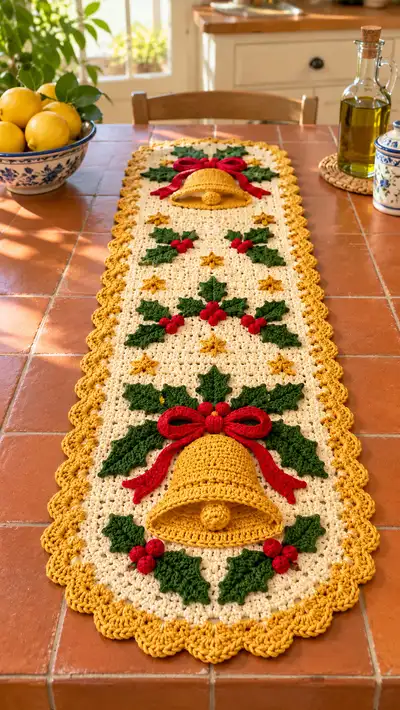
Create a festive Golden Christmas Bell and Holly Table Runner with rich mustard bells, deep green holly leaves and bright red berries. This cozy runner features textured background stitches, scalloped golden edging and three-dimensional appliqued bells, bows and holly clusters for a warm holiday centerpiece. Detailed step-by-step instructions guide you through base construction, applique motifs, and secure assembly for a durable, display-ready runner.
Progress Tracker
0% Complete
— Notes and Gauge :
Info :
Gauge is not critical for table runners, but for consistent size work in worsted weight yarn with 4.0mm hook. Base width in pattern is based on foundation chain of 120 ch (adjustable by multiples of 4 for pattern balance). Finished runner length as written is approximately 48 inches (122 cm) and width approximately 10.5-11 inches (27-28 cm) after blocking.
— Base Panel (Work foundation and main body) :
Foundation :
Ch 120, plus 3 turning ch (counts as first dc) (120 sts across)
Round 1 :
Dc in 4th ch from hook (counts as first dc), dc in each ch across to end, turn (120 dc)
Info :
We are working in rows (referred to as rounds for continuity). Keep stitch count identical each row; counts below list total dc per row after turning chain. Place a stitch marker in the top of turning ch at the start of Row 1 to mark your beginning end if desired.
Round 2-8 :
Ch 3, dc in each st across (120)
Info :
These first even rows form a stable base. Maintain even tension. If your width grows too much, try switching to a slightly smaller hook (3.75mm) for subsequent rows.
Round 9 :
Ch 2 (counts as hdc), *skip next st, 2 dc in next st, skip next st, hdc in next st; rep from * across, ending with hdc in last st (this creates a lightly lacy textured pattern but keeps same stitch count feel). Work carefully to maintain 120 stitch spaces across equivalent (120)
Round 10-16 :
Ch 3, dc in each st across (120)
Info :
At this stage you may place temporary yarn markers along the long edges at 10, 30, 50, 70, 90, 110 stitch positions counting from one short end; these marks will help align applique placement later.
Round 17 :
Ch 2, *2 dc in next st, 1 dc in next 3 sts; rep from * across (120) — this row introduces slight vertical texture; ensure your increases are spaced evenly; though instructions yield same total 'appearance' treat as 120 stitch density
Round 18-24 :
Ch 3, dc in each st across (120)
Info :
If you want a denser fabric to support heavier appliques like bells, substitute dc for hdc on the rows closest to bell placements and use a slightly smaller hook for a couple of rows before appliques to firm the fabric.
Round 25 :
Ch 2, *FLO 1 dc in each of next 4 sts, BLO 1 dc in next st; rep across to create subtle ridges (120)
Round 26-34 :
Ch 3, dc in each st across (120)
Info :
Work the total length of the runner to this point — you should have created three main motif zones down the length (one near each end and one center) by spacing rows between 12 and 26. The sample places appliques after Row 34 leaving space for scallop border. Adjust number of rows to desired length in multiples of 2 for symmetry.
Round 35 :
Ch 3, dc in each st across (120)
Round 36 :
Ch 2, hdc in each st across (120)
Info :
Fasten off the base panel if you plan to make all motifs separately and then assemble. Lightly block the panel rectangular before attaching appliques to ensure straight edges and correct spacing.
— Scalloped Border (worked all around base) :
Preparation :
Join golden yarn in any outer corner with sl st, ch1 to anchor.
Round 1 :
Working along long edge: *sc in next 4 sts, ch3, skip 2 sts, sc in next 4 sts; rep across long edge; at corner work (sc, ch3, sc) in corner turning point; continue along next short edge in same manner; complete around and join with sl st to first sc (maintains same basic coverage)
Info :
This anchor round provides pairing points for scallops; count your edge stitches so scallops fall symmetric at both runner ends. If counts don't align, adjust by adding or removing a small sc group evenly around the perimeter.
Round 2 :
*In each ch3 space work (sc, hdc, 3 dc, hdc, sc) to form a scallop; rep around corners placing the same scallop grouping into corner ch3 spaces; join with sl st to first sc
Round 3 :
Fasten off and weave in ends. Use tapestry needle to tidy underside; if scallops lift, lightly block and steam to relax and set shape.
Info :
Edge may be worked twice for deeper scallop: repeat Round 2 another time for a larger, more pronounced scallop as shown in the sample runner.
— Bell Dome (Make 3 large bells) :
Info :
Each bell is worked in continuous rounds from a magic ring for a dome shape. Use golden yarn and larger hook 4.0mm for slightly open fabric; switch to 3.5mm for firmer structure if desired. Work with MR method; do not join rounds unless specified. Count shown after each round.
Round 1 :
Mr, 6 sc in mr (6)
Round 2 :
Inc in each st around (12)
Round 3 :
(1 sc, inc) x6 (18)
Round 4 :
(2 sc, inc) x6 (24)
Round 5 :
(3 sc, inc) x6 (30)
Round 6 :
(4 sc, inc) x6 (36)
Info :
At this stage the dome is expanding; place a marker at the first st of round 7 and move it each round to track beginning of round. You may increase or stop at 36 sts if you want a smaller bell.
Round 7 :
(5 sc, inc) x6 (42)
Round 8 :
(6 sc, inc) x6 (48)
Round 9-14 :
1 sc in each st around (48)
Info :
Rounds 9-14 create the main height of the bell dome. Work these rounds evenly to create a clean profile. If you want a taller bell, add up to 4 more even rounds before shaping the rim.
Round 15 :
(6 sc, dec) x6 (42)
Round 16 :
(5 sc, dec) x6 (36)
Info :
Begin to shape the bell inward so the rim forms and overlaps slightly when sewn to base. Do not stuff the dome; bells are decorative and sit open on the runner. If you want the bell to keep a semi-rigid open mouth, consider stiffening with light craft glue lightly brushed into rounds 9-14 and allowed to dry.
Round 17 :
(4 sc, dec) x6 (30)
Round 18 :
(3 sc, dec) x6 (24)
Round 19 :
(2 sc, dec) x6 (18)
Round 20 :
(1 sc, dec) x6 (12)
Round 21 :
6 dec (6) — leave stitches live and do not fasten off; this small opening will be the top of the dome where clapper attaches
Info :
To form the bell rim (the lip), we will pick up stitches around the outer edge of the open base of the dome. With the dome opening facing you, insert hook into each stitch around the last even round before the decreases (round 14 in this layout) and pick up 48 sts to work a decorative rim.
Rim Round 1 :
Attach yarn to previous round 14 edge, ch1, sc evenly around entire outer edge picking up 48 sts total, join with sl st (48)
Rim Round 2 :
Ch2, (hdc, dc, dc, hdc) in each sc around to form flared l ip effect; join with sl st (48 clusters equivalent)
Rim Round 3 :
Optional decorative picot: *sl st in next 2 sts, picot into 3rd ch space; rep around; join and fasten off
Info :
Shape the rim while wet blocking if necessary so it flares gently outward as seen in the photo. If you want a more pronounced bell, block over a shallow bowl to set the curve.
— Bell Clapper (Make 3) :
Round 1 :
Mr, 6 sc in mr (6)
Round 2 :
Inc in each st (12)
Round 3 :
(1 sc, inc) x6 (18)
Round 4 :
1 sc in each st around (18)
Round 5 :
(1 sc, dec) x6 (12)
Round 6 :
6 dec (6), fasten off leaving long tail for sewing. Stuff lightly to form a small rounded ball. Attach to the top center interior of the bell with a few secure stitches, leaving enough yarn to anchor through the dome to the underside of the base panel if you prefer to stitch inside the bell and attach to runner for added security.
Info :
For safety and durability, sew clappers through the bell top and into the runner with extra stitches so they remain anchored when the runner is moved.
— Small Decorative Berry Bobbles (Make 18-24) :
Round 1 :
Mr, 6 sc in mr (6)
Round 2 :
Inc in each st (12)
Round 3 :
(1 sc, dec) x4, 1 sc, 1 dec (8) — adjust to make a neat approximate sphere
Round 4 :
1 sc in each st around (8) — fasten off and leave long tail for sewing. Do not overstuff; these sit flat when sewn and are primarily decorative.
Info :
When grouping berries into clusters of three, sew them together first in a triangular grouping then attach the cluster to the base runner or to the center of a cluster of leaves for a clean, dimensional look.
— Holly Leaf (Make 12-16 leaves) :
Info :
Each holly leaf is worked flat in short rows with increases and decreases to form pointed teeth along both edges. Use forest green yarn and 3.5-4.0mm hook for defined shaping.
Round 1 :
Ch 10, sc in 2nd ch from hook and across to end (9 sc). Turn (9)
Round 2 :
Ch1, sc in first st, hdc in next, dc in next 3 sts, hdc in next, sc in last (9)
Round 3 :
Ch2, at end of row on last st work 3 sc in last st to create turning point, then work across bottom of foundation chain: dc in next 3 sts, hdc in next, sc in last, sl st to join at base (shape resembles leaf center) (approx 9)
Round 4 :
Working along one side of leaf only: attach yarn at base, ch1, sc in base, *(hdc, dc, tr) in next st to form a point; rep 2 times; dec across last 2 sts to narrow back to base; finish with sc in final base st; fasten off (structure creates pointed edge)
Round 5 :
Refine edge: rejoin yarn at leaf tip, work small picot points along edge: *sl st, ch3, sl st in same st, skip 1 st; rep along top edge; fasten off
Info :
Sew the leaf's center vein by surface slip-stitching a line in contrasting darker green or by embroidering a central seam with backstitch to mimic leaf veins. Block each leaf lightly to flatten and set edge points.
— Bow (Make 2 large bows for top and bottom motifs) :
Loop Piece (Make 4 halves to assemble two loops per bow) :
Ch 30, dc in 3rd ch from hook and across to end (28 dc)
Round 1 :
Ch2, turn, hdc in each st across (28)
Round 2 :
Ch2, turn, dc in each st across (28)
Round 3 :
Ch1, turn, sc in each st across (28). Fold loop piece in half lengthwise and sew ends together to create a tube. Stuff lightly along center if you want a slightly puffed loop
Info :
Make two loop pieces and sew them to form the classic two-loop bow shape. Shape loops by pinching center and sewing through several times with a length of yarn, then wrap center with small band piece described below.
Tail Pieces (Make 2 per bow) :
Ch 24, dc in 3rd ch from hook and across (22 dc). Ch1, turn, sc in each st back for 4 rows, fasten off leaving tail for placement. Shape ends to a pointed tail by folding last 6 sts and decreasing across last 3 rows to a point.
Center Band :
Ch8, sc in 2nd ch and across (7 sc), work 3 rows of sc, then wrap tightly around joined loops and tails to finish bow center, secure ends with tidy stitches and hide tails.
Info :
Sew bow to bell top using strong stitches through the center band to ensure bow sits flat and secure. You can slightly steam the bow to shape curves for a lifelike look.
— Small Golden Stars and Accents :
Round 1 :
Mr, ch2, 5 sc in ring, join (5)
Round 2 :
*Ch3, sl st into next sc to form star point; rep 5 times; fasten off
Info :
Make 6-10 small stars to fill spare negative spaces between holly clusters. Sew flat to the base with small stitches to avoid creating lumps under the bell.
— Assembly Prep :
Info :
Layout all motifs on blocked base panel according to photo references or your own spacing. Typical layout uses three primary bell motifs evenly spaced, with holly clusters and berries flanking each bell and smaller stars between them. Use pins to temporarily hold pieces in place and photograph layout to remember placement before sewing.
Info :
Pre-sew any cluster pieces together where needed (for example, sew three berries together to make a tight cluster, or sew leaves into triads before attaching to the base). This makes final attachment easier and reduces visible stitching on top of the base fabric.
— Attaching Large Bells :
Step 1 :
Position the bell onto the base panel at the desired motif location. Ensure the bell lip sits slightly above the fabric so its shadow is visible; pin the bell at three equidistant points around rim to hold in place.
Step 2 :
Using matching golden yarn and a mattress stitch or whip stitch through the underside edge of the rim, sew the rim to the base panel, taking small stitches through both the rim and the base to secure. Go slowly and keep stitches neat to avoid pulling the rim flat.
Info :
If you want the bell to be removable for washing, place small snap fasteners or sew a loop of yarn on the bell rim that ties to an eye stitch sewn into the base instead of sewing it permanently.
— Attaching Clappers and Interior Anchors :
Step 1 :
Bring the clapper tail through the top center hole of the bell and stitch through several times into the base panel beneath the bell for extra stability. Knot on the underside of the panel and weave tail in.
Info :
For an even cleaner underside, stitch the clapper onto a small felt disc that you then glue or stitch into place under the bell's interior before closing off stitches; this spreads load and avoids tearing yarn under heavy handling.
— Attaching Holly Clusters and Berries :
Step 1 :
Sew leaves in their clusters first. Place the center of leaf cluster under the bell or near bow as shown. Attach by sewing along the central base of each leaf with a few secure stitches into the runner, then sew adjacent leaves together to reinforce the cluster.
Step 2 :
Sew berry clusters on top of the leaf junctions using long tails and a yarn needle, then secure with backstitches through each berry to anchor them. For strongest attachment, sew two or three passes through each berry into the base.
Info :
Arrange leaves so that points radiate outward from berry cluster. Slightly overlap leaves for a natural look; this also helps disguise the joining stitches underneath.
— Attaching Bows and Tails :
Step 1 :
Center the bow over the top of the bell, place tails so they drape downward and outward. Sew the center band first by passing stitches through band and into the bell top rim a few times, then secure tails by sewing into base panel under the bell and around leaf clusters as needed.
Info :
Tension the bow band snugly but not so tight that loops flatten. Slight steaming while shaping can give the bow a polished, lively curve as in the sample photo.
— Final Finishing :
Info :
Weave in all yarn tails on underside, trim any stray fibers. Lightly steam or block the whole runner to relax seams and set shapes. Inspect the underside to make sure no sharp needle knots are present that might scratch furniture; place a small felt panel under large bells for extra furniture protection.
Info :
For long-term durability, consider stitching bells with upholstery thread through hidden spots for extra reinforcement—this is especially useful if the runner will be moved frequently.
This Golden Christmas Bell and Holly Table Runner pattern brings classic holiday charm to your home. Each detailed applique—bells, bows, holly leaves and berries—adds texture and depth, creating a warm centerpiece that catches light and attention. The scalloped edge finishes the runner with a handmade flourish you will be proud to display. Enjoy the meditative rhythm of the base rows and the satisfying assembly as the motifs come together. Happy stitching and festive decorating! 🎄🧶