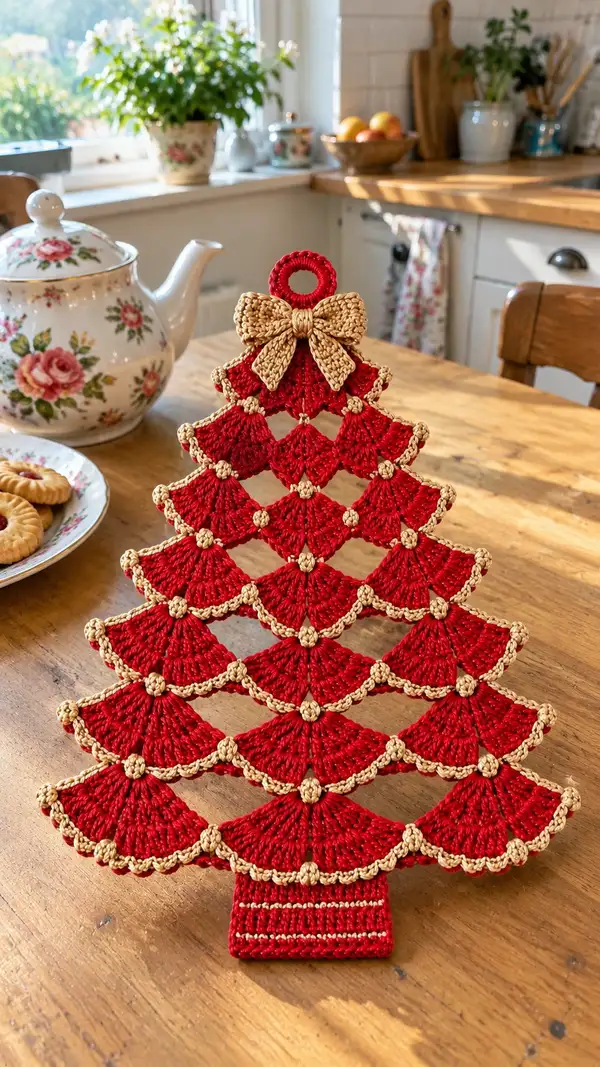
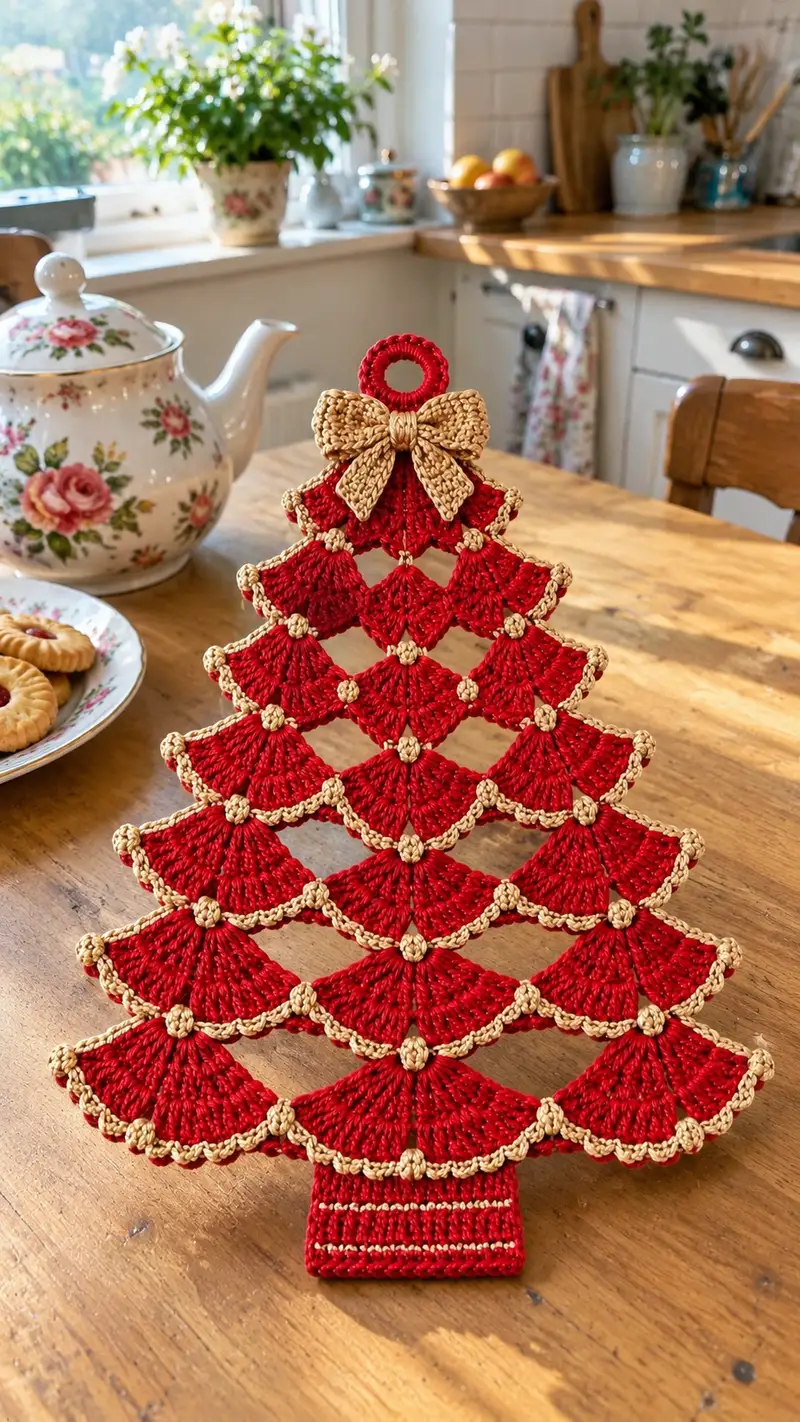
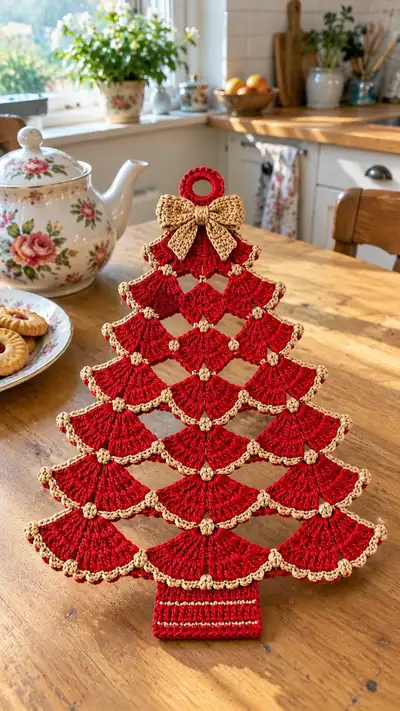
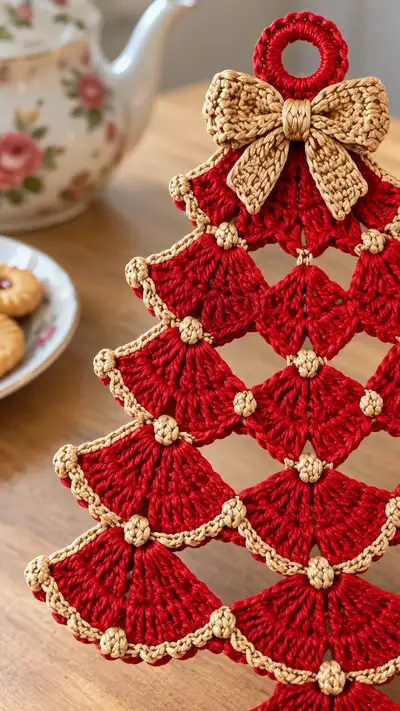
A charming layered crochet tabletop Christmas tree worked in rich red with metallic-gold trims and a decorative bow. This freestanding tree is built from repeating fan/diamond motifs joined in tiers, finished with gold picot edging and small bobble knots for ornaments. The eye-catching loop at the top makes it perfect to hang or stand as a seasonal centerpiece. Detailed step-by-step instructions guide you through each motif, trims, bow and trunk so you can recreate this elegant holiday decoration.
Progress Tracker
0% Complete
— Supplies & Gauge :
Info :
Gauge is not critical for this decorative piece, but a tight, tidy stitch will give the best structure. Using a 3.5mm hook with worsted cotton, each fan motif measures approximately 4.5cm wide and 3.5cm tall. Adjust hook size if you want a denser or looser fabric.
— Top Ring :
Round 1 :
With gold yarn and 3.0mm hook: 6 sc in magic ring (6)
Round 3 :
(1 sc, 1 inc) x 6 (18)
Info :
This small cup is used to crochet over and around a small plastic ring if you prefer. If using a ring, place the ring in the center and work Round 1 around it, crocheting stitches over the ring to cover it completely.
Round 4 :
1 sc in each st (18)
Round 5 :
Slip stitch around front loops to create a neat edge. Fasten off leaving a long tail for sewing the bow and attaching to tree top.
— Decorative Bow (Make 1) :
Round 1 :
With gold yarn and 3.0mm hook: ch 21, sc in 2nd ch from hook and across (20)
Round 2 :
ch1, turn, sc in each st across (20)
Round 3 :
Repeat Round 2 (20)
Round 4 :
Fold rectangle in half lengthwise. Working along long edge with right side facing, sc 20 through both loops to join, creating a narrow long tube (20)
Info :
Turn the tube so seam is inside and flatten. This becomes the main bow loop; create two tails separately to attach underneath.
Round 5 :
Bow tails (make 2): ch 8, sc in 2nd ch from hook and across (7)
Round 6 :
ch1, turn, sc in each st across, fasten off leaving long tail for attaching (7)
Round 7 :
Create center wrap: with gold, wrap yarn around tube 8-10 times and secure on underside with a few stitches. Sew tails to underside of bow so they sit at 45-degree angle. Secure bow to top ring with long tail from Round 5 (or sew separately then attach).
Info :
Block the bow lightly to shape it; press with a damp cloth if necessary. The bow sits at the top of the tree; ensure the loop facing out is neat and centered.
— Motif Unit (Fan / Diamond) - Make 15 (7 tiers layout shown) :
Info :
The tree is built from repeating diamond-shaped fan motifs. Each motif is worked in 6 rounds so the motifs have structure and a raised, fan-like face. Make 15 motifs in red for the tree body: 1 top motif, then 2, 3, 3, 3, 2, 1 per tier visually (you can add extra tiers to make a taller tree).
Motif Round 1 :
With red and 3.5mm hook: ch6, join with sl st to form small ring (6 ch loop)
Motif Round 2 :
ch3 (counts as dc), 11 dc into ring, join with sl st to top of ch3 (12 dc total) (12)
Motif Round 3 :
ch1, sc in same st, ch2, *sc in next dc, ch2; rep from * around to create small arches between dcs (12 sc, 12 ch-2 sps)
Motif Round 4 :
In each ch-2 sp: (2 dc, ch1, 2 dc) fan cluster. Join with sl st to first dc of first fan (12 fans, each fan = 4 dc with ch1 separation) (48 dc +12 ch-1 sps)
Info :
This creates a round of small fan clusters. Each fan will become an outer scallop when shaped. Ensure all fans are worked into the ch-2 spaces to remain even.
Motif Round 5 :
ch1, sc in first dc of each fan, ch3, sc in next fan first dc; repeat around making a chain-3 decorative spacer between fans (12 sc, 12 ch-3 sps)
Motif Round 6 :
Working into each ch-3 sp: (3 tr, ch2, 3 tr) to make a pronounced shell. Fasten off leaving long tail (approx 20cm) for joining (12 shells)
Info :
When blocked lightly, shells fan out to form the visual petal of the motif. Keep tails long for joining motifs together and to the tier below.
— Motif Bobble (Gold) - Make 14 small bobbles :
Round 1 :
With gold and 3.0mm hook: mr, ch1, 6 sc in mr, pull tight (6)
Round 2 :
ch1, (bp over next st: yarn over, insert, pull through, repeat 4 times, yarn over and draw through all loops), sl st to secure and hide tail. Fasten off leaving a short tail for sewing.
Info :
These bobbles are placed at motif junctions (points where four fans meet visually). Make 14 to decorate and to function as join points on a 7-tier layout. Alternatively you can create a larger number if you add more motifs/tiers.
— How to Join Motifs into Rows (Joining as you go) :
Info :
Each motif is joined to its neighboring motif(s) by stitching through adjacent shell tips and secures with a gold bobble placed at the 4-way intersection. We recommend using the long tail left from Motif Round 6 to whip-stitch through both shell tips and secure the yarn tail to the back of the motif.
Round J1 :
Position first motif (top). Using long tail, fold motif in half with front facing and sew about 4 evenly spaced stitches to give a subtle curve to the top row. Fasten off and weave in ends.
Round J2 :
Make two motifs for second row. Place them side-by-side under the top motif so their upper shell edges sit under the top motif's lower shell row. Using tails from each motif, sew the top edge through two stitches into the underside of the top motif to create a secure join. Repeat on both sides.
Info :
Keep joins minimal and use small, neat stitches on the back so the front shows clean scallops. Place a bobble at each 4-way meeting point to conceal the join and add decorative shine.
— Tier Assembly - Row-by-Row Directions (Follow layout: 1,2,3,3,3,2,1 motifs) :
Info :
Each tier is made by joining motifs across and connecting them to the row above. The directions below give the join steps in rounds for each tier and include Info sections with measurements and positioning tips.
Tier 1 (Top) - Positioning :
Place single motif made earlier at top center. Attach top ring and bow by sewing top ring to topmost shank of the motif and secure with small whip stitches from the ring tail to the motif back. Sew bow beneath ring, centering it over the motif.
Tier 2 - Joining (2 motifs) :
Make 2 motifs as per Motif Unit. Align them below the top motif so that each touches the top motif by 3-4 stitches. Use long tails to sew through corresponding fan tips and secure with a gold bobble at the center junction between the two new motifs and the top motif. Repeat on both sides.
Info :
Secure each bobble by running the tail through the center of the bobble and into the underlying joining stitches, then knot on the back. Clip tails and weave in neatly.
Tier 3 - Joining (3 motifs) :
Make 3 motifs. Align them along the next level so that each of the three sits below and between two motifs of Tier 2. Join each motif to its immediate upper neighbors by sewing through shell tips, then add a bobble where three motifs meet at a point. Continue until the row is complete. (3 joins per pair approximately)
Info :
To maintain symmetrical shape, pin motifs in place on a flat surface before sewing. Space them evenly so the tree forms a balanced triangle when all tiers are joined.
Tier 4 - Joining (3 motifs) :
Repeat Tier 3 technique for next row of 3 motifs, aligning them directly below Tier 3. Secure joins with small whip stitches and bobbles at intersections.
Tier 5 - Joining (3 motifs) :
Repeat the joining process for the final wide row of 3 motifs. Ensure the bottom edges line up with the planned trunk attachment area so the tree sits centered above the trunk.
Tier 6 - Joining (2 motifs) :
Make 2 motifs and join them under Tier 5, aligning their lower shell tips to the outer edges of Tier 5. Add bobbles at junctions and ensure the bottommost seam is neat for trunk attachment.
Tier 7 - Bottom (1 motif) :
Make 1 motif and place centrally under Tier 6 as base of tree silhouette. Sew to the row above with neat back stitches and finish with bobble at the center meeting point.
Info :
After all motifs are joined, gently block the tree to encourage the scallops to sit outwards and the tree to take a triangular profile. Use pins on a padded board and lightly spray with water or fabric stiffener if desired.
— Gold Edging & Picot Trim :
Round E1 :
With gold yarn and 3.0mm hook, start at the bottom center of the tree. Join with sl st to the outermost edge of the bottom shell tip.
Round E2 :
ch1, sc evenly along the outer scalloped edge working 1 sc in each shell ridge (approx 8-10 sc across small shell edge), then at each seam between fans: ch3, sl st into seam to create a decorative arch. Continue around the outer perimeter of the tree until you reach the top and join to starting point with sl st.
Info :
Count stitches as you go; you should have roughly consistent sc counts across each scallop to keep the trim even. If the trim appears tight, add an occasional ch1 between sc to ease tension.
Round E3 :
To create picot edge: *sc in next st, ch3, sl st into 3rd ch from hook (picot made), sc in next 2 sts; rep from * across each scallop edge. Fasten off and weave ends.
Info :
Picots give a delicate look; if you prefer a smoother gold rope, instead work 2 sc per scallop ridge and skip picots. The pattern shown uses picots to create a subtle bead-like rim.
— Gold Bobble Attachment (Place at intersections) :
Round B1 :
Using the pre-made gold bobbles, sew each bobble over the meeting point of fans where four seams converge (or where three converge on edges). Use the tail from the bobble or a short length of gold yarn to stitch through the motif layers several times and then knot on the back. Trim tail and weave in securely.
Info :
Sewing through multiple motif layers requires a sturdy yarn needle. If you have trouble piercing dense cotton layers, use a sharp embroidery needle to get through and then switch to yarn needle to finish knotting.
— Trunk / Stand :
Round T1 :
With red and 3.5mm hook: ch9, sc in 2nd ch from hook and across (8)
Round T2 :
ch1, turn, sc in each st across (8)
Round T3 :
Repeat Round 2 for a total of 10 rows (this creates a flat trunk piece approx 6cm tall). Keep edges square by working sc in each stitch.
Round T4 :
To create base thickness: Fold trunk rectangle lengthwise so short ends meet. With right sides facing, sc 8 through both loops along one long edge to join (8)
Round T5 :
ch1, sc in each st around remaining edges, working 2 sc in corners to round them slightly. Fasten off leaving long tail for sewing to tree bottom.
Info :
Lightly stuff the trunk with a small amount of fiberfill so it keeps a slight fullness. You want enough to allow the tree to stand but not so much that the trunk bulges at join seams.
Round T6 :
Optional gold stripes: Using gold yarn, with 3.0mm hook, work 2 rounds of hdc around trunk spaced 3 rows apart to mirror the decorative stripes seen on the sample. Fasten off and weave in ends.
Round T7 :
Attach trunk to the underside center of the bottom motif row: Align trunk so seams face back. Using long tail from trunk, whip stitch through the underside of the bottom motif and trunk top; secure with 8-10 small stitches around the circumference and knot on the back. Weave in tail inside trunk for a tidy finish.
Info :
Optionally glue a small circular piece of felt to the underside of the trunk for additional stability when standing on a surface.
— Finishing Touches and Structural Tips :
Info :
Check all joins and bobbles for firmness. Add extra securing stitches where motifs feel loose. Block the tree once more after assembly if you used any glue or starch to set shape. Allow to dry completely before display.
Round F1 :
Weave in all loose ends using tapestry needle, hiding tails inside motif gaps and trunk cavity. Trim close to fabric but avoid cutting too near knots.
Round F2 :
If you wish to hang the tree, use the top ring loop. For freestanding display, ensure trunk and bottom motif row sit flat; adjust stuffing slightly if needed.
Info :
For shipping or gifting, the tree can be flattened gently between layers of tissue and re-shaped at destination. The modular construction also allows motifs to be detached and re-joined for travel.
— Variations & Sizing Notes :
Info :
To create a larger tree, make more motifs in each row and add additional tiers. To make a smaller tree, use a thinner yarn or fewer motifs per row. Changing yarn fiber to a fluffier wool will alter texture, while mercerized cotton gives a neat, shiny finish.
Round V1 :
Color change suggestions: Work the main motifs in one color and the shell trims in another. To carry color, work trims separately and sew on for a crisper two-tone effect.
Info :
Keep track of motif counts and bobble placements with a small diagram or notation as you work so the finished tree mirrors the balanced design in the sample image.
This layered red and gold tabletop tree is a delightful combination of simple motifs and elegant finishing touches. Every scalloped fan and shimmering bobble come together to create a timeless holiday accent you'll be proud to display 🎀🎄. The modular design means you can easily adapt size or colors to suit your home or gifting needs. Happy hooking—may your holiday crafting be full of warmth and sparkle! ✨