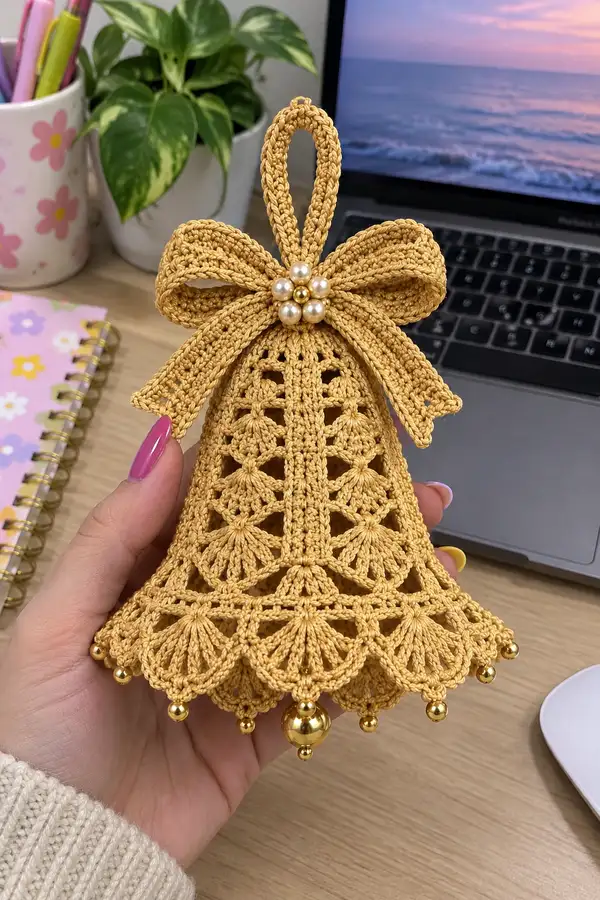
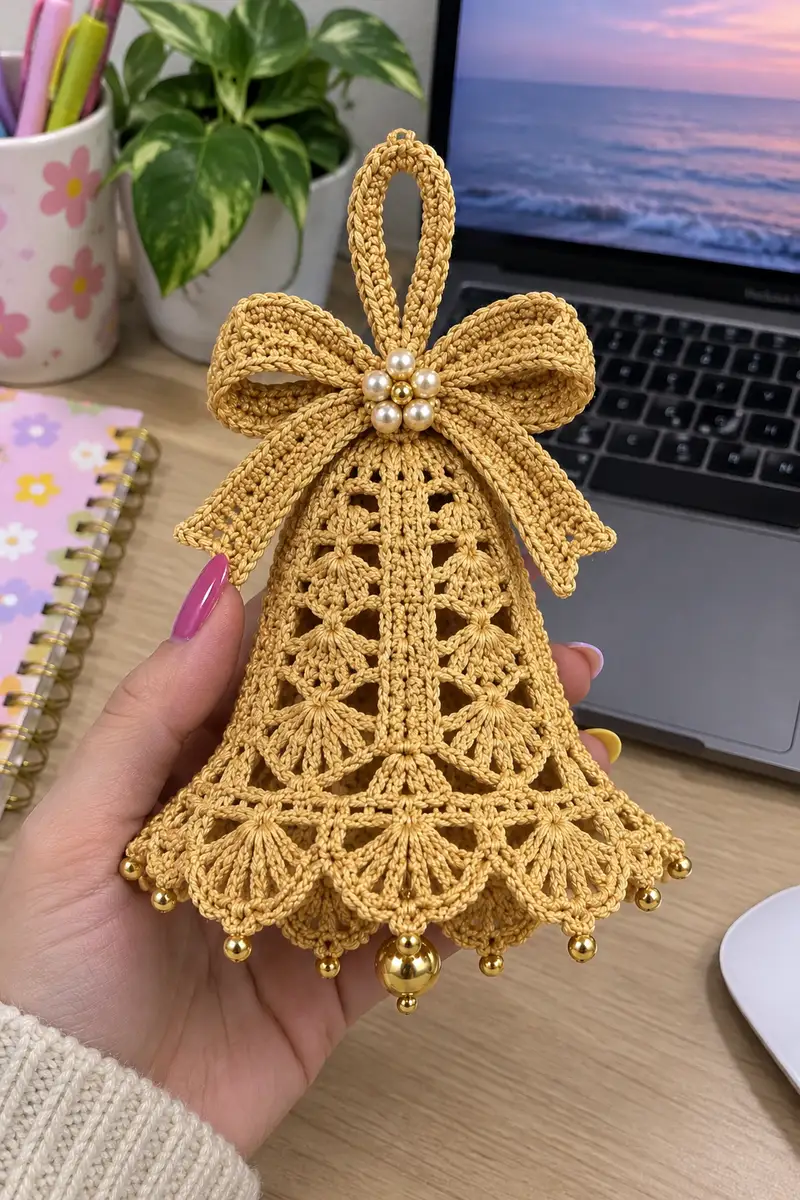
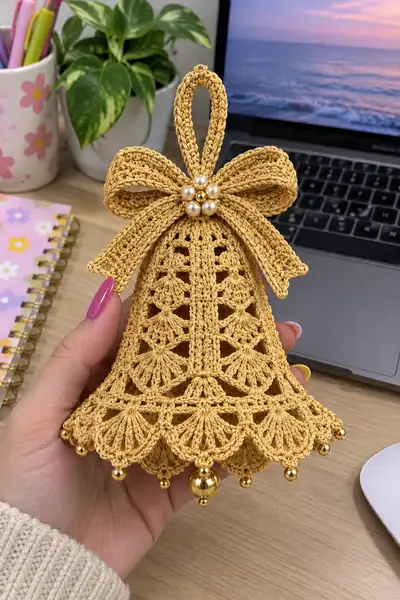
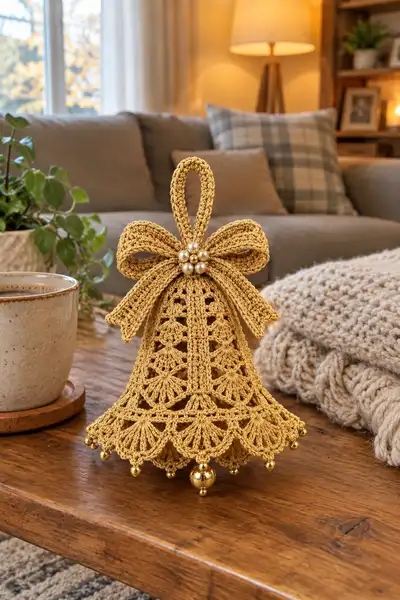
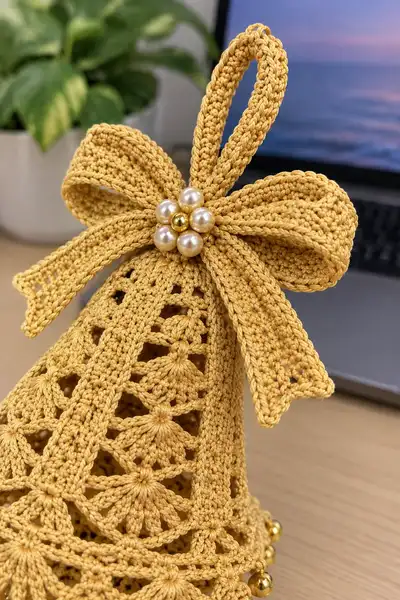
This elegant Golden Lace Christmas Bell is a delicate, decorative ornament made from fine cotton thread in a warm gold tone. It features intricate lace panels, a scalloped ruffle with tiny gold bead dangles, and a lovely crocheted bow topped with pearl accents. Finished with a sturdy loop for hanging, this ornament is perfect for a tree, wreath, or gift topper. The openwork design creates a lightweight, vintage-inspired bell that shimmers in holiday lights.
Progress Tracker
0% Complete
— Bell (Main Lace Cone) :
Round 1 :
6 sc in magic ring (6)
Round 3 :
(1 sc, inc) x 6 (18)
Round 4 :
(2 sc, inc) x 6 (24)
Round 5 :
(3 sc, inc) x 6 (30)
Round 6 :
(4 sc, inc) x 6 (36)
Round 7 :
(5 sc, inc) x 6 (42)
Round 8 :
(6 sc, inc) x 6 (48)
Info :
We are establishing a 48-stitch base circumference. This count divides neatly into 8 vertical panels of 6 sts each for the lace pattern; place a marker at the last stitch to mark round start.
Round 9 :
1 sc in each st (48)
Round 10 :
1 sc in each st (48)
Round 11 :
1 sc in next 2 sts, ch3, sk1, 1 dc in next st, ch2, 1 dc in same st (creates beginning of a vertical lace panel), *1 sc in next 5 sts; repeat from * around to form 8 panel starters (48)
Info :
Round descriptions use small shell and chain spaces. Each vertical panel will occupy an area of 6 foundation stitches. Keep tension consistent to preserve round shape.
Round 12 :
Ch1, turn: 1 sc in each sc across base sections, in each panel area work: (ch3, 3 dc cluster in ch3 space, ch3) anchored by sc into adjacent sc foundations; repeat across to maintain 48 total stitches and 8 clusters (48)
Round 13 :
1 sc in each sc and ch-space anchor (48)
Round 14 :
Begin fan cluster row: *In panel: 1 sc in base, (ch3, 7 dc fan worked into same sp or worked as 7 dc group), ch2, sl st to base anchor; 1 sc across next 5 sts; repeat from * around (48)
Info :
Fans are made as groups of 7 dc made into a single chain space or into the center of a panel; the sc counts between panels keep the lace evenly spaced. Use a stitch marker after completing one panel to verify panel repeats.
Round 15 :
Sc round: 1 sc in each dc and across anchors to tidy fan bases (48)
Round 16 :
Work a shell-link row: *1 sc in next 2 sts, ch4, sk 2, sl st in tip of fan, ch4, 1 sc in next 2 sts; repeat around (48)
Round 17 :
1 sc in each sc and sl st anchor across to make vertical columns (48)
Round 18 :
Start stacked small fan motif: across each panel area work: ch3, (5 tr cluster into same sp) ch3, sl st to center anchor, sc across remainder; repeat (48)
Info :
Stacking fan motifs gives the bell its tall lace look; be sure clusters sit centered in each panel. If your hook tension makes fans tight, work fewer dc or tr to match size proportionally.
Round 19 :
Sc round: 1 sc in each stitch and anchor to stabilize (48)
Round 20 :
Repeat Round 14 (second bigger fan row) to continue vertical stacked fans: *into panel center work 7 dc fan, ch2, sl st; 1 sc across panel foundation; repeat (48)
Round 21 :
1 sc in each st across; position markers to check repeat lines (48)
Round 22 :
*1 sc in next 3 sts, ch3, make a shell of 5 dc into same sp, ch3, 1 sc in next 3 sts; repeat around to form a wider fan effect (48)
Round 23 :
Sc tidy row: 1 sc in each st (48)
Info :
At this stage the bell is roughly two-thirds height; repeat the fan sequences to extend height until desired bell length—we will repeat the three-round fan block multiple times. If you want a shorter bell, stop sooner and begin scallop edging.
Round 24 :
Repeat Round 18 (stack-small-fan) (48)
Round 25 :
Repeat Round 19 sc tidy (48)
Round 26 :
Repeat Round 20 (big fan) (48)
Round 27 :
Sc tidy row 1 sc each (48)
Round 28 :
Repeat Round 22 (wider fan) (48)
Round 29 :
Sc tidy row (48)
Info :
Continue alternating the stacked fan blocks. The bell in the photo shows approximately three stacked fan repeats above the scallop; we will continue to Round 40 to create a tall cone. Check your height against a 12-14cm reference if desired.
Round 30 :
Repeat Round 18 (stack-small-fan) (48)
Round 31 :
Sc tidy round 1 sc in each st (48)
Round 32 :
Repeat Round 20 (big fan) (48)
Round 33 :
1 sc in each st (48)
Round 34 :
Begin vertical column definition: *1 sc in next 6 sts, (BLO) 2 sc in next st (makes a narrow raised column), repeat around (48)
Round 35 :
1 sc in each st (48)
Round 36 :
Repeat Round 14 (7 dc fan) to begin prepping scallop join (48)
Round 37 :
Sc tidy round: 1 sc in each st (48)
Round 38 :
Prepare scallop base: *1 sc in next 3 sts, ch5, 1 sc in next 3 sts; repeat around producing 8 ch5 spaces (48)
Round 39 :
In each ch5 sp work: (1 sc, ch2, 7 dc, ch2, 1 sc) to form scallop shells; 1 sc across each 3-st foundation between scallops (48)
Info :
Scallops are the bell hem. Be consistent with dc count in scallops to ensure even ruffle. If your scallops pull tight, increase ch length by 1-2 chains before working shell.
Round 40 :
Sc tidy row: 1 sc in each st and in each shell edge and anchor stitch (48)
Round 41 :
Work picot edging: *ch2, 1 sc in next 3 sts, picot (ch3, sl st in 3rd ch), 1 sc in next 2 sts; repeat around to add decorative points (48)
Round 42 :
1 sc in each st to tidy picots and reinforce edge (48)
Round 43 :
Optional ruffle repeat: *In each scallop space work another 5 dc fan, anchored by sc on either side; repeat around (48)
Round 44 :
Sc tidy round across all stitches (48)
Info :
At this point the bell cone is complete. Press lightly with steam and pin the scalloped rim to spread and shape shells as desired. If using starch or fabric stiffener, apply now to set shape. Allow to dry before adding beads.
Round 45 :
Reinforce top opening row: 1 sc in each st (48)
Round 46 :
Fold top opening by working a tube round to narrow the top: *1 sc in next 4 sts, sc2tog over next 2 sts; repeat around (40)
Round 47 :
*1 sc in next 3 sts, sc2tog; repeat around (30)
Round 48 :
*1 sc in next 2 sts, sc2tog; repeat around (20)
Round 49 :
*1 sc in next st, sc2tog; repeat around (13)
Round 50 :
Sc decrease: sc2tog around until opening narrows to small hole, leaving an opening for the loop; fasten off leaving long tail for sewing or inserting loop base (approx 8-10 sts remain then close as desired)
Info :
Stuffing: For this ornament we keep the bell hollow and unstuffed. If you want a firm bell, insert lightweight tissue paper or a small styrofoam cone to hold shape before closing top. If inserting a clapper bead, leave the bottom open until bead is secured then close.
— Scallop Edge Detailing (Bead Dangles) :
Round 1 :
With bell finished, identify scallop tips at hem; there should be 8 scallops. In each scallop point join thread with sl st to center top of scallop (0)
Round 2 :
Ch1, work 3 sc evenly around the scallop peak to create a small picot platform (3)
Round 3 :
Fasten off leaving long tail. Thread small gold bead onto thin wire or strong thread; pass through picot platform, secure with knot or crimp, trim tail. Repeat for each scallop (8 small beads)
Info :
For the large central clapper bead, use the largest scallop center (front-facing scallop) and attach the large gold bead with stronger thread, knotting and hiding tail inside bell. If using metal bead caps or eye pins, secure ends with pliers.
— Top Loop (Hanger) :
Round 1 :
Ch16, join with sl st to form a loop (16)
Round 2 :
Working around chain loop: sl st in each ch to first ch, then 1 sc in each ch around to create a tidy cord (16)
Round 3 :
Repeat Round 2 for 3 rounds total to give loop thickness (16)
Round 4 :
Fold in half and join both ends to bell top using sc stitches around the top opening; sew through 8-10 stitches evenly to secure loop base (0)
Info :
Make loop size larger or smaller depending on where you will hang the bell. Reinforce base with extra sc stitches and weave tails through several rounds inside for security.
— Bow (Make 1 double bow with tails) :
Round 1 :
Ch50 (or ch to desired bow tail/loop length). For a smaller bow reduce ch to 40 or for larger bow increase to 60 (50)
Round 2 :
Turn, 1 sc in 2nd ch from hook and each ch across (49)
Round 3 :
Ch1, turn, 1 sc in each st across (49)
Round 4 :
Repeat Round 3 for 6 rows total to create a firm strap that will be folded into the bow (49)
Info :
The bow in the photo is full and double-layered. To replicate, make two identical straps and sew them together, or create one long strap and fold to form two loops with tails. Use a smaller hook for a tight neat edge.
Round 5 :
Optional decorative row: 1 sc across, then 1 row of hdc in each st for a raised ridge; fasten off leaving long tail for sewing (49)
Round 6 :
Make second strap repeating Rounds 1-5 (49)
Round 7 :
Assemble bow: fold each strap into a loop to form two bow loops and two tails. Overlap central area and wrap with a short piece of thread or narrow strap (make a 10-ch tail, sc 9 across to form center band). Pull tight to form bow shape and secure with whip stitch (0)
Round 8 :
Sew bow to bell top: position bow centered over top opening with loop behind it; sew through top rounds and through bow tails to secure. Hide all ends by weaving 4-6 cm inside the bell and trimming (0)
Info :
Press and shape loops with steam. Insert a few small stitches through bow center and bell top to ensure bow stays upright. The photo uses faux pearls sewn into the center - attach these last using a strong thread and knot securely.
— Decorative Pearl Center :
Round 1 :
Arrange 6 faux pearl beads in a circle with one small gold bead in center on top of bow center band. Using a long sewing needle, pass thread through each bead and into bow center, making several passes to secure (0)
Round 2 :
Weave thread back inside bow and knot several times. Hide knot by passing needle through fabric a few times and trimming close (0)
Info :
If pearls have holes too big for the sewing thread, use thin wire or beading thread for extra security; bend wire ends inward and hide beneath the bow center.
— Final Finishing & Reinforcement :
Round 1 :
Check all joins: reinforce bow and loop attachments by sewing a second pass through top rounds and weave in ends at least 3 rounds deep (0)
Round 2 :
Block: pin scallop edge symmetrically on a foam mat and steam lightly to open scallops; allow to dry. Optionally apply diluted fabric stiffener inside scallops to hold shape (0)
Round 3 :
Attach bead dangles final check: ensure each small bead hangs freely and the central clapper bead swings; if beads are heavy, reinforce with additional stitches around their anchoring points (0)
Info :
Weave all loose tails on the inside of the bell and trim close. For extra durability apply a tiny drop of clear glue on knots that will not be visible.
This elegant lace bell becomes a treasured holiday keepsake with every stitch you make. The layered fans and scalloped edge create a vintage, shimmering feel while the pearl-topped bow adds refined charm. Whether you hang it on the tree or gift it as a special topper, each piece carries the warmth and care of handmade decorations. Enjoy the relaxing rhythm of lace crochet and proudly display your golden bell this season! 🎄✨