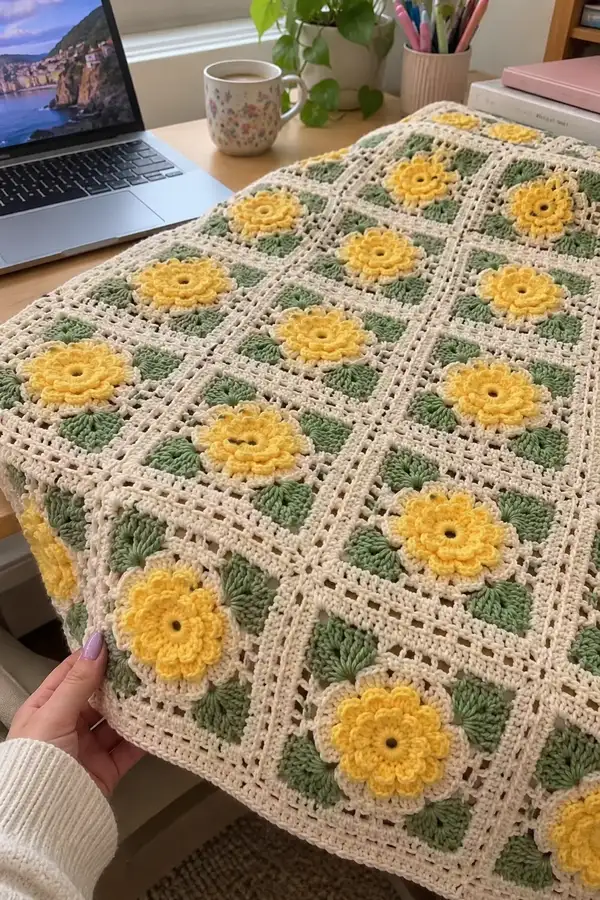
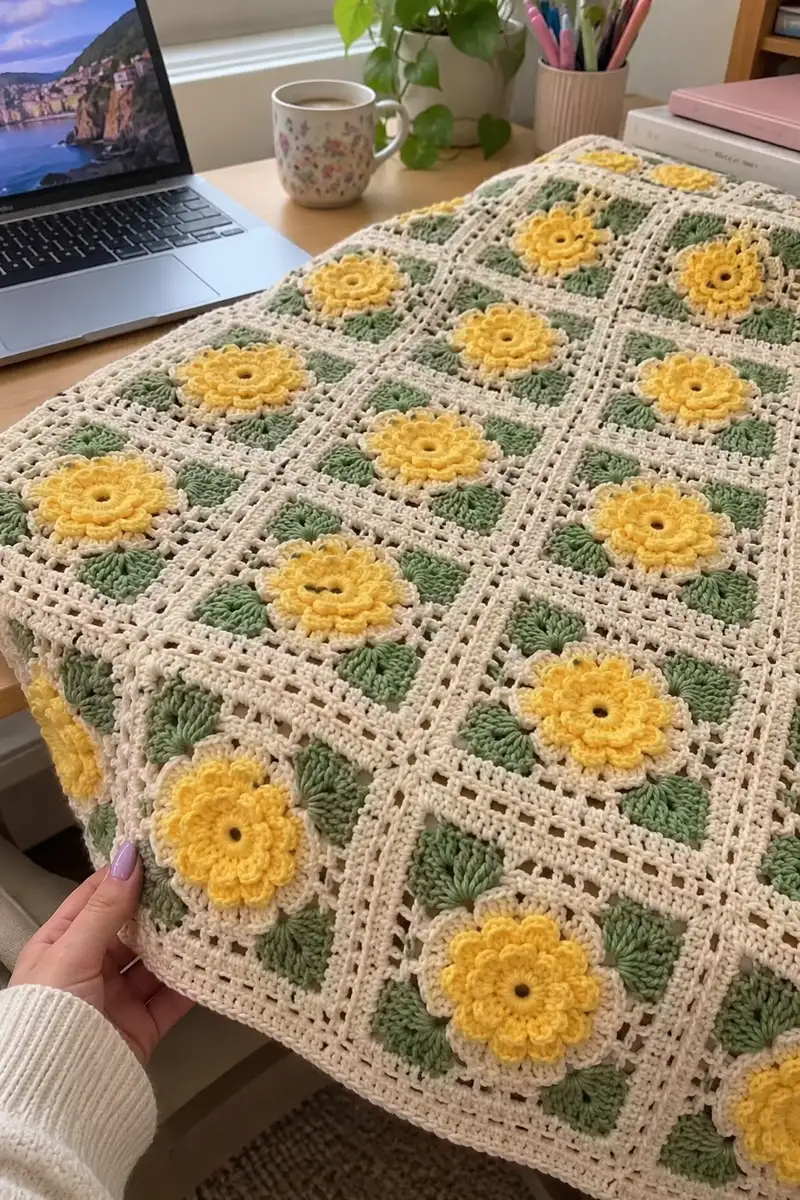
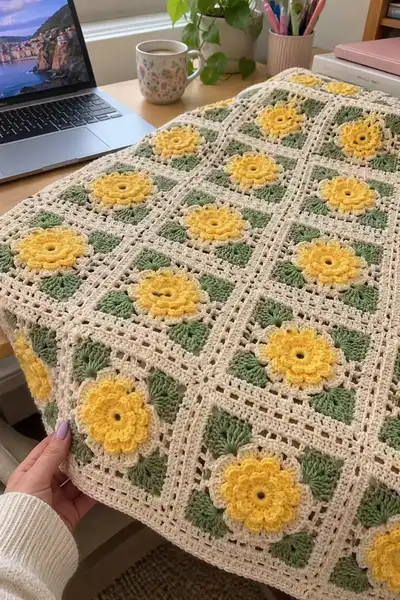
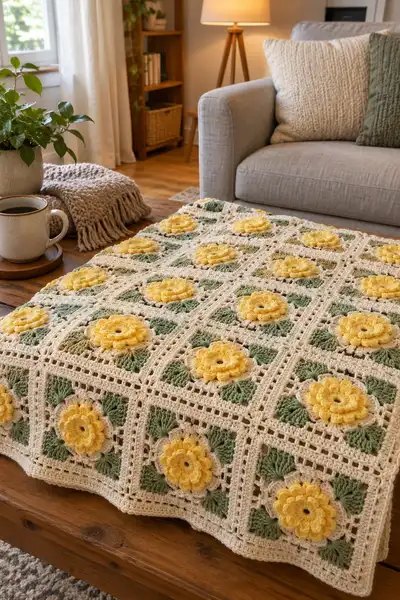
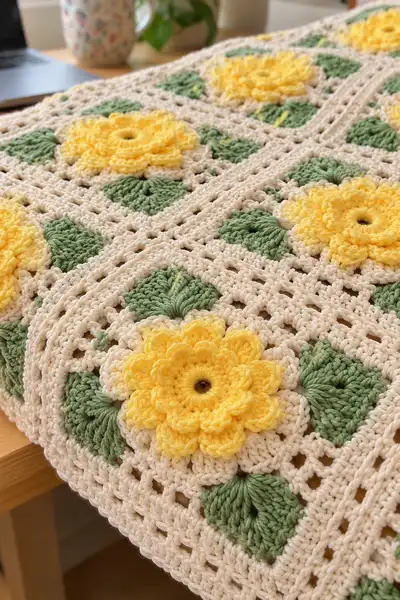
A cosy, cottage-style bedspread made from 3D sunflower granny squares. Each square features layered yellow petals, soft sage leaves and a warm cream frame that joins into an airy, lacy blanket. This pattern walks you through every petal, leaf and joining round for a handcrafted heirloom throw.
Progress Tracker
0% Complete
— Notes & Gauge :
Info :
This pattern is written in US terms. Gauge is approximate due to motif style: one finished square (including petals and frame) measures approximately 6.5-7 inches (16.5-18 cm) when blocked using worsted weight yarn and a 4.0 mm hook. Adjust hook if your squares measure significantly different. Make a sample square to verify gauge before committing to full blanket.
Info :
Puff stitch: yo, insert hook, pull loop (repeat 3 or 4 times as directed), yo and pull through all loops on hook, ch1 to close puff. Each puff occupies a single base stitch unless otherwise indicated. Work puff stitches tightly and consistently for the best 3D effect.
— Flower Motif (Make X squares to desired blanket size) :
Round 1 :
Using yellow (sunflower) yarn. Work 12 dc into a magic ring. Join with sl st to top of first dc. (12)
Round 2 :
Ch 3 (counts as dc), *dc in next st, dc inc in next st (work 2 dc in same st)*; repeat from * around to end; join with sl st to top of ch 3. (18)
Round 3 :
Ch 3, dc in next 2 sts, *inc (2 dc) in next st, dc in next 2 sts*; repeat around; join. This produces 24 stitches. (24)
Info :
Place a removable marker at the start of round 4; the 24-st base will be divided into 8 petal sections (3 base sts per petal). Keeping the sections consistent is key for neat petals.
Round 4 :
Ch 1, sc in each st around (24). Join with sl st. (24)
Round 5 :
Ch 1. *Sc in next 2 sts, prepare petal in next st: (yo, insert hook into same st, pull up loop) x4, yo and pull through all loops, ch 1, sl st in same st to secure petal; rep from * around to form 8 petals. Finish with sl st to first sc. (Base remains 24)
Info :
Petal technique: each 4-loop puff is made into the anchor stitch for that petal. After finishing the puff, ch1 and sl st secure it; the next two sc are worked as the base between petals so that you finish with 8 evenly spaced puffs.
Round 6 :
Ch 3, dc in same st as join, work 2 dc in each petal anchor space to create a low-rise cluster around petals: *(2 dc in puff base, dc in next 2 base sts)* repeat around; join. (36)
Round 7 :
Switch to slightly lighter yellow (optional) or continue same yellow. Ch 1, sc in each st around (36). Join. (36)
Round 8 :
Begin second petal layer. *Work 1 sc in next 3 sts, then make a larger petal on next st by working a 5-loop puff: (yo, insert hook, pull loop) x5, yo pull through all loops, ch1, sl st to secure; rep from * to make 8 large petals; join to first sc. (Base count maintained at 36)
Info :
Create slightly larger puffs on this round (5-loop puff) to give a tiered petal look. Keep tension consistent — too tight will flatten the petal, too loose will make petals floppy.
Round 9 :
Ch 1, sc in each st for one round to tidy the base and lock petals in place. (36)
Round 10 :
Switch to a bright yellow for petal edge (optional). Ch 2, hdc in same st, *hdc in next 2 sts, in front of each petal work 3 hdc into the ch1 space created after the puff to create a ruffled petal edge; repeat around; join. (36)
Info :
If you prefer two-dimensional petals, you can skip round 8 and 10 and instead make a single 3-loop puff per petal; adjust counts accordingly. This pattern uses two layers for maximal 3D impact.
Round 11 :
Change to a small contrast center (optional amber brown). Join color in center hole and sc evenly around the very center: sc into each stitch around the inner round 1 opening to reduce the center hole if desired. Work 12 sc around into inner ring to create a defined center. Join. (12)
Info :
Work the center sc tightly to reduce the visible hole. Alternatively, you can leave a small hole for a rustic center look. Both produce attractive results depending on your preference.
Round 12 :
Fasten off the yellow and weave in tail behind petals; leave a long tail for attaching to the square frame if you prefer sewing instead of joining with new round. (No change to base count)
Info :
At this stage the sunflower core and petals are complete. If you want more dramatic petals, repeat rounds 6-10 with an additional layer of slightly larger puffs placed offset from the previous petals.
— Leaf Cluster (Four per square) :
Round 1 :
Using sage green yarn. Make a small leaf base in magic ring: ch 1, 6 sc in magic ring, join. (6)
Round 2 :
Ch 1, sc in next st, hdc in next st, 3 dc in next st (center of leaf), hdc in next st, sc in next st. Join. (6 shell sequence completed)
Round 3 :
Work 1 sc in each st, rotating the leaf so the 3-dc forms the raised center. (6)
Round 4 :
Ch 1, in first st work (sc, hdc, 3 dc, hdc, sc) to make a slightly longer leaf shape; join. (6 base spaces but leaf is elongated)
Info :
Each leaf is created as a small fan that will be attached at the cardinal positions around the sunflower. Make four per square. Keep leaves consistent in size by using the same number of dc in the fan for each leaf.
Round 5 :
Fasten off and leave a long tail for sewing. Block lightly if desired to encourage a flat leaf tip. Repeat to make 4 leaves per square. (No stitch count change)
Info :
Leaves are typically attached under the sunflower at rounds where the cream frame will cover the joins, so leave tails long for secure sewing beneath the frame stitches.
— Square Frame (Build around flower and leaves) :
Info :
Switch to cream yarn for the square frame that transforms the circular sunflower into a structured granny square. The frame will be worked in rounds that convert the circular motif into an approximately square motif with four leaf corners. Keep stitch counts consistent; where necessary, ch-spaces will be used to turn the circle into a square shape.
Round 1 :
Join cream in the back loops behind the petals at an even point. Ch 3 (counts as dc), *dc in next 7 sts, ch 3, skip 3 sts to form a corner ch-sp; repeat (dc in next 7, ch3, skip 3) around to create 4 corner ch3 spaces. Adjust number of straight dc stitches between corners so you have four even sides; join with sl st to top of ch3. (Approx 32 dc + 4 ch-3 corners — count shown as (32) base)
Info :
If your base flower had slightly different counts, distribute the dc evenly between corners so that the square sides appear equal. Use stitch markers at the corners to keep track.
Round 2 :
Ch 3, dc in each dc across until ch-3 corner, into corner make (2 dc, ch 3, 2 dc), continue along next side; repeat for all 4 corners; join. (This creates a true square outline; total stitch count varies slightly by gauge.)
Round 3 :
Ch 1, sc in each st and in each ch space around to tidy the edge and make a neat foundation for lacy rounds. Make 3 sc in each corner ch3 space for stability. Join. (Base count maintained)
Info :
Position the 4 green leaves so that they sit in the middle of each square side just outside the flower petals. Using the long tails left from each leaf, sew them to the cream frame area so the leaves face outward into the four corners. Secure with neat whipstitch and weave in tails on the wrong side.
Round 4 :
Ch 3, dc in each st to corner, (2 dc, ch 2, 2 dc) in corner ch space, repeat around; join. This softens the corners and starts the lacy open-work. (Approximate dc total increases accordingly.)
Round 5 :
Ch 1, sc in next st, *ch 3, skip next 2 dc, sc in next st* across each side to create a chain-lace effect, in corner sc in corner dc to maintain shape. Join. (Spacing forms a grid when squares are joined.)
Info :
This openwork (ch-3/ch-2 repeats) creates the lacy grid visible between squares. If you prefer a denser blanket, replace ch-3 spaces with ch-1 and sc clusters to tighten the frame.
Round 6 :
Ch 3, dc in next 3 sts, *(dc, ch1, dc) into each ch-3 space as a small arch, dc in the next 3 dc across the side; at corner work (2 dc, ch2, 2 dc). Join. (Keeps base count even and creates small arches at grid points.)
Round 7 :
Ch 1, sc in each st around; in corner work 3 sc in corner ch2 for stability. This is your final tidying round before optional decorative rounds. Join. (Base st count consistent.)
Info :
If you plan to join squares with join-as-you-go (JAYG), stop here and proceed to the joining instructions. If you prefer to seam squares later, make the required number of squares and block them to exact dimensions before seaming.
Round 8 :
Optional: For a delicate raised border around the sunflower, change to a lighter cream and work a surface slip-stitch ridge around the perimeter: sl st in each st for one round. Fasten off and weave ends. (No stitch count change)
— Joining Squares (Join-As-You-Go Method) :
Info :
This pattern describes a join-as-you-go method which produces visible grid lines consistent with the sample blanket. Squares are joined on their final frame round by working through corresponding ch-3 spaces on an already-joined neighbor. This yields a nearly invisible seam and preserves the lacy openwork.
Round 1 (JAYG Join) :
Work final frame round on the square to be joined until you reach a corner. At the corner ch-2, turn and position square next to an already-joined square. Instead of working the three corner sc, work sl st through the corresponding corner ch-space of the adjacent square (matching stitches) to join; then continue across the side: for each ch-3 space on your square chain, make a dc cluster and sl st into the corresponding ch-3 space of the neighbor to lock in place. Continue joining across the side; finish corner with sl st into neighbor corner. Repeat for sides that abut previously joined squares. For free sides (not yet joined), work regular stitches as before. Join with sl st at end. (Seam does not change base stitch counts.)
Info :
Work the first row of squares in a straight line. For the second row, join the squares along the long side to the row below as you build them, then join adjacent squares horizontally. Keep your tension on join a little looser than single-square rounds to prevent puckering at seams.
Round 2 (Alternate seaming) :
If you prefer a visible saddle seam, join squares using a whipstitch with cream yarn by placing squares right side up and sewing through both frame rounds 'through the back loops only' to create a neat ridge. Use long tails from each square or a separate strand of yarn for a secure seam.
Info :
Ensure each square is oriented consistently so that flowers align the same way across the blanket. For a randomized appearance, vary orientation but maintain consistent join placement for neat edges.
— Blanket Layout & Assembly Notes :
Info :
Typical bed size shown: 5x7 grid (35 squares) for a small bed topper. Lapghan example: 3x5 grid (15 squares). Calculate required squares by multiplying square count by final square size (including borders). Arrange squares into the desired layout before joining, then assemble row by row using JAYG or seaming method.
Info :
Blocking: Once all squares are assembled, lightly steam or wet-block the blanket to even out edges and open the lacy grid. Pin the blanket square so that rows are even, and allow to dry completely for best drape and join stability.
— Outer Border (Multiple Rounds to Finish) :
Round 1 :
With cream yarn, join at any seam on the outside edge. Ch 3, dc around entire outer edge, placing 3 dc clusters into each corner for even turning. Place dc evenly along sides, working 1 dc for each square base stitch where possible. Join with sl st. (Total dc count depends on blanket final dimensions.)
Round 2 :
Ch 1, sc in each st around for a neat edge; in each corner work (3 sc) to maintain shape. Join. (Base count unchanged)
Round 3 :
Ch 3, *skip next st, dc in next st, ch 1* repeat to create small lacy comb edging; in corners ch 3 to preserve corner structure. Join. (Creates decorative airflow around edge)
Round 4 :
Ch 1, sc in each st and each ch space to tidy the lacy comb. Join. (Neatening round)
Round 5 :
Optional scalloped edge: Using light yellow or cream, work (sc, hdc, 3 dc, hdc, sc) into every third or fourth stitch around to create a scalloped shell border. Adjust spacing so shells sit evenly. Join and fasten off. (Scallops add a decorative vintage finish.)
Info :
If you prefer a straighter framed edge for bed use, repeat rounds 1-4 for a 2-3 row frame rather than scallops. For a more dramatic finish, work an additional round of puff stitches spaced evenly for texture.
— Detailed Round-by-Round Expanded Version (Extra texture & finishing rounds) :
Round 1 :
Create central sun disk as above: mr, ch 3, 11 dc into ring (12). (Repeat of earlier foundation for clarity.)
Round 2 :
(1 dc, inc) x 12 = 24. Mark every 3rd st for petal centers. (24)
Round 3 :
Sc around (24). Place 8 markers equally spaced every 3 sts to denote petal anchors. (24)
Round 4 :
1 sc in next 2 sts, make 4-loop puff in next st, ch1, sl st into same st; repeat to form 8 puffs. (24 base)
Info :
Check that each puff sits neatly and that puff loops are drawn through to the same height for uniform petals. Adjust tension on puff loops to match others.
Round 5 :
Ch 3, dc across base to next puff anchor, into ch1 space behind puff work (3 dc to lift petal), repeat around. (Base becomes 36 with added dc clusters where indicated)
Round 6 :
Sc round to stabilize (36). Use this round to trim any stray loops and align petal orientation. (36)
Round 7 :
Second petal layer: *sc in next 3 sts, make 5-loop puff in next st, ch1, sl st in same st; rep around to create 8 larger puffs. (36 base)
Round 8 :
Ch 1, sc around to anchor second layer (36). Join and change to lighter yellow for edges if desired. (36)
Info :
Petal layers create depth; if you want taller petals, increase the loops per puff on the second layer to 6 loops instead of 5. Keep loop count consistent across the round.
Round 9 :
Edge hdc round: ch2, hdc in each st across to corner point (or to the place where leaf will attach). Work 3 hdc in corner spaces. (Helps transition to square frame.)
Round 10 :
Switch to cream. Ch 3, dc in next 8 sts, (2 dc, ch3, 2 dc) in corner to begin creating square outline; continue around adjusting dc counts so each side has an even number of dc stitches between corners. Join. (Approx 40-44 dc depending on distribution)
Info :
Even distribution is crucial for square symmetry. If one side is slightly longer, adjust by +/- 1 dc on the side when placing corners so the square looks balanced. Use a measuring tape across opposing sides to ensure squareness.
Round 11 :
Ch1, sc across each dc and in corner ch-3 spaces work 3 sc. Join. (Count matches maintained)
Round 12 :
Work lattice round: *ch 3, sk 2 dc, sc in next dc* along each side; in corners work sc in corner dc to maintain shape. Join. (Creates visible grid holes for join-as-you-go.)
Info :
When joining squares later, these ch3 holes line up to form a beautiful openwork window between motifs. Keep both squares blocked to same size for neat joining.
Round 13 :
Ch3, dc in each dc across, in each ch-3 space work (dc, ch1, dc) to form small arches. Work (2 dc, ch2, 2 dc) into corners; join. (Expands the square gradually for join flexibility.)
Round 14 :
Ch1, sc in each st around; 3 sc in corner spaces. This completes the standard square frame which measures approximately 6.5-7 in. Repeat all motifs to make required number of squares. (Final frame round for each individual motif.)
Info :
At this point, if sewing leaves beneath the frame, do so now. Position the four leaves at the midpoint of each side so that each leaf points diagonally outward into the corner of the finished square. Secure with tails from the leaf rounds and weave ends on the wrong side.
Round 15 :
Optional raised border round around the sunflower core: join cream into the round just behind petals and work surface sl st around the petal bases to create a faint ridge; this helps petals cast a subtle shadow when joined. (No count change)
Round 16 :
Fasten off and weave ends behind the square frame; trim tails close after weaving. Block square to measurements if desired. Repeat for all squares. (Square assembly complete)
— Joining Strategy & Row Construction (Expanded) :
Round 1 :
For the first row of squares, make X squares and lay them out in a straight line. Join each adjacent square using JAYG on the final frame round: when you are at the ch-3 space at the side, instead of working (dc, ch1, dc), work (dc, ch1, dc) INTO your square and then sl st into the corresponding ch-3 of the neighbor. Do this for every ch-3 to lock the grid. This method leaves small open holes aligned across joins, creating the lacy connected look. (No overall stitch count change per square)
Info :
Take care to join only when squares are fully blocked and each side lies flat. Holding the neighboring square under the working square while joining keeps edges flush and tidy.
Round 2 :
After joining the first row, build the next row by joining along the long edge to the row below using JAYG for the entire length. This forms a stable seam with the grid holes remaining open and aligned vertically and horizontally.
Info :
Stitch count integrity: joining doesn't change the individual square's internal count, but joining tension affects blanket drape. If joining pulls, block again and re-join with adjusted tension or use whipstitch as an alternative.
— Large Border & Finishing Details (Expanded rounds) :
Round 1 :
Once all squares are joined and blanket is assembled, attach cream at any join on outer edge. Work 2 rounds of dc evenly around the entire perimeter placing 3 dc in each corner for a stable outer frame. This gives a consistent thickness to the border that mirrors internal frames.
Round 2 :
Switch to a half-double cluster round: ch 2, *hdc in next 2 sts, ch 1* around to create a slight texture that outlines the blanket. Join and fasten off. (Neaten the outer edge.)
Round 3 :
Optional crochet fringe: With cream, attach strands at intervals across the edge (every 8-10 stitches) forming a tidy fringe or tassel. For a refined finish, skip fringe and work a final round of slip-stitches around edge for a slim clean border.
Info :
Weave in all ends carefully on the wrong side. If using multiple color changes for petals or centers, be sure tails are well secured and trimmed. Give the blanket a final blocking to shape and even out edges.
Round 4 :
Final pressing/steam: Lay flat on a blocking board or clean surface. Use pins to square the blanket, paying attention to the outer edge so scallops or corners sit evenly. Allow to dry fully. (Finishing step)
Info :
Care instructions: Hand wash or gentle machine wash in cool water, lay flat to dry. Avoid high heat that may flatten puff stitches over time.
Finishing this Golden Sunflower Blanket is a joyful, tactile experience — each stitched sunflower becomes a tiny sun to warm your home. The layered petals and sage leaves yield a cozy vintage aesthetic perfect for gifting or decorating. Every square joins into a lacy grid that looks beautiful draped over a bed or couch. I hope making it fills your house with bright joy and handmade warmth! 🧶🌻