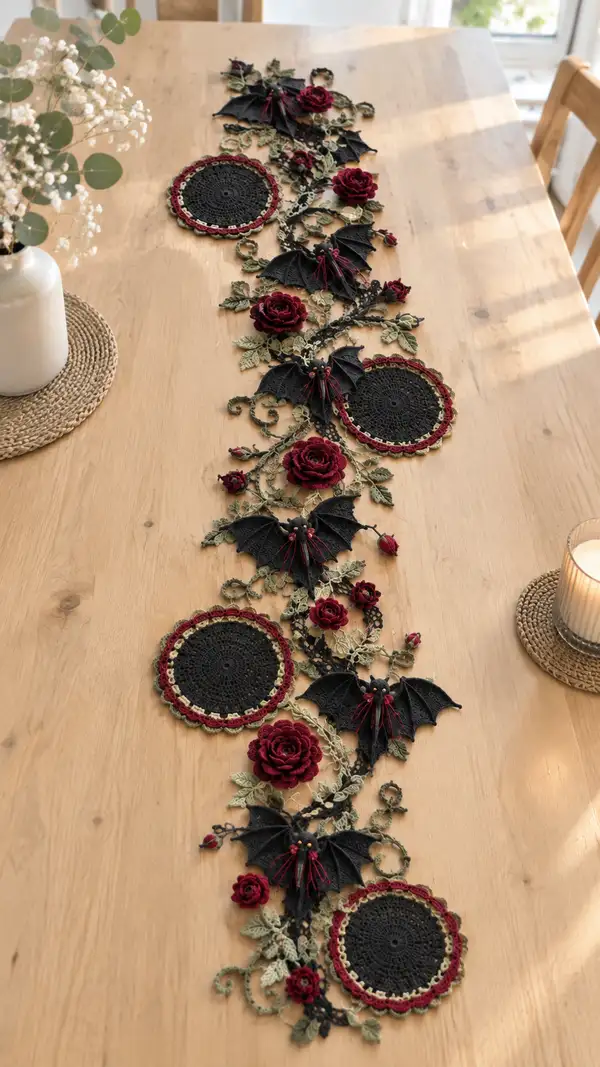
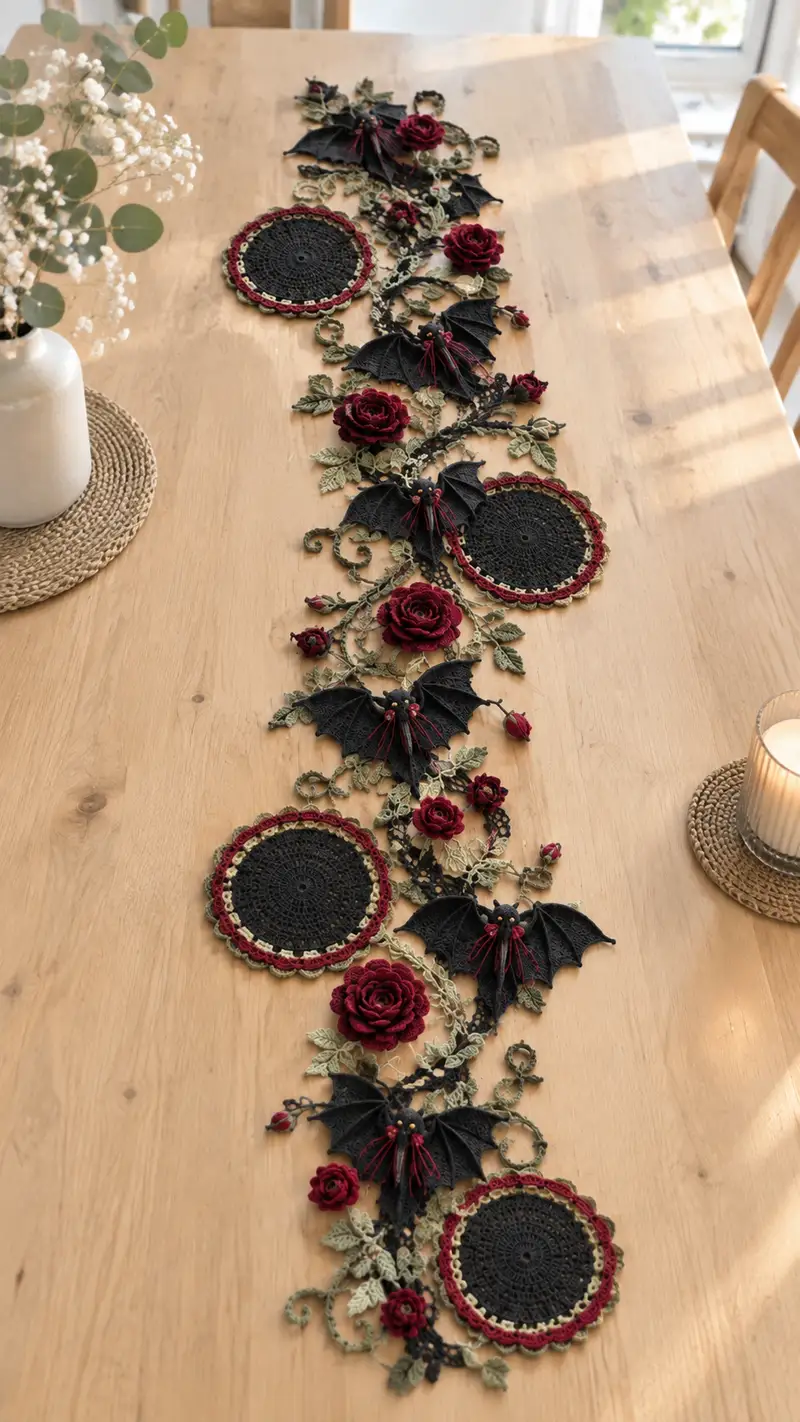
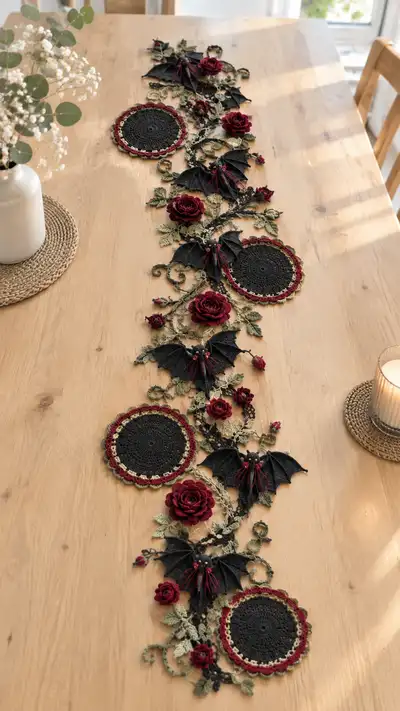
A dramatic, romantic crochet table runner featuring black circular doilies, sculpted burgundy roses, delicate olive vines and elegant bat motifs. This long runner pairs vintage lacework with 3D floral elements for a stunning centerpiece. The pattern includes detailed motif instructions and step-by-step joining guidance so you can recreate the layered, dimensional look.
Progress Tracker
0% Complete
— Notes & Gauge :
Info :
This runner is constructed from separate motifs worked in fine cotton thread and joined with decorative chain-and-picot lace. Gauge is not critical but work tightly enough that stuffing (for roses) does not show through. Use a small hook relative to yarn size for crisp stitch definition. Block all motifs to shape before joining and match the tension of all motif elements before assembly.
— Large Lace Medallion (make 4) :
Round 1 :
Make a magic ring. ch1, 8 sc into ring, pull tight (8)
Round 2 :
Inc in each st around (16)
Round 3 :
(1 sc, inc) x8 (24)
Round 4 :
(2 sc, inc) x8 (32)
Round 5 :
(3 sc, inc) x8 (40)
Round 6 :
(4 sc, inc) x8 (48)
Round 7 :
1 sc in each st around (48)
Info :
Keep rounds even and do not join with sl st; continue working in continuous rounds if preferred. If using round joins, sl st to start and ch1 at round start.
Round 8 :
(6 sc, inc) x6 (54)
Round 9 :
1 sc in each st around (54)
Round 10 :
(7 sc, inc) x6 (60)
Round 11 :
1 sc in each st around (60)
Round 12 :
(2 sc, 1 dc, ch2, 1 dc, 2 sc) in every 6th st to create subtle spokes; work evenly around so there are twelve decorative spokes (60)
Info :
Change to black thread or maintain black if already using it. These decorative spokes prepare visual segments for edging. Count carefully to keep even spacing for the later scalloped borders.
Round 13 :
1 sc in each st around (60)
Round 14 :
BLO 1 sc in each st around for subtle ridge (60)
Round 15 :
Switch to beige/gold yarn. *(ch3, skip 2 sts, sc in next st) repeat around to form a chain-lattice edge; adjust last repeat to meet evenly* (approx 20 chain loops)
Info :
If carrying color, carry unused yarn inside the lace so floats are hidden in the next round. Fasten colors tightly at the start to avoid loose loops.
Round 16 :
Switch to burgundy yarn. Work into each chain loop: (sc, hdc, 3 dc, hdc, sc) to make small shell in each loop (20 shells)
Round 17 :
1 sc in each st back into black inner edge to secure shells and join colours (60)
Round 18 :
Switch to black. *(ch4, sl st into scallop peak two sts ahead) repeat around for picot-lace loops to allow joining points (20 loops)
Round 19 :
Work a final round of black sc around connection points, making sure counts remain (60)
Round 20 :
Finishing round: *sc in next 3 sts, picot (ch3 sl st) in next st* repeat around to create a delicate edged rim (60)
Info :
Block each medallion to a flat disc approximately 15-18 cm (6-7 in) diameter depending on yarn and tension. Pin shells outward to keep scallops even. Steam lightly or wet-block with starch for crispness.
Round 21 :
If you want a slightly larger medallion: *(5 sc, inc) x10 (70)
Round 22 :
Optional denser border: 1 sc in each st around (70)
Info :
Make four medallions identical. Keep note of which side faces up as you will join to the runner on the same side for consistency.
— Small Lace Medallion / Filler (make 6) :
Round 1 :
mr, ch1, 6 sc into ring (6)
Round 2 :
Inc in each st (12)
Round 3 :
(1 sc, inc) x6 (18)
Round 4 :
(2 sc, inc) x6 (24)
Round 5 :
1 sc in each st around (24)
Round 6 :
Switch to burgundy. *(ch3, sl st into next st) repeat around to create little loops (8 loops)
Round 7 :
Into each loop: (sc, hdc, 3 dc, hdc, sc) to form tiny scallops (8 scallops)
Round 8 :
Switch to olive green and make 1 sc in each inner stitch to secure (24)
Round 9 :
Decorative outer: *ch4, sl st in next st* repeat to make joining loops for vines (24)
Info :
These smaller medallions will sit between large medallions and along the vine to add rhythm and balance. Block and set aside.
— Bat Motif (make 6) :
Info :
The bat is worked in rounds and short rows to create a winged, slightly cupped shape. Work flat for the wing span then add body center and tassel fringe. Make six identical bats and attach small beads for eyes.
Round 1 :
Using black, ch8, join to form a ring with sl st, ch1. Work 10 sc evenly around chain ring (10)
Round 3 :
(1 sc, inc) x10 (30)
Round 4 :
1 sc in each st around (30)
Round 5 :
Change to flat working: ch1, turn, 1 sc in next 15 sts (work across half circle) - these 15 sts become left wing base; leave remaining sts unworked for now
Round 6 :
Work wing shaping in rows along the 15-st edge: Row 1: dec at edge, 11 sc, dec (13) Fasten off, join to other side to mirror for right wing
Info :
Wings are shaped with short rows and picots for scalloped membrane ridges. Keep counts even when mirroring the right wing.
Round 7 :
Rejoin to central base. Along the wing edge create scallops: *(sl st, ch3, sl st) repeat across wing edge to form wing fingers (approx 6-8 finger loops per wing)
Round 8 :
Into each finger loop: sc, hdc, 3 dc, hdc, sc to create small rounded wing tip scallops for a structured look
Round 9 :
Return to centre, sc around existing central circle and between wings to form body base, approx 40 sts total depending on your shaping (40)
Round 10 :
Form body by crocheting 6 rounds of sc around the central base without increases to produce a slight dome (40)
Round 11 :
Stuff body lightly or insert a small bead core if desired for weight and shape; continue 1 sc in each st (40)
Round 12 :
Attach 3 small burgundy fringe lengths (approx 8-10 strands each, knotted) under the head to mimic hanging tassels. Secure with tight knots and hide ends into body with a needle
Round 13 :
Sew two 3-4mm beads for eyes in the body centre; secure through with thread and reinforce with a knot within body, then weave ends inside
Round 14 :
Edge wings with BLO sc rounds to create a ridged membrane look: 1 sc BLO around each wing edge
Info :
If you prefer a flatter bat, leave wings unstuffed and work wings more open by adding more ch loops between scallops. For sculpted effect, lightly shape scallops when blocked using pins and steam.
Round 15 :
Make a second binding round: sl st into each st around inside wing for stability. Fasten off leaving long tail for sewing to vines
Round 16 :
Optional: Embroider vein lines on wings using surface slip stitch with a slightly thicker thread for contrast. Use 3-4 lines radiating from body to wing tips.
Round 17 :
Optional reinforcement: insert two small pieces of thin wire along wing ridges (tucked into stitches and anchored) for slightly poseable wings. Fold wire ends and wrap in thread to avoid sharp points.
Info :
Make six bats in all. Block flat on a mat, stretching scallops to a crisp shape. Keep tails from securing until assembly so you can position them along vines.
— Large Sculpted Rose (make 4) :
Info :
The rose is worked as a spiral that forms ruffled petals. Work a long foundation of chains and build petals in repeated shell sequences, then form into a spiral and sew the base to close. Use burgundy yarn and an embroidery needle for final shaping.
Round 1 :
Chain 90 (or adjust length for desired finished bloom size). Turn, sc in 2nd ch from hook, sc across foundation chain (approx 89 sc)
Round 2 :
*sc in next st, hdc in next st, 3 dc in next, hdc in next, sc in next* repeat across to form the first petal row; do not join, continue in spiral (petal repeats approx 18-20)
Round 3 :
Continue spiral: into each 3dc cluster from previous row work *(sc, hdc, 5 dc, hdc, sc)* to deepen petals and create a fuller ruffle. Keep the spiral loose and do not join rounds
Round 4 :
Repeat increasing cluster size for next two spiral passes: *(sc, hdc, 7 dc, hdc, sc)* then *(sc, hdc, 9 dc, hdc, sc)* across as needed until ribbon of ruffled petals is sufficiently ruffled (this should yield 4-5 distinct ruffle rows)
Info :
The number of chains determines the rose's diameter. For a medium-large rose, 90 chains yields a bloom 7-9cm across after rolling. If you want larger roses, increase chain foundation by 20-40 chains and add more dc in clusters.
Round 5 :
Finish last petal row with a dense round of sc along the long edge to stabilize the ribbon. Fasten off leaving a long tail for sewing (approx 40-50cm)
Round 6 :
Form rose: lay the ruffled ribbon with the decorative side up. Start at one end and roll tightly for the center; continue rolling while twisting slightly to open petals naturally. Use the long tail to whip stitch through the base of the spiral as you roll, anchoring stitches every 6-8mm to keep the spiral tight and secure.
Round 7 :
When rose is formed, stitch the base in several radial stitches across the whole bottom to close. Trim tail and weave in ends. Add a small dab of glue if desired for extra security.
Info :
Block or lightly steam petals and shape with fingertips while warm to get a natural petal curl. Do not over-stretch; the rose should have tiers of petals that nest into each other. Make four large roses and three smaller medium roses by reducing foundation chain to 60 for smaller blooms.
— Small Rosebud (make 8) :
Round 1 :
Ch 18, sc in 2nd ch from hook, sc across (17)
Round 2 :
Turn and work short petal rows: *(sc, hdc, 3 dc, hdc, sc) across* to form a small petal ribbon
Round 3 :
Fasten off leaving long tail. Roll tightly into a bud and stitch base with the tail. Add a single small green leaf under bud when attaching to vine
Info :
Make eight buds of varying sizes (some with 14 chain foundations and some with 20) to create visual variety. Secure each bud to the vine with a few hidden stitches through the base.
— Leaf (make 24) :
Round 1 :
Using olive green, ch11. Row 1: sc in 2nd ch from hook, hdc next, dc next, tr next, dtr next (center st), tr next, dc next, hdc next, sc last. Turn (9-11 sts depending on shaping)
Round 2 :
Working along the opposite side of the foundation chain: sc, hdc, dc, tr, dtr, tr, dc, hdc, sc to mirror the other side—do not turn; finish with sl st into starting point to form a leaf oval
Round 3 :
Edge: *(sl st, ch3, sl st) along the outer edge to create little lobes* around leaf (approx 10 lobes)
Round 4 :
Surface vein: using a tapestry needle and chain stitch embroidery, sew a central vein from base to tip. Anchor veins with a knot and hide tail under edge stitches
Info :
Vary leaf sizes slightly by changing the number of foundation chains (9-13) to create natural variety. Make 24 leaves total and block flat with slight cupping along the central vein.
— Vine & Chain Connectors (make many to run full length) :
Info :
The vine is created with long chains stitched into occasional loops and reinforced with sc and picot decorative accents. Make multiple lengths and join them by crocheting into medallion picot loops.
Round 1 :
Using olive green, ch120 (or desired vine length for one segment). Work sc back along chain: sc in 2nd ch from hook and across to make a narrow cord (approx 119 sc)
Round 2 :
Along vine body, every 10th st make a decorative spur: *(sc in next 9 sts, ch6, sl st in 2nd ch from hook to make a small loop, sc in next st) repeat across* Create about 10-12 spur loops per vine segment
Round 3 :
Into each spur loop make 3 small leaves: attach leaf base with sl st and work 3 sc to anchor. This gives the illusion of emerging leaf clusters
Round 4 :
Edge vine with picots: *sc 5, picot (ch3 sl st) repeat along to create delicate edging allowing future joins to medallion picots to catch* (approx 110 sc)
Info :
Make enough vine segments to run the full length of your table. The runner in the photo uses 3-4 long vine segments with linking loops to stagger motifs. Keep measurements and account for medallion spacing before trimming vine segments.
Round 5 :
Join vine segments by overlapping ends 4-6 cm and working sc through both layers, creating a seamless cable that won't gap. Reinforce with a second pass if necessary.
— Lace Filler Motif (make 10) :
Round 1 :
mr, ch1, 6 sc into ring (6)
Round 3 :
(1 sc, inc) x6 (18)
Round 4 :
Switch to olive green. *(ch3, sl st in next) repeat to create picot ring (6 loops)
Round 5 :
Work small shell into each loop: (sc, 3 dc, sc) to form tiny floral centers (6 shells)
Info :
These small motifs knit the visual gaps between larger medallions and bats. Use them to anchor rosebuds and small leaves.
— Assembly & Joining Plan (pre-assembly work) :
Info :
Before assembly, block every motif flat or to shaped three-dimensional form (roses). Lay out the runner on a foam board or table with pins, positioning large medallions evenly at desired intervals (photo shows 4 large medallions spaced with bats and roses between). Place vine segments to create sinuous connections, then place bats layered over vines and arrange roses where clusters form focal points.
Round 1 :
Join medallions to vines: using olive thread, whip stitch through medallion picot loops and through vine picot loops, making secure but invisible connections. Use 6-8 evenly spaced stitches per connection point
Round 2 :
Anchor filler medallions by sewing their outer picot loops to the vine's spur loops. Reinforce with a small sc button stitch over each joined loop on the underside for security
Info :
Sew pieces from underside so the top surface remains clean. Use small stitches and weave tails thoroughly to avoid slipping. Leave thread tails long until after final placement to allow adjustments.
Round 3 :
Place bats by overlapping wings across vines and medallions, using the bat's long tail to sew through vine foundation at multiple points (5-7 small stitches per wing) so the bat sits slightly raised for dimensionality
Round 4 :
Sew roses: place rose base onto junction points where vines intersect and medallions meet. Use the rose�s base tail to run several strong stitches into vine foundation across the whole base, then take a few stitches into the underside of the medallion for stability
Round 5 :
Attach leaves and buds: tuck leaf bases under stitched roses and secure with 2-3 stitches each. Sew buds to vine spurs and close any remaining gaps with filler motifs
Info :
Work assembly gradually from center outward. Pin each piece before sewing, check overall balance, and step back often to ensure symmetry and spacing. Use contrasting thread only where visible; otherwise match olive thread for invisible joins.
— Final Finishing Touches :
Round 1 :
Check all joins on the underside and make reinforcing stitches where necessary. Trim stray ends and weave them under several stitches. Tidy any small glue used for beads.
Round 2 :
Lightly steam the entire runner while pinned to the blocking board to set shapes and gently encourage petals and wing scallops to set. Do not oversteam roses to avoid flattening.
Info :
Lay felt or a table protector beneath the runner when displaying on a dining table to prevent sliding and protect wood surfaces from any potential dye transfer.
— Extra Decorative Embroidery (optional) :
Round 1 :
Using fine gold thread, couch a few decorative lines across medallion shells for sparkle—run short couching stitches through outer shells and secure ends on underside
Info :
Add tiny seed beads to rose centers or medallion scallops by stitching beads through the motif and knotting them on the underside securely. Small bead clusters make bats� eyes catch light.
— Care Instructions :
Info :
Hand wash gently in cool water with a mild detergent. Do not wring; press between towels and reshape on blocking board. Avoid machine laundering or tumble drying. Store flat or rolled on acid-free tissue to preserve three-dimensional roses and wing shapes.
Completing this runner is such a satisfying project—watching the lace discs, sculpted roses and dramatic bats come together creates a really theatrical centerpiece. Each hand-stitched join adds personality and ensures your table decor is truly unique. Take time to block and position each motif for the best visual harmony. 🧶🌹🦇 Enjoy the slow, meditative process and be proud of this striking handmade accent!