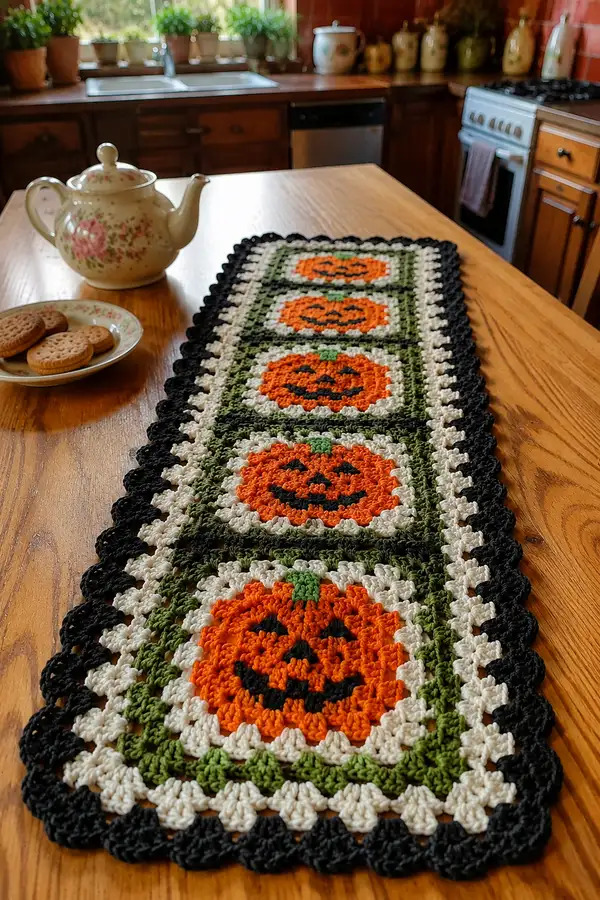
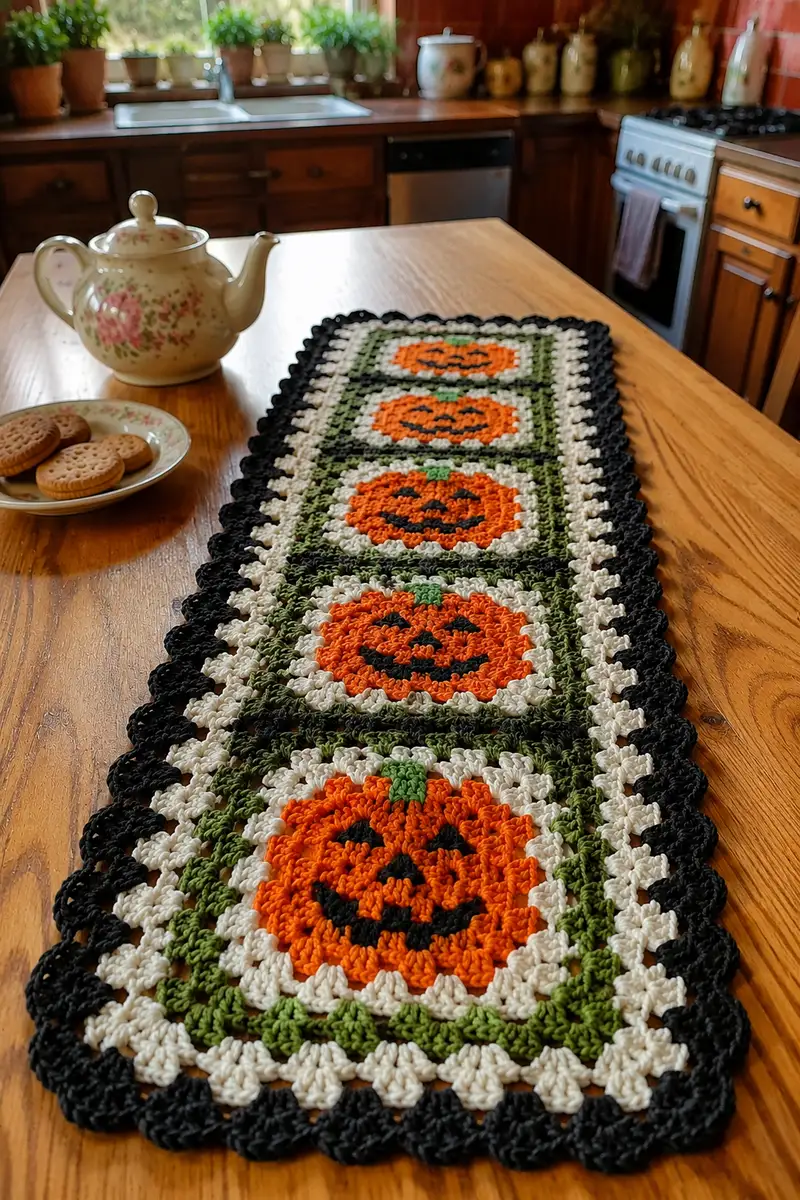
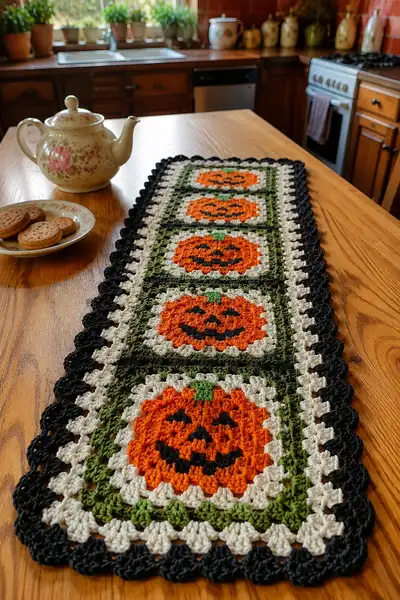
Create a charming Halloween table runner built from four pumpkin granny squares joined into a long runner. This pattern features bright orange jack-o-lantern centers, green and cream frames, and a scalloped black border for a classic seasonal look. Worked in worsted-weight yarn with simple granny-cluster rounds, it is easy to customize length and color. Ideal for bringing autumn vibes to a kitchen table or sideboard.
Progress Tracker
0% Complete
— Overview :
Info :
This pattern constructs four identical pumpkin granny squares, then joins them into a long table runner with a scalloped border. Each square is worked in rounds from a small center pumpkin circle, expanded into a square by working granny-cluster rounds, and finished with frames in cream and olive. The pumpkin facial details are added using simple surface slip-stitch embroidery with black yarn after the square is complete. Make a gauge swatch before you begin to ensure square sizes match. Final dimensions with recommended yarn and hook: approximately 10" wide x 40-44" long for four squares joined, depending on blocking and tension.
Info :
Abbreviations used throughout: mr, ch, sc, dc, sl st, rep, BLO, FLO. Keep a stitch marker at the beginning of each round and move it up as you join a new round. This pattern lists stitch counts at the end of each round in parentheses.
— Pumpkin Center (make 4 identical centers; these form the orange circle) :
Round 1 :
6 sc in magic ring (6)
Round 3 :
(1 sc, 1 inc) x 6 (18)
Round 4 :
(2 sc, 1 inc) x 6 (24)
Round 5 :
(3 sc, 1 inc) x 6 (30)
Info :
Work rounds 1-5 using Pumpkin Orange. Keep tension even to create a smooth circle. Use a stitch marker in the first stitch of each round so you don't lose track when working in continuous rounds.
Round 6 :
(4 sc, 1 inc) x 6 (36)
Round 7 :
(5 sc, 1 inc) x 6 (42)
Round 8 :
(6 sc, 1 inc) x 6 (48)
Info :
At the end of Round 8 you should have 48 stitches. This creates a pumpkin circle approximately 4.5"-5" across when using the recommended yarn and hook. If your circle is larger or smaller, adjust hook size and rework rounds to match the target size for all centers.
Round 9 :
1 sc in each st around (48)
Round 10 :
1 sc in each st around (48)
Info :
Rounds 9-10 build a stable flat surface for the pumpkin face. You can stop at Round 9 if you prefer a slightly smaller pumpkin face; keep all centers consistent. This is a good place to fasten off if you plan to embroider faces before adding the surrounding granny rounds; otherwise continue to next rounds to begin square transition.
— Pumpkin Face Embroidery (do after Round 10 of each center or after full square) :
Info :
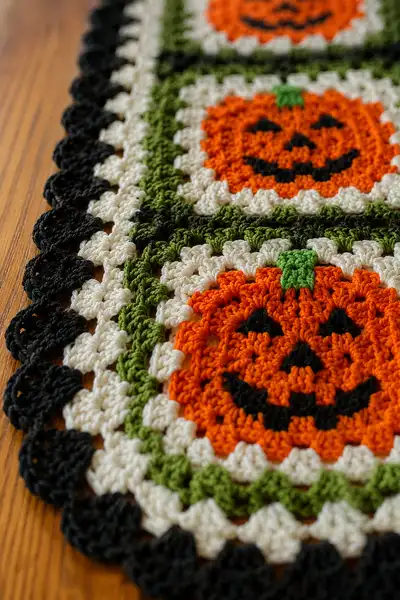
Place your pumpkin face so the stem side (the side you plan to orient toward the runner center) will be upward. Use black yarn and a tapestry needle. Typical face placement uses a small triangle for the nose centered on the pumpkin, two triangle eyes above and separated by 8-10 stitches, and a smiling mouth 6-8 stitches wide. Work surface slip stitch or embroidery with single strands to keep lines crisp.
Face Stitch Guide :
Embroider eyes: Insert needle from back to front at desired eye location, work 3-4 surface sl st in a small triangular shape, secure and weave back to the back side. Nose: small triangle of 2-3 sl st. Mouth: curve with series of short surface sl st or tiny backstitches to create smile and teeth marks. Secure and weave ends to back.
Info :
Alternatively, embroider face after the full square is worked to ensure placement relative to the square frame. Mark a horizontal reference line by counting 4 stitches up from the beginning of the last sc round; this helps keep faces level across all squares.
— Transition Round: Convert circle to initial cluster frame :
Info :
Join to the outermost round with a sl st in any stitch. We will begin working 3-dc clusters (granny-style) into groupings around the circle to begin forming the square. Maintain Pumpkin Orange for the first clustering round.
Round 11 :
Join Pumpkin Orange: ch3 (counts as dc), *2 dc in next 4 sts, 2 dc in next st and ch2 and 2 dc in same st (corner made); repeat from * 3 more times to make 4 corners total, then 2 dc in remaining sts to fill edge until you reach start; join with sl st to top of ch3. This round will create 12 groups of 3 dc plus 4 corner ch2 spaces—visual count: 12 clusters + 4 corners (approx 40-44 dc total depending on spacing).
Info :
The goal in Round 11 is to create four evenly spaced ch2 corner spaces as anchors for the square. If the clusters crowd or leave gaps, adjust placement by slipping a few more stitches between clusters so corners sit roughly 12 stitches apart. Keep four corner ch2 spaces aligned for subsequent rounds.
— Granny Cluster Rounds to Square (Pumpkin orange rounds form the inner motif) :
Round 12 :
Ch3 (counts as dc), *in each cluster space work (2 dc, ch2, 2 dc) into the ch2 corner space, and between corners work (3 dc) cluster into the space between clusters; repeat evenly around to form a square with 4 corner spaces; join with sl st (clusters per side will be approx 5-7 depending on spacing)
Info :
After Round 12 your piece should begin to take a square shape. Each side will have roughly the same number of 3-dc clusters; count clusters per side to ensure symmetry. Use your stitch marker to mark one corner ch2 to reference orientation for the face embroidery if you haven't embroidered yet.
Round 13 :
Ch3, work 3-dc clusters into each previous round's cluster group, and (2 dc, ch2, 2 dc) in each corner ch2; join with sl st. Aim for balanced clusters—result: a neat granny square in Pumpkin Orange with approx 4 corners and a cluster count that increases slightly each round (visual count of clusters per side ~ 7-9).
Round 14 :
Repeat Round 13: ch3, 3-dc clusters in every cluster space, corner (2 dc, ch2, 2 dc); join with sl st. At this point your square should be roughly 6" across (depending on gauge).
Info :
If you prefer a more circular pumpkin within the square, stop adding increasing rounds in orange earlier; if you want a larger pumpkin occupying more of the square, add one extra orange cluster round. Keep all four centers identical in number of cluster rounds so their outermost edges line up when joining.
— Cream Halo and Olive Frame (surround each pumpkin) :
Info :
We now build the halo (cream) and a slim olive frame using granny-cluster style rounds. These rounds create a consistent square size so all four squares match.
Round 15 :
Change to Cream/Ivory: join with sl st in any corner ch2, ch3 (counts as dc), work *2 dc in corner ch2, ch2, 2 dc in same corner ch2; then (3 dc) cluster in each side cluster space across; repeat around and join. This is first cream round (clusters per side approx 7-9)
Round 16 :
Ch3, 3-dc clusters into each cluster space, corners (2 dc, ch2, 2 dc); join with sl st (cream) (square growing outward)
Round 17 :
Repeat Round 16 in cream (this creates a two-round cream halo). Join and fasten off cream if you prefer a distinct line before the olive round.
Info :
If you want a thicker cream halo like the photo, work three cream rounds instead of two. In the pictured runner there are two cream rounds, creating a bright border around the pumpkin before the olive frame starts.
Round 18 :
Change to Olive/Green: join with sl st to any corner ch2, ch3 (counts as dc), work corner (2 dc, ch2, 2 dc), and 3-dc clusters across each side cluster space; join. This olive round begins the frame around each pumpkin square (olive clusters per side ~ 7-9).
Round 19 :
Ch3, 3-dc clusters into each cluster space, corner (2 dc, ch2, 2 dc); join (olive)
Round 20 :
Optional: Repeat Round 19 if you desire a thicker olive frame (makes the frame more visible; photo shows two olive rounds). Join and fasten off olive.
Info :
At the end of Round 20 each square should measure around 9" - 10" across before blocking depending on yarn and tension. Block squares gently to match measurements and flatten edges for neat joining.
— Square Outer Edge Prep (cream rejoin for alignment) :
Round 21 :
With Cream, join to any corner ch2, ch3, (2 dc, ch2, 2 dc) in corner, *3 dc cluster in each side space; repeat to complete round and join. This outer cream round helps create an even edge for joining and for the black scallop later (Cream outer round total clusters per side will be 9-11 depending on previous rounds).
Info :
Fasten off and weave ends for each square now, or leave tails long and weave after joining if you plan to join before finishing ends. At this stage you may embroider or darken the pumpkin face if you did not previously.
— Repeat Pumpkin Square (Squares 2, 3, and 4) :
Info :
Make four identical squares in total. Repeat Rounds 1-21 exactly for Squares 2, 3, and 4. Ensure that the number of cluster rounds in orange, cream, and olive match across all four squares so edges align precisely when joining.
Square 2 Rounds 1-21 :
Repeat Rounds 1-21 from 'Pumpkin Center' and 'Granny Cluster Rounds' sections. Match face placement and orientation of the stem so all pumpkins face the same direction on the runner.
Square 3 Rounds 1-21 :
Repeat Rounds 1-21. Keep all joins and counts identical.
Square 4 Rounds 1-21 :
Repeat Rounds 1-21. Block each square to identical dimensions and flatten corners for seamless joining.
Info :
After all four squares are complete and blocked, lay them out in the final order for the runner. The photo shows pumpkins aligned centered so stems face the same top edge. Adjust orientation as desired before joining.
— Join Squares (Join-as-you-go option or whip-stitch seam) :
Info :
Two main methods: Join-as-you-go (JAYG) using a joining round in black or olive to seam adjacent squares as you work their final rounds, or sew squares together after finishing using whip stitch or mattress stitch. The instructions below show a joining round using Olive then Black to define separations between squares.
Join Round 22 (Olive join) :
With Olive, join at a corner ch2 of Square 1, ch1, sc evenly along the side edges into the spaces between clusters (or through sc rounds) to create a neat seaming ridge. When you reach the side that will join another square, place the second square next to the first with right sides facing up and use sl st into both square edges aligning cluster spaces; continue to join across the full seam with sl st through both pieces to join them. For a runner, join Square 1 to Square 2 along one full side, then join Square 3 to Square 2, then Square 4 to Square 3, creating a chain of four squares joined edge-to-edge. After joining all vertical seams, work a single Olive round over the outer edges of the long joined panel to even out the seam and create a continuous frame.
Info :
When joining, match corner ch2s exactly so the outer cream/olive frames sit square. Use pins to hold squares in position prior to stitching if needed. If sewing after finishing, sew through the back loops of both squares to create a less visible seam.
Alternate Join (Whip stitch method) :
Place two squares with right sides facing up and align side edges. Using matching yarn and a tapestry needle, whip stitch through corresponding stitch posts across the seam, spacing stitches evenly. Knot and weave ends. Repeat until all squares are joined. Work a tidy cream/olive round around the entire runner to neaten the seam.
— Outer Border & Scalloped Edge (Black scallops in photo) :
Info :
The scalloped black border is worked in two stages: an even black border round to create a firm edge, followed by a scallop round using shells (5 dc in same st) to create the decorative scallop. Work evenly spaced stitches around the entire perimeter of the joined panel.
Round 23 (Black border foundation) :
With Black, join at any corner ch2, ch1, sc in corner, then work sc evenly along each side into space between clusters (or into the top of clusters), working 3 sc into each corner ch2 to keep corners square; continue around entire runner and join with sl st to first sc. Total stitch count will depend on joined length—aim for evenly spaced scs so scallops later sit centered atop groups of even stitches.
Info :
If your sc count is not divisible evenly by the scallop repeat, add or remove 1-2 sc evenly along long sides to allow scallops to align symmetrically across the length.
Round 24 (Scallop 1) :
Ch1, *skip next sc, in next sc work (5 dc in same st) (shell), skip next sc, sl st in next sc to anchor shell; repeat from * around to create scallops spaced by single slip stitches; work 3 shells into each corner area for a rounded corner effect; join with sl st.
Round 25 (Scallop finish) :
Optional: For a bolder scallop, work Round 25 in Black: ch1, sl st to center of each shell, *work (3 dc, ch2, 3 dc) in center of previous shell to create a larger scallop, sl st in between shells to anchor; repeat and join. Fasten off and weave in ends.
Info :
Blocking final piece flat and pinning scallops evenly after the scallop round will give the polished look seen in the photo. Steam or wet block carefully according to yarn type and let dry fully before use. The black scallop dramatically frames the runner and hides any join irregularities.
— Additional Decorative Edge Option (Cream picot edge) :
Round 26 :
For a lighter touch, instead of large scallops do a picot trim: With Black or Cream, ch1, sc evenly around, *ch3, sl st in 3rd ch from hook to make picot, sc in next 3 sc; repeat to make a delicate scallop. Join and weave ends. This makes a finer border if desired.
Info :
Choose the trim that best suits your decor. The photo uses pronounced black scallops—if you want subtler framing, choose a picot or single-shell edge instead.
— Final Finishing Touches and Embroidery Recheck :
Info :
After all sewing and border rounds are complete, lay the runner flat and visually inspect pumpkin faces for evenness. If faces need darkening or sharpening, use the black yarn and a tapestry needle to tidy edges with surface slip stitch. Weave all loose ends at least 2-3 inches into the fabric and trim closely. Block the final runner to flatten and align scallops for a professional finish.
Info :
Optional: Add an invisible hanging loop to the back center of the runner if you plan to hang it as a decorative wall or mantel piece. Use matching yarn and tack it near a corner or along the back seam with secure stitches.
— Pattern Notes and Troubleshooting :
Info :
If your squares measure slightly different, add or remove a small accessory round of single crochet around smaller squares or lightly block larger squares smaller. Keep the direction of shells consistent around the entire runner so scallops face outward. If seams gap when joined, add one more sc row in Olive before the black border to tighten the join.
Info :
To adjust runner length: add or subtract the number of pumpkin squares. This pattern is modular—each additional square will increase runner length by the same amount as one completed square (approx 9"-11" after blocking, depending on gauge).
Completing this pumpkin granny square table runner is such a satisfying autumn project — the bright orange pumpkins framed in cream and olive pop beautifully against the bold black scallop edge. Each square is a small victory and watching them join together to form a long, festive runner feels so rewarding. 🧶 The design is modular and customizable, so you can make it longer or shorter for your table. Enjoy the cozy, handmade touch this runner brings to your home! 🎃✨