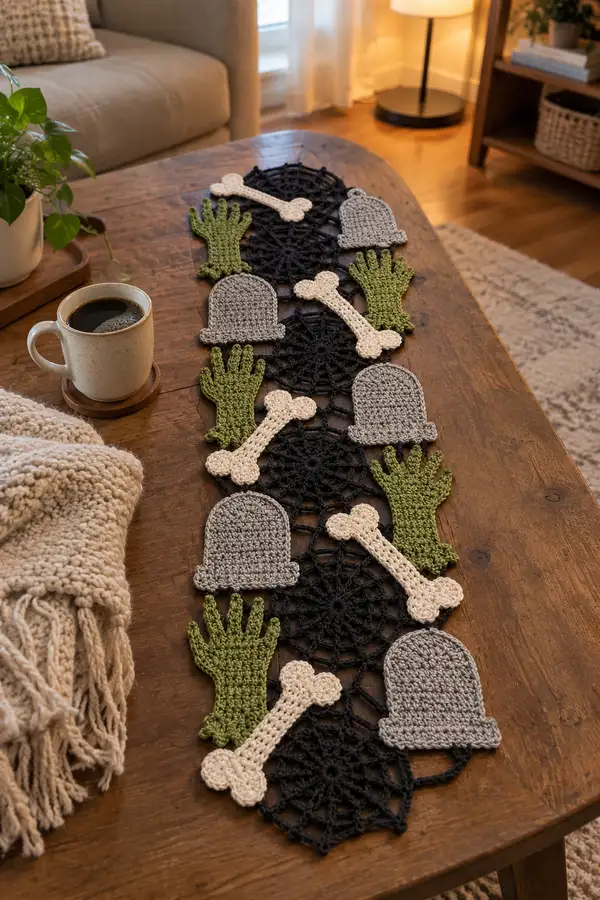
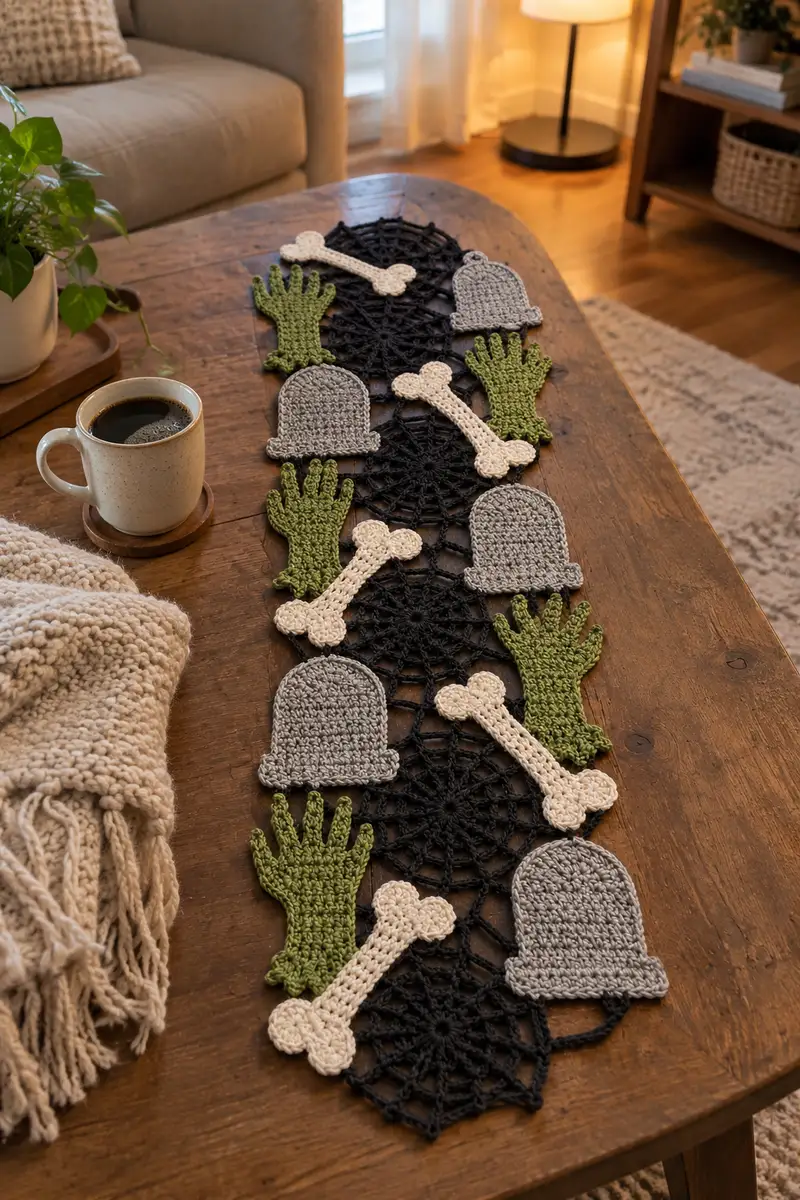
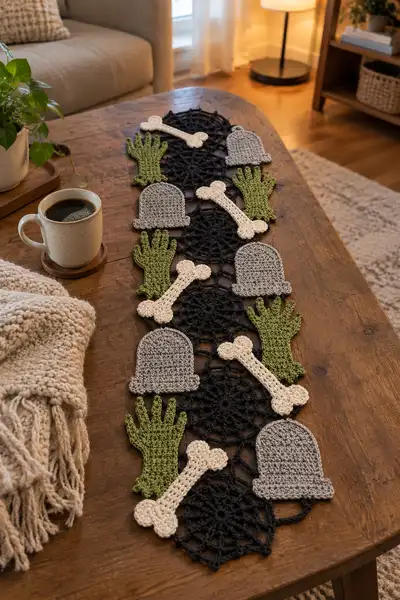
Create a spooky, farmhouse-friendly Halloween table runner featuring lacy black spiderweb motifs topped with applique9 tombstones, cream bones, and green zombie hands. This pattern combines openwork spiderweb rounds with solid crocheted applique shapes that are sewn in place for dimensional texture. Perfect for decorating a dining table or console, the runner layers three repeating panels linked together with a simple joining seam.
Progress Tracker
0% Complete
— Spiderweb Motif (make 6 for a standard runner) :
Round 1 :
Using charcoal yarn and 4.0mm hook, start with a magic ring. Ch 3 (counts as first dc), work 11 dc into ring; pull tight and join with sl st to top of ch3. (12 dc)
Round 2 :
Ch 1, *sc in next dc, ch 5, sk next dc* repeat from * to * around, ending with sc in last dc, join with sl st to first sc. You will have 12 ch-5 loops and 12 sc anchors. (12 sc + 12 ch-5 loops)
Info :
The ch-5 loops in Round 2 become the main spokes of the web. Keep the ch loops even; if yours look loose, use a smaller hook for these rounds only or add an extra sc between loops next time.
Round 3 :
Join with sl st to the top of any ch-5 loop, ch 3 (counts as dc), work (2 dc, ch 2, 3 dc) into same loop (creates first petal), *sl st to next ch-5 loop, (3 dc, ch 2, 3 dc) into loop* repeat around to form 12 petal clusters, sl st to top of ch3 to join. (12 petals)
Round 4 :
Ch 1, sl st in same st, *ch 7, sl st in center of next petal cluster (top of ch-2 sp), ch 1, sl st in same center to anchor* repeat around to create 12 long connecting loops. Join with sl st. (12 ch-7 loops)
Info :
These long loops will later be worked to create the open lattice. Keep tension relaxed; you done2�8�9t want the web to gather too tightly here.
Round 5 :
Work into each ch-7 loop: join with sl st, ch 3 (counts dc), 2 dc, ch 3, 3 dc, sl st to center of next petal cluster; repeat around into every ch-7 loop. You will create larger arches on the web edge. Join to ch3 with sl st. (12 large arch clusters)
Round 6 :
Ch 1, *sc in each of the next 3 sts of arch, (ch 4, sc) in the center ch-3 sp of the arch to form a small loop, sc in next 3 sts* repeat around; join with sl st. This creates a ring of small ch-4 loops around the motif. (Approx 12 ch-4 loops)
Info :
If your web is curling, gently press the motif flat as you go and keep stitches in the outer rounds slightly looser than inner rounds. Blocking will finish the shape cleanly.
Round 7 :
Into each ch-4 loop: join, (sc, hdc, 3 dc, hdc, sc) into loop, sl st to join to next loop. This builds a decorative scallop ring. (12 scallops)
Round 8 :
Ch 1, *sc in next 3 sts, ch 6, sk to next scallop center* repeat to create 12 ch-6 loops spaced around outer scallops; join. (12 ch-6 loops)
Round 9 :
Work into each ch-6 loop: (sc, hdc, 5 dc, hdc, sc) to form a broader outer petal; join. After completing this round, the motif diameter should measure approximately 8-9 inches unstretched, depending on tension. (12 outer petals)
Info :
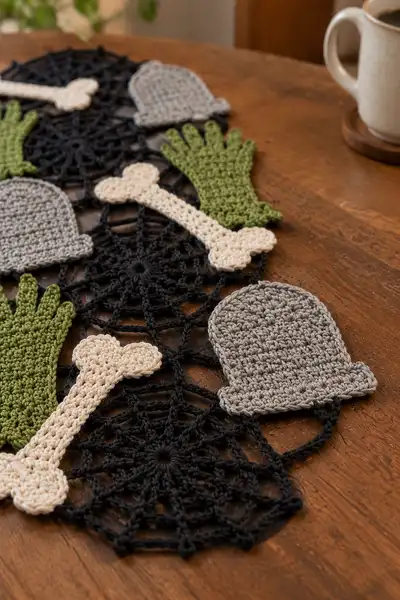
Measure and compare your first finished web to the photograph: aim for a flat disc roughly 8-10 inches across. If your motif is too small, use a larger hook; if too large, tighten tension or use a smaller hook on outer rounds.
Round 10 :
Ch 1, sc evenly around outer edge placing 2 sc in each outer petal top where needed to maintain a smooth edge. Join with sl st. Count should be even; expect roughly 48-60 sc depending on your tension and how many petals required 2 sc increases to lie flat. (Approx 56 sc)
Round 11 :
Ch 1, *sc in next 4 sts, (ch 5, sl st in next sp) repeat from * around to create decorative picot chain connectors. Join. (12 ch-5 picot connectors)
Round 12 :
Working through the back of the ch-5 connectors, ch 3, dc into the base anchor, ch 2, dc into the next base anchor to form a mesh band around the edge; work evenly until motif edge is reinforced. Join. (Even round)
Info :
These outer rounds stabilize the motif for sewing applique9. If you plan to join motifs using slip stitches later, keep the outer round holes accessible by spacing 8-10 sl st anchor points evenly around the edge.
Round 13 :
Ch 1, sl st into every other st around to tighten and tidy the outer edge; this creates a subtle raised ring that looks tidy after blocking. Join and fasten off leaving a 16-18" tail for assembly if you prefer to whipstitch. (Even round)
Info :
Block each spiderweb motif to exact shape before assembly. Pin out the spokes symmetrically and spray lightly with water or use a steam iron at a distance. Allow to dry fully. Blocking dramatically improves visual consistency across repeats.
— Tombstone Applique9 (make 6) :
Round 1 :
Using stone grey and 3.5-4.0mm hook, ch 2, 6 sc in second ch from hook or mr 6 sc into magic ring; join with sl st. (6 sc)
Round 2 :
Inc around (2 sc in each st) — 6 inc = 12 sc total. (12 sc)
Round 3 :
(1 sc, inc) x 6 — repeat around to expand base arch. (18 sc)
Round 4 :
(2 sc, inc) x 6 (24 sc)
Round 5 :
(3 sc, inc) x 6 (30 sc)
Info :
At this point the round foundation forms the curved top radius. From here we'll work in rows to build a flattened tombstone panel rather than continue radial increases.
Round 6 :
Turn your work to begin rows. Ch 1, sc in same st and across the next 14 sts (work across half the round to create the front face), leave the remaining 16 sts unworked to form the back base edge for a flat shape. You should have a flat section of approx 15 sc across (counts depend on previous round; aim for center 15 sc).
Round 7 :
Ch 1, turn, sc in each st across front face (15 sc). Repeat this row 3 times to build height forming a rectangle. (15 sc x 3 rows)
Info :
If you prefer a slightly taller tombstone, add extra rows at this stage. The tombstones in the photo are squat with a distinctive rolled base edge; we'll create the rolled base next.
Round 8 :
Fold the bottom edge under by 1 row and use slip stitches through both thicknesses to create a rolled base ridge: join at the left bottom corner, sl st through both layers along the edge for 15 sl sts, fasten off and weave in tail. This forms the neat little lip at the base of each gravestone. (15 sl st)
Round 9 :
Rejoin at the top center of the arch and sc evenly around the curved top (using the original radial sts left unworked) to tidy the arch and join to the flat face. Make 18-22 sc around arch depending on stitch density so the face sits smoothly. Join and fasten off leaving a 10-12" tail for sewing. (Approx 20 sc)
Info :
Sew a second identical panel if you prefer a double-thick tombstone with hidden raw edges; otherwise single-layer applique9 sewn tightly to the web looks authentic and flat like the photo.
— Bone Applique9 (make 6) :
Round 1 :
With antique cream and 3.5mm hook, ch 7. Sc in 2nd ch from hook and across to turn (6 sc). This forms the narrow shaft of the bone. (6 sc)
Round 2 :
Ch 1, turn, sc across (6 sc). Repeat Row 2 until the shaft measures 14-16 rows long (this will create a long rectangle approximately 4-4.5 inches depending on tension).
Info :
The center shaft is worked in a tight single crochet to keep it sturdy. The photo shows bones approximately 4.5 inches long — adjust row count to match your desired length.
Round 3 :
To form one rounded end: at the short end of the shaft, work in the round: ch 1, sc across remaining 6 sts of the last row, rotate and work 8 sc into the side edge evenly distributed, then work 6 sc across the opposite short edge in a semi-circle (use incs to make a smooth round). Fasten off and repeat for the other end, shaping a symmetrical rounded knob. Expected end count around each knob ~12 sc worked in a small semicircle. (Knob approx 12 sc)
Round 4 :
Optional: work a second round of sc around each knob to flatten and thicken the circular ends, placing 1-2 incs where needed to keep the curve smooth. Fasten off leaving long tail for sewing. Repeat for the other end. (Knob thickened)
Info :
If you want a plumper bone, crochet two identical shafts and seaming them together with an overcast stitch produces a slightly raised applique. In the pictured runner, bones are single-layer and lie flat against the web.
— Zombie Hand Applique9 (make 6) :
Round 1 :
Using leaf green and 3.5mm hook, ch 10, sc in 2nd ch from hook and across to end (9 sc). This forms the wrist base. (9 sc)
Round 2 :
Ch 1, turn, sc across (9 sc). Repeat this row 2 more times to make a short cuff (3 rows total). (9 sc x 3 rows)
Round 3 :
Begin hand palm: ch 1, turn, sc in first 3 sts, (hdc in next 3 sts), sc in last 3 sts (9 sts total). This adds a slightly raised center. (9 stitches)
Info :
From here we will create five finger tabs worked from the top edge. Fingers are made as short rectangles attached with slip stitches to the palm top edge to match the imagee2�8�9a tall slim hand with defined fingers.
Round 4 :
Turn to the top edge, ch 1, *sc in next 1 st (this becomes the base of finger 1), ch 4, turn and work 3 sc back along the chain, fasten off and attach to next st with sl st* Repeat from * to * to create 5 finger tabs spaced evenly across the top edge. Finger widths are 3 sc each and length is 3 rows for a total finger height of approx 0.75-1 inch. (5 fingers of 3 sc each)
Round 5 :
After fastening all finger tabs in place, work a row of sc across the upper finger bases to connect them into a palm top: join and sc through the bases of fingers and the palm edge to create a continuous top seam. Fasten off leaving a long tail for sewing. (Even row)
Info :
Finger spacing is important for the visual likeness. Aim to make the palm base 9 stitches wide and place five evenly spaced finger tabs across the top. If needed, adjust chain length for fingers to be slightly longer or shorter to match images.
— Decorative Joining & Border :
Round 1 :
Lay out six spiderweb motifs in a straight line overlapping edges by about 1-1.5 inches as shown in the photo. Decide which edge anchors will be joined. Using the charcoal yarn and a 4.0mm hook, join with sl st to the outer edge of the first motif and join to the adjacent motif by working 'join-as-you-go' sl sts into the corresponding outer loop points on both motifs: sl st in motif A outer st, sl st into motif B outer st, repeat across the overlap area to securely join them. Continue joining motifs pairwise until all motifs are connected in a row. (Joining procedure)
Info :
Take care to align spokes so the web print remains symmetrical along the runner. Use pins to hold motifs together before sewing or joining-as-you-go. If you prefer a less visible join, use a yarn needle and mattress stitch to seam motifs from the back.
Round 2 :
Once motifs are joined, reinforce the seam by working 1 sc into each visible outer stitch across the join on the top side, or use invisible whipstitch from the back with matching charcoal yarn for a neat finish. This adds stability for applique9 placement. (Even row along joins)
Round 3 :
To tidy the outer edge of the runner, work a single round of sc around the entire runner outline including curved outer edges: ch 1, sc evenly across all outer stitches placing 2 sc in wider curves as necessary to avoid ruffling. Join and fasten off. (Even edging round)
Info :
Give the entire runner one final light blocking after joining. This helps flatten seams and open the web lace for a professional look. Use pins and steam or spray blocking technique and allow to dry before sewing applique9.
— Applique9 Placement and Sewing :
Round 1 :
Arrange your 6 tombstones, 6 bones, and 6 hands on the runner surface alternating as shown in the photo: tombstone - hand - bone repeating down the runner. Space each trio so they sit across the center of each spiderweb motif. Use pins to mark the positions. (Layout stage)
Info :
Take a photograph of your arrangement to preserve layout before sewing. This saves time if you need to reposition pieces during sewing. The pictured runner has each applique9 centered over a distinct web center and offset slightly to create staggering interest.
Round 2 :
Sew each applique9 to the web by placing the applique9 on top, threading a tapestry needle with a 12-16" tail of matching yarn, and using small whipstitches or ladder stitch around the perimeter, catching just the top loop of the web and the edge of the applique9. Work slowly to keep stitches invisible. Fasten off and weave in ends for each piece. (Sewing step)
Info :
Use a single thread of yarn doubled for extra strength if your runner will be in heavy use. Stitch near the outer rounds of the web where stabilization is stronger; avoid sewing through the delicate inner spokes which can distort the web.
Round 3 :
Optional finishing: For extra texture, add a single round of sc around each applique9 edge in a contrasting or matching color to create a neat outline. Work sc evenly and use 2 sc in corners or curves. Fasten off and weave in ends. (Optional outline)
Info :
If you plan to launder the runner, consider adding a light fabric backing or spray-starch the pieces lightly to keep them in place. Spot clean recommended; if wash is necessary, place inside a mesh bag and use gentle cycle and lay flat to dry.
— Final Finishing Notes :
Round 1 :
Inspect all joins and applique9 attachment points and add extra secure stitches where needed. Trim any long tails and weave in all ends with a tapestry needle at least 2-3" into the fabric to avoid unraveling. (Finishing)
Info :
For storing between seasons, fold carefully with tissue paper between applique9s to avoid crushing. Avoid bright direct sunlight for long periods to prevent color fade, especially on green and cream yarns.
This Graveyard Bones runner is a delightful mix of lacy spiderwebs and chunky Halloween applique9s that makes a striking seasonal centerpiece. Each motif is fun to crochet and easy to arrange, and the modular construction means you can lengthen it for larger tables or shorten for a console. The layered applique9s add playful texture and personality that guests will love. 🎃🧶 Make it your own with color swaps and placement tweaks—happy hooking!