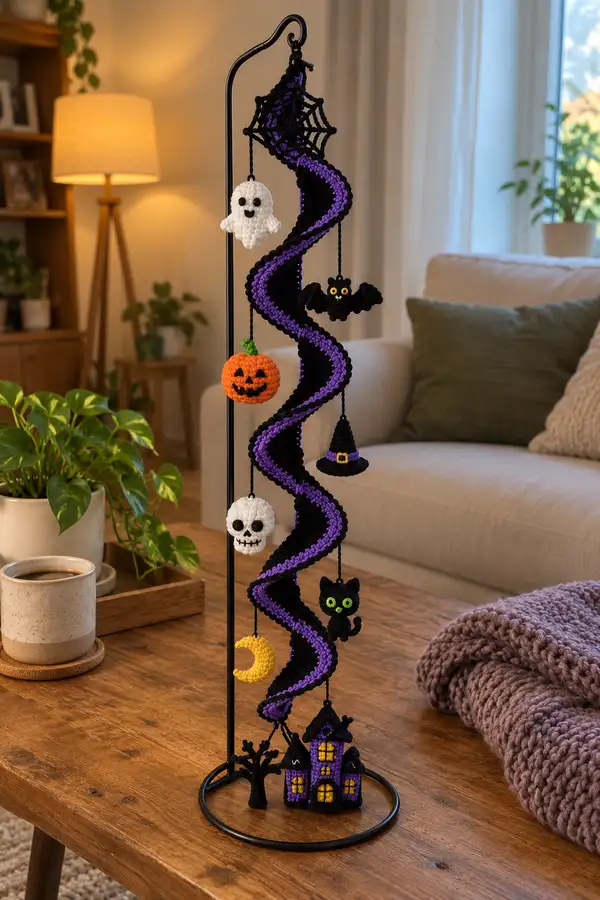
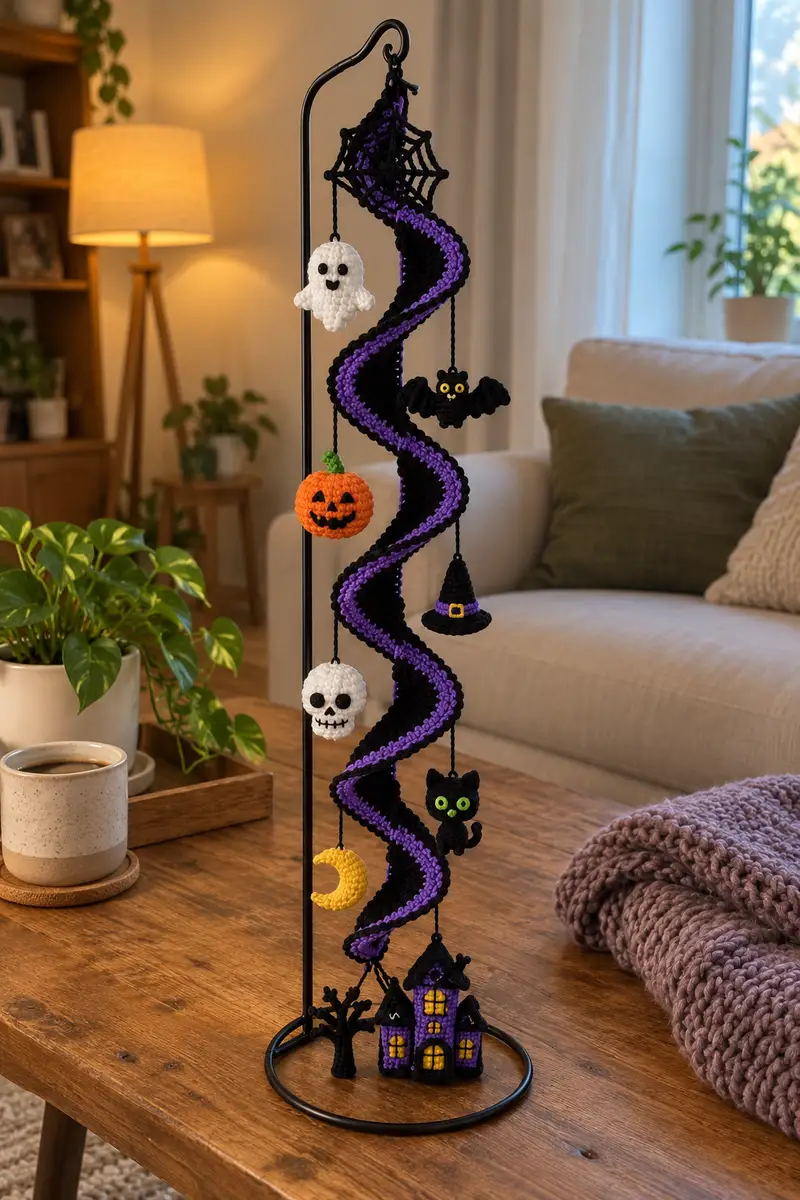
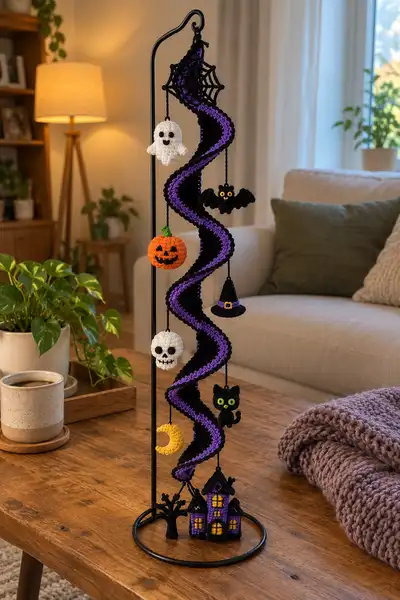
Create a whimsical Halloween spiral mobile featuring a twisting black-and-purple spiral with tiny amigurumi ornaments — ghost, pumpkin, skull, bat, cat, witch hat, moon and a tiny haunted house at the base. This cozy seasonal project combines simple amigurumi shapes with clever shaping to form a dramatic vertical spiral display. Perfect for a mantel, table, or hanging decor — each motif is worked in tight single crochet for a neat, durable finish.
Progress Tracker
0% Complete
— Spiral Ribbon (main structure) :
Info :
This long spiral is worked in continuous rounds to form a tube with a contrasting inner stripe. The tube will be shaped into a corkscrew after blocking and stuffing lightly or leaving unstuffed for a flatter ribbon. Use black as main color and purple for inner stripe. Keep tension consistent; work tightly so stuffing does not show through if you choose to lightly stuff.
Round 1 :
6 sc in magic ring (6)
Round 3 :
(1 sc, inc) x 6 (18)
Round 4 :
(2 sc, inc) x 6 (24)
Round 5 :
(3 sc, inc) x 6 (30)
Round 6 :
(4 sc, inc) x 6 (36)
Round 7 :
(5 sc, inc) x 6 (42)
Round 8 :
(6 sc, inc) x 6 (48)
Info :
We will now build length. The tube diameter is set at 48 sts per round. If you'd like a thicker or slimmer spiral, increase or decrease these counts proportionally before continuing. Join purple inner stripe starting Round 9 by working a narrow stripe through the center of the tube: you will change color every few rounds as indicated below.
Round 9-12 :
1 sc in each st (48) — work with black
Info :
Round 13 begins purple stripe: change to purple at the beginning of the round by pulling through new color. Carry black inside if you prefer, or fasten off tails to weave in later.
Round 13-16 :
1 sc in each st (48) — work with purple (inner stripe)
Round 17-20 :
1 sc in each st (48) — switch back to black, these create an outer band
Info :
To create the spiral ripple, we will use alternating short sections of increases and decreases across several rounds to bias the tube and create a wavy, corkscrew profile. Everything below keeps total rounds at 48 unless noted otherwise.
Round 21 :
(6 sc, inc) x 6 (54)
Round 22 :
1 sc in each st (54)
Round 23 :
(7 sc, dec) x 6 (48)
Round 24 :
1 sc in each st (48)
Round 25 :
(5 sc, inc) x 6 (54)
Round 26 :
1 sc in each st (54)
Round 27 :
(6 sc, dec) x 6 (48)
Round 28 :
1 sc in each st (48)
Info :
Repeat a sequence of small increases and decreases every 6-8 rounds to create the spiral wave. Alternate color stripe sections every 8 rounds (purple inner for 4 rounds, black for 4 rounds) to keep the purple showing as a thin core.
Round 29 :
(8 sc, inc) x 6 (54)
Round 30 :
1 sc in each st (54)
Round 31 :
(7 sc, dec) x 6 (48)
Round 32 :
1 sc in each st (48)
Round 33 :
(4 sc, inc) x 6 (54)
Round 34 :
1 sc in each st (54)
Round 35 :
(5 sc, dec) x 6 (48)
Round 36 :
1 sc in each st (48)
Info :
Change to purple for rounds 37-40 to continue inner stripe. Carefully twist your working tube occasionally while checking how it will lay when coiled into the spiral shape; this will guide where increases/decreases are placed so corkscrew is even.
Round 37-40 :
1 sc in each st (48) — purple stripe rounds
Round 41 :
(6 sc, inc) x 6 (54)
Round 42 :
1 sc in each st (54)
Round 43 :
(7 sc, dec) x 6 (48)
Round 44 :
1 sc in each st (48)
Round 45 :
(9 sc, inc) x 6 (54)
Round 46 :
1 sc in each st (54)
Round 47 :
(8 sc, dec) x 6 (48)
Round 48 :
1 sc in each st (48)
Info :
Continue this pattern sequence (alternating short increase bursts and compensating decreases) until your spiral reaches the desired finished length — for the project pictured this is approximately 120-140 rounds total. For brevity we give an additional 72 rounds repeating the above rhythm; ensure you finish on a round count that keeps the diameter at 48 or 54 as preferred. When finished, fasten off leaving a long tail for sewing the top loop and for finishing ends.
Round 49-120 :
Repeat rounds 21-48 sequence with color striping: every 8 rounds switch to purple for the inner section, then black for outer band. Maintain the increase/decrease rhythm to create corkscrew bias (est. final length 70-90 cm depending on yarn tension). Finish by flattening and tucking tails; block around a tube or ring and allow to dry to hold corkscrew shape.
Info :
Edge scallop — optional: with black, work 1 round of sc along one long edge in BLO to create scalloped border: 1 sc BLO in each st (48). For a picot/scallop, replace every 6th sc with (picot: ch3, sl st into ch1) to form small bumps.
— Top Spider Web Loop :
Round 1 :
6 sc in magic ring (6)
Round 3 :
(1 sc, inc) x 6 (18)
Round 4 :
1 sc in each st (18)
Info :
We will create a small triangular web motif. After Round 4, chain 12, sl st back into center, ch12 repeat to form a 6-spoke star. Tighten center and secure to form loop.
Round 5 :
Join spokes: ch12, sl st into next center st — rep ch12 and sl st 6 times to create spokes. Pull center closed and weave tail to back (no stuffing).
Info :
Work spider web 'threads' by chaining short segments and anchoring them with sl sts to the spokes to make a web diamond pattern. Make a loop for hanging at top using an extra ch 20 and join to web center.
— Hanging Ghost :
Round 3 :
(1 sc, inc) x 6 (18)
Round 4 :
(2 sc, inc) x 6 (24)
Round 5 :
1 sc in each st (24)
Info :
Position safety eyes between rounds 4-5 spaced about 6-8 sts apart for a friendly expression. Alternatively embroider eyes with black yarn. This ghost has a slightly ruffled bottom edge created by working shells.
Round 6 :
(3 sc, inc) x 6 (30)
Round 7 :
1 sc in each st (30)
Round 8 :
(4 sc, inc) x 6 (36)
Round 9 :
1 sc in each st (36)
Round 10 :
(3 sc, dec) x 6 (30)
Round 11 :
1 sc in each st (30)
Round 12 :
(2 sc, dec) x 6 (24)
Round 13 :
1 sc in each st (24)
Round 14 :
Fasten off leaving tail for sewing. Create bottom ruffle: join yarn around bottom and work shell edging: *skip 1 st, 5 dc in next st, skip 1 st, sl st* around to create waves. Finish and weave in tails.
Info :
Stuff lightly before closing top. Attach a small loop of chain 10 at top and sew securely so ghost hangs from cord.
— Little Pumpkin :
Round 3 :
(1 sc, inc) x 6 (18)
Round 4 :
(2 sc, inc) x 6 (24)
Round 5 :
(3 sc, inc) x 6 (30)
Round 6-8 :
1 sc in each st (30)
Info :
Switch to orange yarn for body; begin applying slight ribbing by working one round in BLO to create grooves that mimic pumpkin ribs (1 sc in each st BLO).
Round 9 :
1 sc in each st BLO (30)
Round 10 :
(3 sc, dec) x 6 (24)
Round 11 :
(2 sc, dec) x 6 (18)
Round 12 :
(1 sc, dec) x 6 (12)
Info :
Stuff firmly before final decreases. After closing, cut a short length of green yarn and wrap/stitch a small coil on top for the stem, adding two small ch loops to mimic vine. For carved face, embroider triangle eyes and jagged mouth using black yarn and stitch securely.
— Skull :
Round 3 :
(1 sc, inc) x 6 (18)
Round 4 :
(2 sc, inc) x 6 (24)
Round 5-7 :
1 sc in each st (24)
Info :
Place safety eyes or embroider eye sockets between rounds 4-5 about 6 stitches apart. For nose, use a small embroidered triangle. The skull should be slightly flattened on the back so it hangs facing outward from the spiral.
Round 8 :
(2 sc, dec) x 6 (18)
Round 9 :
1 sc in each st (18)
Round 10 :
(1 sc, dec) x 6 (12)
Round 12 :
Fasten off leaving long tail. Stuff lightly and flatten slightly when sewing — embroider a stitched grin using black yarn across the lower rounds to create teeth detail.
— Bat :
Round 3 :
(1 sc, inc) x 6 (18)
Round 4-6 :
1 sc in each st (18)
Info :
Bat wings are made separately: work two flat semicircle wings then attach to sides of body. For wings: ch 7, sl st to form ring and work 6 sc around, increase to form wing arc, then fasten off. Attach wings symmetrically and embroider small yellow eyes.
Round 7 :
Begin wing attachments and make small ears: work two small teardrop shapes (mr 6, inc to 12, 2 rounds) and sew to top of head. Fasten off and weave tails.
Info :
Stuff lightly so bat remains flat and hangs well. Sew an 8-10 cm length of cord into top center of head for hanging.
— Black Cat :
Round 3 :
(1 sc, inc) x 6 (18)
Round 4 :
(2 sc, inc) x 6 (24)
Round 5-7 :
1 sc in each st (24)
Info :
Create two triangular ears by making two small rounds: mr 6, inc to 12, 1 round sc, then flatten and stitch to head top. Eyes are lime green circles worked in a 6-st mr then sewn on, or use safety eyes with embroidered rims for bright look.
Round 8 :
Start body: attach at base and work 12 rounds in continuous rounds 1 sc in each st (24) to form small cylindrical body.
Round 9-12 :
1 sc in each st (24) — stuff lightly as you go
Round 13 :
(2 sc, dec) x 6 (18)
Round 14 :
(1 sc, dec) x 6 (12)
Round 15 :
6 dec (6) — close and leave tail for sewing to spiral. Make a small curved tail by chaining 6 and working back with 5 sc, sew to body side.
Info :
Attach cat so it appears to cling to the spiral by sewing the back of body to the spiral surface with a few securing stitches. Optionally insert a short piece of wire into tail for posing and wrap securely with yarn when stuffing.
— Witch Hat :
Round 3 :
(1 sc, inc) x 6 (18)
Round 4 :
1 sc in each st (18)
Round 5 :
(2 sc, inc) x 6 (24)
Round 6 :
1 sc in each st (24)
Round 7 :
Work cone: dec rounds to shape cone: (2 sc, dec) x 6 (18)
Round 8 :
(1 sc, dec) x 6 (12)
Round 9 :
6 dec (6) — finish tip, fasten off and sew to small flat brim worked as ch 24, join and work 1 sc in each ch around to form brim (24)
Info :
Add a small purple band and tiny buckle by sewing a yellow square of 6 sc wide at front of brim for decoration.
— Crescent Moon :
Round 3 :
(1 sc, inc) x 6 (18)
Round 4 :
Work shaping for crescent by increasing on one side more heavily: (2 sc, inc) x 6 (24)
Round 5 :
1 sc in each st (24)
Round 6 :
To form curve, work partial decreases on inside curve: sc 10, (dec) 2 times, sc rest (22)
Round 7-8 :
1 sc in each st (22) — stuff lightly and shape with fingers to form crescent. Finish with a tight closure of 6 dec across center to create inner concave edge. Fasten off and weave in tails.
Info :
For a clean crescent, use yellow and work surface stitch lines to emphasize curvature if desired.
— Haunted House (main base) :
Info :
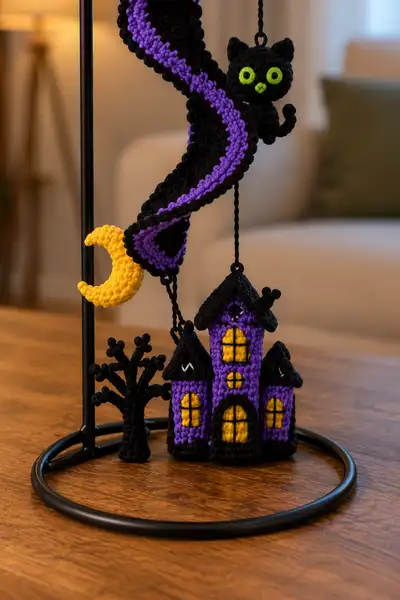
The haunted house is built of several small tower blocks joined together. Work three cylinder towers (left, center tall, right) then stitch doors, roofs and windows. Each tower uses the same base technique with slightly different heights.
Tower A Round 1 :
6 sc in mr (6)
Tower A Round 2 :
6 inc (12)
Tower A Round 3 :
(1 sc, inc) x 6 (18)
Tower A Round 4-10 :
1 sc in each st (18) — work 7 rounds to create short tower height
Tower B Round 1 :
6 sc in mr (6)
Tower B Round 2 :
6 inc (12)
Tower B Round 3 :
(1 sc, inc) x 6 (18)
Tower B Round 4-16 :
1 sc in each st (18) — work 13 rounds to create tall center tower
Tower C Round 1 :
6 sc in mr (6)
Tower C Round 2 :
6 inc (12)
Tower C Round 3 :
(1 sc, inc) x 6 (18)
Tower C Round 4-9 :
1 sc in each st (18) — medium height
Info :
Sew towers together side-by-side matching bottom rounds. Stuff lightly each tower before closing. Windows and door are worked separately and sewn on: Windows are 6-st mr worked in yellow then edged with black. Door is an arch: ch 6, join and work short rows, sew centered on front tower.
Roof :
For each tower, make triangular roof: ch 6, turn and sc across, dec one at each end every row until 1-2 sc remain, then fasten off and sew to top of tower. Edge roof with black; add little chimney by crocheting a 6-st tube and attaching to roof side.
Round Final :
Assemble house: sew towers together. Embroider window panes with black yarn as crosses. Add tiny black birds or bats on roof by sewing small 4-sc wings for silhouette. Fasten off and weave all ends.
— Bare Tree :
Trunk Round 1 :
6 sc in mr (6)
Trunk Round 2 :
6 inc (12)
Trunk Round 3-6 :
1 sc in each st (12) — make trunk height 4 rounds
Branch Work :
Create branches by chaining 6-8 then sl st back along chain to trunk at selected points; make multiple branch clusters then fasten and shape. Flatten base of trunk and sew to house base so tree stands beside house.
— Assembly & Hanging Cords :
Info :
Make braided hanging cords for each ornament: cut three strands of black yarn 30-40 cm, tie at end and braid for 15-20 cm then knot to secure. Attach cords to motif tops by sewing through round center. Attach other end to the spiral at desired spacing using whip stitch.
Info :
Attach the top spider web loop to the topmost neck of the spiral using a couple of secure stitches. Hang spiral on a hook or stand and arrange ornaments evenly spaced. Pin motifs during assembly to test visual balance before final sewing.
Info :
Finish by hiding all tails inside the spiral or motifs, and add a couple of stitches through spiral to each cord to prevent sliding. For extra stability, tie a small knot around spiral tube where each cord meets, then secure with a couple of whip stitches.
This Halloween spiral mobile is a delightful mix of sculptural crochet and tiny amigurumi charms that bring a cozy spooky vibe to any room. Each motif is a small, satisfying make and the spiral ribbon ties everything together into a dramatic hanging display. As you finish each piece the mobile comes alive — it's a lovely seasonal project to make for yourself or as a handmade gift. 🎃🕸️