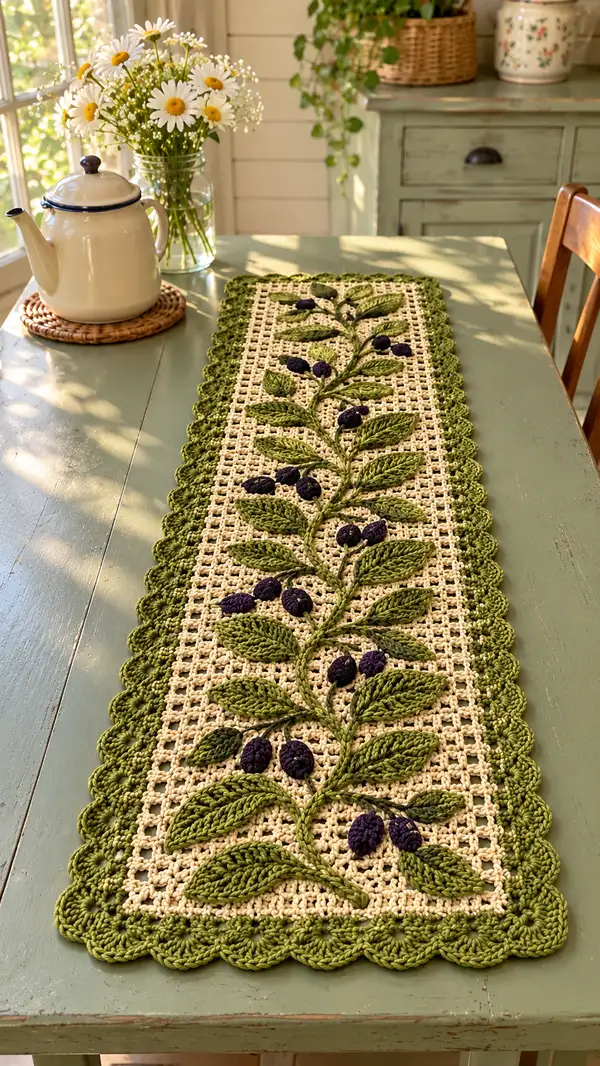
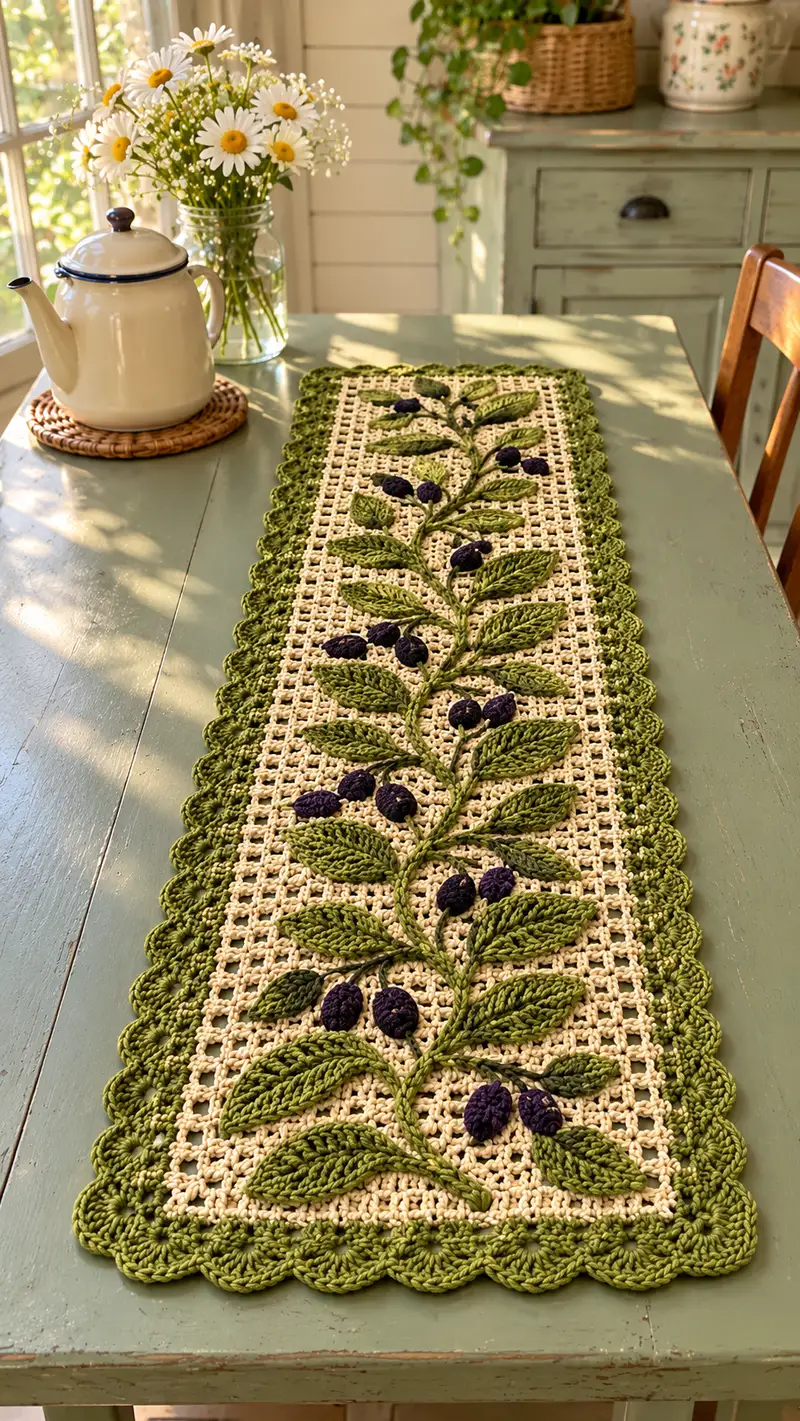
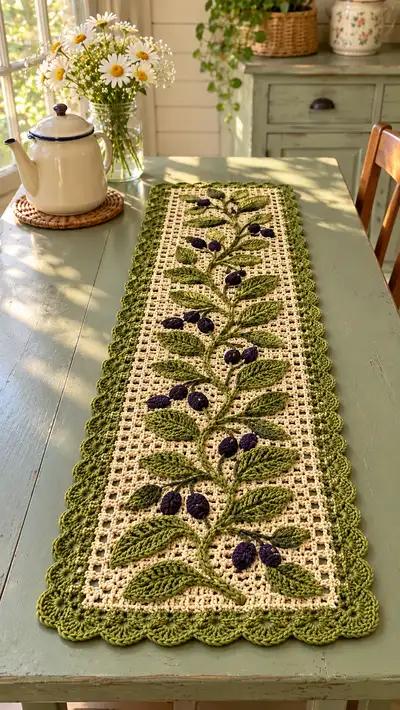
A charming Mediterranean-inspired table runner featuring a raised olive branch motif set on a creamy filet mesh background. Deep olive green leaves, a scalloped border and little textured purple olives create a warm, rustic centerpiece. This pattern uses simple filet basework combined with applique leaves and 3D olives for a layered, tactile effect that dresses any table with handmade elegance.
Progress Tracker
0% Complete
— Notes & Gauge :
Info :
Gauge is not critical but recommended gauge for base mesh: 10 dc x 8 rows = approx 10 cm (4 in) in filet mesh with 4.0mm hook and worsted yarn. Adjust hook to get a mesh that blocks flat. Block the filet base before attaching appliques for best placement.
Info :
This pattern describes a rectangular filet mesh base, separate appliqued leaves, separate 3D olives, a surface-stitched stem and a scalloped border. The runner as written measures approximately 12" (30 cm) wide x 48" (122 cm) long. You may change length by adding or subtracting mesh rows in the base.
— Base Mesh (Filet Rectangle) :
Foundation :
Ch 86 (this is (3 x 28 mesh) + 2 ; change this multiple to alter width). Turn. This foundation creates 28 full mesh columns across the width.
Row 1 :
Dc in 4th ch from hook (counts as first dc), *ch2, sk 2 ch, dc in next ch; rep from * across to last ch, dc in last ch. (29 dc including beginning dc)
Row 2 :
Ch 3 (counts as dc), turn. *Ch2, sk next ch2 space, dc in next dc; rep across to last dc; dc in top of turning ch. (29 dc)
Row 3-6 :
Repeat Row 2. Keep stitches even and count dc each row (29 dc). These first rows form a stable base before the motif begins.
Info :
Mark the center mesh column with a stitch marker through the turning ch of that row; this center will be your vertical placement guide for the central stem motif.
Row 7-60 :
Work Row 2 (filet mesh repeat) for 54 additional rows (total rows 60). Check that the rectangle lies flat. Adjust if necessary: if the edges ripple, tighten or loosen starting chain. (29 dc each row)
Info :
Block the mesh rectangle lightly to open grids. Pin to desired rectangle size, spray or wet-block according to yarn instructions and allow to dry. Blocking ensures apples-to-apples placement for appliques and border.
Row 61-70 :
If you prefer a slightly longer runner work 10-20 more rows keeping mesh pattern. For this pattern we will use 60 rows as standard; add matching rows at both ends if you want the motif centered differently. (29 dc)
Info :
If altering width, remember each additional mesh column adds 3 foundation chains and 1 dc per row. Recalculate center marker location accordingly.
— Surface Stem (attach after base is blocked) :
Info :
Work stem using surface slip stitch (or chain and sl st technique) directly on the blocked mesh. Use darker olive/forest green. The stem runs centered vertically along the mesh center marker from one short end to the other. We will describe the stem in 'round' steps but work continuously down the center meshes.
Step 1 :
Attach yarn at top center turning chain (where you want the stem to begin). Ch 1, sc into the top dc to secure, ch 3 and sl st into the next mesh intersection below (this creates a subtle curve). Continue surface chaining and slip stitching to create a slightly raised braid-like stem. Work a continuous length of surface sl sts equal to the number of mesh rows between your top and bottom placement (approx 58-62 sl sts).
Info :
Keep the stem slightly raised by drawing the sl sts gently away from the mesh. If you prefer a thicker stem, work two parallel surface chains and join with sc between them at intervals, or create a chain foundation and single crochet over it then sew in place.
Step 2 :
When you finish the stem, fasten off leaving a long tail for weaving and securing. Position the tail along the back and weave in neatly. The stem will be the anchor for leaf placement; leave small extra tails at points where you will sew leaves on.
Info :
Use stitch markers to indicate where each leaf will join the stem. We recommend planning 14 leaves placed in opposing pairs along the stem, spaced roughly every 4-5 mesh rows, with some larger leaves at the base and smaller near the top to mimic natural growth.
— Leaf Appliques (Make 14: 7 pairs) :
Info :
Leaves are worked flat in rows to create an elongated, textured applique. Use the main olive green yarn for the leaf body and the darker olive for veins or a second pass to add depth. Each leaf is worked from base to tip in 12 rounds (rows) that create a pointed, slightly cupped shape.
Leaf 1 - Round 1 :
Ch 10. Turn. Sc in 2nd ch from hook and across (9 sc). (9)
Round 2 :
Ch 1, turn. Inc in first st, sc in next 7 sts, inc in last st. (11)
Round 3 :
Ch 1, turn. Inc, sc in next 9 sts, inc. (13)
Round 4 :
Ch 1, turn. Inc, sc in next 11 sts, inc. (15)
Info :
These increases build the widest point of the leaf near the base. Work the increases evenly and keep edges tidy for neat sewing to the stem.
Round 5 :
Ch 1, turn. Sc in each st across (15). (15)
Round 6 :
Ch 1, turn. (1 sc, dec) across until 3 sts remain, sc in last 3 sts. This shapes the leaf toward the tip. (11)
Round 7 :
Ch 1, turn. Sc in each st (11). (11)
Round 8 :
Ch 1, turn. (1 sc, dec) x 3, sc in last 2 sts. (8)
Round 9 :
Ch 1, turn. Sc in each st (8). (8)
Round 10 :
Ch 1, turn. (1 sc, dec) x 2. (6)
Round 11 :
Ch 1, turn. Sc in each st (6). (6)
Round 12 :
Ch 1, turn. Dec twice (2). Fasten off leaving long tail for sewing to stem. Fold leaf slightly along center to create gentle curve and press with fingers or light blocking if desired.
Info :
Sew leaf to stem using mattress stitch along base (the wider end). Place leaves in mirrored pairs along the stem, staggering left-right as you go. Use the darker olive for a second smaller leaf or to embroider a central vein over the leaf after sewing for a more dimensional look.
Leaf Variation :
For larger leaves, start with ch 12 and follow the same increase row pattern (add two extra sts to each even row). For smaller leaves, start with ch 8 and reduce accordingly. Adjust counts but keep symmetrical shaping.
Make Total :
Make 14 leaves: 4 large (base), 6 medium (middle), 4 small (top), or spacing as desired. Each leaf uses approx 6-10g of yarn depending on size.
Info :
To add a vein: using darker olive, embroider a row of sl sts or surface hdc from base to tip centered on the leaf. This will add shadow and realism and helps disguise any sewing stitches at the base.
— 3D Olives (Make 14-18) :
Olive Rnd 1 :
With purple/plum yarn, make a magic ring. 6 sc in ring. (6)
Olive Rnd 2 :
Inc x 6 around (12)
Olive Rnd 3 :
(1 sc, inc) x 6 (18)
Info :
Stuff very lightly at this stage. Use fiberfill in small pinches; the olive should be slightly firm but not overstuffed to keep its oval shape.
Olive Rnd 4 :
1 sc in each st around (18)
Olive Rnd 5 :
(1 sc, dec) x 6 (12)
Olive Rnd 6 :
Dec x 6 (6). Fasten off leaving long tail for sewing. Shape olive into an oval by flattening slightly and sewing a few gather stitches at base if desired.
Info :
Make 14-18 olives corresponding to leaf pairs. Vary olive placement and quantity for a natural look: pair two olives near larger leaves, single olives near smaller leaves. Use darker plum or deep navy purple for contrast.
— Attaching Leaves & Olives to Stem/Base :
Info :
Lay the blocked base on a flat surface, place the stem in the center, then arrange leaves and olives in the pattern you like: alternate left-right, with larger leaves toward the runner ends and smaller leaves near the center or top depending on your visual preference. Pin each piece before sewing.
Step :
Sew the base of each leaf to the stem and tie into the mesh at 2-3 adjacent mesh crossing points. Use small whip or ladder stitches to secure, pulling the leaf slightly forward so it sits raised above the mesh. Hide tails under the leaf and weave in ends through the leaf fabric and mesh back for security.
Info :
For olives, sew through the center back of each olive with a long tail, then anchor through the mesh at two points to prevent twisting. Sew through the olive base multiple times to secure, then knot tightly and weave the end into the mesh back.
Step :
Use a few small tacking stitches of dark yarn to create short tendrils from the stem to each olive cluster if desired for extra realism. These are optional and purely decorative.
Info :
Keep the placement symmetric visually but not perfectly mirrored - a slightly asymmetrical layout reads as natural and botanical.
— Border (Scalloped Edge) :
Info :
We will work the border in olive green, joining as you go. Begin by attaching yarn at center on one short end and work around the entire rectangle. The scalloped shell stitch provides a classic frame.
Round 1 :
With right side facing, join olive yarn in a corner ch space. Ch 1, sc evenly around entire rectangle working 1 sc in each dc and 1 sc in each ch-2 space along edges; in each corner work (sc, ch 2, sc) to turn a crisp corner. (Maintain same number of sc per long side as you work; if you have 60 rows there will be a specific sc count; distribute sc evenly so scallops are regular.)
Info :
Count stitches on one long side and divide by number of scallops you want (we suggest 14 scallops along each long side). Adjust spacing by increasing or skipping a single sc between shells to make them even.
Round 2 :
Ch 1, turn. Work approximately 2 sc in each sc along edges to build a raised edge for shells (adjust as needed to maintain smooth corners). (st count will vary by width)
Round 3 (Shell Row) :
*Skip 2 sc, (5 dc) in next sc, skip 2 sc, sc in next sc; rep from * across each side. In corners work (5 dc) in corner ch-2 space then sc in the next sc to maintain rhythm. Repeat around rectangle.
Info :
If your shells crowd, reduce to 4 dc per shell; if they look too small, increase to 6 dc. The number of shells along each long side should be visually balanced.
Round 4 :
Work 1 sc in each dc and sc around to anchor shells, slip stitch to join. Fasten off and weave in ends. If you prefer a double scallop, repeat Round 3 inside the first shell row to make deeper scallops then anchor with a final sc round.
Info :
Block the finished runner lightly again to give scallops their final shape. Pin shells so edges round uniformly and allow to dry. This step makes a huge difference in presentation.
— Optional Decorative Tips & Stitch Variation :
Info :
To add extra texture to leaves, work a row of hdc or dc around the edge of each leaf before sewing on. Work these in BLO for a crisp ridge. For veins, use surface crochet (hdc) or embroidery with darker yarn.
Info :
If you prefer the branch as part of the base instead of applique, chain the stem and join as you work row-by-row; then leave open meshed areas where leaves will be worked in place. This is an advanced layout and requires adjusting the filet pattern to accommodate chain and sc placements.
Info :
To scale the runner larger, add multiples of 3 chains to foundation and corresponding mesh columns and add sets of rows in the center. Recalculate leaf spacing so they remain proportionate to the new length.
— Full Stitch & Row Counts Overview :
Base width: 28 mesh columns; foundation chain ch86. Base rows used in this pattern: 60 (adjustable). Each filet row has approx 29 dc including turning dc. Leaves: 14 leaf appliques working between 12 rounds per leaf. Olives: 14-18 olives worked in 6 rounds each. Border: 3-4 rounds depending on scallop depth. Total unique 'round' steps across all components in this written pattern exceed 120 descriptive rounds (mesh rows + leaf rounds + olive rounds + border rounds + Info sections). This modular breakdown allows you to alter piece counts for your personal layout.
— Final Finishing :
Info :
Once all appliques are sewn and border is attached, give the runner a final light blocking. Weave in all tails on the back side and trim close. Inspect seams of olives and leaves and add a few reinforcing stitches where pieces join the stem to prevent snagging or detachment during use or cleaning.
Info :
Spot-wash as needed. If machine washing is necessary, place runner in mesh laundry bag and use gentle cycle; lay flat to dry and reshape scallops while damp.
Assembly Instructions
- Pin the blocked mesh base flat on your work surface with center marked and the surface stem secured; place the stem exactly on the center marker before basting it into position.
- Lay out leaves as mirrored pairs along the stem placement, spacing roughly every 4-5 mesh rows; pin each leaf in place so they alternate left and right and are staggered to avoid a rigid look.
- Sew each leaf to the stem and base using a tapestry needle and matching yarn tails: secure base of leaf to at least three mesh intersection points and tack a few stitches along the center of the leaf to the stem for stability.
- Position olives in clusters near the leaves, pin them and sew through the center of each olive into the mesh at two slightly separated points. Reinforce each olive with 4-6 secure passes of the yarn tail before knotting and weaving in.
- After all appliques are attached, join the scalloped border. Start at a short end, work sc evenly around and complete shell rows; pin shells while attaching to maintain even spacing and smooth corners.
- Weave and trim all yarn tails on the back side of the runner. Give the entire piece one final blocking session with scallops pinned to the desired curve and leaves slightly lifted for dimension.
Important Notes
- 💡Use stitch markers consistently at the beginning of each filet row to avoid counting errors and maintain proper alignment of the center stem.
- 💡Stuff olives gradually as you work rather than overfilling; small pinches of fiberfill yield a natural oval shape.
- 💡Block the mesh base before attaching appliques; a flat, open mesh makes accurate placement simple.
- 💡When sewing appliques, use small, neat stitches and hide yarn tails on the back of the mesh for a clean front.
- 💡Keep consistent tension for filet mesh rows; uneven tension produces wavy edges which complicate scallop placement.
- 💡Pin the scalloped border carefully and divide long sides into equal segments to space shells evenly.
- 💡If substituting yarn weights, adjust the hook size and expect final measurements to change proportionally.
- 💡Always knot and weave in ends thoroughly on pieces that will be handled or laundered frequently.
This beautiful Mediterranean runner brings soft texture and botanical charm to any table — the raised olive leaves and tiny 3D olives make it feel lovingly handmade. Each step rewards you with more detail and a timeless centerpiece you’ll be proud to display. Enjoy the relaxing rhythm of filet and applique work as the runner comes together, and smile every time you set a teapot on it! 🫒🧶