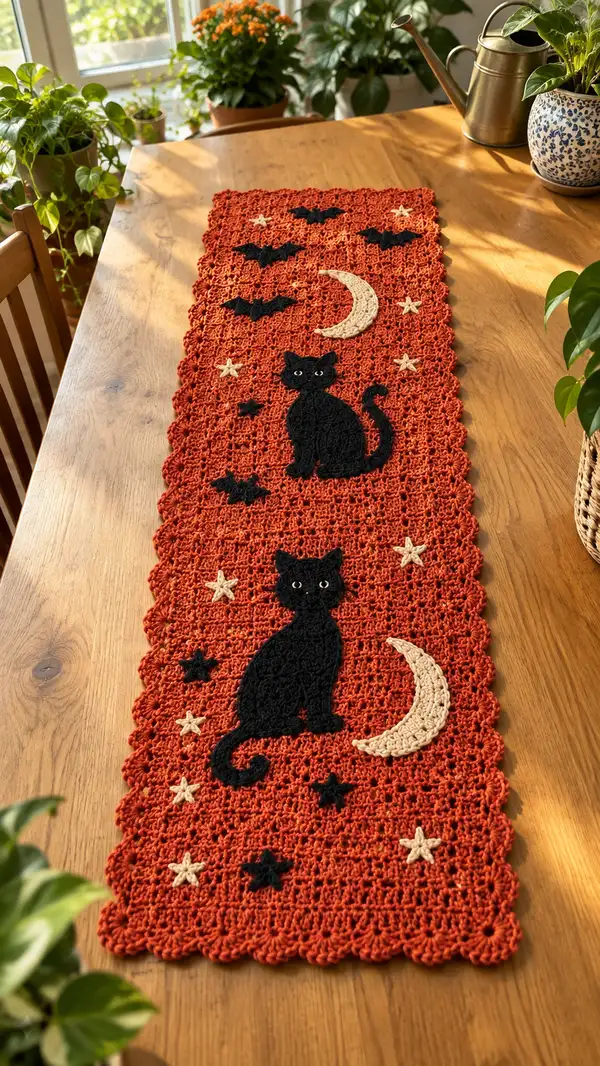
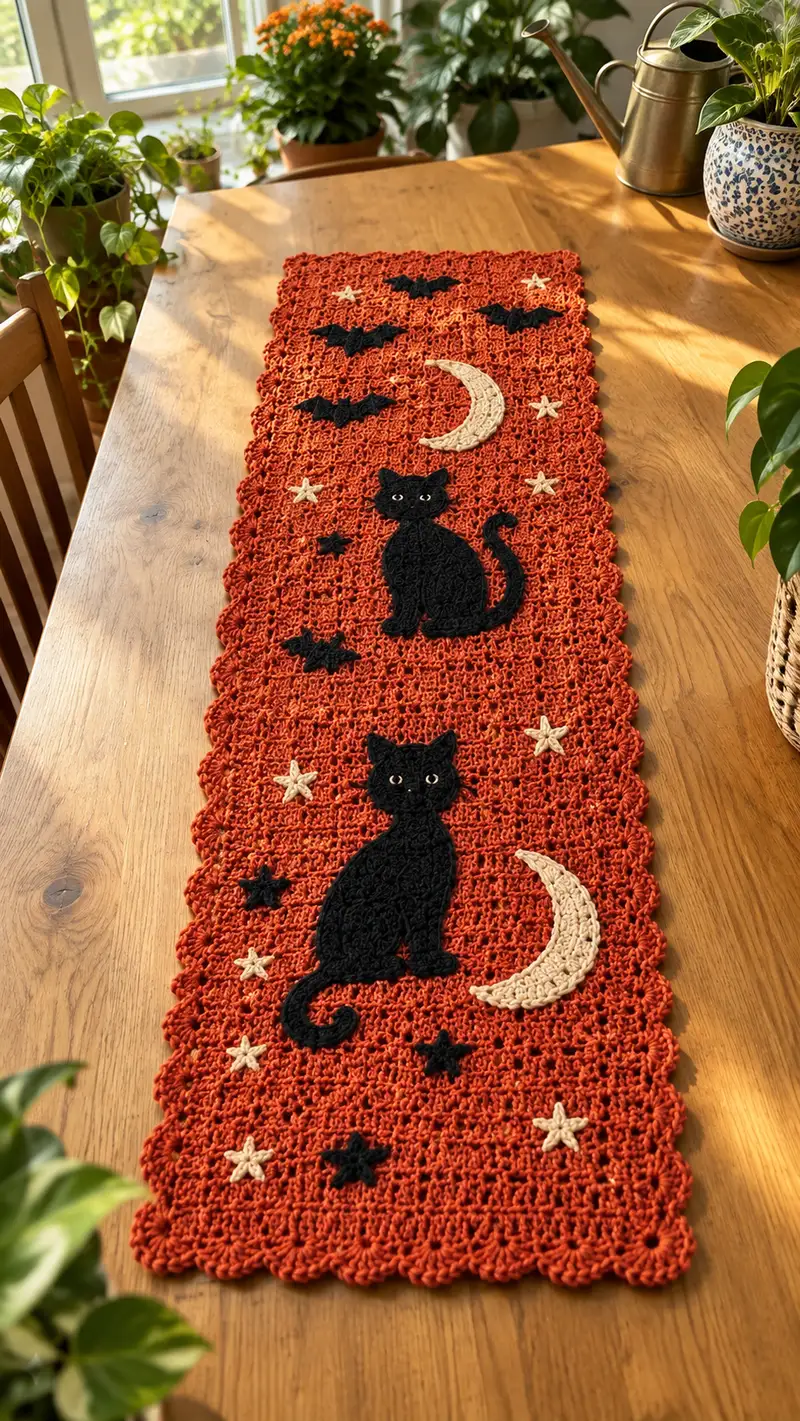
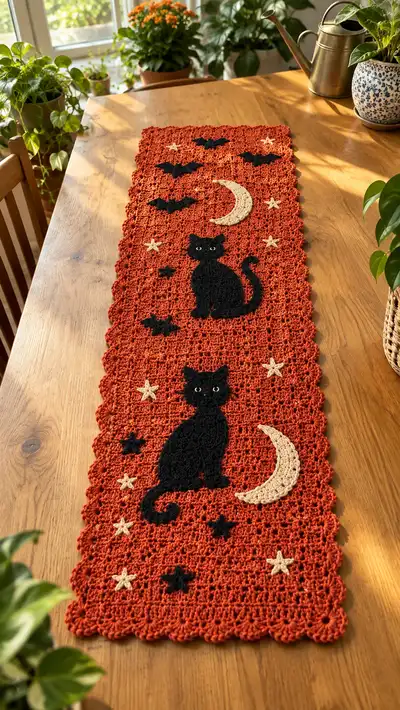
A warm, lacy table runner in pumpkin-orange cotton with black cat appliques, cream moons and stars, and bat accents. The openwork body uses a repeating shell-and-chain lace stitch, finished with a scalloped border. Perfect for seasonal décor, this runner lays flat and features appliques sewn on top for a layered, handcrafted look.
Progress Tracker
0% Complete
— Notes and Overview :
Info :
This runner is worked flat from one short end to the other using a multiple of 8 stitches plus 3 for turning. The sample measures approximately 10.5" (27 cm) wide and 42" (107 cm) long after blocking using worsted-weight cotton with a 4.0mm hook. Appliques are worked separately and sewn on after blocking. The pattern is written in rows; each 'Round' refers to a row worked across the width. Gauge is not crucial for motif placement but will affect finished width/length. For reference, the sample gauge is 16 dc + 8 rows = 4" (10 cm).
— Materials and Starting Chain :
Info :
Decide your runner length first. The written pattern uses a foundation chain of 83 (8 x 10 + 3) for a narrow runner. If you want a wider runner, add multiples of 8 to the foundation chain keeping the +3 turning chain. For a longer runner, repeat the body rows more times before finishing the edging.
Round 1 :
Using main color (pumpkin-orange), ch 83. Turn. (Multiple of 8 + 3)
Round 2 :
Row 1: Dc in 4th ch from hook (counts as 1 dc and ch 1 space), *ch 1, skip next ch, dc in next ch; rep from * across until 3 ch remain, dc in last ch. Turn. (Approx 80 dc positions alternating with chain spaces)
Info :
This initial row establishes a firm foundation row. Keep stitches even and avoid stretching the foundation chain. Use a stitch marker at the first stitch after turning to mark row starts if desired.
Round 3 :
Row 2: Ch 3 (counts as dc), skip first dc, *dc in next ch-1 sp, ch 1; rep from * across to last stitch, dc in top of beginning ch-3. Turn. (Establishes evenly spaced dc and ch-1 grid)
Round 4 :
Row 3: Ch 1, sc in first st, *ch 3, sk 1 dc (or ch-1 sp), sc in next dc; rep from * across ending with sc in turning st. Turn. (Creates chain arches to build lace shell anchors)
Info :
The sample opens into a lacy grid; the next sequence turns these anchors into shell clusters. If counting feels off, measure against sample width and adjust chain multiple before proceeding.
Round 5 :
Row 4: Ch 3 (counts as dc), in the first ch-3 sp work (2 dc, ch 2, 3 dc) - this is a shell; *skip next sc, in next ch-3 sp work shell (3 dc, ch 2, 3 dc); rep from * across ending with dc in top of turning ch-3. Turn. (Creates row of shells; shell count = 10 shells across for ch 83)
Round 6 :
Row 5: Ch 1, sc in first st, *ch 3, sc in center ch-2 sp of next shell; rep across; sc in last st. Turn. (Shell centers anchored with sc and ch arches)
Info :
Always work shells into the chain-2 space of the previous shell. Count shell centers after each shell row to ensure the number of shells remains constant (10 shells for this chain). Add or remove repeats in the foundation chain to change width.
Round 7 :
Row 6: Ch 3, *in next ch-3 sp work shell (3 dc, ch 2, 3 dc); rep from * across to last shell, dc in top of turning ch-3. Turn. (Repeat shell row pattern)
Round 8-16 :
Row 7-15: Repeat Rows 5-7 sequence to establish central lace panel. Work 9 rows of shell-and-arch pattern in total to create height for one motif band. (Maintain 10 shells across)
Info :
These nine rows form a band where appliques may be sewn later. In the sample two cat appliques and supporting motifs are positioned centered within designated band areas. Use a removable stitch marker to note the row numbers where you plan to place appliques.
Round 17 :
Row 16: Ch 1, sc in first st, *ch 3, sc in center ch-2 sp of next shell; rep across; sc in final st. Turn. (Preparation arch row before repeating the lace band)
Round 18-99 :
Rows 17-98: Repeat Rows 5-7 (shell, arch, shell) continuously for a total of 82 more rows, or until the runner reaches your desired length. In the sample, the runner body contains 96 total lace rows (including starting set) before edging. This gives a long runner suitable for a dining table.
Info :
Place appliques after you have worked the body and while the piece is still flat. Use pins to experiment with placement. In the sample, motifs are centered in three main bands down the length: bottom (cat + moon), center (cat + moon + bats), and top small bat cluster. Note the row numbers for each band so placement is symmetrical.
— Applique: Cat Silhouette (Make 2) :
Info :
Each cat applique is worked flat in rounds (spiral optional) using black yarn with a 3.5mm hook for tighter edges. The applique is a silhouette combining two ovals (body and head) shaping by increases and decreases; tail and ear shaping are worked as short rows. Work the pieces slightly larger than you think; they can be blocked and flattened before sewing. Optional: embroider small eye highlights in cream or attach tiny safety eyes if the runner is decorative only.
Round 1 :
Start: Ch 6, join with sl st to form a small ring, ch 1. Work 8 sc evenly into ring. (8)
Round 2 :
(Inc) 8 inc around (2 sc in each st). (16)
Round 3 :
(1 sc, inc) x 8 = (24)
Round 4 :
(2 sc, inc) x 8 = (32)
Round 5 :
(3 sc, inc) x 8 = (40)
Info :
At this point the circle represents the base of the body oval. We will lengthen the shape by working in rows across a partial number of stitches to create an oval; keep a stitch marker at the first stitch of each round to monitor counts.
Round 6 :
Work 12 sc, ch 1, turn (work across half of the round), continuing back across the same stitches without joining to create an oval extension. 12 sc across, then join to next unworked stitch on the original round with sl st. (Oval extension in place)
Round 7 :
Work 1 sc in next 20 sts, then 3 sc in next 2 sts (tiny shaping for thigh), 1 sc in next 18 sts. (Approximately 44 sts total)
Round 8 :
Even round: 1 sc in each st around (44)
Round 9 :
Work (4 sc, dec) x 7, remaining sc as-is to shape waist into slight narrowing. (Approx 37)
Round 10 :
Even round: 1 sc in each st around (37)
Info :
We will now form the bottom feet area and finish the lower body. Keep counts approximate; flatten the applique frequently to ensure the silhouette looks correct. The body should be slightly elongated and flat, not stuffed.
Round 11 :
Work 8 sc, (inc) in next st, 18 sc, inc in next st, 8 sc. (39)
Round 12 :
Even round: 1 sc in each st around (39)
Round 13 :
Begin shaping tail base: 10 sc, leave next 6 sts unworked (these will form a bay for tail attachment), sc in next 23 sts. (Tail bay left open)
Round 14 :
Sc around, working the 6 tail-bay unworked stitches as turning chains to maintain edge if needed. (39)
Info :
Do not fasten off yet. The head will be worked separately as a small oval and sewn to the top of this body piece. The tail will be crocheted in the next section and sewn into the tail bay. Blocking at this stage flattens seams and opens the black silhouette to show detail.
Round 15-22 :
Work 8 rounds of even sc around to build body height (8 rounds x 39 = keep the same 39 sts in each round). These rows create the flat body surface suitable for applique sewing. After round 22 fasten off leaving a long tail for sewing to runner. Block flat. (Maintain 39 sts)
Info :
Mark the top center of the body where the head will attach. Use a scrap yarn loop to mark the exact stitch. The head should be centered and sit slightly in front of the body centerline to mimic the sitting silhouette in the photo.
— Cat Head (Make 2) :
Each head is a small oval with ear shaping worked in short rows and small decreases to create facial contours.
Round 1 :
Ch 6, join with sl st to form a ring, 8 sc into ring. (8)
Round 3 :
(1 sc, inc) x 8 = 24
Round 4 :
(2 sc, inc) x 8 = 32
Round 5 :
Even round: sc in each st around (32)
Round 6 :
Short-row ear shaping: Work 10 sc, turn (do not join), 10 sc back. Continue across the small arc to shape one ear by decreasing 2 sts at the ear tip over two short rows: dec, sc across, dec. Fasten off ear tip and repeat on opposite stitch group for second ear. (Ear shaping is achieved by short rows reducing by 2-4 sts at the top)
Info :
Sew the head to the top of the body using the long tail. Position the head so ears are upright and slightly forward-tilted for a playful silhouette. Use small whip stitches around the base for a secure attachment; weave in ends on the reverse.
— Tail (Make 2) :
The curled tail is crocheted as a long cord with flat increases to produce a curled decorative tail.
Round 1 :
Using black, ch 31 (length for curl), sc in 2nd ch from hook and across (30 sc). Fasten off leaving tail for sewing. Create a firm plait by using sc in BLO on both sides to produce a slightly raised cord if desired.
Round 2 :
Optional: With smaller hook, work sctog along the long chain to round edges and create a rope-like cord. Work 1 sc in each ch around the cord and then sl st to close. Fasten off. (Cord ready to shape)
Info :
Steam or lightly wet the cord and wrap around a marker or pin to form the curled tail shape; allow to dry before sewing into the tail bay left on the body applique. Sew securely with small stitches; do not overstuff.
— Moon Applique (Make 2) :
Info :
Mond crescent shapes are worked flat in cream yarn using a small oval technique with decreasing arches to create the crescent negative space. Work with 3.5mm hook for neatness.
Round 1 :
Ch 8, join with sl st to form ring, 10 sc into ring. (10)
Round 3 :
(2 sc, inc) x 6, sc remaining 8 sts = 26
Round 4 :
Work 4 rounds of even sc to build thickness (26 sts each). Block flat.
Round 5 :
To form the crescent, fold the round over and sew a short row along one side removing 6-8 sts from the opposite edge by slip-stitch decreases across 6 sts. This forms a crescent curve. Fasten off leaving long tail for sewing.
Info :
Trim and block to shape. The crescent should be slightly raised above the runner surface when sewn on to mimic the lifted look in the photograph.
— Star Applique (Make 8) :
Round 1 :
With cream yarn, ch 6, join with sl st to form ring, ch 1. (Working in round) *Ch 3, 3 dc in ring, sl st in ring to make one petal; repeat from * 5 more times for 6 petals total. Fasten off leaving tail for sewing.
Round 2 :
Optional: For dimensional stars, once petals are made, work a second round of sc around the outer loops and create a picot on each petal tip (ch 3, sl st into base of ch-3) to create textured points. Block and sew onto runner.
Info :
Star placement is staggered around cats and moons; pin before sewing to test spacing. The sample uses 8 small cream stars distributed evenly across the runner.
— Bat Applique (Make 6) :
Round 1 :
Using black, ch 16, sc in 2nd ch from hook across to create a short wing strip (15 sc). Turn and sl st across back along the top to create a stretchy wing strip. Work short scallops across the top edge: (ch 3, 3 dc in same st, sl st) across 3 positions to form wing lobes. Fasten off.
Round 2 :
Create two small triangular ear/wing tips by ch 4, 3 sc, dec, fasten off. Sew these to the top edge of the wing strip to form a stylized bat silhouette. Block flat and sew onto runner.
Info :
Bat sizes are small and simple to make; vary wing strip length to create different bat sizes. The sample includes six bats scattered near the top and center bands.
— Assembly and Motif Placement :
Info :
Block the runner and all appliques first. Pin appliques to the runner following the placement guide: Bottom band (rows 6-18 from the short end): large cat + small crescent to the right; Middle band (rows 34-56): cat centered with moon above and bats flanking; Top band (rows 74-86): smaller bat cluster. Keep symmetry when pinning and check against both short ends.
Round 1 :
Secure each applique with sewing pins, then use matching thread or yarn and a yarn needle to whipstitch appliques to runner through the outermost stitches only. Use small, even stitches to keep the edge neat and avoid visible thread on the runner's front.
Info :
For the cat eyes, use cream yarn to embroider two almond-shaped highlights: use satin stitch or small sl st clusters to create the eye shape, add a tiny white dot for the reflection. If using safety eyes (decorative only), insert before sewing head down; otherwise, embroider for a washable finish.
— Outer Scalloped Edging :
Info :
With main color and 4.0mm hook, we will add a scalloped edge all around the runner for a finished look. Work around entire runner edge with uniform scallops spaced every 4 dc positions.
Round 1 :
Attach yarn to any corner with sl st, ch 1. Work 1 sc evenly along edge about every 4 dc to create anchors; at each corner work (sc, ch 2, sc) to maintain right angle. Join with sl st to starting sc.
Round 2 :
*Sc in same st, skip 1, work (5 dc) in next st, skip 1, sc in next st; rep along side and around corners. When you reach a corner, work (5 dc, ch 2, 5 dc) into the corner sc to create a full shell. Join with sl st and fasten off. This creates the scalloped shell border.
Info :
Block again with the scalloped edge pinned to the desired shape. Gently steam or wet-block to set scallops so the runner lays perfectly flat.
— Finishing Touches :
Round 1 :
Weave in all loose ends on the reverse using a yarn needle. Use blocking pins to set motifs and scallops square. Trim any stray fibers. Add a touch of fabric-safe glue to stubborn applique corners if needed, but sewing is preferred for durability.
Info :
If you like a slightly raised applique, use a thin layer of batting or a few loose fiberfill tufts under the applique before sewing to achieve subtle dimension. Keep dimension light for a flat finished runner that still photographs and hangs well.
Round 2 :
Care instructions: Hand wash gently in cool water with mild detergent, lay flat to dry to keep cotton from shrinking or warping. Iron on low steam if necessary with a pressing cloth to protect appliques.
This pumpkin-orange table runner brings a touch of handcrafted warmth and whimsical Halloween charm to your table! The dramatic black cat silhouettes, crescent moons, and scattered stars are simple to make yet striking in effect. With a relaxing repeating lace stitch for the body and small appliques that add personality, this is a satisfying project to finish over a weekend. Enjoy the process of blocking, pinning, and sewing each applique — the final reveal is always a delight. 🧶✨