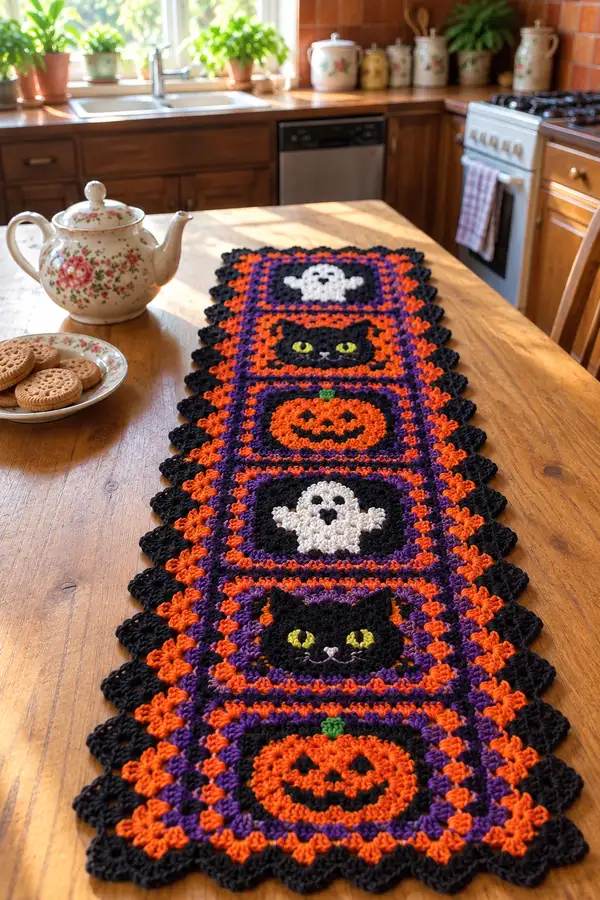
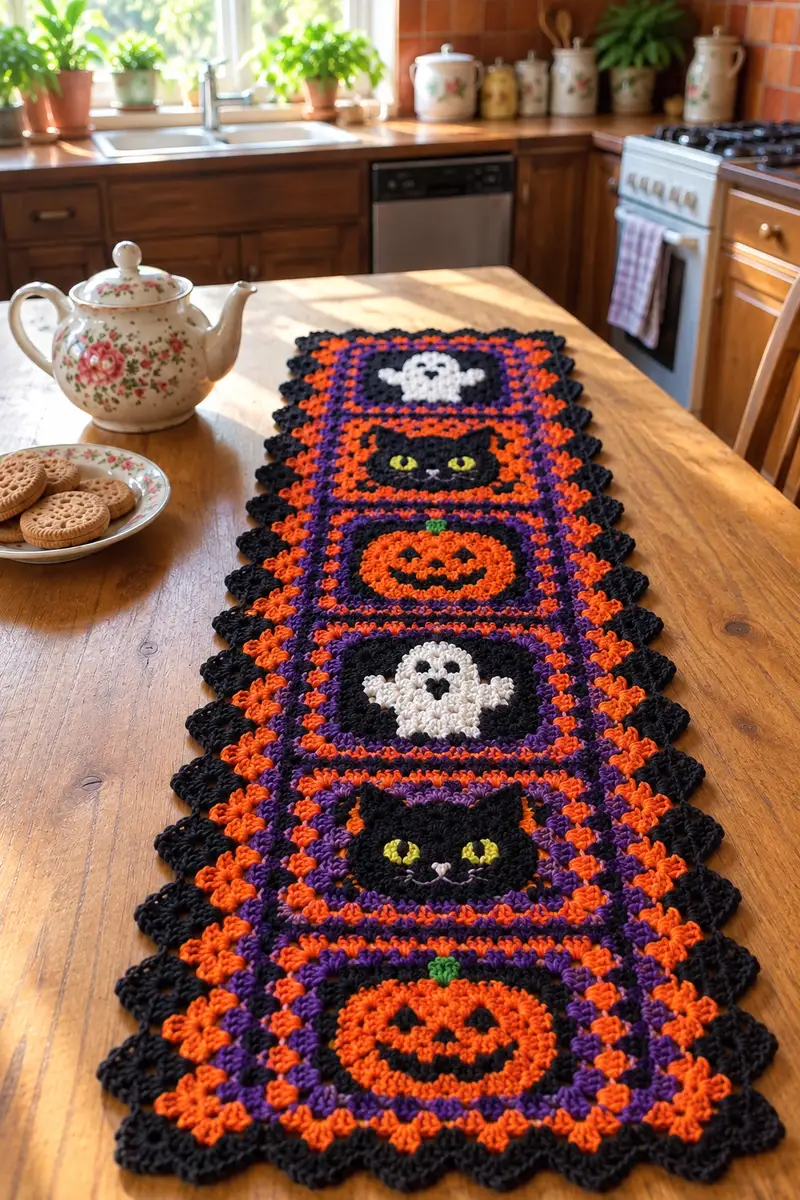
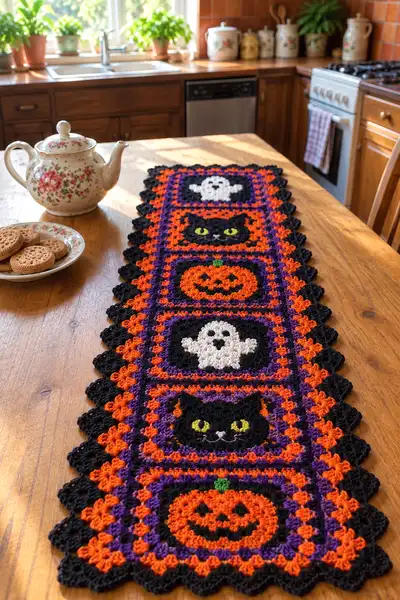
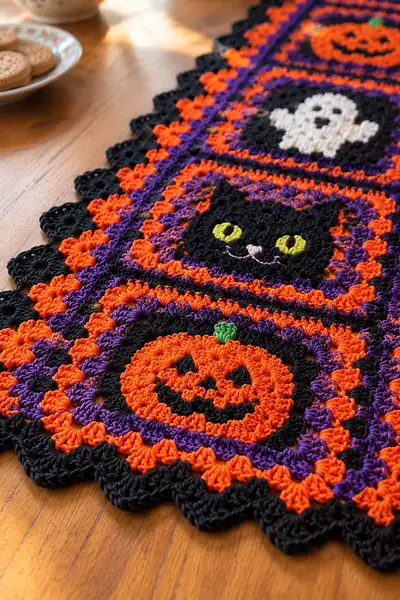
Create a festive Halloween table runner made from stacked granny-style squares featuring pumpkin, black cat and ghost motifs. This colorful runner uses bold orange, black, purple and small accent colors to create a playful, textured piece that looks beautiful on a wooden table. The pattern uses repeatable motif blocks joined with a join-as-you-go method and finished with a scalloped edge for a cozy vintage look. Suitable for makers who enjoy color changes and classic granny construction.
Progress Tracker
0% Complete
— Pattern Overview :
Info :
This pattern builds individual motif centers (pumpkin, cat, ghost) worked in rounds, then converts each circular motif into a square using granny-cluster rounds. Squares are joined with a join-as-you-go technique as you work the outer granny frames. Final outer rounds create a bold scalloped scallop edge in black. The pattern below lists each round in detail for one motif block; repeat as instructed for each motif square and for the number of squares you want in your runner.
— Pumpkin Center :
Round 1 :
With Orange, 6 sc in magic ring (6)
Round 3 :
(1 sc, inc) x 6 (18)
Round 4 :
(2 sc, inc) x 6 (24)
Round 5 :
(3 sc, inc) x 6 (30)
Info :
At this stage the pumpkin is still small and round. Keep tension even; do not over-tighten the magic ring so the center remains flat. If you prefer a slightly larger pumpkin, work one extra increase round using (4 sc, inc) x 6 to reach 36 stitches.
Round 6 :
(4 sc, inc) x 6 (36)
Round 7 :
(5 sc, inc) x 6 (42)
Round 8 :
(6 sc, inc) x 6 (48)
Info :
Change to Black at the end of this round if you want the pumpkin to sit on a black circular background instead of into the later granny frame. For the photo look, we keep pumpkin center orange and build the black frame around it in later rounds.
Round 9 :
1 sc in each st around (48)
Round 10 :
1 sc in first 2 sts, then (dec) every 8th stitch to slightly flatten; (7 sc, dec) x 6 (42)
Info :
Round 10 gently removes extra roundness to give the pumpkin a subtle convex shape. Stuffing is not used for motifs; keep this flat. If your motif begins to cup, block it flat after assembly.
Round 11 :
1 sc in each st around (42)
Round 12 :
Switch to Black for surrounding circle: join Black with sl st to any st, ch1, 1 sc in same st and 1 sc in each st around (42)
Round 13 :
With Black, change to cluster/granny transition: *dc, ch2, dc* worked into evenly spaced points around to create 4 corner chain spaces. To place corners evenly: work 9 sc along top side then make corner (*dc,ch2,dc*), repeat 4 sides. Total clusters before corner placement will be 12 groups of dc clusters placed across 4 sides (exact cluster count depends on spacing) (visual check: aim for 12 corner-adjacent segments)
Info :
This round converts the circular motif into the start of a square frame. Count carefully and place corner chain-2 spaces every quarter of the round so you have four corners. Use stitch markers to mark the three points between corners for consistency.
Round 14 :
Working into corners and sides: *(3 dc cluster in next sp), ch2, (3 dc cluster) in same sp (corner worked as (3dc cluster, ch2, 3dc cluster) in each corner space), then along side work (3 dc cluster, ch1) repeat across each side until corner reached* Repeat for all 4 sides. You should have 4 corners and even numbers of clusters on each side (aim for 7 clusters per side; total clusters 28 plus 4 corner spaces)
Round 15 :
Change to Orange for a thin pumpkin halo: join Orange into any cluster, ch3 (counts as dc), (2 dc in top of next cluster forming a full 3-dc cluster), ch1, *3-dc cluster in ch1 spaces across side, ch2 at corners* Repeat around (maintain ch2 corners) (clusters per side remain consistent from previous round)
Info :
Embroider the jack-o-lantern face on the orange center now or later. For a classic face, use Black yarn and a tapestry needle to stitch triangular eyes and a mouth. For the small green stem, use a few hdc stitches in green at the topmost round (see Face Embroidery section later).
— Pumpkin Face Embroidery :
Info :
Use a small length of Black yarn and a tapestry needle. For two triangle eyes: bring needle up at eye corner, make two tiny satin stitches forming a triangle approximately 6-8 stitches apart in the center circle. For the mouth: stitch a simple crescent with a satin/chain technique across 12-14 stitches depending on pumpkin width. Use Green yarn to add a 4-stitch stem at top center with short vertical satin stitches.
— Ghost Center :
Round 1 :
With White, 6 sc in magic ring (6)
Round 3 :
(1 sc, inc) x 6 (18)
Round 4 :
(2 sc, inc) x 6 (24)
Round 5 :
(3 sc, inc) x 6 (30)
Round 6 :
1 sc in each st around (30)
Info :
Ghost motifs in the photos have a small arm-like wing on each side — we create this shape by working a short lobed round later. Keep the main ghost relatively flat so the little arms read well inside the square frame.
Round 7 :
Shape head top: (4 sc, dec) x 5 (25)
Round 8 :
(3 sc, dec) x 5 (20)
Round 9 :
Work ghost arms: Decide which side will be left, mark the stitch where the arm will begin. From that stitch, ch1, sc across 6 sts to make a small flat arm extension in the next 6 st area, fasten off and rejoin to opposite side to create mirrored arm; continue working in the round around the remaining stitches to hold shape (20)
Info :
Do the arm lobes as small attached flaps — they will be encased later in the black granny frame. Be sure to bury the ends neatly to reduce bulk.
Round 10 :
Switch to Black: join Black, sc evenly around the ghost body (20). Place 4 evenly spaced stitches between the arms to prepare for corner placement.
Round 11 :
Convert to square base: *3-dc cluster, ch2 (corner), 3-dc cluster* in marked corner spaces; along sides work (3-dc cluster, ch1) across to corners. Repeat for 4 sides (aim for 5 clusters per side plus corners)
Round 12 :
With Purple, work one round of granny clusters around frame: join Purple in any corner, (3-dc cluster, ch2, 3-dc cluster) in corner ch2, then along side work (3-dc cluster, ch1) x (clusters per side) until next corner; repeat around. This creates a purple stripe between black granny rounds.
Info :
Embroider ghost eyes and mouth once squares finish: use Black yarn and make small satin stitches for eyes and an oval mouth. Position eyes approximately two rounds below the top center of the white body and spaced about 6-8 stitches apart.
— Cat Center :
Round 1 :
With Black, 6 sc in magic ring (6)
Round 3 :
(1 sc, inc) x 6 (18)
Round 4 :
(2 sc, inc) x 6 (24)
Round 5 :
(3 sc, inc) x 6 (30)
Round 6 :
1 sc in each st around (30)
Info :
To create the cat's head silhouette and ear points, we will shape the top and work short ear triangles later by removing some stitches and then adding tiny triangle flaps attached to the top of the circle.
Round 7 :
(4 sc, inc) x 6 (36)
Round 8 :
Even round: 1 sc in each st around (36)
Round 9 :
Shape top: 1 sc in first 6 sts, dec, 1 sc in next 10 sts, dec, 1 sc in next 6 sts, dec, 1 sc in remaining sts (33) — this gentle shaping forms a slight chin area
Round 10 :
Create ear points: find top center and mark. From top center, work a small triangular ear as follows: ch1, sc in next 3 sts, hdc in next, sc2tog to point, fasten off leaving tail. Rejoin to opposite symmetry point and repeat ear triangle for the other ear. Continue round around remaining head stitches to maintain circle shape (31 remain around after ear shaping)
Info :
Embroider eyes with Yellow yarn: make small almond shapes using satin stitch with the long axis horizontally, and stitch a small vertical slit in the center with black yarn for pupils. Use Pink for a tiny nose and two curved whisker lines each side in light pink or white.
Round 11 :
Switch to Purple: join Purple and work one granny-style cluster round to begin square conversion: (3-dc cluster, ch2 corner) in corners and (3-dc cluster, ch1) across sides; use cluster counts matching previous frame rounds so the square edges remain even (aim for 6 clusters per side plus corners)
Round 12 :
With Orange, work an accent round: single crochet evenly in back loops only around the purple cluster round to create a frame ridge (count equals total sts from previous cluster join, typically approx 72-84 sc depending on clusters)
Info :
Make sure to keep ears pointed: when working the cluster rounds around ear area, avoid flattening the ear points by placing clusters slightly to the side rather than directly on the tip. Small pins can help hold ears up while you work surrounding rounds.
— Granny Frame (common to every square) :
Round 1 :
With Black, join to any corner ch2 space made on the motif and work (3-dc cluster, ch2, 3-dc cluster) into each corner ch2 to define corner; along sides work (3-dc cluster, ch1) across until next corner (this is the first true granny frame round)
Round 2 :
Continue in Black: sl st to center of next side space, ch3 (counts as dc), then (3-dc cluster, ch1) across sides, working (3-dc cluster, ch2, 3-dc cluster) in each corner. Maintain even cluster counts on each side to keep square proportions consistent.
Info :
If your motif center is slightly too large or small, adjust the number of clusters per side by adding or subtracting one (3-dc cluster, ch1) repeat, but keep the same change on all sides to retain symmetry.
Round 3 :
Switch to Purple: work a granny round in Purple. In each corner work (3-dc cluster, ch2, 3-dc cluster), and along sides work (3-dc cluster, ch1) repeat maintaining the cluster counts carried from the Black rounds (this creates a purple stripe)
Round 4 :
With Orange, work a thin accent round: join Orange and make 1 sc in between clusters around the square frame to add definition. Work in back loops only for a ridge effect: 1 sc in each space BLO (approx total sc equals total cluster spaces)
Round 5 :
With Black, repeat a full granny-cluster round as in Round 1 to enlarge the square: (3-dc cluster, ch1) along sides and corners (3-dc cluster, ch2, 3-dc cluster). This is the outer frame that will be used for joining squares.
Info :
Place a stitch marker in one corner (top-left as you hold motif with motif center facing you). This corner will be your reference point for joining and for alignment of embroidered faces later.
Round 6 :
Repeat the Purple accent granny round as in Round 3 to create a repeating stripe effect around the motif. At the end of this round, you should have a square that visually matches the one in the photographs and ready to join to adjacent squares.
— Repeat Counts Note :
Info :
Across most motif squares you will have performed about 12-16 rounds depending on additional shaping for ears and arms. When assembling the runner, keep every square the same number of granny rounds so edges match when joining. If one square is larger, add one more outer granny round in Black to equalize width.
— Join-As-You-Go (JAYG) Method for Runner Assembly :
Info :
After completing the outermost granny frame round on the first square, leave it aside as the base. For each subsequent square, on the final outer black granny round you will join to the previous square row by row using join-as-you-go: replace ch1 between two clusters with sl st into corresponding ch1 space on previously completed square to join them seamlessly.
Round 1 (joining round for second square) :
Work first corner as usual, then when you reach the side that will meet an already finished square, instead of ch1 between clusters, sl st into the ch1 space of the corresponding side on the finished square, ch1 and continue. Repeat sl st joins at each ch1 side space across that side to secure. Continue around remaining sides normally. Count total joins (should equal number of cluster-side spaces) and check alignment visually.
Info :
Work slowly across the joined side so the two squares sit flat. Use pins to align centers before joining; this prevents twisting. If joining several squares into a column, join them one at a time to the growing runner.
Round 2 :
Continue joining third and subsequent squares in the same fashion: join each new square along the long edge to the previous square. When adding a square at a corner (adding width), join on two sides. Keep your joins consistent: always join into the ch1 spaces between clusters, not into the top of clusters.
Info :
For a runner with four motif squares in a column (pumpkin, cat, ghost, pumpkin) you will join three seams. For a longer runner, repeat squares alternately to create a pleasing pattern repeat. The photos show an alternating pumpkin-cat-ghost vertical repeat.
— Inner Border & Stabilizing Rounds :
Round 1 :
With Purple, join to any seam space and work a round of 1 sc in every ch1 or ch2 space around the entire joined panel to create an even inner border. Where squares are joined, be sure to work 1 sc through both layers (approx total counts will vary by runner length - count to ensure evenness).
Round 2 :
With Orange, work one round of 1 sc in each st in BLO to create a ridge. This thin orange band pops between the black outer frames and the purple inner border.
Info :
If your panel is slightly warped after joining, this is the round where you can add or skip a few single crochets at strategic places to square off the edges. Keep equal adjustments across the full length to avoid slanting.
Round 3 :
With Black, work a granny cluster stabilization round: (3-dc cluster, ch1) around, placing (3-dc cluster, ch2, 3-dc cluster) at corners and at each seam junction every time two squares meet to visually reinforce the join. This prepares the panel for the decorative scalloped edge.
Info :
When working through join seams, crochet through both layers to hold joins tightly. If your yarn pool is thick at seam intersections, work a slightly looser tension on these stitches to prevent puckering.
— Outer Scalloped Edge :
Round 1 :
With Black, create a foundation for scallops by working 1 sc in every ch1 space and 1 sc in top of each cluster around the whole panel. This evens out the outer perimeter and readies for scallops. Count perimeter points (this number equals number of scallops).
Round 2 :
Scallop round: *(skip 1 sc, 5 dc in next st), skip 1 sc, sl st in next sc* repeat around. Each 5-dc shell creates a bold scallop. Depending on your stitch count, you will have a shell every 5-7 stitches; adjust spacing to make scallops even. Typically expect 28-36 scallops across the long runner edge, spaced evenly.
Info :
For a crisp scallop, keep your 5-dc shells in the same relative position across the whole piece. If you need to adjust, add an extra sl st occasionally to maintain even spacing. Block scallops after finishing for the best shape.
Round 3 :
Optional deep scallop: slip to middle of each shell, ch1, work (sc, hdc, 3 dc, hdc, sc) in same space to create a layered scallop. Fasten off and weave in ends.
Info :
Blocking tip: wet-block the runner flat and pin scallops open to retain the wavy edge. Use steam or a lightly damp towel depending on yarn fiber. Acrylic needs a different approach than cotton: use steam carefully or use blocking wires held with pins.
— Finishing Embroidery & Details :
Info :
Embroider faces on pumpkin, cat and ghost squares using small lengths of yarn and a tapestry needle. For the cat: yellow almond eyes, a pale pink nose and white whisker lines. For pumpkin: black triangular eyes and crescent smile, green stem loop. For ghost: small black circle eyes and an oval mouth. Keep stitches small and tidy.
Info :
Weave all ends on the back of the runner through a few stitches and trim. For added security at high-traffic surfaces, secure embroidery with a small dab of fabric glue on the backside of the knot, if desired.
— Size and Repeat Notes :
Info :
The sample runner in the photos has four motif squares vertically and measures approximately 12" wide by 48-56" long when worked in worsted weight yarn with a 4.0mm hook. To adjust size, add more motif squares, or use thicker yarn and a larger hook for a chunkier runner.
— Troubleshooting & Tips :
Info :
If corners do not sit flat, add one extra cluster into the corner ch2 space on the outer rounds, or adjust tension. If one square is bigger, add an extra outer granny round to match. Always pin and block before final embroidering to get true dimensions.
This Halloween granny runner brings classic crochet charm to your table with cheerful spooky faces and joyful colorwork. Each square is full of personality — pumpkin smiles, a curious black cat, and a friendly ghost — all framed by bold black, purple and orange granny clusters. The scalloped edge gives a vintage finish that looks lovely on wooden furniture and welcomes guests with seasonal cheer. Happy hooking and enjoy dressing your table for the season! 🎃🕸️