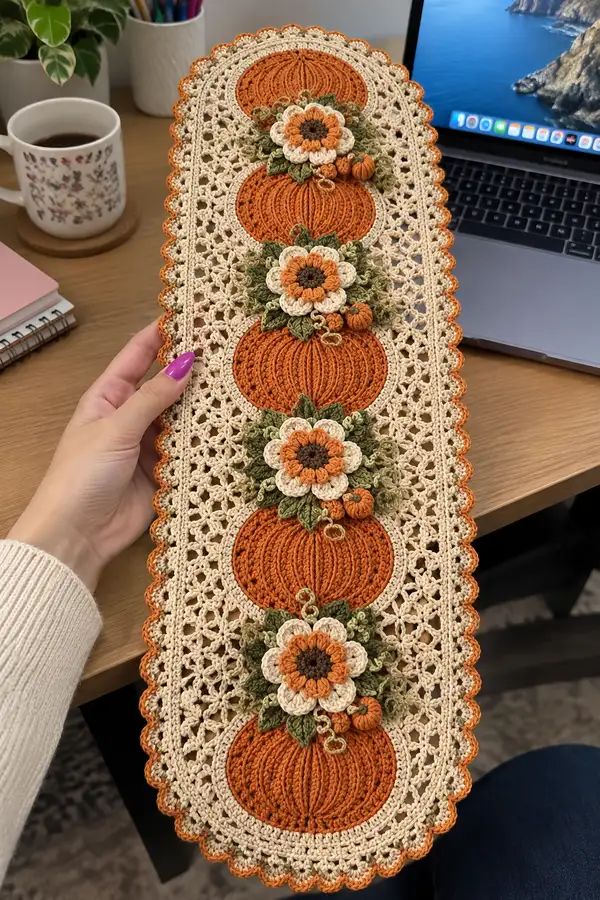
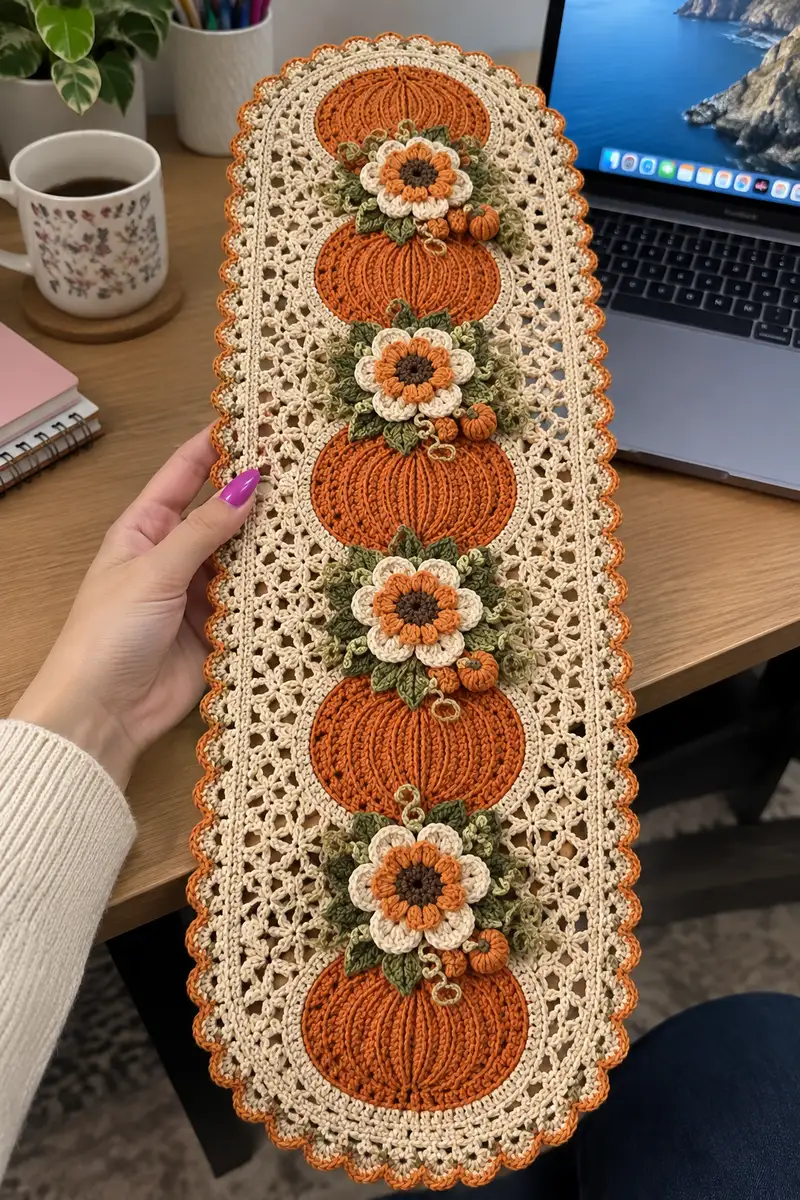
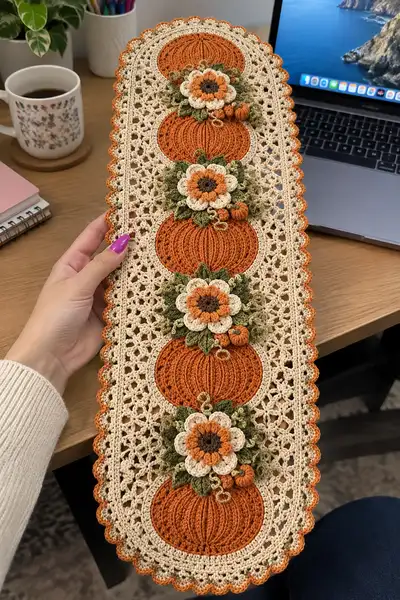
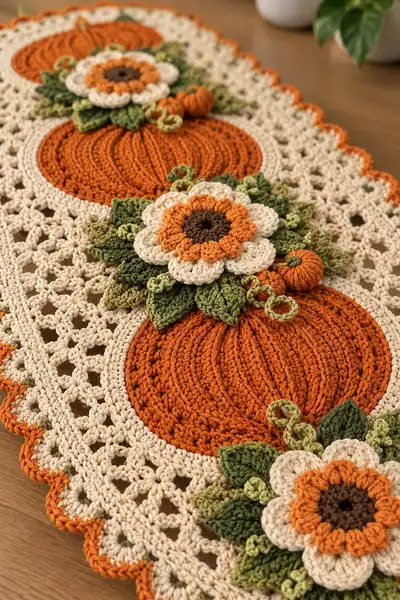
A warm, detailed pattern for a long pumpkin-and-flower table runner worked in cotton yarn. Features four raised pumpkin motifs with layered floral bouquets, leafy vines, lacy lattice background and a scalloped edge. Uses textured ribbed pumpkin stitches and 3D tiny pumpkins and petals for charming autumn decor. Clear, modular sections make assembly straightforward and customizable for different lengths.
Progress Tracker
0% Complete
— Pumpkin Motif (Make 4) :
Round 1 :
6 sc in magic ring (6)
Round 3 :
(1 sc, inc) x 6 (18)
Round 4 :
(2 sc, inc) x 6 (24)
Round 5 :
(3 sc, inc) x 6 (30)
Round 6 :
(4 sc, inc) x 6 (36)
Round 7 :
(5 sc, inc) x 6 (42)
Round 8 :
(6 sc, inc) x 6 (48)
Info :
Join in pumpkin orange. These first eight rounds build a flat disc; tension should be even. Do not pull ring closed so motif lays flat. Place a marker at Round start to keep track.
Round 9-12 :
1 sc in each st (48)
Info :
Work two to four even rounds to create the base height. If you prefer a shallower pumpkin, stop at Round 10. Keep tension consistent to avoid warping.
Round 13 :
1 sc in next 4 st, (fpdc around next st, sc in next st) x 8, 1 sc in remaining 4 st (48)
Round 14 :
1 sc in next 3 st, (fpdc around fpdc of prev round, sc in next st) x 8, 1 sc in remaining 3 st (48)
Info :
Begin creating the ribbing for the pumpkin. Use fpdc to make raised ridges. Count carefully: there are 8 rib segments around the circle. Working fpdc front-post stitches into the fpdc of the previous round creates continuous ribs.
Round 15-18 :
Repeat Round 14 (1 sc between each fpdc) (48)
Round 19 :
1 sc in each st BLO for one round to tighten the rib bases (48)
Round 20 :
1 sc in next 2 st, (fpdc around next st, sc in next 4 st) x 8, 1 sc in remaining 2 st (48)
Info :
Alternate fpdc spacing to deepen rib valleys. If ribs are too shallow, add an extra fpdc round. These fpdc columns will be the visual vertical ribs of the pumpkin.
Round 21-24 :
Continue to alternate one sc rounds and fpdc-placement rounds to develop pronounced ridges. Maintain 48 sts at end of each round (48)
Round 25 :
(6 sc, dec) x 6 (42)
Round 26 :
(5 sc, dec) x 6 (36)
Info :
Begin to cup the pumpkin slightly by decreasing. Do not over-decrease; you want a gentle dome so the motif reads as a raised pumpkin when appliqued to the lattice.
Round 27 :
(4 sc, dec) x 6 (30)
Round 28 :
(3 sc, dec) x 6 (24)
Round 29 :
(2 sc, dec) x 6 (18)
Round 30 :
(1 sc, dec) x 6 (12)
Info :
Fasten off leaving long tail for sewing. Puff slightly by stuffing the center lightly with a small amount of fiberfill if you want the pumpkin to be puffy; otherwise leave flat as applique. Weave tail through remaining 6 sts and pull tight to close, then flatten and leave tail for sewing.
— Small 3D Pumpkin (Make 4 assorted) :
Round 1 :
6 sc in magic ring (6)
Round 3 :
(1 sc, inc) x 6 (18)
Round 4 :
(2 sc, inc) x 6 (24)
Info :
These tiny pumpkins are fully 3D and should be stuffed. Work tightly and use smaller hook if necessary to avoid gaps. Leave a long tail for sewing.
Round 5-7 :
1 sc in each st (24)
Round 8 :
(3 sc, dec) x 6 (18)
Round 9 :
(2 sc, dec) x 6 (12)
Info :
Begin stuffing firmly but not overstuffed; the little pumpkins should retain a soft rounded shape. Use fiberfill pushed in small bits.
Round 10 :
(1 sc, dec) x 6 (6)
Round 11 :
6 dec (3) - optional finish with adjustable closure
Info :
Do not fasten off yet. Use a needle and the long tail to run several lengthwise passes through the pumpkin to make ribbing (wrap tail around the pumpkin and stitch back and forth to create sectioned ribs). Secure and finish. Add small stem by chaining 6-8 with green and sewing into center.
— Flower (Layered Petal Applique - Make 4) :
Round 1 :
6 sc in magic ring with dark brown (6)
Round 3 :
1 sc in each st (12)
Info :
Change to orange for inner petal layer. Keep rounds tight. This center will sit directly on top of the pumpkin motif when assembled.
Round 4 :
(ch2, sl st in next st) x 6 around to make 6 picot-like petal anchors, join with sl st (12)
Round 5 :
*Into each ch-2 space: (sc, hdc, 3 dc, hdc, sc), sl st into next st* x 6 — forms 6 rounded petals (approx 6 petals)
Info :
Fasten off orange inner layer. Attach cream color to the base of the petals for larger outer petals. Outer petals are worked around or behind inner petals to create two-tier look.
Round 6 :
Join cream behind petals; *sc around base of petal, into space between petals: (sc, hdc, 3 dc, hdc, sc)* x 6. Finish and fasten off, leaving long tails for sewing (approx petals remain 6)
Round 7 :
Optional: Add a small cream ruffle by picking up stitches around outer edge with *sc, ch2, sl st* repeat to create scalloped finish
Info :
Use the long tails to sew the flower layered unit to the leaf cluster and then to the pumpkin. Stagger petal layers for a full look.
— Leaf (Make multiple: dark green 8, light green 6, assorted small foliage) :
Round 1 :
Ch 8, sc in 2nd ch from hook, hdc in next, dc in next 2, hdc next, sc next, sl st in last (leaf spine made) (7)
Round 2 :
Turn and sc across other side: sc in next, hdc, dc 2, hdc, sc, sl st join at base. Fasten off (leaf approx 8 sts across)
Round 3 :
Optional: Work BLO around to give a defined crease: 1 sc in each st BLO across to create texture
Info :
Make leaves in two shades of green for depth. Make several sizes: ch6-ch10 for variety. Use the long tails to sew slightly under the flower base and to the sides of each pumpkin.
— Lacy Lattice Background (Main Runner Panel) :
Info :
The runner is constructed as an oval-ended panel with a repeated lattice stitch between pumpkin placements. Work the foundation as a closed tube: start with a chain foundation of 40 and join, or begin with a magic ring elongated oval. For clarity this pattern uses a chain foundation method that creates an oval of approx 12-13" wide and length suitable for 4 pumpkin placements (approx 36" before blocking).
Foundation :
Ch 42, join with sl st to first ch to form ring (42)
Round 1 :
Ch3 (counts as dc), dc in same ch, 2 dc in next 8 ch, (2 dc, ch2, 2 dc) in next ch (end round will spread to form oval), continue 2 dc in next 8 ch, (2 dc, ch2, 2 dc) at opposite long-center, slip to join (approx 58-66 depending on spacing)
Info :
The goal of Round 1 is to establish two short caps at both ends so the panel will be rounded. Place markers at the centers of each long side to later align pumpkin positions.
Round 2 :
Ch1, sc in each st around connecting rounds evenly; when you reach corner ch-2 spaces work (sc, ch2, sc) to reinforce the corner openings. Join with sl st (same count as prev round)
Round 3 :
Ch3, *skip 2 sc, (dc, ch1, dc) in next sc (creates open diamond), repeat from * around, placing (dc, ch1, dc) in corner ch-2 spaces. Join (maintain even lattice spacing)
Round 4-7 :
Repeat Round 3 to build height of lattice. Keep consistent count so diamonds line up vertically. After Round 6 evaluate spacing to match pumpkin motif diameter; adjust rounds up/down to make lattice openings large enough to accept pumpkin appliques.
Info :
Use stitch markers at the four points where pumpkins will be sewn. Measure between markers to ensure equal spacing — aim for 8-9" between pumpkin centers. The lattice should remain slightly loose and open; block flat to set shape.
Round 8 :
Work a firm round of sc around to stabilize and create a raised frame for each pumpkin position. If desired, work this round in BLO to create a ridge (sc in each st BLO) (same stitch count)
Round 9 :
Working one round of sc, create an inner circle around each pumpkin placement by marking a 9-10 st circle of sc that will receive the pumpkin. Do not cut yarn; place temporary stitch markers in these inner circles for each of the four pumpkin positions.
Info :
The inner circle is the area the pumpkin motif will be sewn to. You want it stable and slightly firmer than the lattice. If you used BLO to create a ridge, the pumpkin will sit slightly raised.
— Pumpkin Applique Placement & Attachment :
Info :
Pin each completed pumpkin motif centered over the marked inner sc-circles in the lattice. Space evenly, leaving approx equal distance from one motif to the next and from the top/bottom rounded ends. The bottom and top edges should leave approx 1-1.5" of lattice before the scalloped edge.
Attachment Step 1 :
Using long tail from pumpkin, whip stitch through pumpkin back loops and the sc base of lattice inner circle. Use close, small stitches to hide seam. Work all the way around each pumpkin and secure.
Info :
Make sure the ribs radiate vertically for a realistic pumpkin look. Adjust placement if necessary before committing to sewing. Avoid pulling the lattice too tightly; keep pumpkins slightly domed.
— Floral Bouquet Assembly (Make 4 bouquets) :
Info :
Each bouquet sits at the top-center of its pumpkin. Assemble one flower, 3-4 large leaves, 3 small leaves, one small 3D pumpkin and 2-3 curly vines. Use long tails to sew all elements together before attaching to runner.
Step 1 :
Layer the dark brown flower center, orange inner petals, and cream outer petals. Use ladder stitch to secure layers concentrically. Keep petals slightly offset for fullness.
Step 2 :
Sew leaves into a fan behind the flower: dark green leaves closest to flower, then lighter green leaves layered behind. Vary sizes for natural effect.
Step 3 :
Sew small 3D pumpkin adjacent to the flower cluster, securing base to pumpkin motif and top with a tiny stem. Create curly vines by chaining 10-20 with light green and slip stitching back along chain to curl, then sew into place.
Info :
Use small stitches and sew through the pumpkin motif base and lattice so bouquet is anchored to both the pumpkin applique and the lattice. Reinforce with a couple of hidden stitches behind the lattice for stability.
— Scalloped Border Edge :
Round 1 :
Join cream to any outer edge st; ch1, sc evenly around the outer edge of entire oval to clean up; place 3 sc in each corner/rounded end increase to keep curve smooth (maintain count approx)
Round 2 :
Switch to orange for a single round: *sc in next 3 sts, picot (ch3, sl st in first ch) in next st* repeat around to create small orange dots along edge. Join and fasten off.
Round 3 :
Join cream again and work scallop: *(sc, hdc, 3 dc, hdc, sc) in next space, skip 2 sc* repeat around to create rounded scallops. Adjust to keep scallops even along long sides and cap ends. Join and fasten off.
Info :
Block scalloped runner flat after edging to allow scallops to set. Use pins and steam gently or wet-block. The orange dot round adds a pop of color matching the pumpkins.
— Finishing Touches :
Info :
Weave in all tails securely. Use a tapestry needle to hide ends beneath stitches and inside petals/leaves so they are not visible on the front. Trim any excess yarn.
Optional :
Starch or lightly spray with fabric stiffener if you want the runner to sit very flat. Do not saturate floral pieces; test on a scrap first.
Info :
Final blocking is essential: Lay runner flat on blocking mats, pin every scallop, and gently steam/press until dry. This helps lattice open and pumpkins to sit correctly.
This pumpkin floral runner is a joyful celebration of texture, color and detail — perfect for autumn displays and harvest tables. Each raised pumpkin and layered flower brings a handmade charm to your home, while the lacy lattice keeps the piece elegant and light. I hope assembling each bouquet feels as rewarding as the final reveal; it's a piece you can be proud to display or gift. 🧡🌿 Happy hooking and enjoy every stitch!