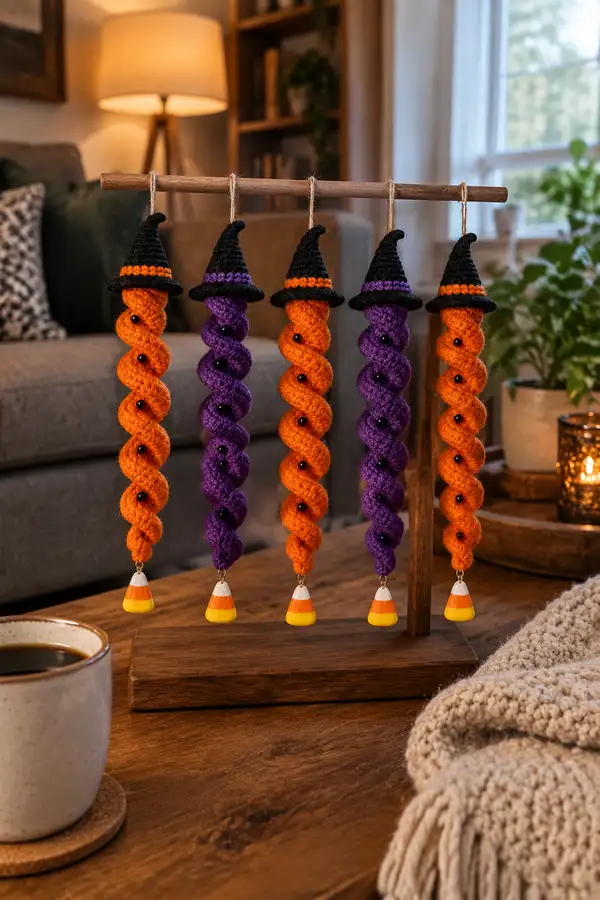
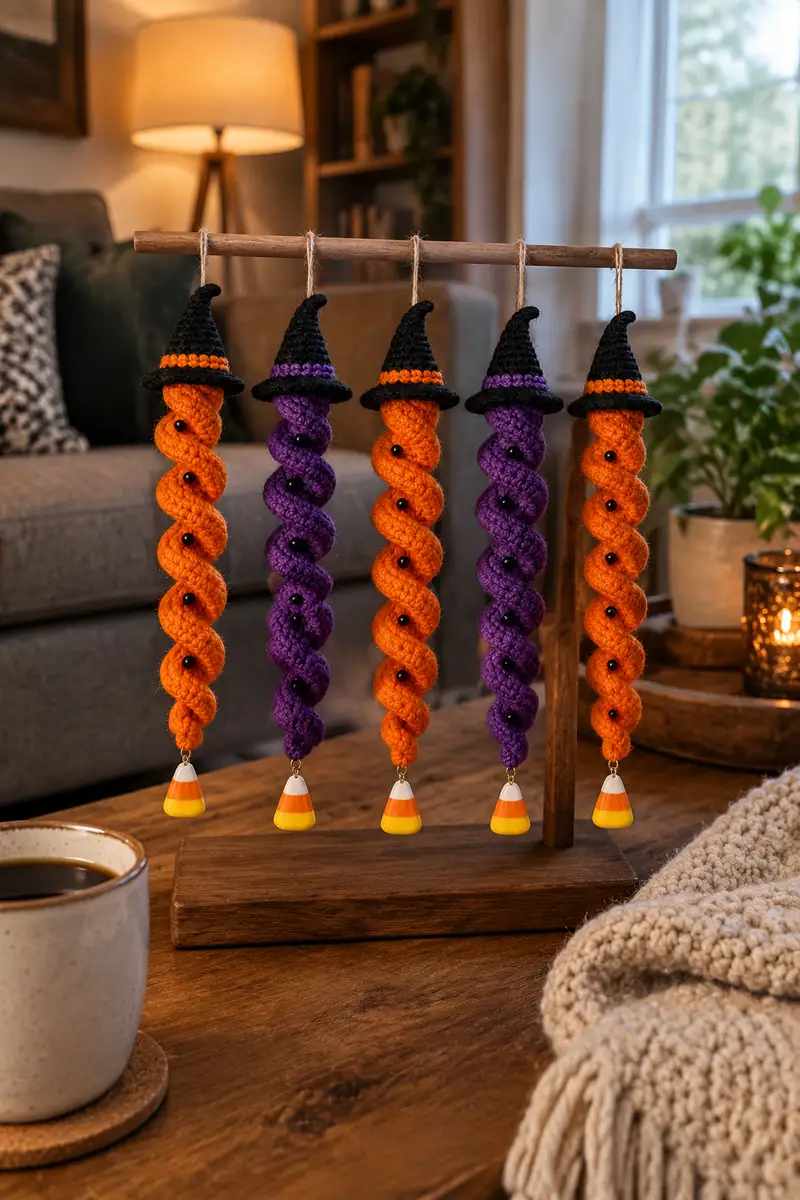
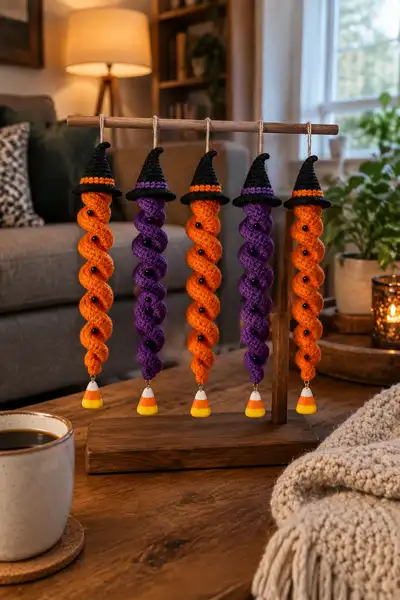
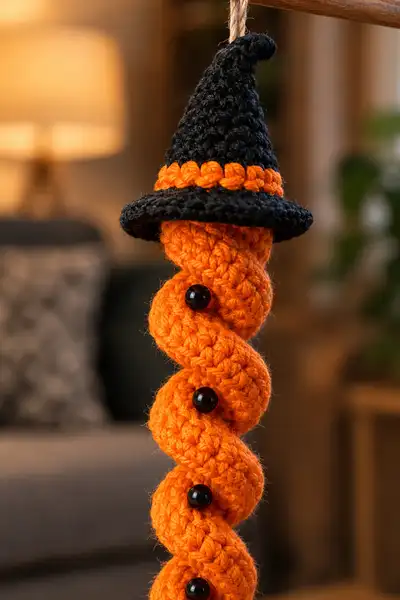
Create a festive Halloween hanging garland of twisted spiral ornaments topped with tiny witch hats. Each ornament features a corkscrew spiral in orange or purple, glossy black bead accents, a crocheted pointed hat with contrasting band, and a candy-corn dangle. This pattern includes step-by-step instructions for making multiple ornaments and assembling them into a charming display-perfect for mantel, window, or doorway.
Progress Tracker
0% Complete
— Spiral (Main Corkscrew Body) :
Round 1 :
6 sc in magic ring (6)
Round 3 :
1 sc in each st (12)
Info :
Place a stitch marker in the first stitch and work in continuous rounds (do not join or ch1). This tube will form the body of your spiral. Use tight tension to avoid stuffing showing through.
Round 4 :
1 sc in each st (12)
Round 5 :
(1 sc, inc) x 6 (18)
Round 6 :
1 sc in each st (18)
Round 7 :
1 sc in each st BLO (18)
Info :
The BLO round creates a subtle ridge which helps the spiral to catch and twist when shaped later. If you prefer a smoother tube skip the BLO instruction and work normally.
Round 8 :
(1 sc, dec) x 6 (12)
Round 9 :
1 sc in each st (12)
Round 10 :
1 sc in each st (12)
Info :
We will now begin the repeating bulge cycle that produces each corkscrew twist. Each bulge cycle is 4 rounds: increase to create the puff, hold, decrease back to the base tube, and a spacer round. Repeat this cycle for the length you want the ornament to be. Standard ornaments in the photo have 9-10 bulges.
Round 11 :
(1 sc, inc) x 6 (18)
Round 12 :
1 sc in each st (18)
Round 13 :
(1 sc, dec) x 6 (12)
Round 14 :
1 sc in each st (12)
Info :
Lightly stuff the tube now using small amounts of fiberfill; the bulge effect is created by the increased rounds plus mild stuffing. Do not overstuff; the spiral should remain flexible.
Round 15 :
(1 sc, inc) x 6 (18)
Round 16 :
1 sc in each st (18)
Round 17 :
(1 sc, dec) x 6 (12)
Round 18 :
1 sc in each st (12)
Info :
Attach black beads: using a sewing needle and short thread, sew a small bead into the middle of each bulge shortly after completing the '1 sc in each st (18)' round while that bulge is formed (for example, attach a bead after each Round 16). Pin bead positions before sewing to ensure they align in a spiral line.
Round 19 :
(1 sc, inc) x 6 (18)
Round 20 :
1 sc in each st (18)
Round 21 :
(1 sc, dec) x 6 (12)
Round 22 :
1 sc in each st (12)
Info :
After three bulge cycles, check the length and spacing of your bulges by laying the tube in a loose spiral. Each bulge should sit slightly offset from the previous, creating the corkscrew look when twisted. Adjust stuffing if bulges are too flat or too tightly packed.
Round 23 :
(1 sc, inc) x 6 (18)
Round 24 :
1 sc in each st (18)
Round 25 :
(1 sc, dec) x 6 (12)
Round 26 :
1 sc in each st (12)
Round 27 :
(1 sc, inc) x 6 (18)
Round 28 :
1 sc in each st (18)
Round 29 :
(1 sc, dec) x 6 (12)
Round 30 :
1 sc in each st (12)
Info :
If you want a longer ornament, continue repeating Rounds 11-30 until you have achieved the desired number of bulges. Ten bulges is a good standard for an ornament roughly 18-22 cm long; eight bulges will make it shorter. Remember to add beads on the '18' rounds as shown earlier.
Round 31 :
(1 sc, inc) x 6 (18)
Round 32 :
1 sc in each st (18)
Round 33 :
(1 sc, dec) x 6 (12)
Round 34 :
1 sc in each st (12)
Round 35 :
(1 sc, inc) x 6 (18)
Round 36 :
1 sc in each st (18)
Round 37 :
(1 sc, dec) x 6 (12)
Round 38 :
1 sc in each st (12)
Info :
Begin tapering the end of the spiral so it finishes neatly for the candy-corn dangle. Over the next rounds we will gradually reduce the circumference and secure the end loop for attaching the dangle hardware.
Round 39 :
(1 sc, dec) x 6 (8)
Round 40 :
1 sc in each st (8)
Round 41 :
1 sc in each st (8)
Round 42 :
(1 sc, dec) x 2 (6)
Round 43 :
1 sc in each st (6)
Info :
Fasten off leaving a long tail (~30 cm) for attaching the candy-corn dangle and for securing the final end to the internal cord. If using wire internally, insert it now and fold the end to avoid sharp points.
Round 44 :
With the long tail, sew the last 6 sts together or weave tail through remaining stitches and pull closed to minimize opening. Secure with knot and weave tail inside the tube. Trim excess yarn close to the work.
Info :
Gently twist the finished tube into a spiral shape. The bulges will sit as rounded segments; if needed, use a few hidden stitches to tack the spiral turns together so the corkscrew shape holds. Tacking is done by sewing into the underside of one bulge and through the next so the spiral holds the twist.
— Witch Hat (Top Cone) :
Round 1 :
6 sc in magic ring (6)
Round 3 :
(1 sc, inc) x 6 (18)
Round 4 :
(2 sc, inc) x 6 (24)
Round 5 :
(3 sc, inc) x 6 (30)
Round 6-10 :
1 sc in each st (30)
Info :
These rounds build the main height of the cone. Work without joining to keep a smooth spiral of stitches. After Round 10 you will have a cone height suitable for a small witch hat perched on top of the spiral. Try the hat on the spiral (without sewing) to check fit; trim or add rounds to reach desired height.
Round 11 :
(3 sc, dec) x 6 (24)
Round 12 :
(2 sc, dec) x 6 (18)
Round 13 :
(1 sc, dec) x 6 (12)
Info :
Fasten off leaving a long tail for sewing the cone to the brim and to the top of the spiral. Optionally stuff the tip lightly with a small amount of filler to make the top keep a rounded look; the hat in the photo is slightly structured.
— Hat Brim :
Round 1 :
Ch 2, 8 sc in second ch from hook, sl st to join to form a small circle (8)
Round 3 :
(1 sc, inc) x 8 (24)
Round 4 :
(2 sc, inc) x 8 (32)
Round 5 :
(3 sc, inc) x 8 (40)
Round 6 :
1 sc in each st (40)
Info :
Work the brim flat in joined rounds or continuous rounds depending on preference. If joined, slip stitch to start of round and ch1 between rounds for a tidy edge. Slight stiffness is helpful so the brim flares; if desired, work the brim with a slightly smaller hook for more structure.
Round 7 :
HDC in each st around for a raised edge (40)
Info :
Center the cone on the brim and sew the cone's base to the brim's inner circle using the cone's long tail. Use even stitches so the cone stands upright and the brim forms a neat circle around it.
— Hat Band and Decoration :
Round 1 :
With contrast color (orange or purple), sl st around the base of the cone where it meets the brim, placing 1 sl st in every 2-3 brim sts to form a narrow band (work about 12-14 sl sts depending on fit)
Round 2 :
Work 1 sc in each sl st around (12-14)
Info :
Alternatively, for a piped effect, work a row of puff stitches or crab stitch (reverse sc) around the brim intersection to emphasize the band. We used a row of contrasting sc for a clean band in the photos.
— Candy Corn Dangle :
Round 1 :
Using white yarn, 6 sc in magic ring (6)
Round 3 :
1 sc in each st (12)
Info :
Switch to orange yarn. The candy-corn charm is small and formed in three color stripes. We work in joined rounds to create short height. Use slip stitches to change color neatly and weave in color joins later.
Round 4 :
With orange, (2 sc, inc) x 3 (15)
Round 5 :
1 sc in each st (15)
Round 6 :
Switch to yellow; (3 sc, inc) x 3 (18)
Round 7 :
1 sc in each st (18)
Round 8 :
Ch 6, sl st back along the chain to form a small loop for jump ring attachment (or leave a long tail to stitch to the spiral end)
Round 9 :
Fasten off leaving a long tail to sew the charm into the bottom of the spiral. If using metal candy-corn charms, you can simply attach them with a small jump ring instead of crocheting.
Info :
To make the candy-corn dangle more dimensional, lightly stuff with a tiny pinch of fiberfill before closing. Attach an eye pin or jump ring through the top loop to hang the charm from the spiral bottom.
— Hanging Loop :
Round 1 :
At the top of the hat, pull a length of jute or yarn through a stitch and knot to create a loop approximately 10-12 cm long. Alternatively, ch 20 with the working yarn and sl st to the base and fasten off.
Info :
Use a sturdy cord for hanging multiple ornaments on a wooden dowel; knot and secure ends with fabric glue if desired. Adjust loop length to your display height.
— Finishing Touches and Assembly Prep :
Round 1 :
Using the long tail from the hat cone, sew cone base to the top opening of the spiral tube. Insert a few stitches through the top 6 stitches of the spiral (or around the tube if you reduced to 6) and through the brim inner ring, spacing evenly. Pull taut to secure.
Round 2 :
Sew brim seam neatly around the cone base. We recommend using small whip stitch or ladder stitch to make the join less visible. Weave in and bury yarn tails inside the spiral.
Info :
Where the spiral meets the hat, pin the hat and check orientation. The front of the spiral should align with the hat band so the bead line sits centered under the brim. Adjust before final stitching.
Round 3 :
Sew the candy-corn charm to the small loop left at the bottom of the spiral. If you created a chain loop, attach a jump ring or stitch the chain loop to the internal tail and knot securely. If using a metal charm, use a small split ring or jump ring to attach it to the folded tail at the tip.
Round 4 :
Attach beads: sew each bead into the middle of the bulges you marked earlier. Use short strong thread, knot securely on the inside of the tube, and hide the knot in the hollow space inside the spiral. Glue knot with a tiny dot of fabric glue for added security if gifting to children.
Info :
Before completing assembly, give the finished ornament a final shaping. Use hidden tacking stitches on the underside of each bulge if the spiral does not naturally stay twisted. A small amount of gentle steam (from distance) can relax fibers and help the spiral sit nicely.
— Repeat Notes and Color Variations :
Info :
Make each ornament individually with the same number of bulges for uniformity. Alternate orange and purple spirals for the garland. If you prefer more compact ornaments, reduce the number of bulge cycles. For longer dramatic spirals work 12-14 bulge cycles following the same pattern. Keep track of rounds using a row counter so each ornament matches.
Info :
If you want a two-tone spiral (for example orange on one side, purple on the other), carry the unused color inside the tube and change color at a reduction round so color bands are clean. Weave tails inside and secure firmly.
Info :
To add extra weight so the ornament hangs straight, stitch a small washer or a few beads inside the lower tip before closing and attaching the candy-corn charm.
These twirly Halloween ornaments combine playful color, tactile spirals, and tiny witch hats into a charming seasonal garland. Each piece is quick to stitch and endlessly customizable—mix colors, beads, and charms for your own spooky style. Hang them on a dowel, over a mantel, or in a window to add handcrafted Halloween cheer. 🧶🎃✨