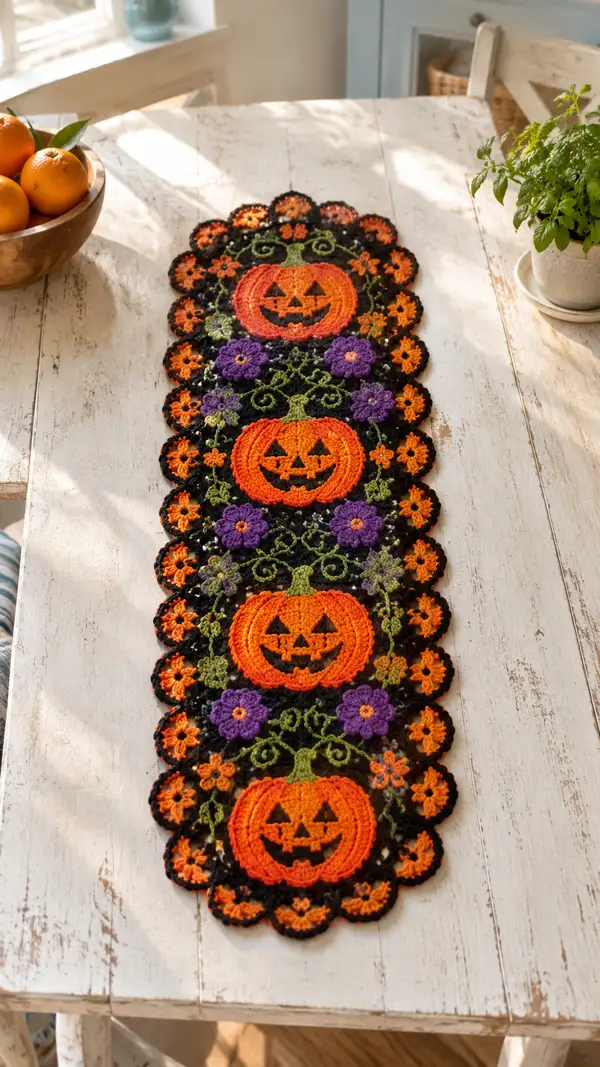
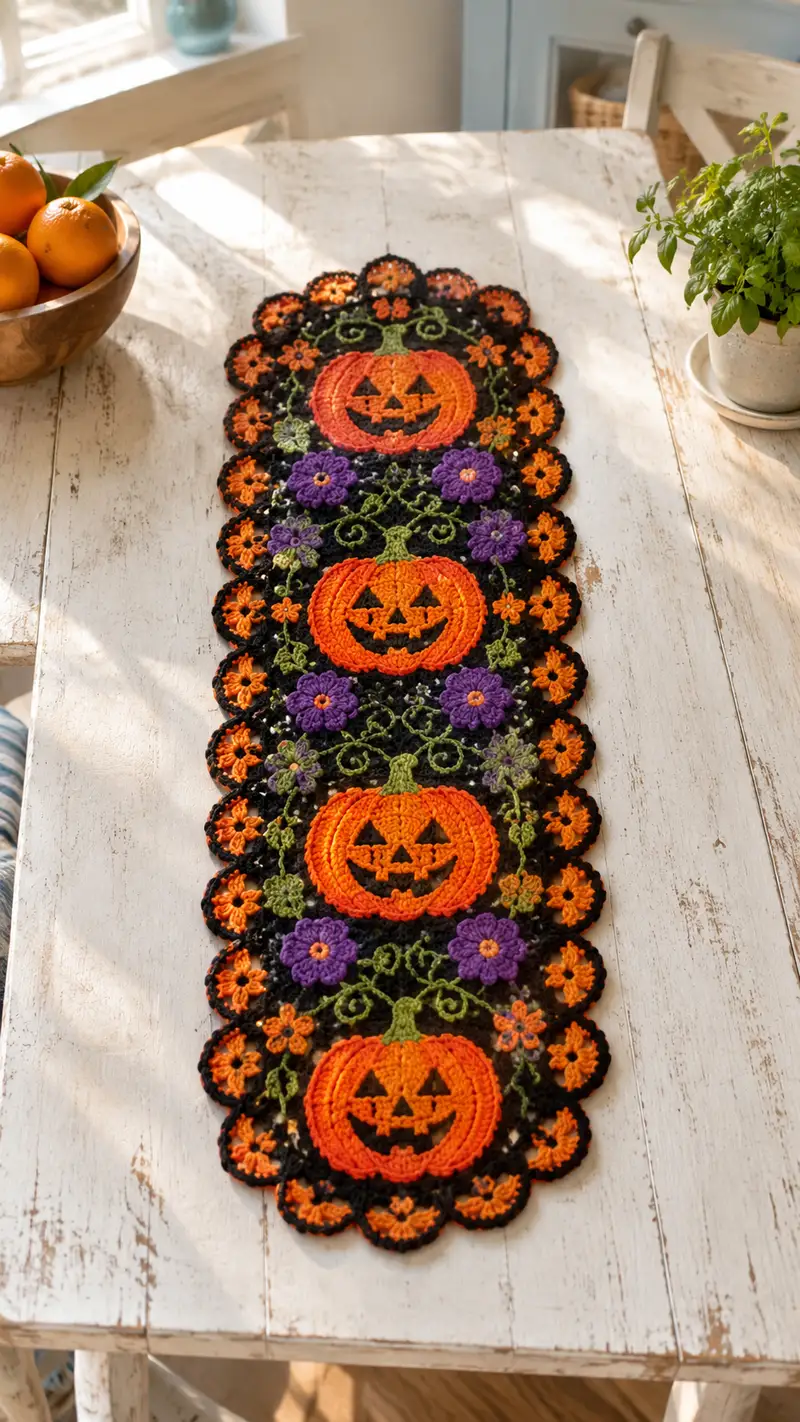
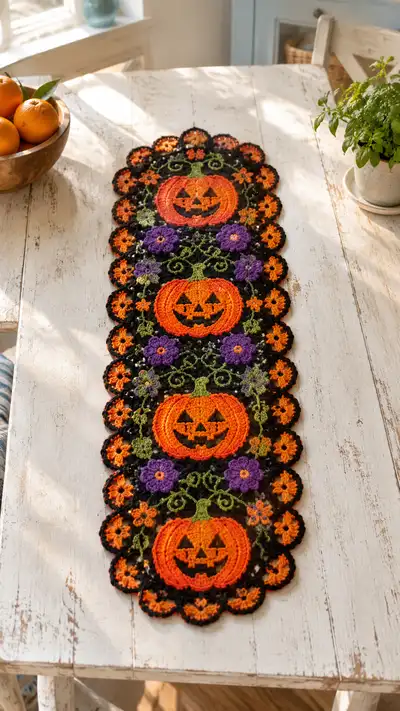
Create a festive Halloween table runner featuring three smiling jack-o-lanterns framed by lacy black motifs, bright orange flowers and purple blooms with swirling green vines. This flat, decorative runner uses modular motifs joined into a long lace panel that lies beautifully on a harvest table. The pattern includes step-by-step instructions for pumpkins, large flowers, small flowers, leaves, vine tendrils, black connector motifs, and the scalloped edging so you can recreate the exact look shown. Perfect for seasonal decorating or gifting to a fall-loving friend.
Progress Tracker
0% Complete
— Overview and Notes :
Info :
This runner is made from repeating modules: Pumpkin motifs, Large flower motifs, Small flower motifs, Leaves and vines, Black connector motifs and a scalloped black border. Make motifs flat, block each piece, then join with slip-stitch assembly and a final black scallop edging. Keep tension even for lace definition. When a color change is required we will mark it with 'Info' before the round.
Info :
Gauge is not critical for motif joinability but affects finished size. Using the recommended yarn and a 3.5mm hook the finished runner measures approximately 12" x 40". To lengthen, add more sets of motif repeats; to shorten, remove a set.
— Pumpkin Motif (Make 3) :
Round 1 :
6 sc in magic ring (6)
Round 3 :
(1 sc, inc) x 6 (18)
Round 4 :
(2 sc, inc) x 6 (24)
Round 5 :
(3 sc, inc) x 6 (30)
Round 6 :
(4 sc, inc) x 6 (36)
Round 7 :
(5 sc, inc) x 6 (42)
Round 8 :
(6 sc, inc) x 6 (48)
Info :
At this point you have a flat circle that will become the front of the pumpkin. Maintain the same number of stitches for the next few rounds while you build ridges that will simulate pumpkin ribs. Carry yarn neatly or fasten off and rejoin for a clean color edge.
Round 9 :
1 sc in each st (48)
Round 10 :
1 sc in each st (48)
Round 11 :
(1 sc, fpdc around next st) x 16 (48)
Round 12 :
1 sc in each st (48)
Info :
Rounds 11 created subtle raised ridges. For deeper ribs, work a second fpdc row aligned with the previous fpdc posts. Ensure fpdc placement stays evenly spaced so ribs look symmetrical.
Round 13 :
(2 sc, fpdc around next st) x 12 (48)
Round 14 :
1 sc in each st (48)
Round 15 :
(3 sc, fpdc around next st) x 12 (48)
Info :
Fasten off orange and switch to darker orange or rust to add a shaded outer round if desired. For a two-tone pumpkin, use a darker orange on Round 16 to create an outer rim that enhances the carved-face look.
Round 16 :
Change to Dark Orange (optional). 1 sc in each st (48)
Round 17 :
(4 sc, sc2tog) x 8 (40)
Round 18 :
(3 sc, sc2tog) x 8 (32)
Info :
We begin a very subtle shaping to make the pumpkin slightly concave for the carved-face effect. Do not over-decrease; this motif should remain essentially flat. If you prefer completely flat, skip Rounds 17-18 and continue to a decorative edging.
Round 19 :
(2 sc, sc2tog) x 8 (24)
Round 20 :
(1 sc, sc2tog) x 8 (16)
Round 21 :
8 sc, join with sl st to first sc. Fasten off orange. (16)
Info :
At this time block the pumpkin motif flat with pins to set shape. Next we will add the carved face using surface crochet or embroidered triangles in black yarn. Place face centered across the slightly concave center.
Round 22 :
Using Black yarn, rejoin at center area for surface face. Surface crochet triangle eyes: mark points with pins. Work surface sl sts to outline two equilateral triangles about 6-8 sts apart depending on preference.
Round 23 :
Embroider nose as small triangle between eyes using surface slip-stitch or small satin-stitched triangle. For mouth, outline a wide crescent with small sl sts and then fill in with a few rows of sl sts to produce a filled black mouth. Fasten off and weave ends securely.
Info :
Facial feature sizes depend on your motif tension. Test position with pins before committing to surface crochet. If you prefer safety from small parts, use embroidered faces rather than sewing on additional pieces.
Round 24 :
Create stem base: join Green yarn at top edge (choose the round where top sits visually) and ch 6, sc back along chain to create short stem. Work 2 rounds in sc around the stem base to fasten. Fasten off and weave in tail. This small stem will be sewn over the top center of the pumpkin motif.
Info :
Make three identical pumpkin motifs. Block flat and set aside ready for decoration and joining.
— Large Flower Motif (Make 6) :
Round 1 :
6 sc in magic ring (6)
Round 3 :
(1 sc, inc) x 6 (18)
Round 4 :
Change to Purple. 1 sc in each st (18)
Round 5 :
(1 sc, ch 4, sl st into same st) x 6 producing 6 loop petals around center. Fasten off purple center if you prefer to add contrasting eye.
Round 6 :
Rejoin Purple to each ch-4 loop, work (sl st, hdc, 2 dc, hdc, sl st) into loop to form a full petal. Repeat around (6 petals)
Round 7 :
Round of picot edging: into each petal end work (sl st, ch 3, sl st) to give small pointed petal tips (6 picots). Fasten off. (6)
Info :
Large flowers are decorative and are sewn between pumpkins. If adding a small bead center, sew a yellow bead or stitch a small yellow circle in the motif center before attaching.
Round 8 :
Optional second layer: join a slightly darker purple or contrast color in between petals: ch 6 from base between petals and sl st to next base to make a small lace ring connecting the petals; fasten off.
Info :
Make six large purple flowers and block gently. These will be placed symmetrically between pumpkin motifs as in the sample photo.
— Small Orange Flower Motif (Make 18) :
Round 1 :
6 sc in magic ring (6)
Round 3 :
Change to Bright Orange. (ch 4, sl st into next st) x 6 to create 6 small loops around base
Round 4 :
Into each ch-4 loop work (sl st, hdc, dc, hdc, sl st) forming 6 tiny rounded petals. Fasten off. (6 petals)
Info :
These small flowers are used to edge the runner and alternate with black scallops. Make 18 and block. Add yellow centers by sewing a small French knot with yarn or by attaching a seed bead.
— Leaf Motif (Make 12) :
Round 1 :
Ch 6, sc in 2nd ch from hook, hdc, dc, hdc, sc (5 sts across) then work back along opposite side of chain: sc, hdc, dc, hdc, sl st to turning ch to form leaf point. Fasten off. (10 sts total)
Round 2 :
Rejoin Green at leaf base, sc around leaf edge (working 2 sc into tip to round it), sl st to base to finish. Fasten off. (approx 18 sc)
Info :
Alternatively make a two-round leaf by working first round in dark green and second round in a lighter green for depth. Make 12 leaves and block with pins on curve to create natural shaping.
— Vine Tendrils (Make many) :
Info :
Vines are crocheted as long chains embellished with single crochets and picots to create curly tendrils. Make multiple lengths to place between pumpkins and flowers. These are sewn on after joining motifs to create the swirling design.
Round 1 :
With Green yarn, ch 60 (or desired length for a long vine segment). Place marker at start.
Round 2 :
Row along chain: sc into 2nd ch from hook and in each ch across (59 sc). Fasten off. This creates a narrow cord that can be curved.
Round 3 :
For curly tendril: make a 30-ch cord and then in RS work (sc, ch 3, picot, sl st back into same st) every 4th stitch along to create loops. Fasten off and block into a spiral.
Info :
Create at least 8-12 vine segments/smaller tendrils to replicate the layered look. Vines will be positioned symmetrically between pumpkin motifs and around large flowers.
— Black Connector Motif (Lace Square, Make 4 large panels) :
Round 1 :
6 sc in magic ring (6)
Round 3 :
(1 sc, inc) x 6 (18)
Round 4 :
(2 sc, inc) x 6 (24)
Round 5 :
Switch to Black yarn. 1 sc in each st (24)
Round 6 :
(3 sc, ch 3, skip 3 sts) x 4 to begin forming a lace square (creating 4 ch-3 corners). After completing round join to first sc.
Round 7 :
At each corner (worked into ch-3 space) work (sc, ch 3, 3 dc, ch 3, sc) to form pointed corner. Along the sides work (ch 3, sl st into next space) to maintain openness. You should have 4 corners.
Round 8 :
Work across sides in a filet-lace pattern: *(sc, ch 4, skip 2 spaces, sc) repeat across side until corner; in corner work (sc, ch 3, sc) ; rep around.* This produces a square openwork tile. Fasten off.
Info :
Connector tiles are the black background that tie pumpkins, flowers and small blossoms together. You will join pumpkins and flowers into these tiles using slip-stitch joins into edge spaces. Make 4 tiles that will be stacked vertically in the runner to support the three pumpkins and intervening flowers.
Round 9 :
Optional: Work a decorative internal motif inside each square by anchoring black yarn to a corner and working (ch 6, sl st to center ring) repeated to make small open spokes. Fasten off.
— Joining Motifs into Runner Panel :
Info :
Before joining, pin your pumpkin motifs, large flowers, small orange flowers, leaves, and vine pieces onto your blocking board in the exact layout you want. Use rust-proof pins and block pieces flat. The sample runner places pumpkins spaced equidistantly with two large purple flowers and two vine swirls between each pumpkin; the small orange flowers form a scalloped edging along both long sides inside the final border.
Round 1 :
Using Black yarn and a 3.5mm hook, rejoin at the outermost stitch of a black connector tile edge where a pumpkin will align. Slip-stitch through the edge stitch of the tile and into the corresponding stitch on the pumpkin motif; continue joining by alternating sl st in tile and sl st in pumpkin edge to form an invisible join. Join across one side edge until motifs are connected (count matches of sl sts equals tile edge count).
Round 2 :
When joining a flower or leaf into the tile, align the flower edge with the tile ch-3 spaces. Sew through the base of each petal and into tile loops using sl st or whip stitch for a neat attachment.
Info :
Maintain symmetry: join motifs in mirrored pairs. Use pins to temporarily secure pieces during joining. Keep join tension relaxed so the fabric lies flat. If gaps appear between motifs after joining, add small connecting chains of 3-6 ch anchored with sl st at both ends to bridge spaces.
Round 3 :
Work the next tile below the first using the same joining method, linking pumpkins vertically via short black lace panels and vine pieces. Repeat until all 4 connector tiles and 3 pumpkin motifs are connected into a single long panel. Fasten off and weave ends.
Info :
Attach vine tendrils by stitching them at 3-4 anchor points (base near pumpkin, side near flower, and into tile openwork) with small whip stitches in matching green yarn. Curve and sew spirals to visually connect pumpkins and flowers as shown.
— Final Scalloped Border :
Info :
The scalloped border is worked in Black around the entire runner to tidy edges and create the scalloped orange/black motif pairing. Begin at a corner and work evenly around, creating scallops that line up with small orange flowers and tile corners.
Round 1 :
With Black yarn join at any outer stitch, ch 1, sc evenly around edge working 2 sc into the tip of any small orange flower or into corner ch-3 spaces to avoid pulling. Keep stitch count even by adding sc in any recessed sections (approx 1 sc every 3-4 edge sts).
Round 2 :
Work scallops: *skip 2 sc, in next sc work (5 dc) to create scallop, skip 2 sc, sl st into next sc to anchor.* Repeat along each long edge. In curved ends work 7 dc for a fuller end scallop. Fasten off.
Info :
Where the runner edge meets small orange flowers, work the scallop so that one scallop sits between each small flower to achieve the alternating look from the photo. Add a small orange flower to each scallop center by sewing a small bright orange or yellow french-knot style circle into the scallop center.
Round 3 :
Optional black picot chain: rejoin black yarn and work *ch 3, sl st into top of each scallop* around to add delicate points to each scallop top. Fasten off and weave ends behind the border.
Info :
Steam-block or wet-block the entire runner: pin into final desired shape, using rust-proof pins and a blocking mat. Allow to dry fully before removing pins. Blocking opens the lace and sets the scallops perfectly.
— Embellishments and Finishing Touches :
Info :
Sew on flower centers using small contrasting yarn knots or attach beads. Use embroidery to add veins on leaves or small highlights on pumpkin ribs with a darker orange. Tidy all ends by weaving tails at least 2 inches into the wrong side of the work and trimming.
Round 1 :
Sew the green stem pieces to the pumpkin tops aligning to the face center. Use mattress stitch or whip stitch and ensure stems are secure. Add extra stitches at base to flatten stems onto the motif if needed.
Info :
Double-check symmetry and balance across runner; adjust vine placements or small flowers as desired before thoroughly securing each piece. A few extra anchor stitches will prevent pieces from shifting in use.
Round 2 :
Weave in all ends and trim. Optional: spray with light starch if you prefer a crisper, less drapey runner.
This Halloween runner brings festive charm to any table with cheerful pumpkin faces, bold purple flowers, and lacy black details. Each motif is a small celebration of seasonal crochet — work them at your own pace and assemble into a show-stopping centerpiece. The modular construction makes it easy to customize size and color while the texture of the pumpkins adds playful dimension. 🧶🍂 Display it proud at your autumn gatherings or gift it to a friend who adores handmade decor. Happy stitching and have fun creating spooky-sweet style! 🎃