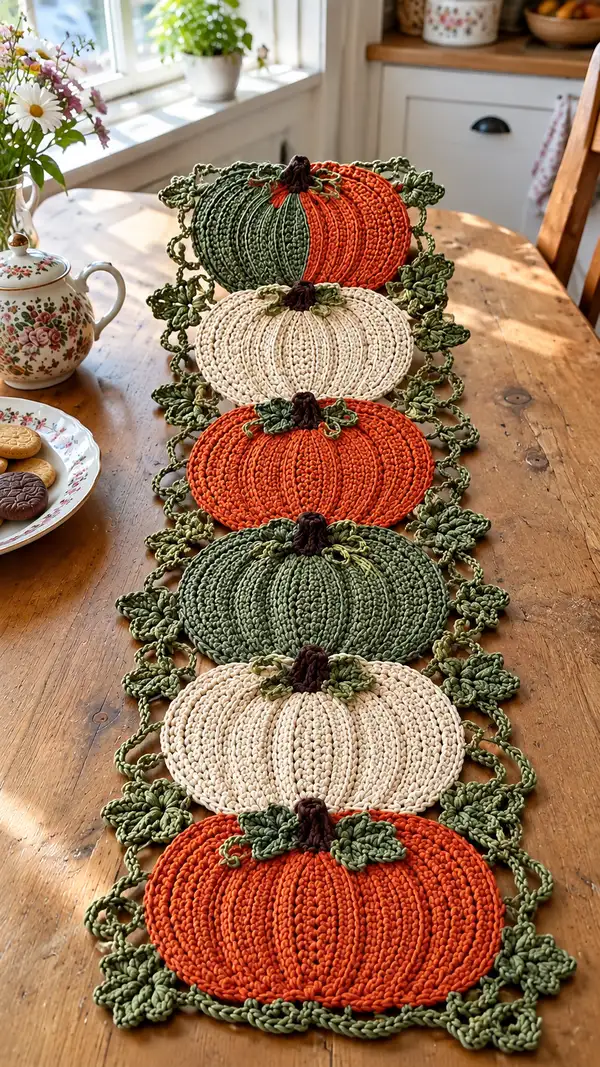
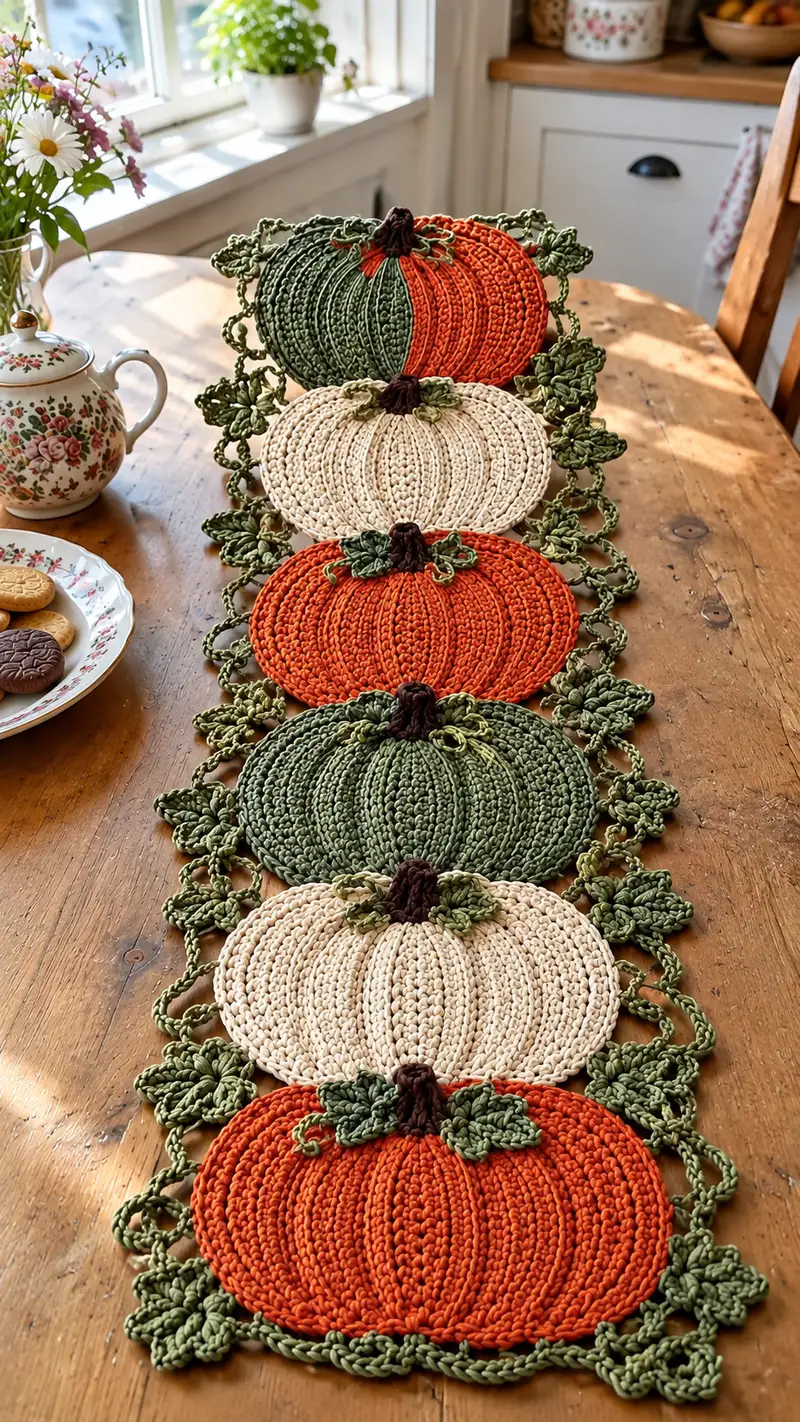
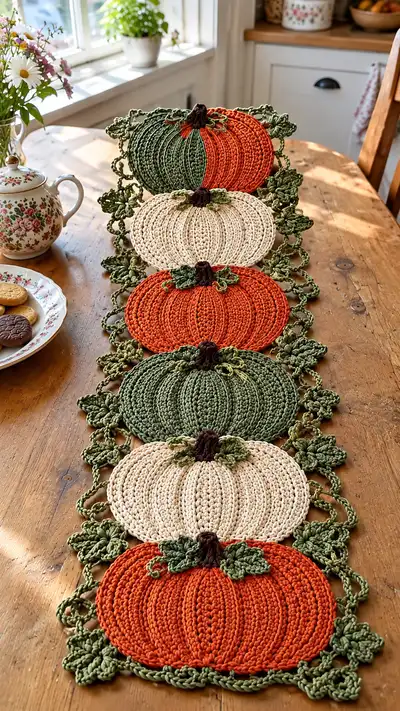
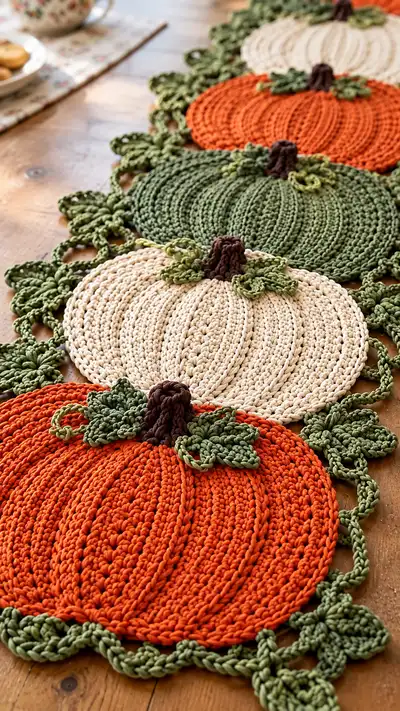
A warm, rustic table runner made from a row of flat pumpkin motifs, joined by swirling vines and layered leaves. This design features alternating pumpkin colors — orange, cream, and sage green — with textured ribs, a sturdy brown stem, and decorative scalloped green vines. Perfect for a cozy fall table setting, each pumpkin lies flat and framed by leafy tendrils for an heirloom look.
Progress Tracker
0% Complete
— Pumpkin Motif (Make 6, alternate colors) :
Round 1 :
Make a magic ring. 6 sc in magic ring (6)
Round 3 :
(1 sc, 1 inc) x 6 (18)
Round 4 :
(2 sc, 1 inc) x 6 (24)
Round 5 :
(3 sc, 1 inc) x 6 (30)
Round 6 :
(4 sc, 1 inc) x 6 (36)
Info :
These first increases build the base diameter of the pumpkin. Use a marker at the first stitch of each round to keep track of round starts. Work tightly for a dense, table-friendly fabric.
Round 7 :
(5 sc, 1 inc) x 6 (42)
Round 8 :
(6 sc, 1 inc) x 6 (48)
Round 9 :
(7 sc, 1 inc) x 6 (54)
Round 10 :
(8 sc, 1 inc) x 6 (60)
Round 11-16 :
1 sc in each st around (60)
Info :
Rounds 11-16 establish the main flat body of the pumpkin. If you prefer a slightly wider pumpkin, add one or two extra even rounds here; if you want it slightly smaller, omit round 16.
Round 17 :
(8 sc, 1 dec) x 6 (54)
Round 18 :
(7 sc, 1 dec) x 6 (48)
Info :
Begin gentle decreases to flatten the pumpkin slightly. Do not over-decrease; the goal is a flat, slightly domed motif. Continue stuffing lightly by pressing flat with your fingers if using cotton yarn (these motifs are not stuffed).
Round 19 :
(6 sc, 1 dec) x 6 (42)
Round 20 :
(5 sc, 1 dec) x 6 (36)
Round 21-24 :
1 sc in each st around (36)
Info :
At this stage you have a flattened circular motif with 36 stitches around the waist. This is the best point to work your ribbing (vertical pumpkin sections). Decide how many ribs you'd like — the pattern uses 9 ribs for an even, classic pumpkin look (36 / 9 = 4 stitches between ribs).
Round 25 :
1 sc in next 3 sts, fpdc around next st; rep from * to end (36)
Round 26 :
1 sc in next 3 sts, fpdc around the fpdc from previous round; rep from * to end (36)
Round 27 :
Repeat Round 26 (36)
Round 28 :
Repeat Round 26 (36)
Info :
The fpdc columns create the raised ribs. Keep the fpdc aligned by always working the front-post stitch around the fpdc of the same rib from the previous round. This stacking builds a visible column that mimics pumpkin grooves.
Round 29 :
1 sc in each st around, working into back loops only for next round edge shaping (36)
Round 30 :
(3 sc, 1 dec) x 9 (27)
Info :
These reductions give the pumpkin a slight inward tuck around the edge and create a neat shape for stitching on the stem area. Keep counts exact — 27 stitches after Round 30.
Round 31 :
(2 sc, 1 dec) x 9 (18)
Round 32 :
(1 sc, 1 dec) x 9 (9)
Round 33 :
Fasten off leaving a 14-16" tail for sewing the center closed and attaching the stem. Use the tail to gather the center slightly - weave tail through the 9 sts and pull tight to form a shallow dimple; knot securely on the WS and weave in tail.
Info :
If you prefer a very flat placemat, block the motif now by pinning it flat to a blocking board and misting with water, letting dry under weight. Block until perfectly flat before attaching stem and leaves.
Round 34 (Optional decorative accent) :
With contrasting yarn, work a round of sl st through the front loops only around the outer edge to create a decorative ridge (36)
Info :
For the two-tone pumpkin seen in the photo, switch color at the end of Round 16. To reproduce the split-color pumpkin (half green, half orange), do the following: after Round 16, mark the halfway point (30 sts equivalent on round 16), change to new color, then work Rounds 17-33 as written in the new color. When working the fpdc ribs, align rib positions across the color change so the ribs run continuously.
— Stem (Make 6) :
Round 1 :
Using brown yarn, ch 7, sl st to form ring. 6 sc into ring (6)
Round 2 :
Inc in each st around (12)
Round 3 :
(1 sc, 1 inc) x 6 (18)
Round 4-6 :
1 sc in each st around (18)
Info :
Stems are worked in rounds to form a short tube. If you want a hollow stem that can be stuffed lightly or wired, leave it open. For a sturdy stem, stuff lightly and then close with a few rounds of dec below.
Round 7 :
(2 sc, 1 dec) x 6 (12)
Round 8 :
6 dec (6) - fasten off leaving long tail for sewing to center top of pumpkin. Insert tail through center of the pumpkin dimple and sew firmly through the back to avoid wobble.
Info :
To recreate the slightly squashed, fluted stem look, before closing completely use a tapestry needle to make a few running stitches vertically down the stem then pull gently to create vertical ridges. Secure and weave in ends.
— Leaf (Make 12 or more) :
Round 1 :
With sage green, ch 8
Round 2 :
Sc in 2nd ch from hook, hdc in next, dc in next 3, hdc in next, sc in last ch (7)
Round 3 :
Turn work to work along opposite side of chain: sc in first ch, hdc in next, dc in next 3, hdc in next, sc in last ch. Join to the first sc with sl st. Fasten off leaving long tail (14-16") for sewing (14)
Info :
This creates a basic leaf. For the layered, textured leaves seen in the runner, you will place two leaves per pumpkin top: one worked slightly larger (ch10, extra dc) and one smaller. You can also add a central vein using bpdc or embroidery yarn after attaching.
Round 4 (Optional textured leaf) :
With contrasting light green, work a few sl sts along the center and finish with a small curled tendril: ch 12, sl st back along chain to create a spiral curl. Fasten off and leave long tail to attach.
— Leaf Variant: Clustered Leaf (Make 18) :
Round 1 :
Ch 6, join to form ring. Work (ch 3, 3 dc, ch 3, sl st) x 4 into ring to create 4 small petals. Fasten off leaving long tail to sew. (4 petals)
Info :
These small cluster leaves form the decorative connectors between pumpkins in the vine. Make 2-3 clusters per side of each pumpkin for the same dense look in the photo.
— Vine & Border (Make 1 long vine to join motifs) :
Round 1 :
With sage green, ch 120 (or length required to connect your pumpkins with 8-10" between centers). Turn.
Round 2 :
Sl st into each ch across (120)
Info :
The vine chain is the backbone of the runner. Measure on your table and adjust chain length. The photo uses a long single chain with loops and leaves attached rather than a thick braided vine; keep this chain flexible and slightly loose for drape.
Round 3 :
Attach small leaf cluster: *Ch 6, sl st into vine at next spacing, ch 6, sl st back into same vine stitch to form a loop; skip 6 ch; rep from * across to create lateral loops for leaf attachment. (Spacing is flexible; adapt to your table and motif spacing)
Round 4 :
At intervals where pumpkins will join, work a decorative connector: (sc, ch 6, sc) in same vine st to create a wide loop that will be used to sew pumpkin edges into place. Make 10–12 connectors along vine matching pumpkin placement.
Info :
Work the vine so that it sits slightly below the pumpkin edge when motifs are laid on top — this gives the leafy framing effect. You can also work back post sc along the vine into the motif edges after pinning to keep the vine tucked under.
Round 5 :
For a scalloped edge along the vine, in each connector loop work (sl st, sc, hdc, 3 dc, hdc, sc, sl st) into loop. This creates a floral scallop between pumpkins. Repeat across all connector loops. Fasten off.
Info :
Where the photo shows decorative chain loops along the outer edge, you can instead work a longer chain and attach additional clustered leaves for fullness. Make as many loops and clusters as you like to match desired look.
— Joining Motifs & Border Stitching :
Round 1 :
Lay pumpkins on table in order. Place vine beneath and position so that the vine connectors align with the top edges of each pumpkin. Pin everything in place to maintain spacing and symmetry.
Round 2 :
Using matching green yarn and tapestry needle, whip stitch through the outer edge of the pumpkin at the connector loops, sewing the pumpkin to the vine at each connector. Use even stitches and leave a small gap for a natural drape. Secure ends.
Round 3 :
To secure the lower edge of pumpkins to the vine and create a continuous runner, use a round of sc along the bottom edge of each pumpkin into the vine chain (work sc through both layers where possible) — this binds motifs to the vine and prevents curling. (Variable counts depending on motif, approx 36 sc per motif)
Info :
Pin before sewing. Using a contrasting stitch like blanket stitch gives a visible handcrafted finish; using invisible whip stitch keeps seams hidden. The photo shows a sewn look with leaves and loops framing the edges; mimic that by sewing small cluster leaves between motifs along the edges.
Round 4 :
Embellish by sewing two medium leaves and one small leaf cluster onto the top of each pumpkin around the stem. Use long tails from the leaves to position and tack them in place before final stitching.
Round 5 :
After joining all pumpkins, weave in all loose ends on the WS with the yarn needle. Block the entire runner again flat for 12–24 hours under weight for best results.
Info :
If you plan to launder the runner occasionally, weave all ends extra securely and consider sewing a lightweight interfacing strip across the underside of the vine where motifs join to strengthen high-traffic areas.
— Decorative Tendrils & Final Touches :
Round 1 :
To create little curlicue tendrils, ch 30 with light green yarn, sl st back along chain to curl it into a spiral. Fasten off and sew one tendril near each stem. Make as many tendrils as desired.
Round 2 :
For additional detail, embroider a vein line from the stem outward using a strand of contrast yarn and long straight stitches on the leaf bases only.
Info :
These finishing touches add charm and match the photo. Keep tendrils small so they don’t get caught on items on the table.
— Alternate Small Pumpkin (Optional) :
Round 1 :
Make a small pumpkin with MR 6, 6 inc (12), (1 sc, inc) x6 (18), (2 sc, inc) x6 (24), rounds 5-9 1 sc each (24), (2 sc, dec) x6 (18), (1 sc, dec) x6 (12), fasten off leaving tail for center gathering. Use this motif to fill gaps or make coasters (24 or 30 stitch variants).
Info :
Small pumpkins make excellent coasters on their own or extra spacers for the runner. They follow the same ribbing process using fpdc every 3 stitches for 6 ribs on a small motif.
Round 3 :
Final assembly: Place runner on table, rearrange any leaves for balanced look, and press gently. Optionally add small non-slip disks under motifs to keep runner in place.
Info :
Throughout the project, keep careful notes of color placements (pumpkin order: orange, cream, green, orange, cream, green as in photo) so your runner matches the layered look. The runner is intentionally flat but textured — avoid stuffing motifs which will make them bulky and unsuitable for table use.
This pumpkin runner is a delightful seasonal centerpiece that blends rustic charm with cozy handmade warmth. Each crochet pumpkin becomes a tiny tableau of autumn — a perfect mix of texture, color, and personality. With simple motifs repeated and richly detailed vines and leaves, the finished runner looks like an heirloom piece. Make one for your table, or create smaller coasters and placemats from the same motifs to build a collection. Happy stitching and may your home feel extra cozy this season! 🍂🎃🧶