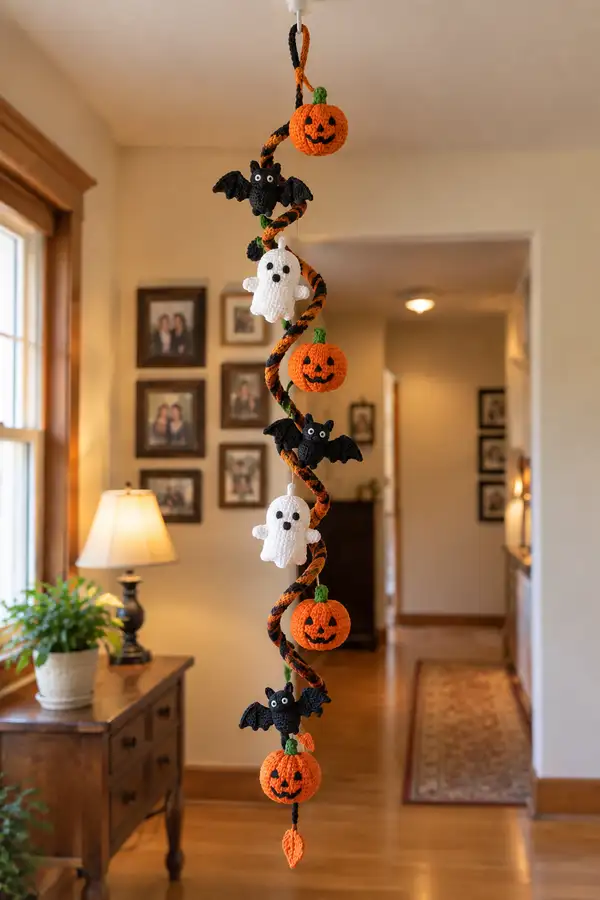
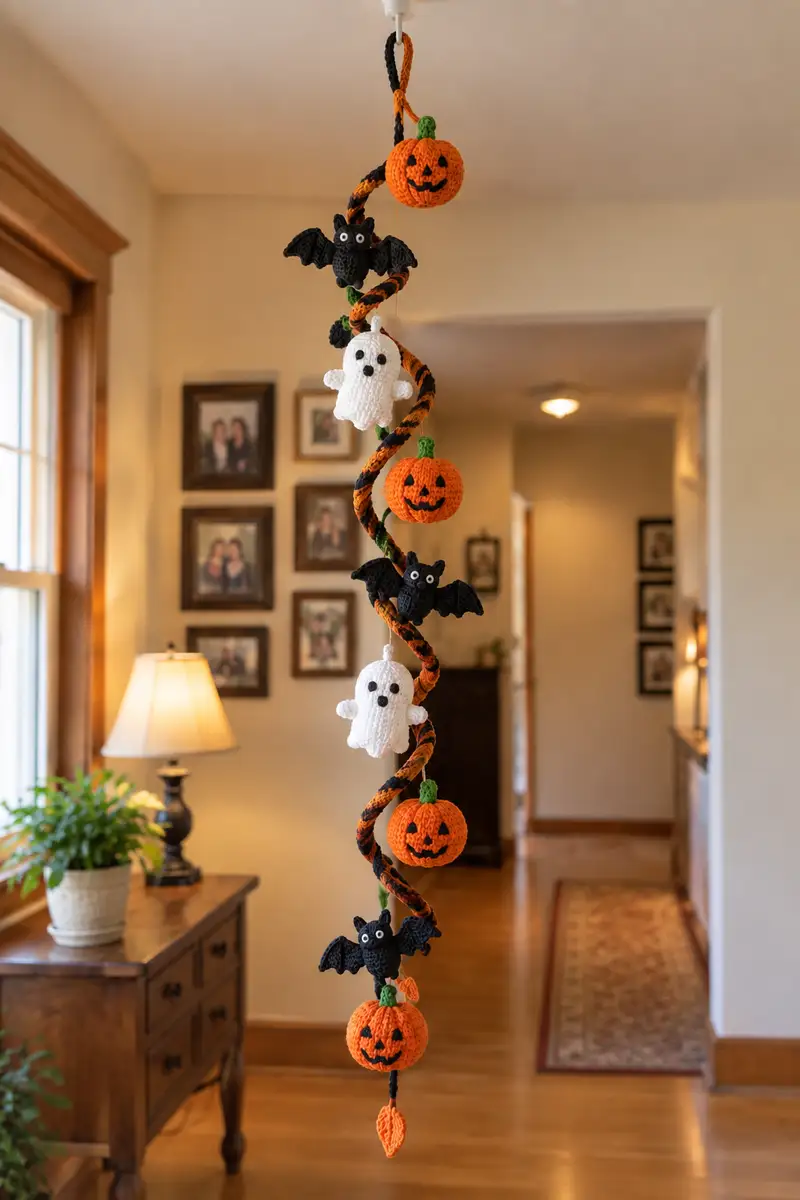
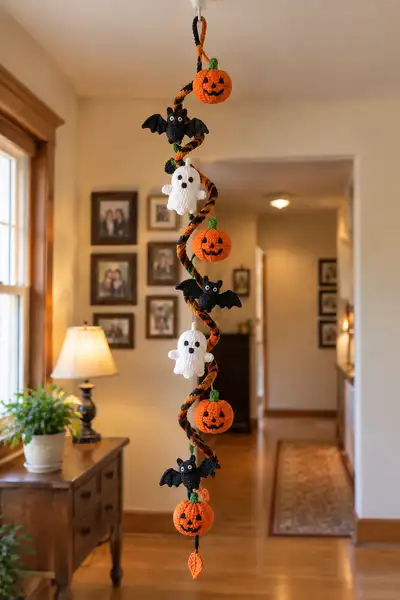
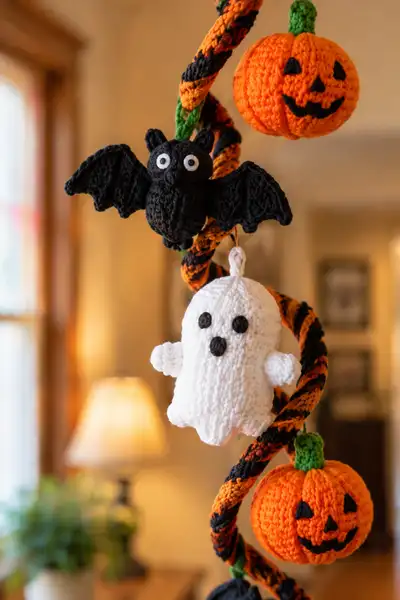
A playful hanging spiral garland featuring tiny crocheted pumpkins, friendly ghosts, and flappy bats — perfect for Halloween decor. This pattern includes detailed step-by-step instructions for the twisted spiral cord, pumpkins with Jack-o-lantern faces, sweet ghosts with scalloped hems, and expressive bats with spread wings. Designed to hang in doorways or from ceiling hooks, it creates a whimsical vertical display of classic Halloween icons.
Progress Tracker
0% Complete
— Supplies & Gauge :
Info :
Gauge is not critical for this decorative garland, but for size reference: 12 sc x 14 rows = 4" square with worsted weight yarn and 3.5mm hook. Work tightly enough that stuffing does not show through.
— General Notes :
Info :
Pattern written in continuous rounds for amigurumi. Use a stitch marker to mark the first stitch of each round. When changing colors, finish the last yarn over with the new color to create a clean transition. Fasten off and weave ends securely. Quantities: Make 4 pumpkins, 3 bats, 2 ghosts, and one twisted spiral cord approximately 80-100 cm long.
— Pumpkin (make 4) :
Round 3 :
(1 sc, inc) x 6 (18)
Round 4 :
(2 sc, inc) x 6 (24)
Round 5 :
(3 sc, inc) x 6 (30)
Round 6 :
(4 sc, inc) x 6 (36)
Info :
Work increases evenly to create a round pumpkin base. Use orange yarn. Place stitch marker on first stitch of each round.
Round 7 :
1 sc in each st (36)
Round 8 :
1 sc in each st (36)
Round 9 :
1 sc in each st (36)
Round 10 :
1 sc in each st (36)
Info :
These even rounds build height. After round 10, place small stuffing to begin shaping the pumpkin. Keep stuffing firm but not overstuffed to allow seam definition later.
Round 11 :
(4 sc, dec) x 6 (30)
Round 12 :
(3 sc, dec) x 6 (24)
Round 13 :
(2 sc, dec) x 6 (18)
Info :
Begin shaping the top of the pumpkin. Add more stuffing as you progress through decreases so the pumpkin retains a plump, round shape.
Round 14 :
(1 sc, dec) x 6 (12)
Info :
Fasten off leaving a long tail for sewing closed. Weave the tail through the front loop of remaining 6 sts and pull to close. Weave tail inside and trim. Form vertical ribs by sewing through top and bottom centers using surface slip stitch or yarn to create 6-8 subtle segments around the pumpkin. Use long strand of yarn and pass from top center to bottom center and back, repeating at several evenly spaced points to create the carved-segment effect.
Stem (make 4) :
With green yarn. Round 1: 6 sc in mr (6)
Round 2 :
1 sc in each st (6)
Round 3 :
(1 sc, inc) x 2, 2 sc (8)
Round 4 :
1 sc in each st (8)
Info :
Stuff lightly, shape into short stub, fasten off leaving long tail for sewing. Sew stem to top center of pumpkin before closing completely if desired. For a vine loop, leave a 6-8 cm chain attached and fasten off to create a hanging loop.
— Pumpkin Face (embroidery) :
Info :
Use black yarn to embroider triangles for eyes and a jagged mouth. Place features centered on one side of the pumpkin. Use small stitches and tack the ends securely inside the pumpkin. Alternatively, crochet small black triangles and sew them in place (3 sc triangle: ch 3, sc in 2nd ch from hook, sc in last ch, fasten off - three rounds to reinforce triangle).
— Ghost (make 2) :
Round 3 :
(1 sc, inc) x 6 (18)
Round 4 :
(2 sc, inc) x 6 (24)
Round 5 :
(3 sc, inc) x 6 (30)
Info :
Ghosts are taller than wide. Work increases to round 5 to form a smooth bell top. Use white yarn. Place stitch marker at start of round.
Round 6-12 :
1 sc in each st (30)
Info :
These even rounds create the elongated body. Do not stuff until after round 10 so the top stays hollow for a hanging loop. When you insert stuffing, use small amounts to keep the ghost slightly soft and airy.
Round 13 :
(3 sc, dec) x 6 (24)
Round 14 :
(2 sc, dec) x 6 (18)
Round 15 :
(1 sc, dec) x 6 (12)
Info :
Begin slight tapering toward the bottom scallop. Stuff lightly now so the ghost has a soft body but not rigid.
Round 16 :
1 sc in each st (12)
Round 17 :
1 sc in each st (12)
Round 18 :
(1 sc, inc) x 6 (18)
Round 19 :
(2 sc, inc) x 6 (24)
Info :
We will form the scalloped skirt by working into the final rounds with short picot-like shells. Stitch counts expand temporarily to shape the bottom frill.
Round 20 :
(sc in next st, 3 dc in next st, sc in next st) x 6 (24 with 6 shells)
Round 21 :
Work 1 sc in each stitch and in each dc group to secure scallops (24)
Info :
Fasten off leaving long tail at top. Create a hanging loop: ch 8 from top center then sl st back into the top center, fasten off and weave in tail. Embroider eyes and mouth with black yarn or sew on small felt circles. Sew small 3-round arm spheres (see Arms below) to sides at approximately round 9-10.
Ghost Arms (make 2) :
Round 1: 6 sc in mr (6)
Round 2-4 :
1 sc in each st (6)
Round 5 :
sl st in next 6 sts to finish as a little tube, fasten off leaving tail for sewing
Info :
Sew arms to ghost sides with the seam at rounds 9-10 for a waving, floating look. Slightly stuff arms with fiberfill to keep rounded shape.
— Bat Body (make 3) :
Round 3 :
(1 sc, inc) x 6 (18)
Round 4 :
(2 sc, inc) x 6 (24)
Round 5 :
1 sc in each st (24)
Info :
Bat bodies are small and slightly oval. Work even rounds to round 7 and then shape the bottom with decreases. Use black yarn. Place eyes after round 5 and before stuffing for secure placement (use embroidered or small white/black felt circles).
Round 6 :
1 sc in each st (24)
Round 7 :
(3 sc, dec) x 6 (18)
Round 8 :
(2 sc, dec) x 6 (12)
Info :
Leave a long tail and fasten off. Stuff the body lightly and shape into a rounded teardrop. Sew the seam closed and weave tail into body. Attach small ears and wings (instructions below). Optionally, slip a short length of pipe cleaner into the body for wing attachment reinforcement.
Bat Ears (make 6) :
Round 1: 6 sc in mr (6)
Round 2 :
(1 sc, inc) x 2 (8)
Round 3 :
1 sc in each st (8)
Info :
Flatten ear and sew the base to the top of the bat body about 2-3 stitches apart. Slightly fold the top to give a pointy ear look. Fasten off and weave tails.
— Bat Wings (make 3 pairs) :
Row 1 :
Ch 12, sc in 2nd ch from hook, sc across (11)
Row 2 :
Ch 1 turn, sc across (11)
Row 3 :
Ch 1 turn, sc2tog, sc across until last 2 sts, sc2tog (9)
Row 4 :
Ch 1 turn, sc across (9)
Row 5 :
Ch 1 turn, (sc, ch 2, sl st in same st) x 3 across to create scalloped points and a wing-tip curve, ending with sc (9 with 3 scallops)
Info :
Work this as a flat piece; repeat for the opposite wing and mirror the shaping. You can also work wings in rounds to create a slightly cupped shape - use BLO on the final round to leave a defined ridge. Sew wings to sides of body centered at the widest point, slightly overlapping for natural placement.
— Spiral Cord (Main) :
Info :
The spiral cord is a crocheted tube in alternating orange and black stripes, approximately 80-100 cm long in the sample. We will crochet three slender tubes (one in black, one in orange, one optional green accent) and braid/twist them together for a sturdy spiral. Each tube is worked in continuous rounds as a small amigurumi tube.
Tube A (orange) Round 1 :
6 sc in mr (6)
Round 3 :
(1 sc, inc) x 6 (18)
Round 4 :
1 sc in each st (18)
Round 5-40 :
1 sc in each st (18) - continue until desired tube length (approx 80 cm). Change to black yarn every 6-8 rounds to create stripes if you prefer a single tube with stripes instead of separate tubes.
Info :
Stuff the tube very lightly with fiberfill as you work to give it body but keep it flexible. If you plan to braid multiple tubes, make two more tubes (Tube B in black, Tube C in orange or green accent) of equal length and similar diameter. Fasten off each tube leaving long tails to braid and to secure ends.
Tube B (black) Round 1 :
6 sc in mr (6)
Round 3 :
(1 sc, inc) x 6 (18)
Round 4-40 :
1 sc in each st (18)
Tube C (optional green accent) Round 1 :
6 sc in mr (6)
Round 2-30 :
1 sc in each st (6 or increase to 18 if you want a thicker accent tube)
Info :
For Tube C you may keep smaller diameter to act as vine accents wrapped intermittently around the braid. If you want one long continuous spiral, create three evenly sized tubes and braid them tightly; if you want a two-color spiral, use only Tube A and Tube B and twist them around each other rather than a full braid.
Creating the Twist :
Lay tubes parallel, tie at one end and measure spacing for hanging. Braid or twist tightly along the full length, securing ends with stitches. For a consistent spiral shape, twist tubes slightly while braiding to encourage a regular helix. Use a few hidden stitches to tack each ornament (pumpkin, ghost, bat) to the braid at measured intervals.
— Attachment Loops & Leaf (small finishing charms) :
Leaf :
With orange or green yarn: ch 6, sc in 2nd ch from hook and across (5). Row 2: ch1 turn, sc2tog, sc, sc2tog (3). Row 3: ch1 turn, sc3, fasten off leaving tail. Fold leaf in half and sew the long edges to create a vein. Attach to the bottom of the cord as a charm.
Attachment Loop Info :
Create a loop on top of the spiral by chaining 20-30 and sl st back to the top center. Secure with several whip stitches and weave in tail. This loop will hang on a ceiling hook or peg.
— Finishing & Emphasis Details :
Info :
Use black yarn to embroider pumpkin faces. For bat eyes, use small white felt circles with tiny black centers glued or hand-sewn. For ghosts, sew black felt or embroidered circles for eyes and a round mouth. Add surface slip-stitch ridges on pumpkins along their segments to accentuate the jack-o-lantern look. Space ornaments evenly along spiral: top-to-bottom sample spacing is approximately 12-18 cm between ornaments to mimic the photo. Adjust spacing to taste.
— Quantities & Assembly Plan :
Info :
Make four pumpkins, two ghosts, and three bats, or customize number and spacing to fit your hanging length. Attach each ornament to the spiral cord with a short chain loop (ch 8-12) sewn into the top of each ornament and stitched securely to the braid. Reinforce with a couple of stitches around the braid to prevent swiveling.
— Care & Storage :
Info :
Spot clean with damp cloth and mild soap. Store flat or loosely coiled to avoid crushing ornaments. Avoid prolonged sun exposure to prevent yarn fading. If using felt parts, secure with fabric glue if used as permanent fixtures.
Assembly Instructions
- Attach pumpkins, ghosts, and bats to the braided spiral using the hanging loop you crocheted at the top of each ornament. Pin each charm in place first, spacing approximately 12-18 cm between ornaments for an even look.
- Sew through the ornament loop and a few wraps of the braid with a yarn needle using matching yarn to secure. Make 6-8 tight passes for each attachment to ensure ornaments do not slide.
- Reinforce pumpkin stems by sewing them into the top center of each pumpkin and stitching through the braid. Bury tails inside so there are no loose ends visible.
- Sew bat wings to the sides of the bat body centered around the widest round (approximately round 4-6 of the body). Use small hidden stitches and tack wings at two points to keep them spread.
- Position ghosts so their scalloped hems face downward and sew the tiny arm spheres to rounds 9-10 on each side. Make sure arms are symmetrical for the floating look.
- Secure the top hanging loop to a hook or peg. If the garland will hang outdoors, add a few drops of clear-drying fabric glue to knots and embroidered features to weatherproof them.
- Weave and trim all loose ends. For additional stability, stitch a line of running stitches along the braid and tie off to prevent unravelling.
- Optional: add a small button or bead at the base of each ornament on the inner side to help keep it facing outward when hung.
Important Notes
- 💡Use stitch markers consistently at the beginning of each round to avoid counting errors and maintain proper shaping
- 💡Stuff body parts gradually as you work rather than waiting until the end, especially for narrow openings like arms and legs
- 💡For embroidered faces, secure knots inside the ornament and weave ends several inches into stuffing for a clean finish
- 💡Maintain consistent tension; too tight will make stiff ornaments, too loose will show stuffing and distort shapes
- 💡Pin all pieces in position before final sewing to ensure even spacing and balanced visual composition
- 💡If you intend to hang outdoors, consider using acrylic yarn for better weather resistance
- 💡When sewing through the braided cord, take care not to pierce yarn in a way that causes the braid to untwist
This cheerful Halloween spiral garland brings seasonal personality to any doorway or hallway with tiny pumpkins, ghosts, and bats! Each element is crocheted with attention to shape and expression, and the twisted cord creates movement and depth. I hope you enjoyed making this festive decoration — it’s a perfect, handmade touch for autumn and makes a great gift too. 🎃👻🦇