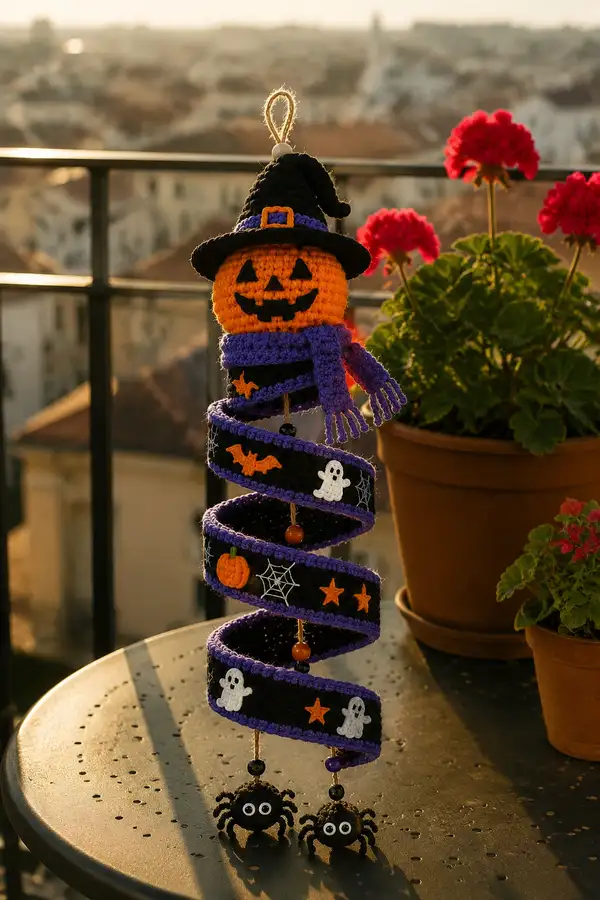
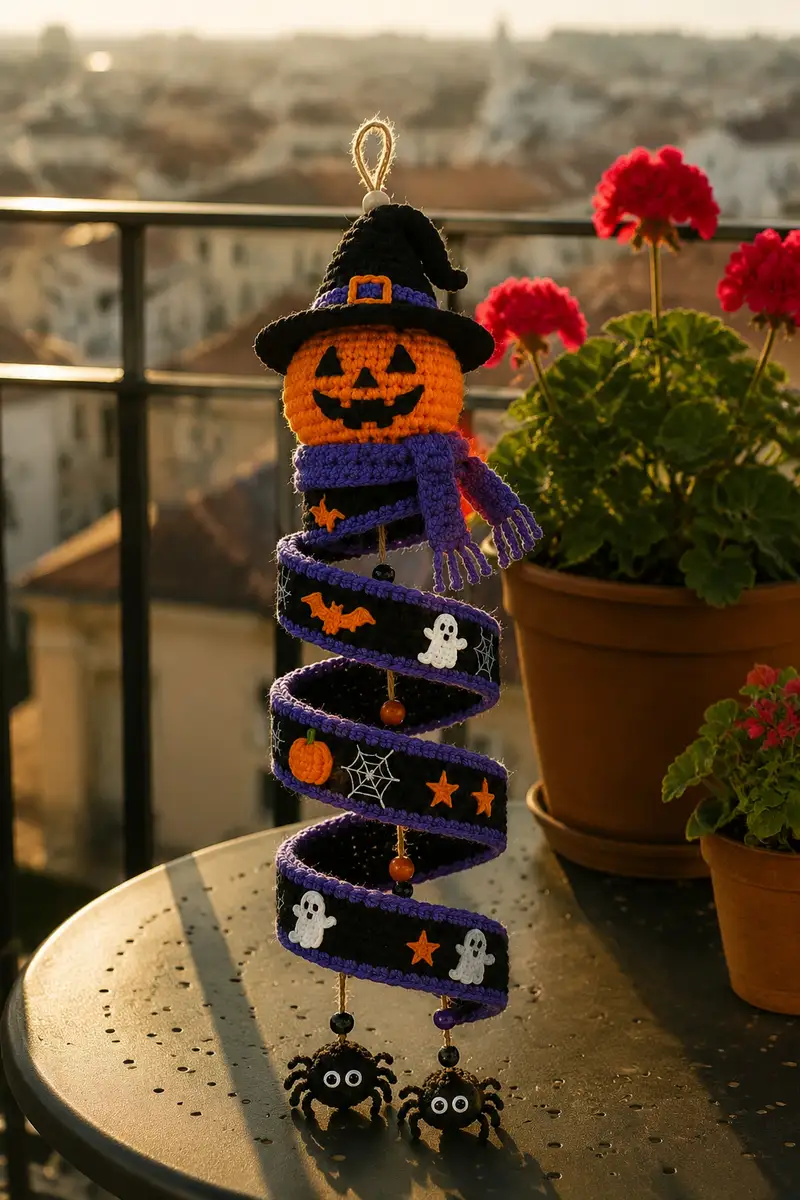
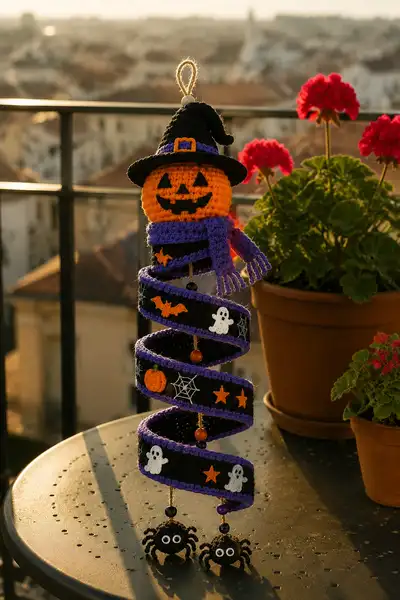
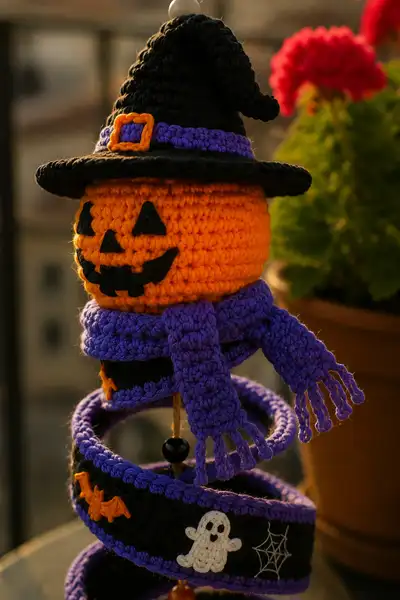
Create a whimsical Halloween spiral ornament featuring a grinning pumpkin head wearing a witch hat, a cozy purple scarf, and a coiled black-and-purple spiral decorated with tiny ghosts, bats, pumpkins, stars and dangling spiders. This vertical hanging amigurumi is a delightful mix of simple amigurumi shapes and decorative appliques—perfect for seasonal décor or a handmade gift. The design includes detailed shaping, color changes, and step-by-step assembly for a stable, playful finished piece.
Progress Tracker
0% Complete
— Head :
Round 1 :
6 sc in magic ring (6)
Round 3 :
(1 sc, inc) x 6 (18)
Round 4 :
(2 sc, inc) x 6 (24)
Round 5 :
(3 sc, inc) x 6 (30)
Round 6 :
(4 sc, inc) x 6 (36)
Round 7 :
(5 sc, inc) x 6 (42)
Round 8 :
(6 sc, inc) x 6 (48)
Info :
This pumpkin head is worked in Bright Orange yarn in continuous rounds (do not join). Use a stitch marker for the first stitch of every round and move it up as you go. Tight tension is important to prevent stuffing showing through.
Round 9-18 :
1 sc in each st (48)
Info :
These even rounds build the height of the pumpkin. At the end of round 13 mark the position for the mouth and eyes—place the two triangle eyes approximately 10-12 stitches apart horizontally and the mouth centered two rounds below the eye placement.
Round 19 :
(6 sc, dec) x 6 (42)
Round 20 :
(5 sc, dec) x 6 (36)
Info :
Begin to shape the underside slightly but keep the head fairly rounded. If you want pumpkin ribs, work surface slip stitch vertical lines now (see ribbing Info below).
Round 21 :
(4 sc, dec) x 6 (30)
Round 22 :
(3 sc, dec) x 6 (24)
Info :
Start stuffing the head firmly but not so hard it becomes rigid. Add stuffing gradually between rounds 21-25. Use small tufts to avoid lumps and maintain a round pumpkin shape.
Round 23 :
(2 sc, dec) x 6 (18)
Round 24 :
(1 sc, dec) x 6 (12)
Info :
Fasten off leaving a 20-25cm tail for sewing the head to the spiral core later. Weave the tail through the remaining 6 sts and pull closed, then diagonal-sew to secure. Do not overstuff the very bottom as the wooden bead and dowel will attach here later.
Round 26 :
Optional: After closing, re-open 6 sts and crochet 6 sc around to make a small neck ring for the scarf to sit on (6). Fasten off.
Info :
Optional pumpkin ribs: Using a darker orange or surface slip stitch with same yarn, work 6-8 vertical surface slip stitch lines from top to bottom evenly spaced. Use tapestry needle and pull slightly to define ribs. Do this before attaching hat and scarf.
— Facial Applique (Mouth & Eyes - Felt or Crochet) :
Info :
The carved face is easiest done with black felt cutouts glued or sewn in place. If you prefer crochet applique, make small triangles for eyes and a multi-piece mouth as described below.
Round 1 (Eye applique) :
With black yarn, mr, ch1, 3 sc in ring, pull tight (3). Fasten off leaving tail to sew. Make 2.
Round 1 (Mouth applique part A) :
With black yarn, ch6, 1 sc in 2nd ch from hook and across (5), turn, ch1, 1 sc across for 3 rows; fold and sl st across base to form tooth notch. Fasten off leaving tail for sewing. Make mouth pieces as needed and attach centered.
Info :
Position eyes between rounds 12-14 about 10-12 sts apart. Tack down features with long tail and yarn needle; glue felt if using felt. For child-safe toys, prefer embroidered eyes instead of glued felt or safety eyes.
— Hat (Crown) :
Round 1 :
With Black, 6 sc in magic ring (6)
Round 3 :
(1 sc, inc) x 6 (18)
Round 4 :
(2 sc, inc) x 6 (24)
Round 5 :
(3 sc, inc) x 6 (30)
Round 6 :
(4 sc, inc) x 6 (36)
Round 7 :
1 sc in each st (36)
Info :
The crown is slightly conical. Work rounds 1-6 to make a dome, then continue even to build height. To create a curled tip, we will decrease and shape later.
Round 8-12 :
1 sc in each st (36)
Round 13 :
(4 sc, dec) x 6 (30)
Round 14 :
(3 sc, dec) x 6 (24)
Round 15 :
(2 sc, dec) x 6 (18)
Round 16 :
(1 sc, dec) x 6 (12)
Info :
Before closing completely, stuff the hat lightly if you want it to hold shape. Leave a long tail to sew the hat to the head. For the floppy curled tip, do not close fully - instead fold along one side and sew to create curl, or add a few extra rounds in the narrower section to roll the tip.
— Hat Brim :
Round 1 :
With Black, ch36, join with sl st to form ring (work as flat round), ch1, 1 sc in each ch around (36)
Round 2 :
(2 sc in next st, 1 sc next 3 sts) around to increase and flare brim. Work increases evenly until you reach 60 sts (example pattern: (1 sc, inc) repeats). For a brim of 60 sts, increase 24 sts across; exact pattern: (1 sc, inc) x 24 then 1 sc x remainder to total 60.
Round 3 :
1 sc in each st (60)
Round 4 :
1 sc in each st BLO (60)
Info :
Working Round 4 in BLO lifts the brim edge slightly and gives a finished rolled look. Attach brim to base of crown by placing crown center over brim center and sewing with whip stitch along base. Make sure brim is wide enough to sit nicely over pumpkin's head.
— Hat Band & Buckle :
Round 1 :
With Purple, ch36, join to work in rounds (36), 1 sc in each ch around for 4 rounds to form a band (36)
Round 5 :
Switch to Orange or Bright Orange for buckle details. Make a small square buckle: ch6, 1 sc into 2nd ch and next 3 (4), turn, 1 sc across for 3 rows, fold and sl st edges to make a square. Sew buckle to front of band.
Info :
Sew the band around the base of the crown before fully attaching hat to the head. The band can be either sewn on or left removable.
— Scarf :
Round 1 :
With Purple, ch18, join to work in rounds forming a small tube or work flat rows: ch18, 1 sc in 2nd ch from hook and across (17) turn (for flat)
Round 2-18 :
1 sc in each st for 17 sts across; repeat for 16 more rows to make a chunky scarf approximately 10cm long (17)
Info :
Work the scarf long enough to wrap around the pumpkin neck twice then tie loosely. Create fringe by cutting 6-8 strands of yarn 6cm long and folding them through edge stitches every 2-3 sts. Trim evenly.
— Spiral Coil (Main Decorative Body) :
Info :
The spiral is worked as a long tubular strip that will be coiled around a dowel or stiff cord. We recommend crocheting a tube in continuous rounds with 40 sts per round and then creating a purple edge on both long sides. You can use a length of 120-140 rounds depending on how many loops you want; below is a recommended 120-round version producing 5-7 loops for a 25-30cm vertical ornament.
Round 1 :
With Black, 40 sc in magic ring or ch40 join to form ring and work first round 40 sc (40)
Round 2-120 :
1 sc in each st (40)
Info :
If you prefer a flat ribbon instead of a tube, work in rows (ch40, 1 sc across for X rows) and then single crochet around the long edges with Purple to create the decorative rim. For the tubular method above, after finishing rounds, use Purple to sc around each long edge by flattening the tube and working slip-stitch joins or sc around the edges to create the vivid purple border.
Round 121 :
With Purple, 1 sc around one long edge (work 1 sc in every stitch along the edge, approximately 120 sts depending on length) - this creates a neat edge trim
Round 122 :
With Purple, 1 sc around the opposite long edge (120)
Info :
Blocking the strip lightly with steam (if your yarn allows) can help the spiral hold a neat coil. If using a core dowel, slip the strip over the dowel and coil tightly, pinning loops until you are satisfied with spacing. You can also run a length of wire or thin rope along the inside before closing one edge to make the spiral permanently stiff.
— Spiral Decorations & Placements :
Info :
Plan appliques roughly 4-6cm apart along the spiral. Leave small gaps for wooden beads and to thread the dowel through. Appliques should be sewn on after the spiral is wrapped around the dowel so they sit facing outward.
— Applique: Ghost (Make 4) :
Round 1 :
With White, ch6, 1 sc in 2nd ch from hook and across (5), ch1 turn
Round 3 :
Dec, 1 sc, dec (3)
Round 4 :
Ch3 for arms and sl st back to base to make a curved shape. Fasten off leaving long tail to sew. Embroider two small black eyes and a small mouth or use small black felt dots.
Info :
Sew ghosts to spiral with the bottom slightly overlapping the purple edging so they appear as though floating. Make 3-5 ghosts spaced along different loops.
— Applique: Bat (Make 4) :
Round 1 :
With Orange, ch10, 1 sc across from 2nd ch (9) turn
Round 2 :
1 sc across, for wings ch3 on either side and sc into side base to form wing points. Fasten off leaving tail to sew and shape wing tips with a few sl sts.
Info :
Make bats and sew them skewed on the spiral for a playful flying look. Slight stuffing (tiny bit of fiberfill) in the bat body gives dimension.
— Applique: Tiny Pumpkin (Make 2) :
Round 1 :
With Orange, mr, 6 sc in ring (6)
Round 3 :
1 sc in each st (12)
Round 4 :
Work 6 surface slip stitch ribs with darker orange or brown to create pumpkin grooves. Fasten off with tail to sew in place.
Info :
Sew pumpkins flat to the spiral and add a tiny green stem with 3-4 Green sc tightly sewn to the top.
— Applique: Star (Make 6) :
Round 1 :
With Orange, ch6, sl st to form ring, ch3, (dc, ch2, dc) in ring x5 to create star points. Fasten off and sew into place.
Info :
Stars are decorative accents—scatter them across several loops for color contrast.
— Applique: Spider Web Embroidery :
Info :
Using white embroidery floss or thin yarn, embroider a small 4-spoke web on the spiral by anchoring at one point then stitching radiating lines and connecting them with small arcs. Make 2-3 webs across loops.
— Beads & Spacer Placement :
Info :
Use small wooden beads as spacers between loops on the dowel. You will thread the dowel through the spiral and alternate bead placements between loops to keep separation. Use 4-6 beads of varying sizes (8-12mm). Secure beads with a drop of hot glue if needed.
— Spider (Make 2) :
Round 1 :
With Black, 6 sc in magic ring (6)
Round 3 :
(1 sc, inc) x 6 (18)
Round 4 :
1 sc in each st (18)
Round 5 :
(2 sc, dec) x 6 (12)
Round 6 :
1 sc in each st (12)
Round 7 :
(1 sc, dec) x 4 then stuff lightly to form a flat round (8)
Round 8 :
Fasten off leaving long tail for sewing. Attach two white felt dots or tiny safety eyes for googly look.
Round 9 (Legs - make 8 legs) :
With Black, ch8, sl st in 2nd ch from hook and across to create a thin leg, fasten off leaving tail to sew. Repeat 8 times and attach evenly around the body base.
Info :
For sturdier legs, use floral wire wrapped in yarn: push thin wire through ch, fold and secure ends into body before sewing. Bend legs into shape for a playful stance.
— Hanging Loop & Core Dowel Prep :
Round 1 :
With Neutral Twine or Black, form a loop of desired length (6-8cm) and knot securely; weave in and treat knot with a drop of glue. Slide a bead over the loop for decoration.
Info :
Cut a dowel or use a stiff cord that fits loosely inside the spiral tube. The dowel should be slightly shorter than the spiral length. Mark positions for head, beads, and bottom spiders so you have a plan before assembly.
— Assembly :
Info :
Assembly is the final, methodical step: slide the spiral over the dowel, position beads between loops, place the pumpkin head at the top, attach hat and scarf, then secure bottom spiders. Below are specific steps to attach each item precisely.
Step 1 :
Insert the dowel through the center of the spiral from top to bottom. If your spiral is tubular, you can feed it through; if it is flat, stitch one long edge closed first into a tube to slip over the dowel.
Step 2 :
Thread a large bead near the top of the dowel then push the pumpkin head down onto the dowel so the bead sits against the bottom of the pumpkin for support. Sew or glue the head to the dowel if necessary.
Step 3 :
Position the scarf around the head base and sew the scarf ends to the neck area using a hidden mattress stitch to keep it tidy. Tip the scarf slightly to one side for personality.
Step 4 :
Wrap the spiral around the dowel in even loops. Place a wooden bead between each two loops on the dowel as spacers (see placements marked earlier). Glue beads in place with a small dot to ensure loops remain spaced.
Step 5 :
Sew the applique elements onto the spiral loops now that it is positioned. Use long tails to tack appliques in place, then secure by sewing through spiral fabric in several spots so the applique won't fold or come loose.
Step 6 :
Attach the spiders to the bottom of the dowel using a short length of twine or chain of beads. Tie the spiders so they dangle about 3-4cm below the lowest loop. Add a knot and a bead to finish the bottom.
Info :
Check the whole piece for balance. If the head tips forward, adjust bead positions or add a small weight inside the lowest spiral loop to counterbalance. Use pins to reposition before final sewing.
— Final Finishing Touches :
Info :
Weave all tails inside the spiral or head and cut close. Use a small dab of fabric glue on felt appliques for extra hold on the spiral's curved surface. Add a thin coat of clear matte sealant to wooden beads if desired for longevity.
This spooky spiral ornament brings together playful design and cozy crochet techniques—every loop reveals a new tiny detail to admire! Sewing the head, hat, and appliques into place is deeply satisfying and the dangling spiders add the perfect finish. Hang it on a hook, use it as seasonal mantel decor, or make a few for gifts—the finished piece will charm any Halloween fan. 🎃🕸️