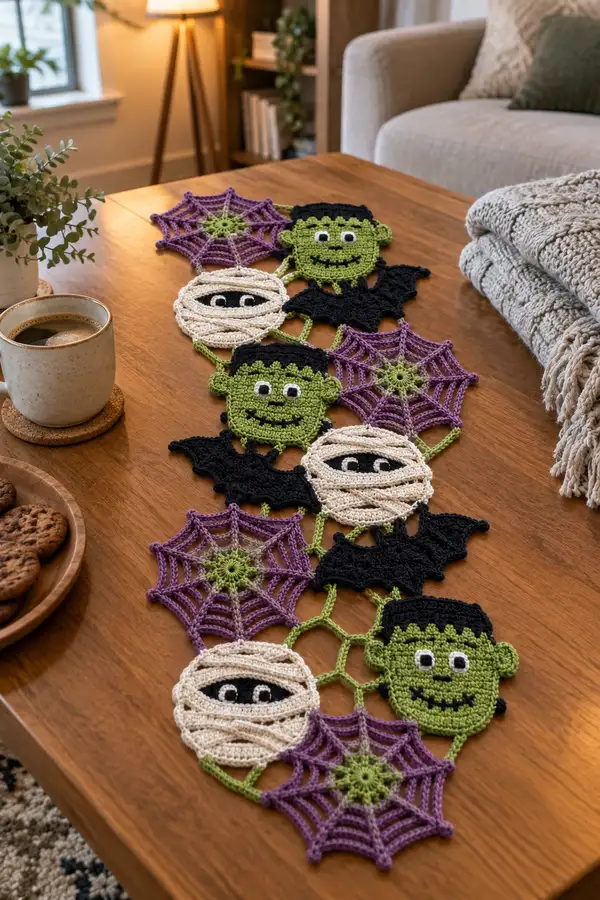
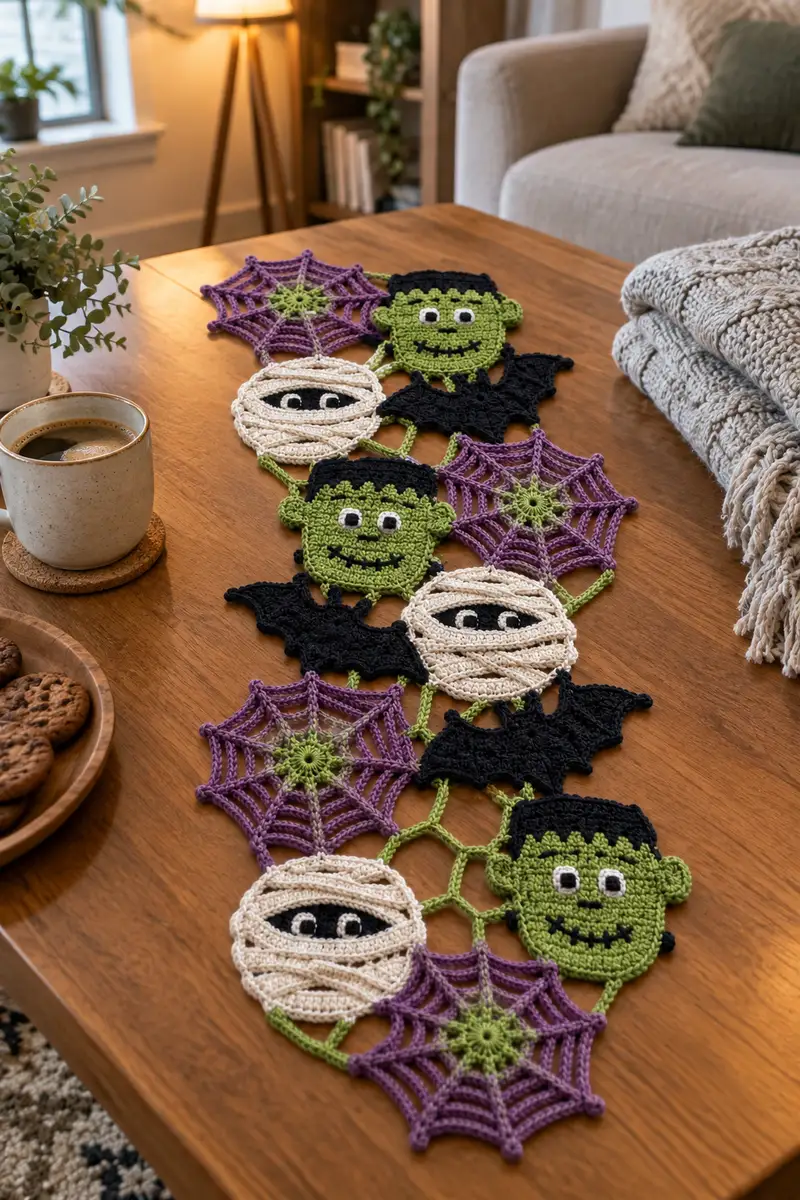
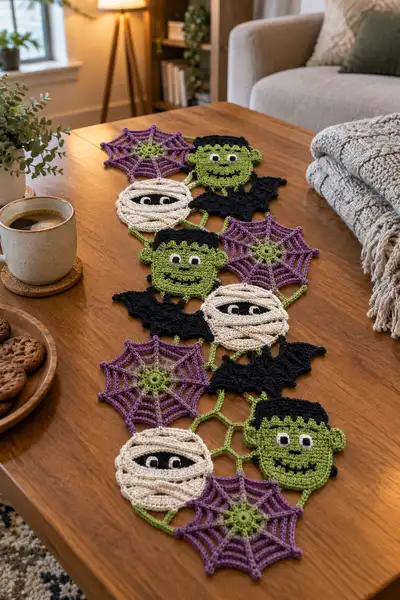
Create a spooky-cute Halloween table runner composed of linked Frankenstein heads, wrapped mummies, delicate purple spiderwebs, and lacy black bats. This pattern uses simple motif repeats and joining chains so you can make a festive runner perfect for a coffee table or mantel. Each motif is crocheted flat with clear round-by-round instructions and seamed together with connecting chains for a handcrafted seasonal accent.
Progress Tracker
0% Complete
— Materials & Gauge :
Info :
Use worsted weight (#4) cotton or cotton-blend yarn for a crisp, flat finish that lies well on tabletops. Gauge is not critical for motif size but for consistency aim for 16 sc x 20 rows = 4 in (10 cm) in single crochet, worked tightly so motifs do not curl or gape. Work with a 3.5mm hook or one that gives you a firm fabric.
— Frankenstein Head (Make 3-4 depending on runner length) :
Round 1 :
6 sc in magic ring (6)
Round 3 :
(1 sc, inc) x 6 (18)
Round 4 :
(2 sc, inc) x 6 (24)
Round 5 :
(3 sc, inc) x 6 (30)
Round 6 :
(4 sc, inc) x 6 (36)
Round 7 :
(5 sc, inc) x 6 (42)
Round 8 :
(6 sc, inc) x 6 (48)
Round 9 :
(7 sc, inc) x 6 (54)
Round 10 :
(8 sc, inc) x 6 (60)
Info :
At this point the face disc is enlarging toward an oval; if you prefer a slightly smaller head, stop at round 8 and continue with even rounds. This pattern uses a slightly larger head to allow room for facial details and the hairline.
Round 11-16 :
1 sc in each st (60)
Info :
Place stitch markers at the start of each round. Plan eye placement: eyes will sit between rounds 13-14, spaced about 12-14 sts apart center-to-center depending on how wide you prefer the expression.
Round 17 :
(8 sc, dec) x 6 (54)
Round 18 :
(7 sc, dec) x 6 (48)
Round 19 :
(6 sc, dec) x 6 (42)
Info :
If you want the head to remain flat like the motifs in the photo, do not stuff. For a slight raised face, add a thin layer of polyfill now and continue with shallow decreases. Most runner motifs are flat, so we will keep this section minimally stuffed or unstuffed.
Round 20 :
(5 sc, dec) x 6 (36)
Round 21 :
(4 sc, dec) x 6 (30)
Round 22 :
1 sc in each st (30)
Round 23 :
(2 sc, dec) x 6 (24)
Round 24 :
(1 sc, dec) x 6 (18)
Info :
Fasten off leaving a long tail for sewing the hairline and any additions. If you prefer a perfectly flat motif, fasten off and weave tail to the back surface so it does not show on the front.
— Frankenstein Ear (Make 2 per head) :
Round 1 :
6 sc in magic ring (6)
Round 3 :
1 sc in each st (12)
Round 4 :
(2 sc, dec) x 3 (9)
Round 5 :
1 sc in each st (9)
Round 6 :
(1 sc, dec) x 3 (6)
Round 7 :
Fasten off and leave long tail for sewing. Flatten ear slightly and sew to sides at approximate placement of rounds 15-17 on the head, 6-8 sts from edge as shown.
Info :
Pin ears to head first, then sew so both ears are symmetrical. Slight forward tilt gives a friendly look.
— Frankenstein Hair / Top (Make 1 per head) :
Round 1 :
Ch 12, join to work in rnd (or start with mr and increasing to a narrow rectangle) then work in rows to create a rectangular top. For motif simplicity we will work a small curved rectangle in rounds.
Round 2 :
Join black yarn to top edge, 1 sc in each of 12 ch (12)
Round 3 :
Ch 1, turn, 1 sc in each st (12)
Round 4 :
Ch 1, turn, 1 sc in each st (12)
Round 5 :
Ch 1, turn, (2 sc in first st, 1 sc in next 10 sts, 2 sc in last st) (14)
Round 6 :
Ch 1, turn, 1 sc in each st (14)
Round 7 :
Work scalloped hairline: (sc in next 2 sts, 3 sc in next st) rep across to create jagged fringe, fasten off and sew across the top of head centered on round 8-10 of head disc
Info :
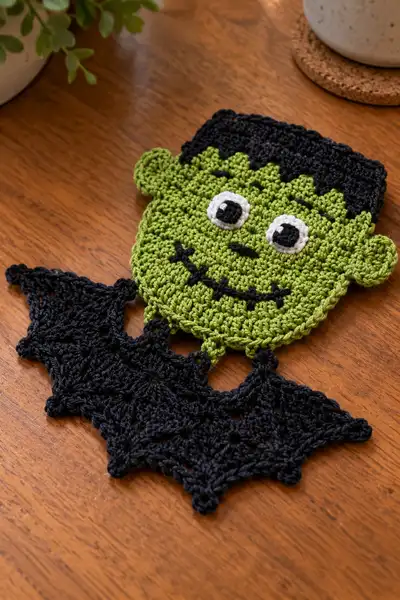
Sew hair with mattress stitch along top of head; arrange jagged fringe so it creates the classic Frankenstein zigzag hairline seen in the photo. You can work the fringe in FLO for texture if desired.
— Eye (Make 2 per head) :
Round 1 :
With white, 6 sc in magic ring (6)
Round 3 :
Fasten off leaving tail to sew in place. Sew white eye disks onto face between rounds 13-14, spaced 12 sts apart. Embroider small black pupil using black yarn or attach tiny crocheted black circle:
Small pupil (optional) :
With black, 6 sc in mr, fasten off and sew to center of white disk (6)
Info :
Position eyes before attaching hair so you can adjust placement. Sew carefully through the eye and the head to secure. If you prefer not to sew, use a dab of fabric glue on the back of the eye disk.
— Face Embroidery / Details :
Round 1 :
Embroider mouth and stitch scar lines using black yarn and a blunt darning needle. For the mouth, run a curved stitch across rounds 11-13 and add small vertical stitch details for teeth, approximately 4-6 short stitches evenly spaced.
Info :
Tie off embroidery securely at the back. If you prefer a crocheted smile, you can chain 6 and sew chain in an arc to create dimension.
— Mummy Face (Make 3-4) :
Round 1 :
6 sc in magic ring (6) with cream yarn (6)
Round 3 :
(1 sc, inc) x 6 (18)
Round 4 :
(2 sc, inc) x 6 (24)
Round 5 :
(3 sc, inc) x 6 (30)
Round 6 :
(4 sc, inc) x 6 (36)
Round 7-12 :
1 sc in each st (36)
Info :
These rounds create a smooth disc the size of the Frankenstein head; we will add wrapped bandage texture over the top. Place markers at round starts to help center the eyes later between rounds 9-10.
Round 13 :
(4 sc, dec) x 6 (30)
Round 14 :
(3 sc, dec) x 6 (24)
Round 15 :
1 sc in each st (24)
Round 16 :
Fasten off and leave long tail for sewing and bandage overlay
— Mummy Eyes (Make 2 per mummy) :
Round 1 :
With black yarn, 6 sc in mr (6)
Round 2 :
Fasten off leaving tail to sew into face at center of the disc. Over-sew a small white semicircle or stitch a white French knot to represent eye whites if desired.
— Mummy Bandage Overlay :
Info :
Bandages are created by working a series of chained strips and sewing them in overlapping arcs across the face. Use cream yarn and a smaller hook (3.25mm) to keep strips tidy.
Strip 1 :
Ch 20, sl st along chain back toward start to create a flat strip (20)
Strip 2 :
Ch 15, sl st back (15)
Strip 3 :
Ch 12, sl st back (12)
Info :
Arrange strips across the mummy face with overlapping edges; sew strips on with small invisible stitches. Leave a central horizontal gap for the eyes; pass a small embroidered black eye behind or between two strips to create the peeking effect in the photo.
— Spiderweb Motif (Make 3-4) :
Round 1 :
With bright green (center color), mr, ch 3 (counts as dc), 11 dc in mr, join with sl st to top of ch-3 (12 dc) (12)
Round 2 :
Ch 1, sc in same st, ch 4, *sc in next st, ch 4; rep from * around, join with sl st (12 ch-4 loops)
Round 3 :
Change to purple. Join in any ch-4 loop, *(sc, hdc, 3 dc, hdc, sc) all in the same ch-4 loop, sl st in next ch-4 loop; rep from * around (creates 12 spider spokes)
Round 4 :
Ch 1, sl st to center of one 3-dc cluster, ch 6, sl st into next cluster center, ch 6; repeat across to make outer arches then join and fasten off
Round 5 :
For a more lacy web, work tiny picot points: *ch 3, sl st into the top of the outer dc to create a small pointed edge; rep between each cluster around
Info :
Block spiderweb flat before sewing to ensure the openwork remains tidy. You may stiffen the web lightly with a spray starch if desired to help it lie flat on the table.
— Bat Motif (Make 5-6) :
Round 1 :
With black, mr, ch 1, 8 sc in mr (8)
Round 2 :
2 sc in each st around (16)
Round 3 :
(1 sc, inc) x 8 (24)
Round 4 :
1 sc in each st (24)
Info :
We will shape bat wings with pointed scallops worked along the lower edge. Mark the bottom center as the wing axis before proceeding for symmetry.
Round 5 :
*Sk into 3rd st to start left wing: ch 3, (tr, ch 1, tr) in same st to form wing tip, sl st into the next st to anchor; work across the lower arc of the disc creating 3 scallops total, then mirror across for right wing*
Round 6 :
Work 3 small picot points at the outermost wing tips for definition: (ch 3, sl st in top of last tr) at each tip, fasten off and weave in tail
Info :
Pin wings flat and steam-block gently to make scallops crisp. Bats are slightly lacy and should lie flat for joining to the runner.
— Connecting Chain Hex (Make many) :
Round 1 :
With bright green, ch 6, join with sl st to form loop, ch 1, 12 sc around loop, join (12)
Round 2 :
Ch 4, *skip next st, sl st in next st, ch 4; rep around to form 6 spokes, join and fasten off
Info :
These small link loops are used to join motifs in a decorative honeycomb-like chain; block them flat and sew or sl st between motifs as you assemble the runner.
— Optional Small Black Accent Knobs (for neck bolts on Frankenstein) :
Round 1 :
With black, mr, 6 sc in mr (6)
Round 2 :
Fasten off leaving tail to sew to either side of head to suggest bolts if desired
Info :
These are purely decorative and small; sew securely and weave in ends through the head so they will not come loose.
— Joining & Edge Link Chains :
Info :
The motifs in the photo are connected with short chains and 6-loop connectors to create a lattice. Make all motifs first, then gently block flat. Use green connectors to join motifs with one or two sl sts in edge stitches to maintain flexibility.
Round 1 :
To join two motifs: align edges and whipstitch through back loops only across 4-6 sts, then secure with green connector loop and repeat across the seam for a secure but open join.
Round 2 :
For a decorative exposed join: chain 8 from one motif edge, join to next motif edge with sl st, ch 8 back; tension should be loose enough to create visible loops that sit between motifs (like photo).
Info :
Use blocking pins to hold motifs in place and adjust spacing as you work around the entire runner; measure as you go to keep the overall length consistent.
— Full Detailed Round Breakdown for Frankenstein Head Variation (Extended for clarity, total rounds 35) :
Round 3 :
(1 sc, inc) x 6 (18)
Round 4 :
(2 sc, inc) x 6 (24)
Round 5 :
(3 sc, inc) x 6 (30)
Round 6 :
(4 sc, inc) x 6 (36)
Round 7 :
(5 sc, inc) x 6 (42)
Round 8 :
(6 sc, inc) x 6 (48)
Round 9 :
(7 sc, inc) x 6 (54)
Round 10 :
(8 sc, inc) x 6 (60)
Round 11-14 :
1 sc in each st (60)
Info :
Place eyes between rounds 13 & 14 and about 12 sts center-to-center for the rounded friendly face. If you want eyes closer together, place them 10 sts apart. Attach white eye disks and then pupils.
Round 15 :
(8 sc, dec) x 6 (54)
Round 16 :
(7 sc, dec) x 6 (48)
Round 17 :
(6 sc, dec) x 6 (42)
Info :
If you prefer a flatter motif like the photos, do not pull the decreases tightly; leave a small opening to flatten the face. For a barely three-dimensional head, pad lightly with a thin layer of batting.
Round 18 :
(5 sc, dec) x 6 (36)
Round 19 :
(4 sc, dec) x 6 (30)
Round 20 :
1 sc in each st (30)
Round 21 :
(2 sc, dec) x 6 (24)
Round 22 :
(1 sc, dec) x 6 (18)
Round 24 :
Fasten off and weave in ends on wrong side
Info :
Sew hair, ears and facial features as previously described. Ensure all small pieces are secured to the face with hidden stitches to avoid visible tails on the right side.
— Full Detailed Round Breakdown for Mummy (Extended 30 Rounds) :
Round 3 :
(1 sc, inc) x 6 (18)
Round 4 :
(2 sc, inc) x 6 (24)
Round 5 :
(3 sc, inc) x 6 (30)
Round 6 :
(4 sc, inc) x 6 (36)
Round 7-12 :
1 sc in each st (36)
Info :
We work extra rounds to create a larger canvas for bandage overlay. Keep tension even to ensure the outer edge remains smooth for attaching bandage strips.
Round 13 :
(4 sc, dec) x 6 (30)
Round 14 :
(3 sc, dec) x 6 (24)
Round 15 :
1 sc in each st (24)
Round 16 :
Fasten off and leave long tail for attaching bandages
Bandage Strip A :
Ch 20, sl st back across chain to make a flat band (20)
Bandage Strip B :
Ch 16, sl st back across (16)
Bandage Strip C :
Ch 12, sl st back across (12)
Round 17 :
Arrange strips on face in overlapping arcs and sew down with small whipstitches. Leave a small gap for the eye line between rounds 9-11.
Round 18 :
Sew black eye disks or embroidered eyes behind the gap so they peek through. Fasten off and weave ends securely behind the face.
Info :
Vary strip lengths and overlap points to create a natural bandaged look. Secure multiple stitches across each band edge so they stay flat after washing or handling.
— Spiderweb Full Step-By-Step (16 Rounds, Lacy) :
Round 1 :
With moss green center, mr, ch 3 (counts as dc), 11 dc in mr; join (12)
Round 2 :
Ch 1, sc in same st, ch 4, sc in next st, *ch 4, sc in next st; rep until you have 12 ch-4 loops; join and fasten off green
Round 3 :
Join purple in any ch-4 loop: ch 1, (sc, hdc, 3 dc, hdc, sc) in same loop; sl st into next loop; rep around to create 12 petal-like spokes
Round 4 :
Ch 1, in the center of each 3-dc cluster sl st, ch 6, sl st into next cluster center; repeat around making 12 ch-6 connecting arcs
Round 5 :
Work picot edging: *ch 3, sl st at base of previous ch-6 arc to form a small point; repeat between each arc to create 12 outer points; join and fasten off
Info :
Use a blocking board to pin each arc so the web becomes even and symmetrical. A small starch spray will give body to the web if you want it to sit crisp on the table surface.
— Bat Deep Lace Version (18 Rounds) :
Round 1 :
With black, mr, ch 1, 8 sc in mr (8)
Round 2 :
2 sc in each st (16)
Round 3 :
(1 sc, inc) x 8 (24)
Round 4 :
1 sc in each st (24)
Round 5 :
Ch 1, sc in next 4 sts, ch 4, skip 2 sts, sc in next 6 sts, ch 4, skip 2 sts, sc last 6 sts; this begins wing shaping
Round 6 :
In each ch-4 space work (sc, hdc, 3 dc, hdc, sc) to create a pointed wing; repeat on both wings; join and continue with sl st edging to flatten points
Round 7 :
Work small picots at each wing tip: ch 3, sl st in top of previous dc; continue across lower wing edge for decorative points; fasten off
Info :
When joining bats to Frankenstein heads and mummies, attach at the small loops created by ch spaces; this yields an airy yet stable connection that matches the photo's look.
— Complete Assembly Sequence (After Making All Motifs) :
Info :
Arrange motifs on a flat surface following the photo pattern: alternation of spiderweb, Frankenstein, bat connectors and mummy faces. Leave a consistent gap of one connector hex between motifs. Pin all pieces in place for evaluation before joining.
Step 1 :
Lay out first spiderweb at one end, then a Frankenstein head to its right, a mummy below that, and a bat to the side following the zig-zag. Use the green connecting hex loops to link motifs. Sew or sl st each connector to the motif edges with small secure stitches.
Step 2 :
Use 2-3 connectors to attach larger motifs (heads and mummies) because they need more stability; smaller bat motifs only need one connector on each tip as shown. Reinforce joins by going back over the seam once to add strength.
Step 3 :
Work a final decorative edge if desired: sc along outer edges of entire runner in black for a finished frame, placing 3 sc in each corner point or scallop and 1 sc along straight edges.
Info :
Block the final assembled runner lightly to align motifs and make joins sit tidy. Use a low iron or steam to help motifs relax and flatten.
Finishing :
Weave all remaining tails to the wrong side and trim. If you added small accent knobs or eyes, check their attachment and re-sew if needed. Give the runner a final light blocking to ensure a flat, even appearance.
This Halloween table runner brings playful spooky charm to any surface — friendly Frankenstein smiles, sneaky mummy eyes, lacy purple webs, and delicate black bats all joined in a cheerful chain. Each motif is handcrafted to sit flat and look tidy on your table; it's a fun seasonal project with a satisfying finish. 🧶🎃 I hope making this runner fills your home with cozy Halloween vibes and lots of smiles! 👻