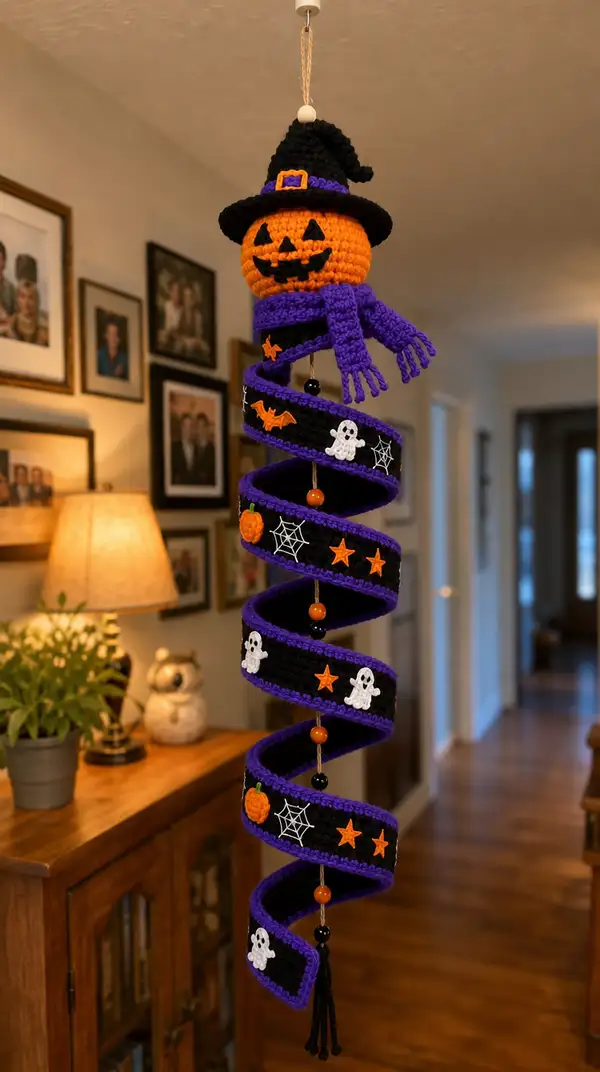
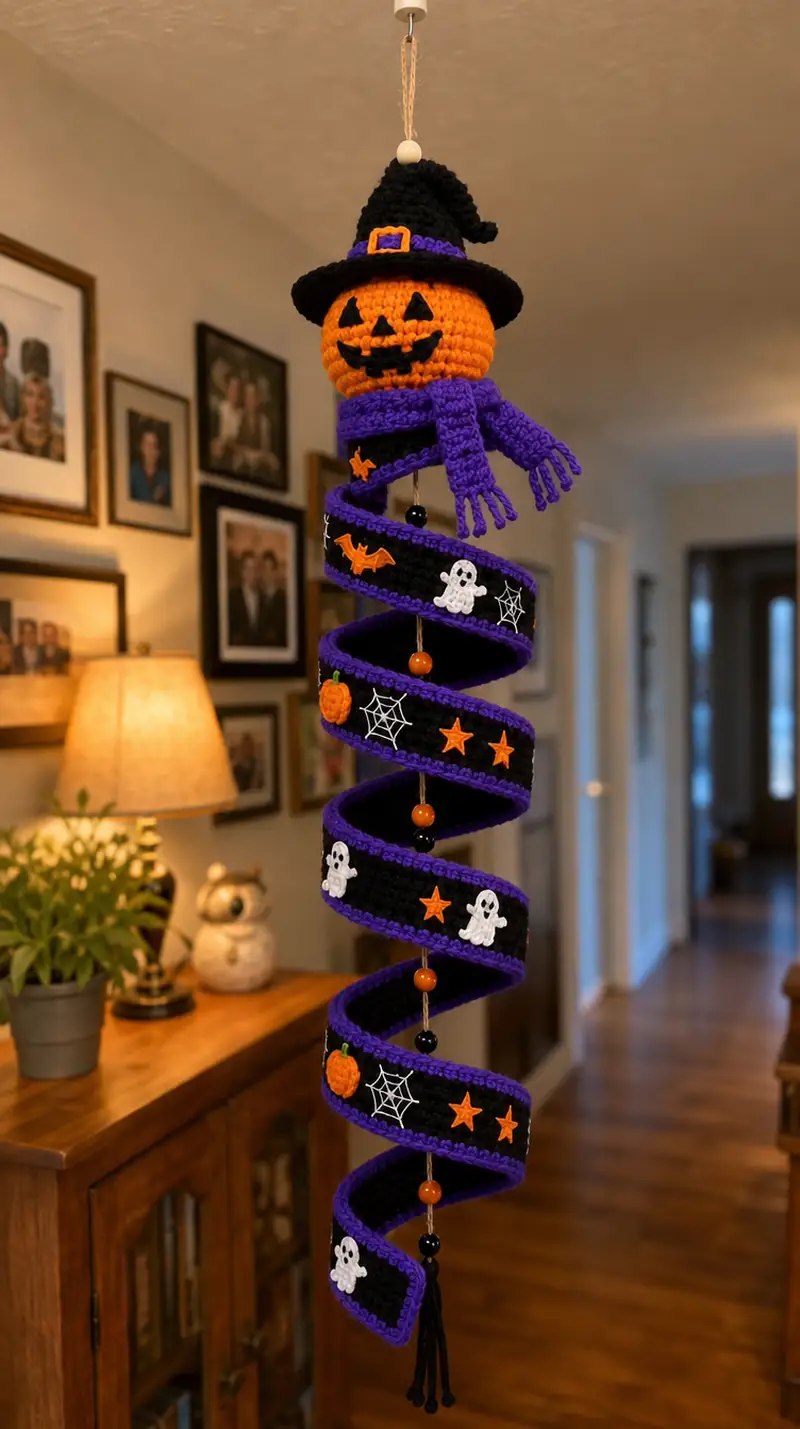
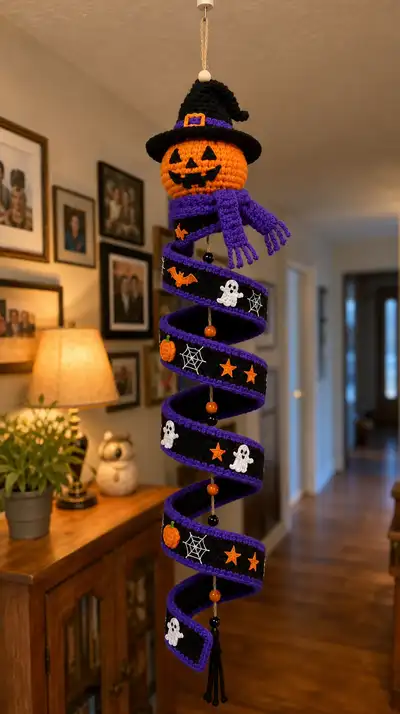
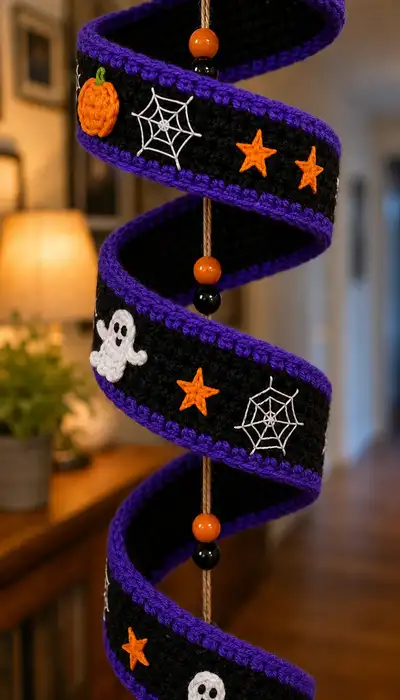
Bring whimsical Halloween charm to your home with this spiral pumpkin hanging ornament. The design features a crocheted jack-o-lantern head wearing a witch hat and purple scarf, suspended above a long black-and-purple spiral ribbon decorated with pumpkins, ghosts, stars and spider webs. Beads and a tassel run through the center for weight and movement. This pattern gives step-by-step instructions to recreate every element for a festive, handmade decoration.
Progress Tracker
0% Complete
— Pumpkin Head :
Round 1 :
6 sc in magic ring (6)
Round 3 :
(1 sc, 1 inc) x 6 (18)
Round 4 :
(2 sc, 1 inc) x 6 (24)
Round 5 :
(3 sc, 1 inc) x 6 (30)
Round 6 :
(4 sc, 1 inc) x 6 (36)
Round 7 :
(5 sc, 1 inc) x 6 (42)
Round 8 :
(6 sc, 1 inc) x 6 (48)
Round 9-14 :
1 sc in each st (48)
Info :
Decide eye placement now. For a 48-st head, place safety eyes between rounds 12-13, spaced 10-12 stitches apart for the friendly jack-o-lantern look. If embroidering eyes instead, mark positions with pins.
Round 15 :
(6 sc, 1 dec) x 6 (42)
Round 16 :
(5 sc, 1 dec) x 6 (36)
Round 17 :
(4 sc, 1 dec) x 6 (30)
Info :
Begin stuffing the pumpkin head firmly but not rock-hard. Add small amounts of polyfill at a time, shaping with your fingers to maintain a round profile. Keep stuffing consistent so the facial features hold shape.
Round 18 :
(3 sc, 1 dec) x 6 (24)
Round 19 :
(2 sc, 1 dec) x 6 (18)
Round 20 :
(1 sc, 1 dec) x 6 (12)
Round 21 :
1 sc in each st (12)
Info :
We leave a short neck tube of 12 sts to attach the head to the cord and hat later. Continue stuffing as you work the neck; push stuffing slightly down so hat can sit neatly on top of the head.
Round 22 :
(1 sc, 1 inc) x 6 (18)
Round 23 :
1 sc in each st (18)
Round 24 :
1 sc in each st (18)
Round 25 :
(2 sc, 1 dec) x 6 (12)
Round 26 :
Fasten off leaving a long tail for sewing (12). Finish stuffing and close if needed, but leave the top opening large enough to fit the hat brim when assembling. Weave tail inside to hide.
Info :
Facial features: Use black yarn for the classic carved jack-o-lantern face. Embroider triangular eyes and nose and a toothy grin using surface embroidery or duplicate stitch across Rounds 10-12 where your marked eye positions occur. If using safety eyes, place them before final stuffing and secure washers firmly.
— Witch Hat (Crown & Peak) :
Round 1 :
6 sc in magic ring (6)
Round 3 :
(1 sc, 1 inc) x 6 (18)
Round 4 :
(2 sc, 1 inc) x 6 (24)
Round 5 :
(3 sc, 1 inc) x 6 (30)
Round 6-9 :
1 sc in each st (30)
Info :
These rounds create the top of the hat that will fit over the pumpkin head. Try the hat on the head as you work to ensure a snug fit. The crown height will be built next to make a pointed witch hat.
Round 10 :
(4 sc, 1 inc) x 6 (36)
Round 11-14 :
1 sc in each st (36)
Round 15 :
(5 sc, 1 inc) x 6 (42)
Round 16-18 :
1 sc in each st (42)
Info :
To create the conical top, we will begin working some decreases and a spiral twist. You can introduce occasional decs to make the top pointier. Try the crown on the pumpkin to judge height and angle.
Round 19 :
(6 sc, 1 dec) x 6 (36)
Round 20 :
(5 sc, 1 dec) x 6 (30)
Round 21 :
(4 sc, 1 dec) x 6 (24)
Round 22 :
(3 sc, 1 dec) x 6 (18)
Round 23 :
(2 sc, 1 dec) x 6 (12)
Round 24 :
(1 sc, 1 dec) x 6 (6)
Round 25 :
6 sc (6) – leave tail to sew peak closed and shape the tip into a whimsical curl; you may sl st across remaining sts and pull tight, shaping the tip to curl slightly to one side
Info :
Optional: To achieve the curled witch hat tip seen in the photo, after closing the tip, stitch along the tip edge with a running stitch and pull to curve. Reinforce with a ribbon of wire inside the tip if you want it permanently posed.
— Hat Brim :
Round 1 :
6 sc in magic ring (6)
Round 3 :
(1 sc, 1 inc) x 6 (18)
Round 4 :
(2 sc, 1 inc) x 6 (24)
Round 5 :
(3 sc, 1 inc) x 6 (30)
Round 6 :
(4 sc, 1 inc) x 6 (36)
Round 7 :
(5 sc, 1 inc) x 6 (42)
Round 8 :
(6 sc, 1 inc) x 6 (48)
Round 9 :
(7 sc, 1 inc) x 6 (54)
Round 10 :
(8 sc, 1 inc) x 6 (60)
Round 11 :
1 sc in each st (60)
Round 12 :
Optional: 1 sc in each st BLO (60) — this slightly lifts the brim edge for a defined look
Info :
Try the brim around the pumpkin head to make sure it sits well. Sew the crown to the brim inside the first round of the brim for a neat join. Add a decorative purple band by working a round of sc or a small strip sewn around the brim base.
— Hat Band & Buckle :
Round 1 :
Chain 6, join to work in the round to create a narrow band, 1 sc in each ch around for 6 rounds to create a 6-st band. Fasten off and sew around hat base (6 sts across small band)
Info :
For the buckle, make a small square: ch 6, sl st to form a loop, work 6 sc around, fasten off. Use a small yellow/gold yarn to stitch an inner square for a buckle look. Sew buckle centered on the purple band.
— Scarf (Make 1) :
Round 1 :
Chain 6 (or desired width 6-8 ch). Turn. (This is worked in rows; we will number rows as rounds for consistency.)
Round 2 :
Starting in 2nd ch from hook, 1 sc in each ch across (5 sc). Ch 1 turn (5)
Round 3-20 :
1 sc in each st across, ch 1 turn (5) — continue until scarf length is approx 12-14 inches or desired length for wrapping twice around the pumpkin neck
Info :
Create a ribbed effect by working final 2 rows in BLO or by alternating sc and hdc rows. Add fringe: cut 6 pieces of yarn 3-4" long, fold in half, pull through the end stitches and knot to secure—make 3-5 tassels on each end for the look in the photo.
Round 21 :
Fasten off and weave in ends. Attach scarf around the neck area of the pumpkin and secure with a few small stitches so it will not shift on the cord.
— Long Spiral Band (Main Body of Hanger) :
Info :
The spiral is created from a long rectangular band worked in joined rounds to maintain consistent edge stitches; black is the main color, with a purple edging added along top and bottom. This band will be wrapped in a spiral around the central cord/rod to form the hanging coil.
Round 1 :
Chain 120 (foundation chain for the length of the band). Join with sl st to first ch being careful not to twist. (120)
Round 2 :
Ch 1, 1 sc in each ch around and in the joining stitch to create a joined-round strip (120)
Round 3-50 :
1 sc in each st (120) — every round makes the band longer; work 48 more rounds or until band reaches desired total length. For the shown spiral allow about 48-60 rounds for a long hanging coil
Info :
If you want a narrower or wider spiral, change the number of starting chains and rounds. Keep the stitch count constant across rounds to prevent shaping. Work tightly so the band holds its spiral curve when wrapped.
Round 51 :
Change to purple. 1 sc in each st BLO for one round to create a defined top border (120)
Round 52 :
Change to purple. 1 sc in each st (120) — this forms the visible purple edging on the top
Round 53 :
Change back to black and 1 sc in each st (120)
Round 54-60 :
1 sc in each st (120) — finish the body of the band; end with a purple border round (see below)
Round 61 :
Change to purple. 1 sc in each st (120) — bottom edge purple border round
Round 62 :
Optional: 1 sc in each st BLO in purple to make a raised ridge along both edges for a framed look (120)
Info :
Blocking: Lay the band flat and gently steam or pin into shape if desired. To make the spiral hold its form when wrapped, you can lightly stiffen the band by spraying with fabric stiffener or using a wire inserted along the inside edge before wrapping.
— Appliques & Embroidery (Pumpkins, Ghosts, Stars, Spider Webs) :
Pumpkin Applique - Round 1 :
Using orange, 6 sc in magic ring (6)
Round 3 :
(1 sc, 1 inc) x 6 (18)
Round 4 :
1 sc in each st (18) — fasten off, leave tail to sew to band
Pumpkin Stem :
With green, ch 4, 1 sc in 2nd ch from hook and next two chs (3), fasten off and sew to top of pumpkin
Info :
Sew pumpkins to the spiral band evenly spaced. In the picture pumpkins are placed roughly every 3-4 spiral turns; adapt spacing to your length. Stitch firmly through the band so appliques do not droop.
Ghost Applique - Round 1 :
With white, ch 6, 1 sc in 2nd ch from hook and across (5). Ch 1 turn.
Round 2 :
Sc across 5 sts, ch 1, turn. Repeat for 3 rows to create a small rectangle (5x3). Shape bottom by working 3 sc in first st, skip 2 middle sts, 3 sc in last st to make 'curly feet' (total shape approx 9-11 sts). Fasten off and sew to band.
Ghost Eyes :
Embroider two small black dots for eyes with black yarn or use French knots in embroidery thread; place eyes centered on ghost body.
Star Embroidery :
Using orange embroidery thread, stitch 5-point stars directly on the band using the star stitch or by embroidered straight stitches radiating from center; each star uses 5 long straight stitches and is secured in the middle with a small knot - place stars in clusters as pictured.
Spider Web Embroidery :
Using white embroidery thread, stitch a small center knot then make 6 radiating straight stitches to create spokes. Connect spokes with small arcs of thread (tiny backstitches) to form a neat web. Place webs evenly for balance.
Info :
Plan your decoration layout on the band before sewing or embroidering. Pin or baste appliques in place and step back to ensure even spacing. Use matching thread for invisible joins if desired.
— Beaded Center Cord & Tassel :
Round 1 :
Cut a length of sturdy cord or twine longer than the finished hanging (approx 2x desired finished length). Thread beads in alternating pattern: orange, black, orange, black, etc., leaving room at the top to tie a loop for hanging and room at the bottom for the tassel.
Round 2 :
Insert cord through the center of the pumpkin head (through the neck tube created earlier). If desired, reinforce by sewing head onto cord around the neck area using a tapestry needle and the long tail from the neck round.
Round 3 :
Slide the spiral band onto the cord, wrapping the band around the cord in a gentle spiral as you add beads to the cord at intervals. Use larger beads to space spiral loops and provide weight so the band hangs open.
Info :
Test the spiral spacing as you assemble. The beads act as spacers and visual accents; move them until the spiral looks balanced and the coils are even in distance between each turn.
Round 4 :
Make a tassel for the bottom of the cord: wrap purple yarn around a 3" card 12 times, cut one edge, tie top close to form a tassel head, attach to bottom of cord and bind with yarn. Trim ends evenly.
— Assembly & Final Finishing :
Info :
Assemble on a long workspace where you can see the full hanging. Start by sliding the pumpkin head onto the cord above the top of the spiral band so the head sits on top and the band spirals below. Place beads between the top of the spiral to hold the first loop in place.
Round 1 :
Sew hat brim to crown: Place crown inside brim and stitch around joining the crown base to the brim top with invisible whipstitch. Sew securely so the hat will not wobble on the head (use the long tail from the crown or a new length of yarn).
Round 2 :
Sew hat to pumpkin head with a few stitches through the crown base into the head just above the neck tube. Secure with a knot and weave in tail. Add the purple hat band and buckle centered on the front.
Round 3 :
Attach scarf by wrapping around neck and sewing a few stitches where the scarf overlaps to secure it from shifting. Tuck ends under the hat brim or leave them visible as in the photo and secure to the band with a stitch so they won’t detach.
Round 4 :
Sew appliques and embroider webs/stars in planned positions along the band. Reinforce appliques with a few extra stitches through the band to prevent sagging. Use small stitches and hide tails inside the band when possible.
Round 5 :
Slide the spiral coil into final position on the cord: move beads between coils until the spiral spacing is to your liking. Tie a strong knot at top of cord to form a hanging loop and secure with a dab of fabric glue if desired.
Info :
For extra stability, sew a couple of stitches through the band to the cord at the top and bottom of each coil. If the spiral tends to flatten, insert a slim flexible wire along the inner edge of the band before final placement, or stiffen the band with a textile stiffener spray.
This Spooky Spiral Pumpkin hanging brings a blend of handcrafted charm and seasonal fun to your home décor. Each carefully stitched element — from the pumpkin’s grin to the embroidered spider webs and charming beads — adds personality and movement. Assemble with care, and you’ll have a durable and delightful decoration that catches eyes and compliments all autumn displays. 🎃🧶 Make one for yourself or gift to someone who loves handcrafted Halloween magic!