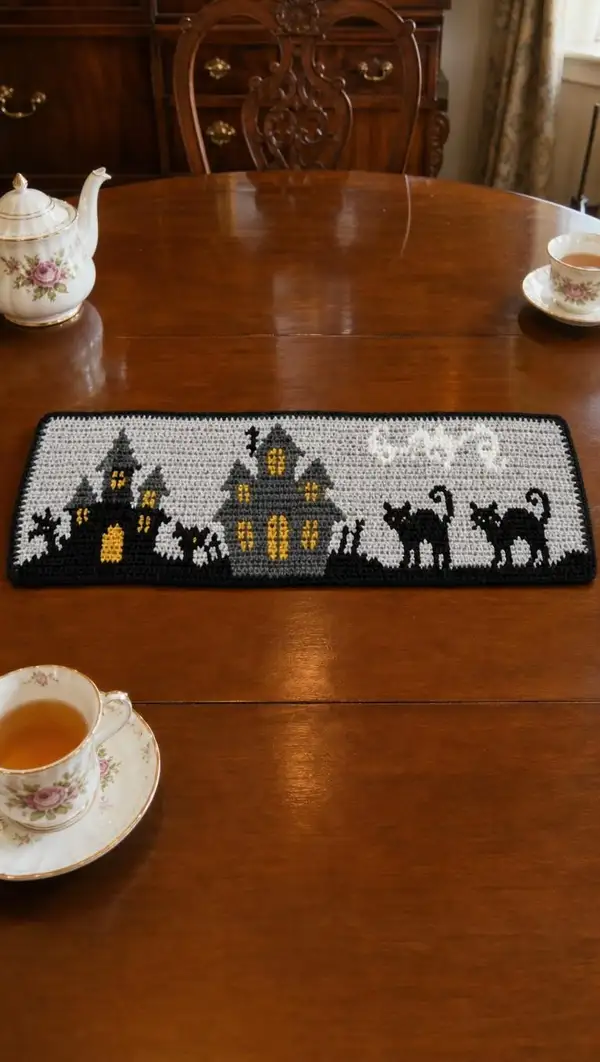
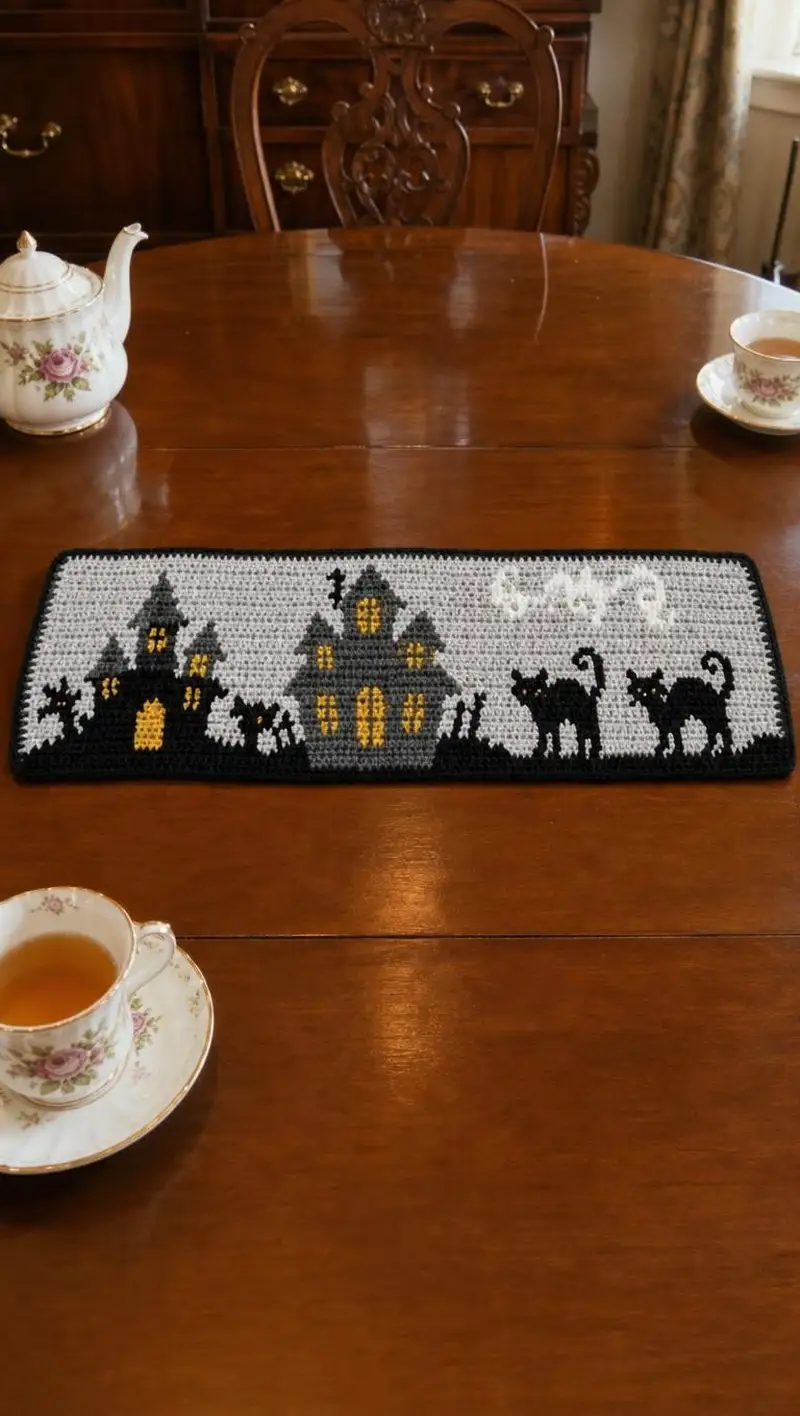
A spooky-yet-elegant rectangular tapestry crochet table runner featuring silhouetted haunted houses, prowling black cats, glowing yellow windows and a moonlit sky. Worked in tapestry single crochet for dense coverage, this runner sits perfectly on a dining table to add subtle Halloween charm. Neutral gray background, charcoal silhouettes and golden window accents create high contrast and a refined seasonal look.
Progress Tracker
0% Complete
— Overview & Gauge :
Info :
This runner is worked flat in tapestry single crochet rows. Gauge is not critical for the motif placement as long as you maintain consistent tension, but a good reference is 18 sc and 20 rows = 10 cm (4 in) using worsted weight yarn and a 4.0mm hook. The finished size provided assumes 140 stitches across and 120 rows high; this produces a runner approximately 12.5 x 40 inches depending on tension and blocking.
Info :
Pattern uses three main colors: Background Gray (G), Black Silhouette (B), and Yellow Light (Y), plus a small amount of Charcoal (C) and White (W) for cloud highlights. Work with the color chart provided in the accompanying PDF or print a single-stitch-per-square graph. Each square = 1 sc. The running stitch count across every row remains 140 sc.
— Materials & Starting Chain :
Round 1 :
Chain 141. This chain count yields 140 foundation base stitches. Note: You may also work 140 foundation single crochets instead of a chain if you prefer.
Round 2 :
Turn, starting in 2nd ch from hook: 1 sc in each chain across. Total: 140 sc. (140)
Info :
From here on we refer to each horizontal pass as a Row rather than Round. Keep a stitch marker in the first stitch of the row to mark the beginning; move it up each row. Carry unused colors along the wrong side keeping floats snug. When floats exceed 6-8 stitches, twist the two yarns together once to anchor the float and prevent long loose strands.
— Body Panel (Rows 1 - 120) :
Row 1 :
1 sc in each st across using Gray (G). (140)
Row 2 :
Turn. 1 sc in each st across using Gray (G). (140)
Row 3-8 :
Turn at end of each row. 1 sc in each st across using Gray (G). Work 6 rows of even gray to create lower background band. (140 each row)
Info :
Rows 1-8 form the lower plain background area. Keep tension consistent so the lower edge remains straight. If you prefer foundation single crochet for a less stretchy base, you may start with fsc instead of a chain.
Row 9 :
Turn. Follow chart beginning of motif: Work 10 sc in Gray (G), 8 sc in Black (B) to form left silhouette edge, 122 sc remaining in Gray (G) across. Total 140 sc. (140)
Row 10 :
Turn. 9 sc in Gray (G), 10 sc in Black (B), remaining 121 sc in Gray (G). (140)
Row 11 :
Turn. 8 sc in Gray (G), 12 sc in Black (B), 120 sc Gray (G). (140)
Info :
Rows 9-20 gradually build the left haunted house base and foreground black silhouette. The specific stitch counts in these early motif rows are simplified here — for exact silhouette edges consult the graph. Maintain carried black yarn behind the Gray section until needed again.
Row 12-14 :
Turn. Continue across following motif graph: distribute Black stitches between columns 11-50 to shape left house roof and tower. Remaining stitches are Gray background. (140 each row)
Row 15 :
Turn. Introduce Yellow (Y) on interior window pixels: Work Gray to first window column, switch to Yellow for 2-6 stitches (as chart indicates) to form window block, then switch back to Black or Gray accordingly. Keep color transitions tight by changing color on last yarn-over of previous stitch. (140)
Info :
When switching colors, complete the last pull of the previous color until two loops remain on hook; yarn over with the new color and complete the pull through to begin the next stitch. This keeps color joins neat at the face of the work. Carry less-used colors behind the live color, twisting with active yarn when floats exceed 6 stitches to prevent sag.
Row 16-20 :
Turn. Continue following chart to complete left house verticals, windows, and small birds/bats silhouettes that sit near the roofline. Place Black pixels to create jagged tree/shrub shapes in front of the house. (140 each row)
Row 21 :
Turn. Work even gray background across much of the row while reserving a central block of 36 stitches for the center mansion foundation — those stitches will be worked in Black/Charcoal in the coming rows as shown on chart. Example: 52 sc Gray, 36 sc Black/Charcoal mixed for mansion base, 52 sc Gray. (140)
Row 22-28 :
Turn. Build center mansion by concentrating Black (B) and Charcoal (C) stitches within the central 36-stitch block: shape towers and dormers by adding black columns and leaving occasional Yellow pixels for windows. Surrounding Gray remains plain background. (140 each row)
Info :
The mansion is approximately 36 stitches wide and about 28 rows tall in the center area of the graph. Pay attention to the placement of Yellow windows: they are often 2-4 stitches tall by 2-4 stitches wide. Work windows using Yellow (Y) and when making vertical stacks leave one or two Gray stitches as mortar to keep window forms crisp.
Row 29-34 :
Turn. Continue central mansion shaping. Mix Charcoal (C) and Black (B) to create roof slopes — alternate C and B pixels strategically to suggest depth (for instance: B,B,C,B in a roof edge) while keeping majority Black for silhouette strength. Background Gray unchanged. (140 each row)
Row 35 :
Turn. Add small accent bats and tree branches near the mansion roofline by inserting isolated Black stitches into the light Gray sky area. These are single or clusters of 1-4 Black stitches per row occupying columns immediately adjacent to mansion top. (140)
Row 36-40 :
Turn. Work Gray across most of the row; on right side begin building cat silhouettes: reserve 30-36 stitches near the right quarter for two cat shapes and foreground shrub silhouettes in Black. (140 each row)
Info :
Right-side cats are about 12-16 stitches wide each and 16-22 rows tall. To capture the elegant arched-back shape, place clusters of black pixels for the body and leave small gaps for neck and tail curve. Use single-stitch transfers of Gray to form negative space that defines the cats' outline (the motif is silhouette-based — dark shapes on light background).
Row 41-48 :
Turn. Build cat bodies and tails in Black, adding smaller Yellow stitches for eyes (1-2 stitches per eye) on the cat heads at the appropriate rows. Simultaneously, maintain background Gray in remaining stitches. (140 each row)
Row 49 :
Turn. Insert small White (W) cloud/ghost accents in the upper right quadrant — these are 2-4 stitches wide puffs placed at row 49-55. Background remains Gray; accents use white to suggest moonlit wisps. (140)
Row 50-56 :
Turn. Continue adding small cloud stitches and ensure cat tails reach their completed height (about rows 41-56). Keep houses finished below and maintain even tension. (140 each row)
Info :
The tiny Yellow eyes on the cats should be placed symmetrically. For each cat: on its head row place 2 adjacent Yellow stitches separated by 1-2 Black stitches to imply pupils. If you find carrying Yellow awkward, you can embroider eyes after the panel is finished using duplicate stitch for perfect placement.
Row 57-68 :
Turn. Work broad even Gray sky across these rows, inserting sporadic Black stitches to create distant tree lines and rooftop chimneys. This area provides breathing room between skyline elements and the border. (140 each row)
Row 69-76 :
Turn. Add a low foreground silhouette row: work Black across the bottom 6-10 stitches of these rows to create a darker ground effect directly behind the foreground silhouettes — blend into full Gray above. Example for row 69: 15 sc Gray, 110 sc Black silhouette band (varying per chart), 15 sc Gray. (140)
Info :
To make the ground appear layered, use an intermittent Black/Charcoal mix across 6 rows: alternate rows with more Charcoal to soften the silhouette edge. This gives the impression of gentle gradation while maintaining the graphic silhouette style.
Row 77-84 :
Turn. Continue sky and final rooftop details. Place any remaining detail stitches for small birds, bats, and distant windows in these rows according to the chart. (140 each row)
Row 85-92 :
Turn. Add final Yellow windows sparkle rows: place occasional Yellow stitches in houses to suggest lit windows on alternate rows — for example, 2-4 Yellow stitches per house clustered vertically. (140 each row)
Row 93-100 :
Turn. Work plain Gray rows to separate motif from border; keep these rows even and consistent to prepare for border rows. (140 each row)
Info :
Before edging, check motif placement and count rows to make sure the design is centered. Block the panel lightly if any small distortions are visible to square the edges and help the border sit flat.
Row 101-108 :
Turn. Work 8 rows of Gray as a top background band to balance the lower plain band. (140 each row)
Row 109-114 :
Turn. Work 6 rows of Gray while tidying up ends from carried yarns. Weave in long floats discreetly on the wrong side as you go. (140 each row)
Row 115-120 :
Turn. Finish last 6 rows in Gray for a neat margin above the motif and complete the panel. Fasten off and weave in any remaining ends. (140 each row)
Info :
When weaving in ends, follow the direction of the stitches for best invisibility. Use the yarn needle to thread through a couple of rows on the wrong side and trim close. If a carried color is trapped under many stitches and won’t be cut, leave it hidden between rows to avoid bulk at the edges.
— Border & Finishing :
Info :
To frame the runner, we work a narrow black single crochet border around the entire panel. For a neat look, use a slightly smaller hook (3.5mm recommended) for the border to reduce stretching at the edges.
Round 1 :
Join Black with a sl st to any corner. Work 2 sc into the corner stitch; continue along the side: 1 sc in each row-end (for the short sides) and 1 sc in each stitch (for the long sides). Place 2 sc in each corner to maintain square corners. Count carefully: you should have neat, even sc all around the perimeter. Fasten off when completed and weave in ends. (perimeter variable)
Round 2 :
Optional: Work a second round of sc in Black for a slightly thicker frame, or work crab stitch (reverse sc) in Black for a refined, twisted edge. Ensure corners are worked as 2 sc to avoid cupping. Fasten off and weave in ends. (perimeter variable)
Info :
Blocking: Wet block or lightly steam block the piece to square and relax the stitches. Pin edges straight and allow to dry before using. This will help the border sit flat and the motif appear crisp.
— Alternative Construction Notes :
Info :
If you prefer, you can crochet two narrower panels and seam them together to create a longer runner with less carrying width; seam using mattress stitch on wrong sides to hide seaming. This can make yarn-carrying and tension control easier for some crocheters.
Info :
Another option is to work the motif using tapestry Tunisian single crochet for a slightly denser, thicker fabric. Gauge and hook sizes will differ; adjust pattern and chart accordingly. The tapestry single crochet method used here gives a flat fabric that lays nicely on tabletops.
— Chart & Reading Tips :
Info :
Read chart rows from bottom to top (Row 1 is the bottom). For odd-numbered rows (RS), read chart from right to left; for even-numbered rows (WS), read chart from left to right if the chart is directional. If you prefer, you can flip the chart and work every row in the same read direction as sc in tapestry crochet is symmetrical in this application.
Info :
To mark progress, place a small piece of washi tape on the chart at the current row and move it up as you complete each row. For long panels like this, a printed chart with gridlines and a highlighter is invaluable.
— Care Instructions :
Info :
Hand-wash or use gentle machine cycle in a mesh bag on cold water. Lay flat to dry to preserve shape. Avoid bleach or harsh detergents; spot clean spills immediately. Because this is tapestry crochet with carried floats, drying flat is essential to prevent sagging.
This Haunted Night Table Runner brings cozy, seasonal elegance to any table — it’s a perfect mix of craft and décor. Each single crochet stitch forms a compact tapestry canvas where silhouettes and glowing windows tell a tiny nighttime story. The finished runner feels substantial but lies flat and looks refined framed by the crisp black border. 🎃🖤 Whether you place it under your tea set or showcase it for the season, you’ll enjoy every row of this project. Happy stitching and enjoy the spooky charm!