🧶 Beautiful ✨ Detailed 💝 Adorable

Spooky Halloween Table Runner Pattern

Spooky Halloween Table Runner Pattern
4.5★ Rating
8-10 Hours Time Needed
1.6K Made This
✂️

Intermediate Level

Ideal for those with basic crochet experience, featuring slightly more advanced stitches and techniques to expand your skills.

⏱️

All-Day Adventure

Requires 8-10 hours, ideal for a full day of immersive crocheting.

🏡

Cozy Accent

A warm touch for your space that transforms ordinary corners into inviting nooks filled with handmade charm.

🧶 Jump to Pattern ↓

About This Spooky Halloween Table Runner Pattern

This pattern makes a layered Halloween table runner made from individual crochet motifs: black haunted houses with bright yellow windows, orange spiderwebs, cream circular doilies, smiling pumpkins with green stems, little black bats and gnarled black branches. Each piece is worked flat and then assembled into a repeating staggered layout along the table center. The motifs are lace-like yet sturdy when worked with cotton or cotton-blend yarn, giving a crisp, decorative finish.
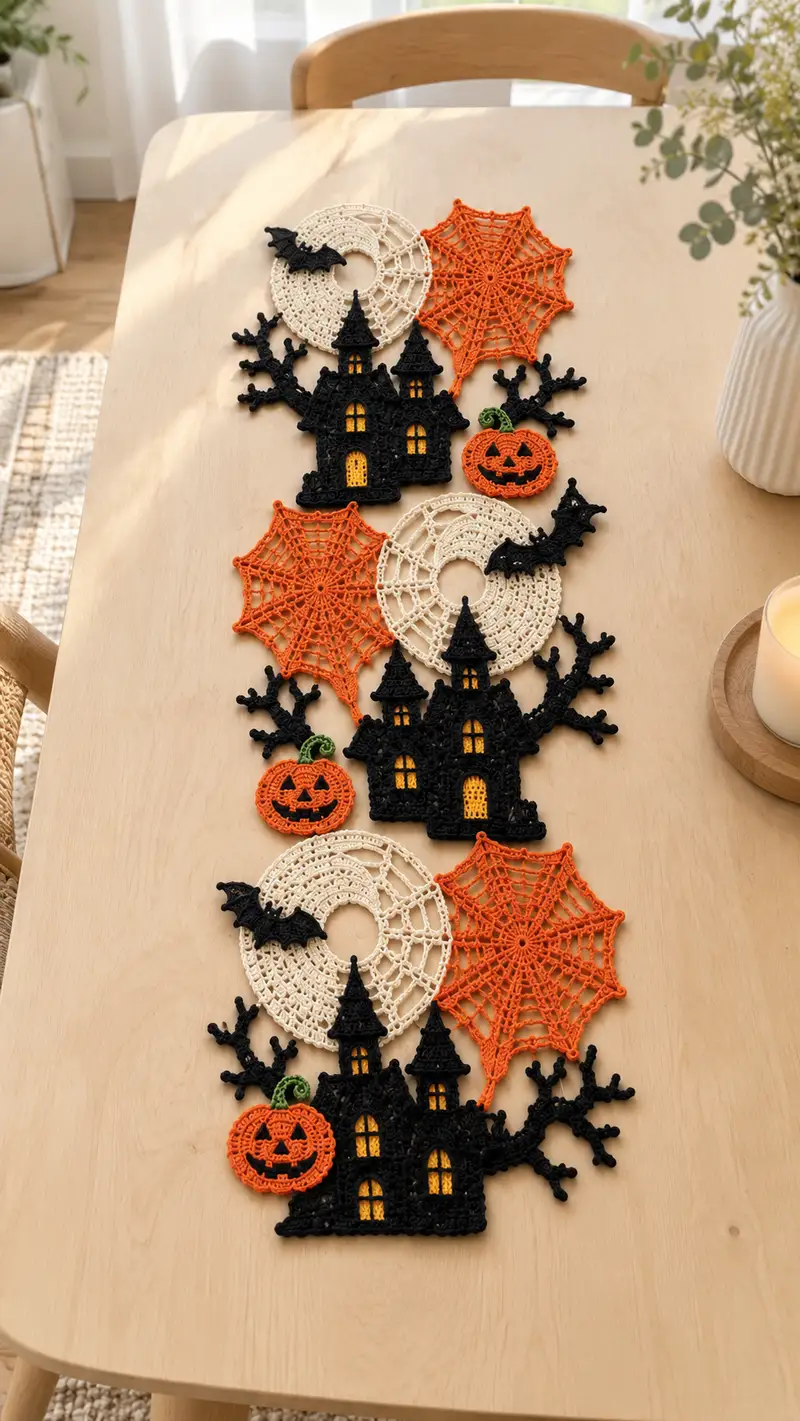
Spooky Halloween Table Runner Pattern crochet pattern - detailed view of completed project

The design is modular so you can make the runner longer or shorter by repeating the motif sets. Color changes and small appliques (pumpkin, bat) make this project visually exciting without advanced colorwork techniques.

Why You'll Love This Spooky Halloween Table Runner Pattern

I love this pattern because it layers classic Halloween motifs into a graceful, linear runner that feels both whimsical and elegant. The high-contrast black houses with yellow window insets and bright orange spiderwebs pop beautifully against the neutral doilies. I also appreciate how modular the design is — you can easily add or remove motif sets to suit your table length and style.

Spooky Halloween Table Runner Pattern step 1 - construction progress Spooky Halloween Table Runner Pattern step 2 - assembly progress Spooky Halloween Table Runner Pattern step 3 - details and accessories Spooky Halloween Table Runner Pattern step 4 - final assembly and finishing

Switch Things Up

I love how flexible this runner is — you can easily change colors for different themes. Try a gothic palette of deep plum instead of orange, or metallic thread for the doilies for a glam Halloween version.

I often swap the cream doily rings for a pale grey or moon-silver for a more ethereal look. You can enlarge or shrink motifs by using a different weight yarn and hook, or add extra rounds for larger spiderwebs to create more negative space between houses.

I recommend experimenting with using a tiny bit of wire inside branches if you want them to hold a particular curve; just wrap wire in yarn ends and sew down carefully so it doesn't poke through the surface. Most importantly, make each runner your own and enjoy the playful layering process.

Common Mistakes & How to Fix Them

✗ Skipping stitch markers at round starts can cause misaligned motif edges and uneven shapes; mark your first stitch of each round. ✗ Inconsistent tension between rounds creates lumpy or wavy motifs; practice maintaining steady, even tension throughout each motif. ✗ Not weaving in color-change tails neatly causes lumps and visible bumps under lace; carry yarn or weave tails under stitches as you go. ✗ Failing to block flat lace pieces will cause motifs to curl and not join evenly; steam or wet block pieces to final shape before assembly. ✗ Not counting increases carefully in architectural pieces (like the house) will distort windows and towers; recount at each round end. ✗ Skipping gradual stuffing (if you decide to use a tiny bit for pumpkin thickness) results in uneven shaping; stuff in small amounts for controlled volume.
Spooky Halloween Table Runner Pattern

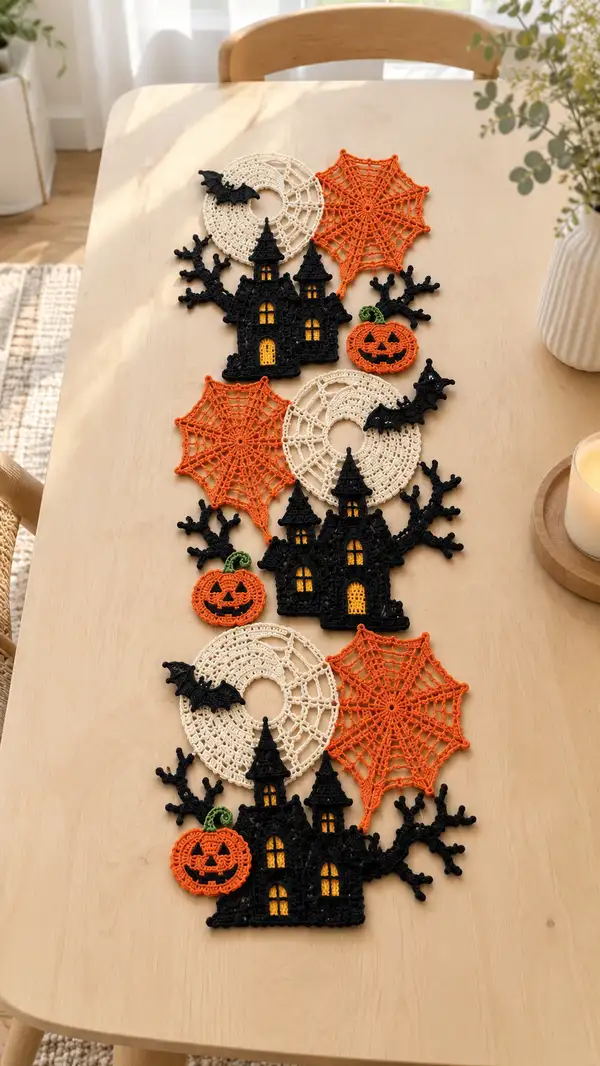
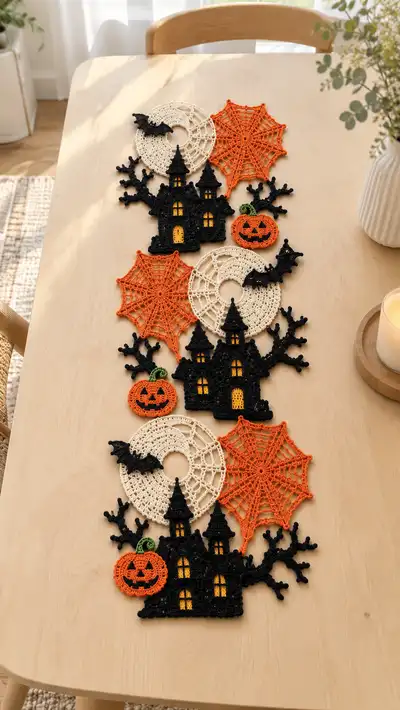
Create a striking Halloween table runner composed of linked crochet motifs: haunted houses, orange spiderwebs, cream ring doilies, jack-o-lantern pumpkins, bats and twisted branches. This flat, lace-style runner uses lightweight yarn and crisp color changes for bold contrast. Perfect for seasonal tables, mantel displays or gifts, the motifs assemble into a repeating, staggered layout for a dramatic, handmade Halloween accent.

Intermediate 8-10 Hours

Materials Needed for Spooky Halloween Table Runner Pattern

— Main Fabric

  • 01
    Sport/fingering weight cotton or cotton blend yarn (approx. 3-4 ply) for crisp lace: 120g in black (main haunted house and branches)
  • 02
    60-80g in bright orange (spiderwebs and pumpkins)
  • 03
    60-80g in cream/ivory (doily rings)
  • 04
    20-30g in bright yellow (window insets)
  • 05
    10-15g in grass green (pumpkin stems and small accents)

— Tools Required

  • 01
    2.5mm (C/2) crochet hook for crisp lace with sport/fingering cotton
  • 02
    2.0mm or 2.25mm hook for very tight small details (optional)
  • 03
    Tapestry/yarn needle for weaving ends and sewing motifs together
  • 04
    Stitch markers (at least 6-8)
  • 05
    Blocking board and pins or blocking mats
  • 06
    Scissors
  • 07
    Optional: small amount polyester fill for pumpkins if you want a slight puff (very minimal)
  • 08
    Optional: fabric glue for securing very small glued-down appliques
  • 09
    Measuring tape or ruler for size checks

Progress Tracker

0% Complete

— Haunted House Motif :

Round 1 :

With black yarn, 6 sc in mr (6)

Round 2 :

6 inc (12)

Round 3 :

(1 sc, inc) x 6 (18)

Round 4 :

(2 sc, inc) x 6 (24)

Round 5 :

(3 sc, inc) x 6 (30)

Round 6 :

(4 sc, inc) x 6 (36)

Round 7 :

1 sc in each st (36)

Info :

These first rounds create a compact central base for the house. Keep tension firm so windows later will be crisp. Place a stitch marker at the start of Round 8 to mark the front center of the house for window placement reference.

Round 8 :

(5 sc, inc) x 6 (42)

Round 9 :

1 sc in each st (42)

Round 10 :

1 sc in next 6 sts, ch 6, skip 6 sts, 1 sc in next 12 sts, ch 6, skip 6 sts, 1 sc in remaining sts to end (42)

Info :

Round 10 creates two ch-6 window openings where we will later define window frames and insets. The first ch loop is the left-side window, the second is the right-side window. Ensure loops sit on the front surface; use markers to keep their position.

Round 11 :

Work 1 sc in each sc and 6 sc into each ch-6 loop to solidify window openings (42)

Round 12 :

1 sc in each st (42)

Round 13 :

(6 sc, dec) x 6 (36)

Round 14 :

1 sc in each st (36)

Info :

Begin shaping the bottom silhouette of the house. At the end of Round 14, place a removable marker at the central top-most stitch to help align tower attachments in subsequent rounds.

Round 15 :

(5 sc, dec) x 6 (30)

Round 16 :

1 sc in each st (30)

Round 17 :

(3 sc, inc) x 6 (36)

Round 18 :

1 sc in each st (36)

Round 19 :

Ch 4, sc in next 3 sts across for roof base then work 1 sc in each st until end (36)

Info :

From Round 17 on we begin creating a slightly taller central panel that will support tower bases. Keep top edge straight by working even rounds; the ch-4 creates a small notch for the roof ridge.

Round 20 :

1 sc in each st (36)

Round 21 :

Working across the top center region only, attach yarn at center, ch 1, (sc, hdc, dc, hdc, sc) in the next 6 sts to form a small triangular tower base; sl st to secure (36 overall)

Round 22 :

1 sc around entire motif in BLO to create a defining edge (36)

Info :

Fasten off black; we will add tall towers separately and sew them onto the top center. The house main body should be a compact flat piece approximately 10–12 cm wide when worked in sport weight cotton with 2.5mm hook. If you prefer a taller house, add 2-4 more even rounds before proceeding.

— House Tower (Make 3: left, center, right) :

Round 1 :

With black yarn, 6 sc in mr (6)

Round 2 :

6 inc (12)

Round 3 :

(1 sc, inc) x 6 (18)

Round 4 :

(2 sc, inc) x 6 (24)

Round 5 :

1 sc in each st (24)

Round 6 :

1 sc in next 4 sts, ch 6, skip 6 sts, 1 sc in remaining 14 sts (24)

Round 7 :

Work 6 sc into ch-6 loop to create window aperture, continue 1 sc in each st around (24)

Round 8 :

1 sc in each st (24)

Round 9 :

(3 sc, inc) x 6 (30)

Info :

These small tower shafts will be slightly conical. Make two towers shorter (right and left) and one for the center slightly taller by adding 2-4 extra even rounds before making the roof cone.

Round 10 :

1 sc in each st (30)

Round 11 :

(4 sc, inc) x 6 (36)

Round 12 :

1 sc in each st (36)

Round 13 :

For roof cone: switch to working in rounds of decreases. (6 sc, dec) x 4 (32)

Round 14 :

(5 sc, dec) x 4 (28)

Round 15 :

(4 sc, dec) x 4 (24)

Round 16 :

(3 sc, dec) x 4 (20)

Round 17 :

(2 sc, dec) x 4 (16)

Info :

Leave a long tail to sew the tower to the main house body. For the center tower, add two additional rounds of (1 sc, dec) x 4 to form a taller, pointier roof before fastening off. Sew the towers to the house at the top center area using the stitch markers you placed earlier.

— Haunted House Window Insets (Make 5 small insets) :

Round 1 :

With yellow yarn, 6 sc in mr (6)

Round 2 :

6 inc (12)

Round 3 :

1 sc in each st (12)

Round 4 :

1 sc in each st BLO to create a slightly recessed inset (12)

Info :

Make as many window insets as needed to fit your house layout — typical house layout uses 4 vertical windows and a taller door inset. Sew these insets into the ch-6 windows and along door rectangles before sewing towers in place so they are visible through window apertures.

— House Door Inset (optional stitchwork, Make 1) :

Round 1 :

With yellow yarn, ch 6, join to make a small ring, work 12 sc evenly around ring (12)

Round 2 :

1 sc in each st for one even round (12)

Info :

Stretch or elongate the door by working an extra row of 6 sc down the center with slip stitches to make a taller arch, then sew into the door aperture on the house front.

— Black Branches (Make 4 long branches plus small offshoots) :

Round 1 :

With black yarn, ch 15, sc in 2nd ch from hook and across (14)

Round 2 :

Turn, ch 1, sc across, at the ends make 3 sc in last st to create a small bulb, 1 sc in each back loop along next edge to return (approx 30 including bulbs)

Round 3 :

Along the branch, make ch-4 offshoots every 3rd stitch: *sc in next 3 sts, (ch 4, sl st back into adjacent stk) repeat* to create twiglets. Finish with sc to end (approx 30)

Info :

Vary the locations and lengths of ch-4 offshoots to create natural-looking branches. Pin branches flat and block to keep twiglets from curling inwards. Branches are worked as flat straps to be sewn behind the house base so they peek out on both sides.

Round 4 :

Fasten off leaving long tail for sewing. Make 4 main branches and additional tiny 3-5 stitch offshoots to sew near house edges as decorative dead wood.

— Spiderweb Motif :

Round 1 :

With orange yarn, ch 6, sl st to first ch to make small ring, ch 3 (counts as dc), 11 dc into ring, join with sl st to top ch-3 (12 dc)

Round 2 :

Ch 4 (counts as dc+ch1), *dc in next dc, ch 1* around, join (12 dc, 12 ch-1 sps)

Round 3 :

Working in ch-1 spaces: *(dc, ch 2, dc) in next ch-1 sp, ch 1* around; join (12 clusters and 12 ch-1 sps)

Info :

Round 3 forms the radial points of the web. Keep tension slightly loose for the web to lay flat and airy. Use blocking to open the lace evenly.

Round 4 :

Ch 6, sl st into next ch-1 space to create long spoke, repeat long spoke for each ch-1 space around (12 long spokes)

Round 5 :

Working back around the spokes: *sc in spoke, ch 2, sl st in next spoke 3-4 sts down to form arc, ch 2* repeat around to join arcs and create web concentric. Finish with sl st to join.

Round 6 :

Continue adding an outer round: *(ch 3, dc) in sl st point, ch 3, sl st in arc center* around to form decorative edge points (approx 48 edge points depending on arcs)

Info :

Make spiderwebs slightly asymmetrical to mimic natural webs; you can vary ch lengths for some spokes for a more organic look. Block flat to exact size after finishing.

— Doily Ring / Cream Moon :

Round 1 :

With cream yarn, ch 6, sl st to first ch to form a ring, ch 3, 11 dc into ring, join (12 dc)

Round 2 :

Ch 3, dc in same st, *dc in next dc, 2 dc in next dc* around (18 dc)

Round 3 :

(1 dc, ch 2, 1 dc) in every 3rd st to form lacy arches, join (18 arches)

Round 4 :

Work shells around: *sl st into arch, ch 3, 3 dc in arch, ch 3, sl st into arch center* repeat around to enlarge lace (18 shells)

Info :

At this stage the doily should be a flat circle roughly the diameter of a small coaster (approx 9–11 cm worked in sport/fingering cotton). The runner design shows a centered hole; if you want a larger center, increase the initial ch ring size (e.g., ch 8 ring instead of ch 6).

Round 5 :

Ch 1, sc around in BLO to form a neat inner ring edge and close any gap to create a donut effect (approx 72 sc)

Round 6 :

Decorative outer edge: *(ch 4, sl st in next shell peak), repeat* around to give a pointed lace finish

Info :

Fasten off and block to flatten. For each runner repeat, make three doily rings set behind houses as shown. You can also use cream or off-white to mimic a moon behind the haunted house silhouette.

— Pumpkin Motif :

Round 1 :

With orange yarn, 6 sc in mr (6)

Round 2 :

6 inc (12)

Round 3 :

(1 sc, inc) x 6 (18)

Round 4 :

(2 sc, inc) x 6 (24)

Round 5 :

1 sc in each st (24)

Round 6 :

Work surface ribs: Front post hdc around groups of 3 sts to create vertical pumpkin ribs across the round (24 posts)

Round 7 :

(3 sc, dec) x 6 (18)

Info :

If you prefer a puffier pumpkin, very lightly stuff the center with a teaspoon of fiberfill before closing. The pumpkin in the photo is relatively flat, so minimal stuffing is recommended to keep it lace-like for laying on a table surface.

Round 8 :

(1 sc, dec) x 6 (12)

Round 9 :

6 dec (6)

Round 10 :

Fasten off leaving long tail for sewing. With green yarn make stem: ch 6, 1 sc in 2nd ch from hook and across, fasten off leaving long tail to sew to top-center of pumpkin. Embroider jack-o-lantern face with black yarn: place two triangles for eyes and a toothy grin using satin stitch for solid shapes.

— Bat Motif (Make several) :

Round 1 :

With black yarn, ch 8, sl st to form small ring, ch 3, 11 dc into ring, join (12 dc)

Round 2 :

Ch 1, sc in same st, (ch 3, skip 1 st, sc in next) repeat around to form wing scallops (12 picots / scallops)

Round 3 :

Work small shaped ears by ch 4 at top, 3 sc in ch loop, sl st back, create small central body by sc 4 across center sts; fasten off leaving tail for sewing (bat approx 3.5–4 cm wide)

Info :

Sew bats onto the doily rings or air-gap areas of web motifs. Slightly stiffen bats with a tiny amount of fabric stiffener if you want them to hold a curved wing shape off the surface.

— Decorative Joining Edging :

Round 1 :

Using black yarn, along the outer edge of the base of each house and along branch junctions, work a neat sc border: join yarn at lower left corner of house and 1 sc in each visible edge st for approx 30 sc per side

Round 2 :

To create connecting loops for assembly, *ch 6, sl st into next edge st* spaced evenly along the edge where the runner will link to adjacent motifs (make 4-6 loops per house depending on layout)

Info :

These ch-6 loops act as anchor points to stitch motifs together and also mimic the circular holes seen behind houses in the photo. Adjust number and spacing so motifs connect securely but remain decorative.

— Blocking and Finishing :

Info :

Wet-block each motif to measurements: haunted house approx 10–12 cm wide x 8–10 cm tall, spiderwebs approx 11–12 cm diameter, doily rings approx 10–12 cm diameter, pumpkins 6–7 cm diameter. Pin to blocking board and steam or wet-block until dry. Blocking opens lace and makes assembly easier. Weave in all ends at least 4–6 cm into motifs and trim flush.

Info :

Review each motif for shape consistency before assembly. If a motif seems too small, you can add an extra even round or enlarge the initial ring chain on doilies and webs to compensate.

Assembly Instructions

  • Lay out your motifs according to the staggered layout shown in the photo: repeating units of [doily ring + spiderweb + haunted house + branch + pumpkin + bat]. Alternate orientation so houses face slightly inward from both ends.
  • Attach house towers to the main house base before joining motifs: sew towers at top center using the long tails left at Round 21 of the towers. Place center tower first, then left and right towers symmetrically.
  • Position window insets behind the ch-6 window apertures created on Round 10 of the house main body. Sew yellow insets in place from the back so the yellow shows through the windows from the front; use small whip stitches around the window edges.
  • Sew branches to the back of the house base, inserting branches under the bottom edge and sewing through several stitches of the house base to anchor securely. Branch offshoots should peek from both sides as decorative limbs.
  • Attach the spiderweb and doily ring behind and slightly overlapping the upper side of the houses: align center of doily ring so that the house sits in front of it and sew through 4-6 anchor points evenly spaced around the ring to the house top edge.
  • Sew pumpkins to one side of the house base near the bottom edge using the long tail from the pumpkin fast-off. Position pumpkins slightly overlapping the house edge and branches for a layered look.
  • Sew bats onto doily rings or the doily edges using small invisible stitches; position bats to appear in flight near the moon-like doily ring.
  • To join entire runner rows: use the ch-6 connecting loops created in the Decorative Joining Edging to sew adjacent motifs together with black yarn using sl st joins or small whip stitches. Reinforce joins with additional stitches from the back if it will be handled frequently.
  • After joining, lay the complete runner flat and add a final blocking step to ensure all joints lie flat and the lace opens evenly. Press lightly with a steam iron if needed, being careful with cotton yarn's heat sensitivity.

Important Notes

  • 💡Use stitch markers consistently at the beginning of each round to avoid counting errors and maintain proper shaping.
  • 💡Block all motifs before assembly to ensure flatness and accurate final dimensions for even joining.
  • 💡Weave in color-change tails neatly and hide them under subsequent rounds to avoid lumps in lace areas.
  • 💡For stability, use cotton or cotton-blend yarn; acrylic can be used but will produce a softer, less crisp lace.
  • 💡If adding a tiny amount of stuffing to pumpkins, do so sparingly; the runner is intended to be mostly flat for tabletop use.
  • 💡Pin all pieces in position and audition their placement before final stitching to get the staggered arrangement symmetrical.
  • 💡When sewing motifs together, use small, even stitches and sew from the back so the seams are less visible.
  • 💡If you plan to launder the runner, use colorfast yarn and wash on a gentle cycle or hand-wash; reshape and block while damp.

This Halloween table runner makes a show-stopping centerpiece that blends lace crochet with charming seasonal motifs. Each detail from the glowing window insets to the delicate spiderwebs is designed to layer together into a cohesive, spooky display. I hope this project brings a little handcrafted magic to your holiday decor and is a joy to make and display. 🎃🕸️✨

You ask,

we answer.

FAQs

What is the finished size of this runner?

With the recommended yarn and 2.5mm hook, one repeat set (three houses with corresponding webs and doilies) runs approximately 90–110 cm long and 20–24 cm wide. Add or subtract motif repeats to match your table length.

Can I use different yarn weights for this pattern?

Yes! Thicker yarn will produce larger, chunkier motifs; use a hook 1-2 sizes up and expect the runner to be proportionally larger. Thinner yarn will make more delicate lace; adjust hook size down slightly for crisp stitches.

Do I need to block the pieces?

Absolutely. Blocking opens the lace motifs, evens stitch tension and makes assembly far easier. Wet or steam-block onto a firm surface and pin to desired measurements.

Can I make the runner longer or shorter?

Yes. The pattern is modular: add or remove motif sets (house + doily + web + pumpkin + branch) to achieve your desired length. Plan your layout before joining to keep symmetry.

Are safety eyes or stuffing needed?

No safety eyes are needed for this flat decor piece. Stuffing is optional and not necessary; pumpkins in the sample are unstuffed or only minimally padded for a low-profile look.

How do I attach the window insets so they don't show seams?

Sew window insets from the back of the house using small whip stitches around the aperture edge; position and tack down at 4–6 points to keep them flat and avoid visible stitching from the front.

Can I make motifs child-safe?

Yes. Use embroidered faces for pumpkins instead of buttons and avoid adding any glued embellishments. Securely sew all elements and consider using acrylic if machine-washable durability is desired.

What if my stitch counts don't match?

Unravel to the most recent round where counts matched and rework from there. Using a stitch marker at the start of each round and counting after each round prevents drift.
