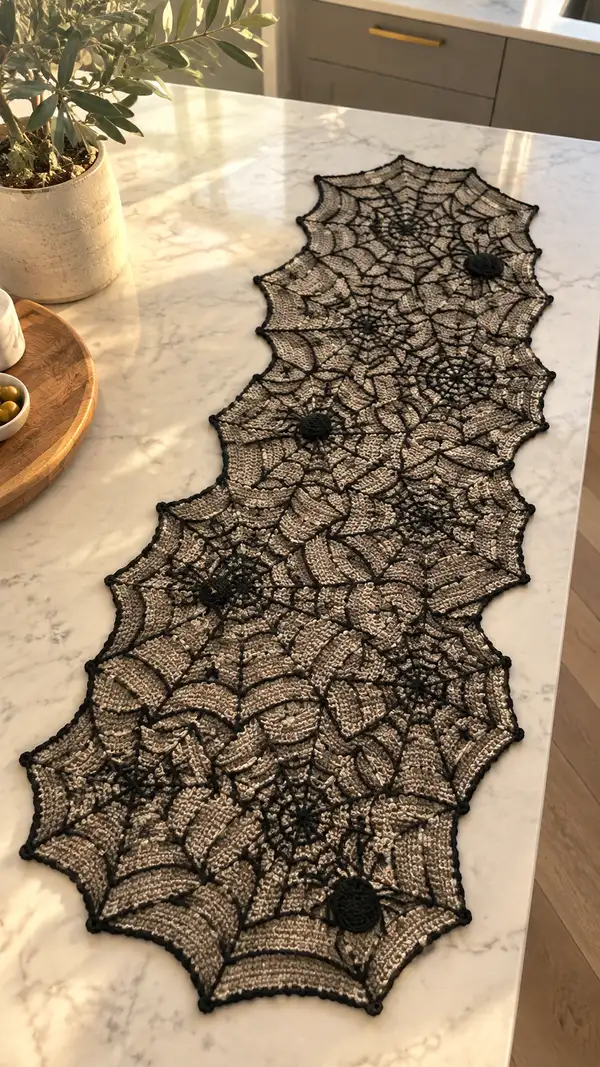
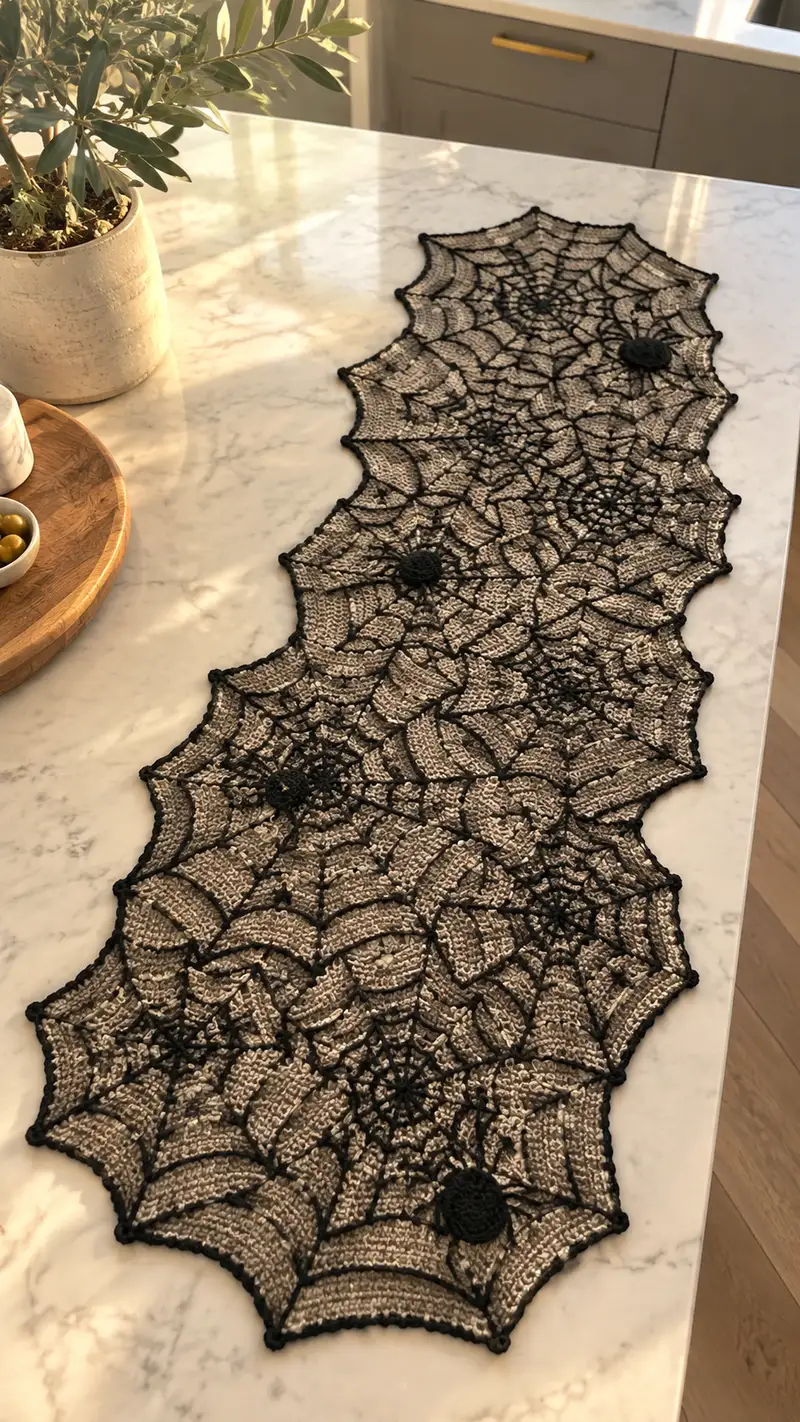
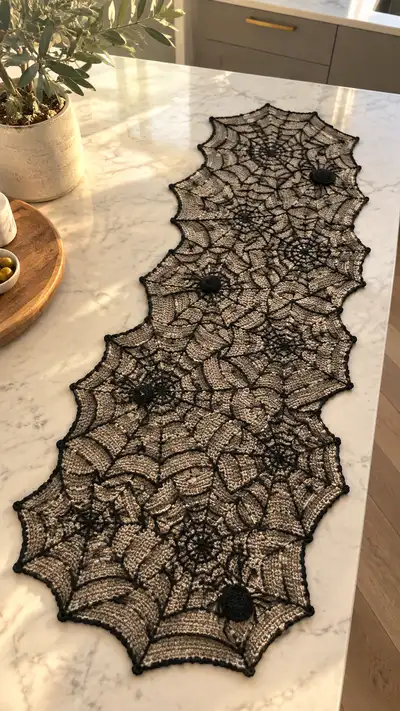
Create an elegant, spooky spiderweb table runner that layers a lacy black web over a warm tan base. This long runner is built from repeating scalloped fan motifs joined into a serpentine shape, then accented with a raised black web overlay and small spider appliques. The finished piece adds gothic, seasonal charm or year-round dramatic texture to any table.
Progress Tracker
0% Complete
— Notes and Overview :
Info :
This pattern is modular: make Fan Module A in tan, then add a black Web Overlay for each module. Join modules in a serpentine chain to create a long runner. The pattern gives round-by-round instructions for one fan module (32 rounds), one web overlay (30 rounds), a secondary narrow connector panel (20 rounds) plus border rounds. Repeat modules as needed for your desired length. Blocking before overlay and after finishing is essential for a clean, flat runner.
Info :
Gauge is not critical for table runners, but consistent tension is important for even scallops. Work tightly enough so the black overlay stitches sit on top of the tan base without sinking through.
— Fan Module (Tan Base, make X modules) :
Round 1 :
MR, ch1, 8 sc in magic ring, pull tight (8)
Round 3 :
(1 sc, inc) × 8 (24)
Round 4 :
(2 sc, inc) × 8 (32)
Round 5 :
(3 sc, inc) × 8 (40)
Info :
These initial increase rounds establish a circular fan center. Keep stitches tidy; do not twist rounds when joining. Place a marker at the first stitch and move each round.
Round 6 :
(4 sc, inc) × 8 (48)
Round 7 :
1 sc in each st (48)
Round 8 :
1 sc in each st (48)
Round 9 :
BLO: 1 sc in each st BLO to create a subtle ridge (48)
Info :
The BLO round will create a shallow ridge that reads as a line between inner and outer fan rows; this helps anchor the shell pattern that follows.
Round 10 :
*ch3 (counts as dc), sk1, 4 dc in next st, sk1, dc in next st,* rep around for shell pattern; adjust last shell spacing to finish evenly (48 shells established visually)
Round 11 :
Work a shell in the top of each dc shell from previous round: *(ch2, 5 dc in shell top, ch2, sl st in next dc of previous round)* rep around allowing shells to tessellate (48 shell tops)
Info :
If you prefer a denser base, substitute dc with hdc for a shorter shell. Keep the spacing consistent so scallops align in later joining.
Round 12 :
1 sc evenly around in the spaces between shells to even out fabric (48)
Round 13 :
*(ch1, sk1), 1 hdc in each of next 5 dc, ch1, sl st in shell center* rep around to build a ridged fan effect (48 groups)
Round 14 :
1 sc in each st around (48)
Round 15 :
*(ch4, sk 3 sts), 1 sc in next st, ch4, sl st in next sc* rep around; this stretch introduces long chain loops that will accept the black overlay spokes later (48 loops)
Info :
The chain loops in Round 15 are optional but recommended: they create tidy anchor points for the overlay's radial spokes and help the overlay lie flat without pulling the base.
Round 16 :
1 sc in each st around; treat chain loops as single stitch anchors (48)
Round 17 :
*(1 dc, ch2, 1 dc) in shell top to make a raised cap, then 1 sc across next 6 sts* rep around to build texture (48)
Round 18 :
1 sc in each st (48)
Round 19 :
*(BLO) 1 hdc in next 6 sts, sk 1, sl st in next loop from round 15* rep around to create subtle rows (48)
Info :
Use each sl st into the Round 15 loops to slightly pull rows inward, increasing the rippled fan look. This also creates visible ridges that the overlay will emphasize.
Round 20 :
1 sc in each st (48)
Round 21 :
*(2 dc, ch1, 2 dc) in shell center to make a larger petal, then 1 sc over next 4 sts* rep around (48)
Round 22 :
1 sc in each st (48)
Round 23 :
*(ch6, sl st into anchor loop created in round 15), sk 2, 1 sc in next 3 sts* rep around to create decorative chain arches (48)
Info :
Chain arches will be partially covered by the black web but help the tan base read as textured panels beneath the web arcs. Keep chains even in tension so arcs match across motifs.
Round 24 :
1 sc in each st (48)
Round 25 :
*(1 sc in next 6 sts, dec over next 2 sts) × 6 (42)
Round 26 :
*(1 sc in next 5 sts, dec) × 6 (36)
Info :
Begin gentle shaping so the fan edge produces a neat scalloped outline for the overlay. These decreases do not remove the shell look; they simply tidy the outer edge.
Round 27 :
*(1 sc in next 4 sts, dec) × 6 (30)
Round 28 :
*(1 sc in next 3 sts, dec) × 6 (24)
Round 29 :
1 sc in each st (24)
Round 30 :
*(1 sc, dec) × 6 (12)
Round 32 :
Fasten off. Leave a long tail for joining motifs later (6)
Info :
Block each Fan Module flat to the same measurements. Pin out scallops so they line up during joining. Blocking ensures the overlay fits neatly and motif joins are even.
— Narrow Connector Panel (Tan, optional, make between modules) :
Round 1 :
Ch 36, join with sl st to form a ring careful not twisted; ch1 (36)
Round 2 :
1 sc in each ch around (36)
Round 3 :
1 hdc in each st around (36)
Round 4 :
1 dc in each st around (36)
Info :
Connector panels add breathing space between fan modules and visually elongate the runner. Make as many rounds as needed to match spacing between fans when joined.
Round 5 :
*(2 dc in next st, 1 dc in next 10 sts) × 3 (39)
Round 6 :
1 sc in each st (39)
Round 7 :
BLO 1 hdc in each st to create a subtle ridge for overlay anchoring (39)
Round 8 :
1 sc in each st (39)
Round 9 :
*(ch4, sl st into same st) × across to form small loops along each long edge; sl st to join and fasten off (approx 39 loops)
Info :
Connector panels are worked to match the fan module height. Block to be the same height as fan motifs before joining overlays.
— Black Web Overlay (make 1 overlay per Fan Module) :
Round 1 :
MR with black, ch2 (counts as first tr), work 10 tr into MR, join with sl st to top of ch2 (11 tr total) - this creates the hub (11)
Round 2 :
Ch3, *sl st into base of next tr, ch6, sl st into next tr* around forming 11 spokes of long chains (11 spokes)
Info :
The long chain spokes will be laid across the tan fan and secured later with small slip stitch anchors. Count spokes carefully so the web aligns with fan scallops.
Round 3 :
Attach overlay to fan by placing the hub over the fan center. Working in black, sl st through the chain spokes and into the underlying tan fabric at each spoke landing to secure: *sl st into chain, insert hook through fan where spoke meets scallop, pull loop, sl st* rep around (11 anchors)
Round 4 :
Ch4, *sl st into spoke chain a few chains out from center, ch5, sl st into next spoke* rep around to create the first web round of arcs. Keep tension even so arcs float slightly above tan base (11 arcs)
Round 5 :
Working in spaces formed by ch5 arcs, sl st into arc centers and create small picot anchors: *sl st, ch3, sl st* rep around to add texture (11 picots)
Info :
These small picots provide a raised look and help hold the arcs in place. If using a finer hook for overlay, pick up cleaner, tighter chains.
Round 6 :
Ch6, sl st into mid-point between previous arc anchors forming slightly larger outer arcs; rep around to create a continuous ring (11 larger arcs)
Round 7 :
Sl st into the top of each larger arc and make 3 sc clusters separated by ch2: *(3 sc, ch2) in top of arc, sl st to next arc top* rep around creating denser web flesh (11 clusters)
Round 8 :
Ch8, sl st into center points of clusters to form airy web loops; rep around (11 loops)
Info :
When forming arcs and loops, keep chains consistent. If overlay feels too loose, switch to a smaller hook or make chain lengths 1-2 stitches shorter.
Round 9 :
Along each spoke between rings, sc into the spoke chain at regular intervals (approx 3-4 sc per spoke) to add radial density. Count to keep uniform (approx 33-44 sc total depending on spacing)
Round 10 :
Make decorative join rounds: sl st along arcs, at edge points (align with fan scallops) make a small raised knot: *(ch3, sl st back into base of ch3) to mimic a bobble* at each scallop tip (11 bobbles)
Info :
Bobble-like knots at scallop tips draw the eye and help the overlay define the module edge. Use secure sl sts and small picots to avoid catching on table linens.
Round 11 :
Ch10, sl st to next spoke forming the outermost chain arc; rep to create a wide web skirt that follows the fan curve (11 arcs)
Round 12 :
Along each outer arc form small sc clusters to create a scalloped outer edge in black: *(5 sc in arc center, sl st to next arc)* rep around (approx 11 clusters)
Round 13 :
Work small connecting bridges between adjacent outer arc clusters with ch6, sl st into next cluster center to give the appearance of netting (11 bridges)
Round 14 :
Refine anchor points: using sl st, secure overlay to the tan base at 11 evenly spaced locations around the outer ring (11 secured points)
Info :
Sew the overlay to the base with tiny whip stitches using black yarn where the sl sts meet the tan base to make the overlay permanent. Avoid bulky knots on the underside.
Round 15 :
Create an additional inner web round: working between spokes do *ch4, sl st into next spoke chain*, rep around to make a dense inner web effect (11)
Round 16 :
Make short radial connections with sc between inner and outer rings: sc into spoke, sk 3 ch, sc into next spoke for each spoke to form small bridges (11 spokes × 3 terra points ≈ 33 sc)
Round 17 :
Along outer clusters add a decorative picot at each peak: *(sc, ch3, sl st into top of cluster)* rep around (11 picots)
Info :
If one overlay feels too busy, skip one or two of the interior chain rounds. The runner will still read as a web with fewer arcs and better contrast to the tan base.
Round 18 :
Reinforce radial spokes: using sc, work 2 sc in each spoke anchoring point across the web to firm up the web (approx 22-33 sc depending on spacing)
Round 19 :
Work tiny sl st joins between adjacent web arcs to avoid the overlay moving: sl st in loops created between arcs (approx 22 joins)
Round 20 :
Outline each outer cluster with a single sc border: 1 sc in each st around outer ring to neaten edge (approx 66 sc)
Round 21 :
Create the final scallop picots that align with the tan scallops: *(sc in 3 sts, ch3, sl st into same place)* around to pick out 11 points (11 picots)
Info :
Now that overlay is shaped, lightly block the module with overlay attached. Pin outer picots neat and steam lightly or use fabric stiffener sparingly to help the web hold shape.
Round 22 :
Inspect web, weave in ends on the underside where possible; fasten off leaving tail for sewing to adjacent overlays or connector panels
Round 23 :
Optional: Add a thin line of whip stitch along some radial spokes to deepen shadow and definition; do this sparingly for a refined look
Round 24 :
Optional: With black yarn, sl st around outermost edge to create uniform border before joining modules (approx 66 sl st)
Info :
The overlay rounds are intentionally descriptive rather than strictly mathematical because spokes and arcs depend on how your fan module blocked and how many scallops you align to. Adjust chain lengths and counts so the overlay lands on 11 primary anchor points that match your fan's scallops.
— Spider Applique (Make 3 or more) :
Round 1 :
MR with black, ch1, 6 sc in MR (6)
Round 3 :
(1 sc, inc) × 6 (18)
Round 4 :
1 sc in each st (18)
Round 5 :
*(ch6, sl st into body to make a leg) × 8 around but only use 6 legs total placing them evenly* make small chain legs and fasten off (6 small legs)
Info :
Make 3 or more spiders and slight variations for realism. Sew each spider to the overlay at round 10-12 of overlay where outer arcs meet, positioning as desired. Fasten legs to overlay with tiny stitches for security.
— Joining Modules and Assembly :
Info :
Arrange blocked Fan Modules in the desired sequence on a large blocking mat. If using connector panels, place them between fans to achieve the serpentine shape as seen in the photo. Overlay each fan before joining all modules together to ensure web continuity across joins.
Round 1 :
With tan tails left from Fan Module Round 32, align two modules right sides facing and whip stitch through corresponding scallop peaks to join along one edge; use a mattress stitch approach for an invisible seam (approx 12-18 stitches per join depending on scallops)
Round 2 :
Join each subsequent module the same way until your runner reaches desired length. If you prefer seams on the underside, use a slip-stitch join through both pieces with tan yarn from the right side and then flip.
Info :
When joining, ensure scallops match so the black overlay can be connected at outer arc points. Pin overlays into position and secure with small whip stitches through both overlay and base only at anchor points to avoid visible underside bulk.
Round 3 :
Once modules are joined, lay the runner flat and decide where the overlay across joins should carry on. Use a blunt tapestry needle to weave overlay tails across seams and make small sl st bridges in black to create continuous web lines across joins (approx 1-2 stitches per seam point)
Info :
Take your time connecting the overlays across seams; small, even stitches will visually blend the webs and make the runner look like one continuous piece rather than separate motifs.
— Final Border and Edge Finishing :
Round 1 :
Using black yarn and 3.5–4.0mm hook, with the runner flat, work 1 sc evenly along the entire outer edge of the joined runner to create a neat outline. Keep stitches close to avoid stretching (approx 200–300 sc depending on runner length)
Round 2 :
*(sc in next 3 sts, picot (ch3 sl st in top of ch3), sc in next 3 sts, sl st into next peak)* repeat along edge creating decorative picot scallops at each tan scallop tip
Info :
Edge picots give a crisp, finished look and echo the web's peaks. If you prefer a gentler edge, substitute a single round of hdc around edge instead of picots.
Round 3 :
Fasten off and weave in all tails on the underside. Use a few whip stitches to further secure any overlay seams that feel loose.
Info :
Final blocking is recommended: pin to shape and lightly steam or mist with water plus fabric stiffener to set the runner. Allow to dry thoroughly before placing on table.
— Optional: Stiffening and Care :
Info :
For a crisp look, use diluted fabric stiffener or spray starch. Apply sparingly and reshape webs and scallops with pins while drying. Hand wash gently in cool water and reshape while damp; avoid tumble drying.
This spiderweb table runner pattern blends delicate lacework with bold contrast to create a striking centerpiece. Each fan module and overlay is crafted for texture and drama, coming together into a unique decorative runner you'll be proud to display. Whether for spooky season or moody year-round style, this runner is a beautiful handmade statement. 🕸️🧶