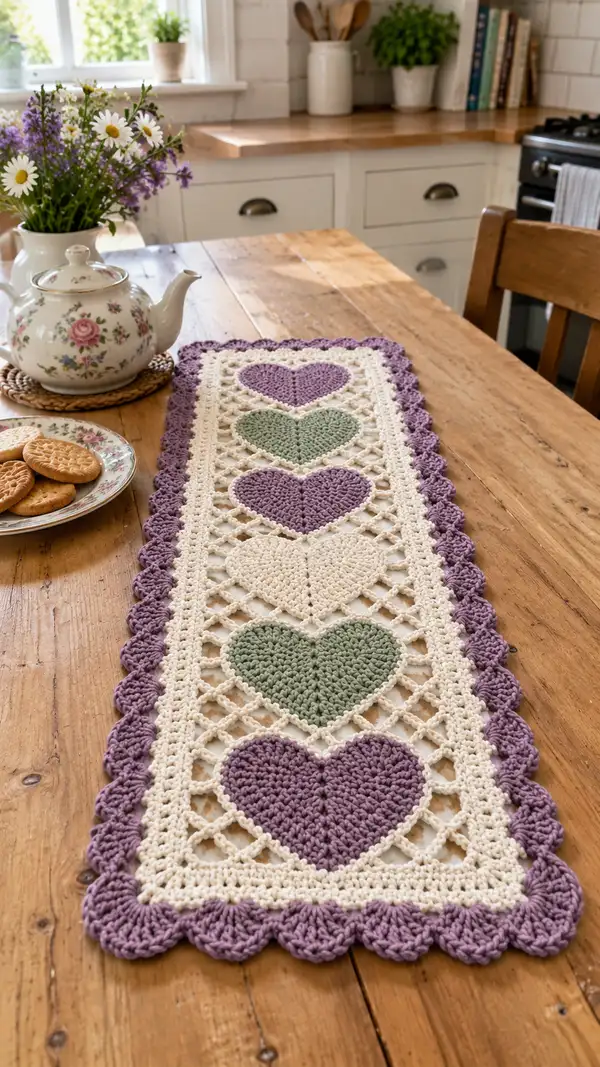
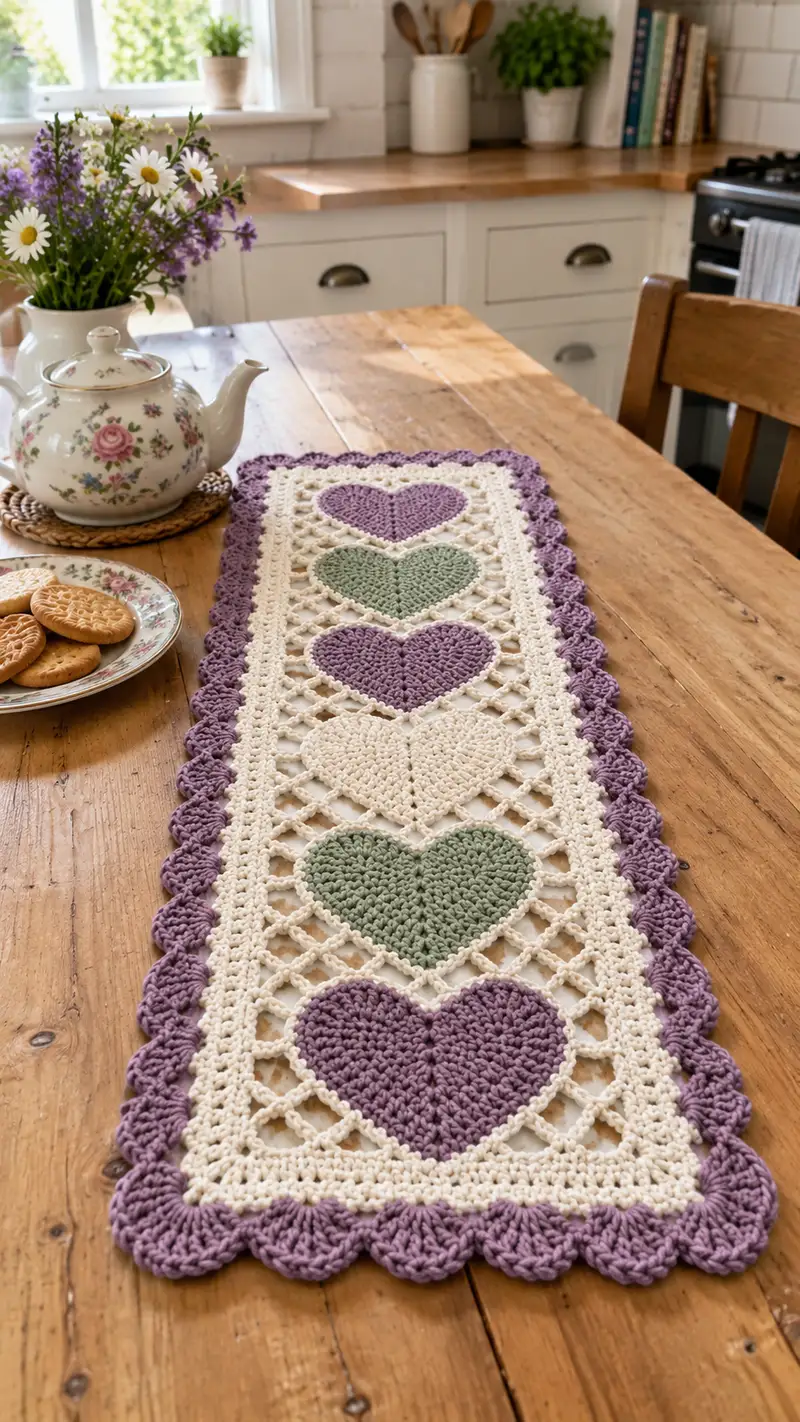
A charming rectangular table runner featuring a repeating heart motif set into an open lattice panel with a scalloped outer edge. Worked in three soft colors — cream, lavender, and sage — this runner adds a handmade vintage touch to your table. The pattern uses basic stitches with clear joining and border instructions to create a stable, flat piece perfect for tabletops, dressers, or as a runner for special occasions. Detailed round-by-round instructions make it easy to follow and customize.
Progress Tracker
0% Complete
— Notes & Gauge :
Info :
This pattern is worked in panels and joined as you go. Gauge is not critical for lace look but important for final dimensions. Sample gauge: 14 sc x 16 rows = 4 inches in single crochet using worsted cotton and 4.5 mm hook. Adjust hook size if you prefer a looser or tighter fabric. The example runner measures approximately 12 x 40 inches (30 x 102 cm). Use blocking to flatten hearts and grid before final joining.
— Heart Motif (Make 6, work flat in rounds) :
Round 1 :
6 sc in magic ring (6)
Round 2 :
Inc in each st around (12)
Round 3 :
(1 sc, inc) x 6 (18)
Round 4 :
(2 sc, inc) x 6 (24)
Round 5 :
(3 sc, inc) x 6 (30)
Info :
At this stage the circle is forming the bottom of the heart. Work with consistent tension. Change to chosen heart color now if not already working in it.
Round 6 :
(4 sc, inc) x 6 (36)
Round 7 :
(5 sc, inc) x 6 (42)
Round 8 :
1 sc in each st around (42)
Info :
We will now begin shaping into lobes. Place a stitch marker at the center back of the round to help mirror shaping on both sides.
Round 9 :
(6 sc, dec) x 6 (36)
Round 10 :
(5 sc, dec) x 6 (30)
Round 11 :
1 sc in each st around (30)
Info :
Start visualizing the heart’s central vertical split. We will create two small lobes on the next rounds by working short arc shaping on either side of center. Mark the center front stitch as reference.
Round 12 :
(2 sc, 2 hdc, 3 dc, 2 hdc, 2 sc) in one stitch (heart lobe 1 made), sl st to the mirror stitch on opposite side, repeat (2 sc, 2 hdc, 3 dc, 2 hdc, 2 sc) to create second lobe; continue in sc to finish round (30)
Round 13 :
Sc around smoothing between lobes: 1 sc in each sc and hdc, 1 dc in each dc to even out points (30)
Round 14 :
1 sc in each st around (30)
Info :
If you prefer a shallower lobe, omit Round 13 and work Round 14 directly after Round 12. For a fuller heart, add an extra dc round before smoothing.
Round 15 :
(3 sc, dec) x 6 (24)
Round 16 :
(2 sc, dec) x 6 (18)
Round 17 :
(1 sc, dec) x 6 (12)
Info :
Fasten off leaving a 20 cm tail for sewing and weaving. Press or lightly steam-block the heart flat, shaping lobes gently with pins on a blocking mat. Repeat to make 6 hearts in desired colors (alternating lavender, sage, cream as shown).
— Lattice Panel Base (Center panel built around hearts) :
Info :
The lattice panel is created in long rows connecting the hearts with mesh squares. We'll work foundation chains across the runner width and build rows of chain spaces and double crochets to create the open grid. Work the base in background cream color. The following rounds are counted as rows across the width.
Round 1 (foundation) :
Ch 122 (this will make a runner approximately 12 inches wide with heart widths placed in the center; adjust length by adding multiples of 20 chains if needed)
Round 2 :
Row 1: 1 sc in 2nd ch from hook, 1 sc in each ch across. Turn. (121)
Round 3 :
Ch 3 (counts as dc), sk 2 sc, *dc in next sc, ch 3, sk 2 sc; rep from * across, ending with dc in last sc. Turn. (This establishes the 3-ch mesh)
Round 4 :
Ch 1, sc into top of ch-3 and into each dc across to create a framed line under the mesh. Turn. (count varies by mesh repeat)
Info :
The mesh is worked so that each block between hearts lines up. If your stitch counts differ, block the panel lightly and count the mesh squares so hearts will sit symmetrically.
Round 5 :
Ch 3, *sk next sc, dc in next sc, ch 3; rep across. Turn.
Round 6 :
Ch 1, sc across into tops of dc and into each ch-3 space (work 1 sc on each side of the ch-3 to make little framed squares). Turn.
Round 7-20 :
Repeat Rounds 5-6 (mesh repeat) until you have approx. 28 mesh rows (14 mesh repeats) or until the runner length reaches the measurement where the first heart will be placed. Check placement by laying out a heart every 6-7 mesh repeats vertically. Keep the panel flat; block if necessary to keep alignment straight.
Info :
We will create pocket-rounds where the hearts will sit. Each heart will be attached to a framed square area of mesh that is reinforced with sc rows around it. Plan heart placement now: place 6 hearts evenly along panel with approximately 6 mesh repeats between centers. Use pins to hold hearts in place before joining.
— Reinforced Heart Frame Rows (Work under/around each heart position) :
Round 21 :
Work 2 sc rows across the panel to strengthen the area: Ch 1, sc across entire foundation row, turn. (121)
Round 22 :
Repeat Round 21. Turn. These two solid rows create a ledge for the heart base to sit on.
Round 23 :
Ch 1; sc across to the first heart placement marker; at heart position: ch 2, sk 2 sc, 5 dc into next sc (create a small arch to anchor right side of heart), ch 2, continue sc across. Turn.
Round 24 :
Ch 1; sc across to the same positions; work sc around the arch created in R23, placing 1 sc into top of each dc and 1 sc into each ch-2 space to box the heart opening. Continue sc across. Turn.
Info :
These arch-shaped reinforcements give the heart a solid base to sew onto and prevent sagging. Repeat R23-24 for each heart position along the panel. Space them evenly; typical spacing is 16-18 sc between heart frames depending on your foundation chain length.
— Attaching Heart Motifs (Join-As-You-Go method) :
Round 25 :
With heart placed on top of its framed opening, using cream yarn and yarn needle, whip-stitch from the bottom center of the heart to the top of the frame through the back loops only of the heart and the top loops of the framed sc to create a subtle ridge (sew around entire heart perimeter). Fasten off and weave in tail. Repeat for all hearts. (This is counted as attachment rather than crocheted round.)
Info :
Note :
For a neater look, sew the heart using the tail left when fastening off from the heart rounds. Pin the heart first, then sew with small invisible stitches. Ensure the heart's bottom aligns exactly with the center of the framed arch.
Round 26 :
Once hearts are sewn in, resume mesh rows above the heart: ch 3, *dc, ch 3 across the mesh area between hearts, working dc into sc frames beside hearts to anchor them. Turn.
Round 27-40 :
Continue mesh repeat rows (R5-6 pattern) until you have mirrored the lower mesh count and reached the topmost heart frame. Insert two solid sc reinforcement rows above and below each heart frame as done in R21-24 to keep the hearts securely sandwiched between stable lines.
Info :
At this point the center panel should be a long rectangle with six hearts secured inside the mesh. Block the entire panel flat to remove ripples and align mesh squares. Pin hearts gently to keep them centered.
— Inner Border (Cream) :
Round 41 :
Work 1 sc evenly around the entire rectangular panel, placing 3 sc in each corner to keep corners flat. Use 1 sc for each sc across and 1 sc in the top of each dc and each ch-3 space of mesh. The stitch count will vary with your panel size—maintain a tidy even edge.
Round 42 :
Work 1 hdc in each sc around to build a slightly raised inner border. Place 3 hdc in each corner. Tie off and weave in ends neatly. (This gives a neat frame before scallops.)
Info :
Check the perimeter length in increments of your scallop repeat — scallops will be worked in groups of 6 stitches across; make sure your total perimeter count is divisible by 6 or add/removes a few sc evenly across the inner border to make it fit. Use small markers every 6th stitch if needed.
— Outer Scallop Border (Lavender) :
Info :
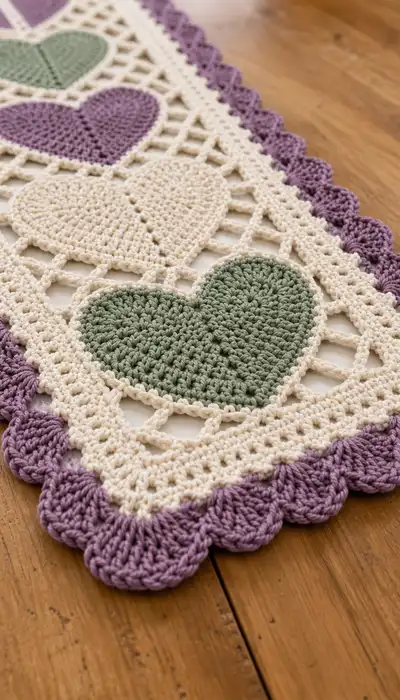
Change to lavender yarn at the end of Round 42. Work shell scallops around the outer edge using groups of double and treble crochets to create robust shells similar to those pictured.
Round 43 :
Join lavender with sl st to any point on the hdc round. Ch 1, *(sk 2 hdc, (5 dc) in next hdc, sk 2 hdc, sl st in next hdc); rep from * around, placing 3 shells in each corner to keep turning. Fasten off and weave ends.
Info :
Each shell (5 dc) creates one scallop. If your perimeter needed extra stitches, place additional shells in larger corners or space shells with single crochet gaps to even out.
Round 44 :
For a fuller scallop, rejoin lavender behind each shell: sl st to the center dc of each 5-dc shell, ch 2, 3 tr into the same st, sl st into center dc; repeat into each shell center to create a layered scallop look. Fasten off and weave ends.
Info :
When working layered scallops, watch tension on corners so the edge does not flare. Pin the scallops and steam lightly if needed to shape them nicely.
— Decorative Raised Ridge Around Each Heart :
Round 45 :
Using cream yarn and a 4.0 mm hook, work 1 sc around the perimeter of each heart through both layers (heart and top of framed sc) to create a raised ridge that outlines each heart. Work 1 sc in each sc and 1 sc in top of each dc/hdc around lobes for a maintained count. Fasten off and weave in ends. (This produces a neat, piped border around each heart.)
Info :
This raised ridge is both decorative and functional—hiding any tiny gaps and strengthening the join. If you prefer a subtle edge, use slip stitches only instead of sc.
— Optional Top Stitching (Contrast) :
Round 46 :
For a decorative touch, use sage or lavender to embroider a centered vertical seam line down each heart’s middle with simple running stitches or small surface slip stitch. Keep stitches small and consistent. This is optional but authenticates the look in the photo.
Info :
If embroidering, use a tapestry needle and matching yarn to make stitches on the surface only—avoid pulling too tight which can pucker the heart.
— Finishing Rounds (Edge tidy and final finishing) :
Round 47 :
Check the entire runner for loose ends. Weave all tails into the underside of the runner using a tapestry needle, following stitch paths for invisibility. Trim flush.
Round 48 :
Lightly steam-block the full runner flat on a padded blocking board. Pin straight edges first, then pin scallops shaped nicely. Allow to cool and dry fully before unpinning. This sets the shape and evens the mesh squares.
Round 49 :
Optional: If you want more rigidity, spray lightly with diluted fabric stiffener following manufacturer instructions and lay flat to dry.
Info :
All steps above assume a runner comprised of 6 hearts; to increase runner length, repeat the central mesh and heart frames to add more motifs. To make runner narrower or wider, adjust the initial foundation chain by multiples of the mesh repeat (20 ch recommended for small adjustments) and re-balance heart placement.
— Pattern Modifications & Sizing Tips :
Info :
To make a shorter runner: reduce number of mesh repeats between hearts or make fewer hearts. To make a wider runner: add additional mesh repeats on each side of the hearts and expand the foundation chain accordingly. To change scale: use DK yarn and 4.0 mm hook for a slightly smaller runner, or bulky cotton and 5.5 mm hook for a larger, chunkier runner. Adjust hearts by adding or subtracting increase rounds before shaping lobes.
Finishing this runner is so satisfying — watching the hearts pop against the open lattice and then framing them with the scalloped edge creates a delightful heirloom-ready piece. The layered texture from the raised ridge and scallop border gives it a professional, handmade feel that’s perfect for gifting or dressing a special table. 🧶🌸 I hope this pattern brings a little vintage charm and a lot of cozy hands-on fun to your home. Happy crocheting and don’t forget to block and pin for the best finish! ✨