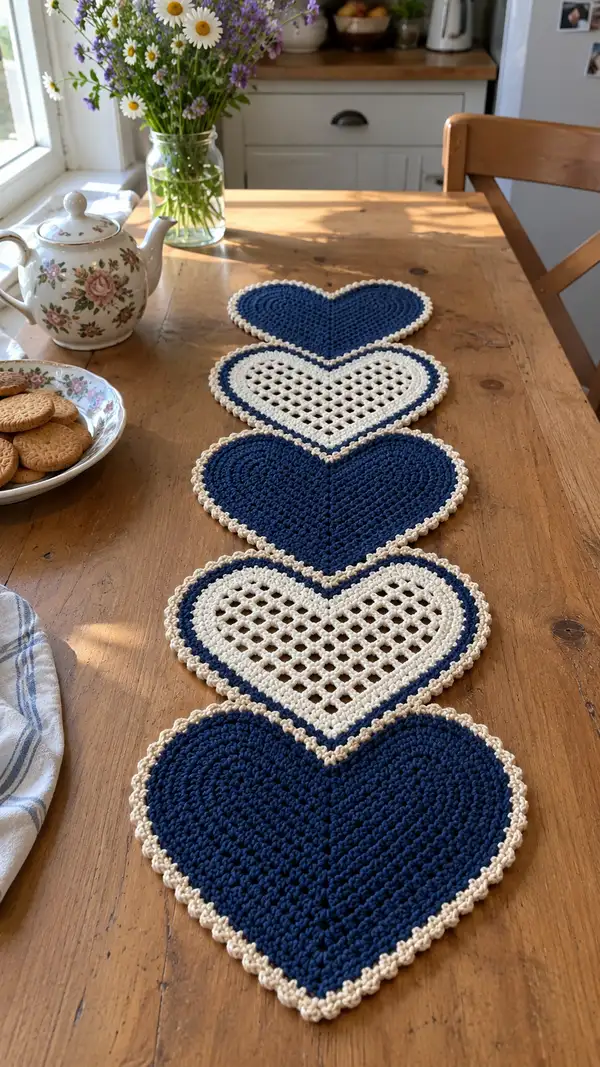
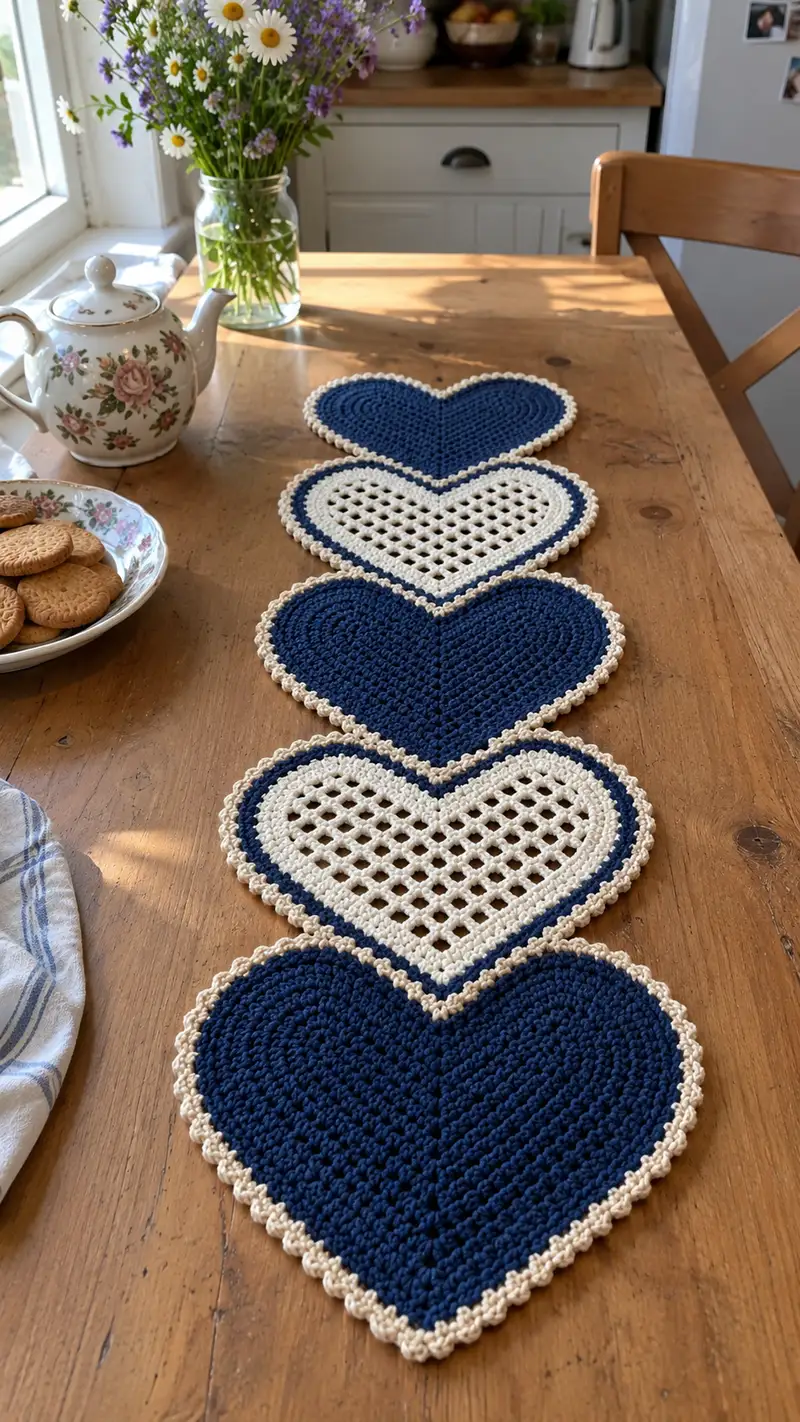
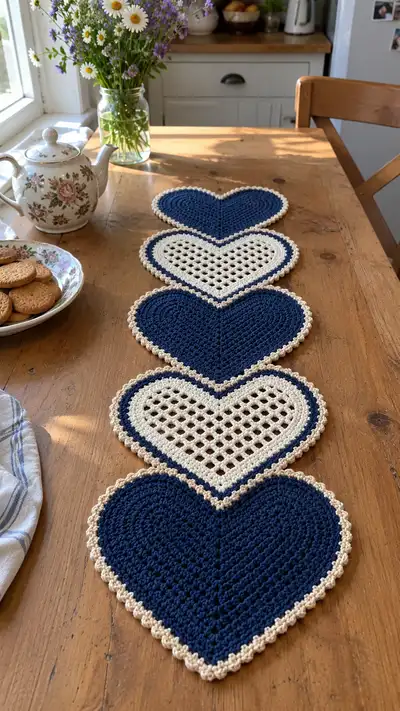
Create a charming heart-shaped table runner made of five connected crochet heart motifs in deep navy, warm cream and a soft beige scallop edge. This pattern alternates solid and lattice hearts, joined with a neat join-as-you-go seam and finished with a delicate scalloped border. Perfect for kitchen and dining decor or a heartfelt gift, the runner lays flat and has a textured handcrafted look that photographs beautifully.
Progress Tracker
0% Complete
— Notes & Gauge :
Info :
This runner is composed of five heart motifs (3 solid hearts, 2 lattice hearts) joined tip-to-tip. Using worsted-cotton and a 3.5mm hook, each finished heart measures approximately 18-20cm (7-8") across at the widest point and about 17-19cm (6.5-7.5") tall. Gauge for solid rounds: 14 sc x 16 rows = 10cm measured in single crochet flat (worked in joined rounds).
Info :
Before you begin, wind yarn into accessible balls and place stitch markers to mark round starts. Work tightly enough so stuffing or table surface will not show through (for solid hearts the fabric is dense). Light blocking of motifs before joining helps them sit flat.
— Solid Heart (Make 3) :
Round 1 :
6 sc in magic ring (6)
Round 3 :
(1 sc, inc) x 6 (18)
Round 4 :
(2 sc, inc) x 6 (24)
Round 5 :
(3 sc, inc) x 6 (30)
Round 6 :
(4 sc, inc) x 6 (36)
Round 7 :
(5 sc, inc) x 6 (42)
Round 8 :
(6 sc, inc) x 6 (48)
Info :
Rounds 1-8 create a wide base for the two lobes of the heart. Place a stitch marker at the first stitch of Round 9 to mark the center top junction for later alignment. At the end of Round 8 you should have 48 sts.
Round 9-12 :
1 sc in each st (48)
Info :
Work these even rounds to build height. If you prefer faint ribbing across the heart, work Round 10 in BLO (48) — it will create a subtle ridge running parallel to the centre line.
Round 13 :
(3 sc, inc) x 12 (60)
Round 14-16 :
1 sc in each st (60)
Info :
Round 13 expands the heart outwards to create the full lobes. These three even rounds (14-16) let the shape stabilize. Check that your heart has a gentle rounded top and a wide centre at this stage.
Round 17 :
(7 sc, dec) x 6 (54)
Round 18 :
(6 sc, dec) x 6 (48)
Info :
Begin forming the lower point of the heart with consistent decreases grouped around the centre back area. These rounds draw the bottom into a tapered shape while retaining width at the top lobes.
Round 19 :
(5 sc, dec) x 6 (42)
Round 20 :
(4 sc, dec) x 6 (36)
Round 21 :
(3 sc, dec) x 6 (30)
Info :
At this stage the motif is clearly heart-shaped with the lobes at the top and the bottom tapering. Lay the flat motif on your table and ensure the left and right halves mirror each other. Make small tension adjustments if needed.
Round 22 :
(2 sc, dec) x 6 (24)
Round 23 :
(1 sc, dec) x 6 (18)
Info :
Fasten off leaving a 30-40cm tail for weaving in. Weave the tail to the back of the motif and secure. Block flat by pinning gently on a towel to open the lobes evenly and straighten the point. Repeat to make a total of three solid navy hearts.
— Lattice Heart (Make 2) :
Info :
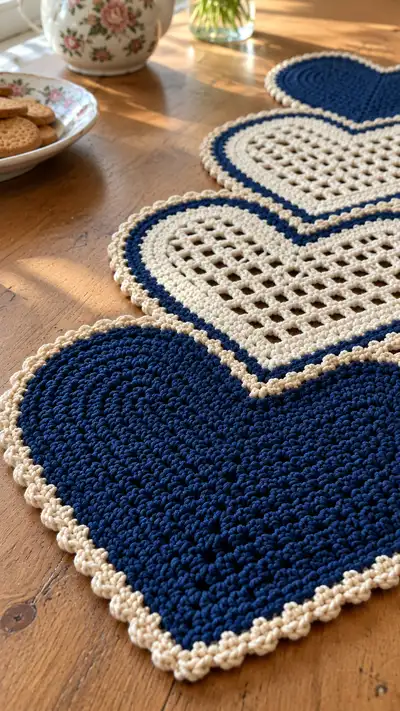
The lattice heart is worked in rounds with alternating rows of sc and mesh (ch1/ ch2 grid). The inner cream area is open, framed by a navy inner line and a beige scallop later. Work with the same gauge hook and carry yarn neatly.
Round 1 :
6 sc in magic ring (6)
Round 3 :
(1 sc, inc) x 6 (18)
Round 4 :
(2 sc, inc) x 6 (24)
Round 5 :
(3 sc, inc) x 6 (30)
Round 6 :
(4 sc, inc) x 6 (36)
Round 7 :
(5 sc, inc) x 6 (42)
Round 8 :
(6 sc, inc) x 6 (48)
Info :
As with the solid heart, rounds 1-8 build the base. Double-check that Round 8 has 48 sts. We will convert to an openwork mesh beginning on Round 9 by switching to cream yarn for mesh rows.
Info :
Change to Cream yarn (color B) by finishing the last pull of Round 8 with the new color. Carry the navy inside if you prefer a neater back, or fasten off and weave later.
Round 9 :
Join cream, ch2 (counts as first dc for mesh foundation), *sk 1, dc in next st; rep from * around (24 dc, 24 sk) — you will have 24 open spaces across. Sl st to top of ch2 to join (24)
Round 10 :
Ch3 (counts as dc), *ch1, sk next dc, dc in next dc; rep from * around, sl st to top of ch3 — this creates a chain mesh staggered for a square filet look (24)
Info :
Rounds 9-12 build an airy grid. Keep tension consistent; if your mesh looks too loose, switch to one hook smaller for the mesh rounds only, or work single crochet and chain-1 meshes as ch1 spaces to tighten.
Round 11 :
Repeat Round 10 (24)
Round 12 :
Repeat Round 10 (24)
Info :
The mesh section height can be adjusted. For this runner the mesh is 4-6 rounds tall. After you finish the mesh, you will trim and frame the heart with a navy round to unify shape before shaping the lower point.
Round 13 :
Change to Navy (color A). Ch1, sc in same st and in each st and ch-space around for one round to frame the mesh (48)
Round 14 :
(3 sc, inc) x 12 (60)
Round 15-16 :
1 sc in each st (60)
Info :
Now begin tapering toward the bottom point similar to the solid heart, but keep the mesh visually centered between the lobes. Maintain stitch counts carefully because the framed mesh and the solid sections must match when joining to adjacent hearts.
Round 17 :
(7 sc, dec) x 6 (54)
Round 18 :
(6 sc, dec) x 6 (48)
Round 19 :
(5 sc, dec) x 6 (42)
Round 20 :
(4 sc, dec) x 6 (36)
Round 21 :
(3 sc, dec) x 6 (30)
Round 22 :
(2 sc, dec) x 6 (24)
Round 23 :
(1 sc, dec) x 6 (18)
Round 24 :
6 dec (6). Fasten off leaving long tail for weaving. Block flat and shape the lattice so the mesh sits square and the lobes are even.
Info :
Make two lattice hearts matching this sequence. The mesh rounds (9-12) create the characteristic airy centre seen in photographs. Keep the framed navy rounds symmetrical for a neat look.
— Scallop Border (All motifs) :
Info :
Each heart gets a two-round neutral beige scallop edge that unifies the appearance across solid and lattice motifs. Work the scallop around the entire perimeter once motifs are blocked and before joining, or work scallop as you join for a continuous finish (instructions for both methods included).
Round 1 :
With Beige, join to any stitch at edge, ch1, sc in same st, *sc in next 2 sts, 5 dc in next st (shell), sc in next 3 sts; rep around adjusting where needed to keep shells evenly spaced. Aim for 36-40 shells depending on motif size; typical count for our hearts is 40 shells. Join with sl st to first sc.
Info :
Space shells so the scallop feels even. If you find shells bunching near the heart point, add an extra sc before the shell to ease shaping; if gaps appear, reduce an sc between shells. Blocking will help shells sit uniformly.
Round 2 :
Ch1, sc in each sc and 3 sc across each shell (treat shell center as 3 sts for rough spacing). In the center of each shell work (sc, picot, sc) for a delicate raised edge. Join and fasten off; weave ends.
Info :
Alternatively, for a tighter scallop: work Round 1 as sc evenly and Round 2 as (sc, 3 dc, sc) in every 6th stitch to create smaller shells. Choose the look you prefer. Make sure every motif has the scallop applied before final assembly if you want a neat continuous edge.
— Join-as-you-go Centre Seam (Assemble five hearts) :
Info :
The runner is assembled by joining hearts tip-to-tip using a join-as-you-go slip-stitch seam down the center back. Place motifs in order: Solid, Lattice, Solid, Lattice, Solid (as in photos) with their bottom points meeting the top points of the next motif. Always align the scallop edges so they mirror each other.
Round 1 :
Place two hearts with right sides up, bottom point of Heart A overlapping top point of Heart B by about 1.5cm. With Beige in hand on Heart A, insert hook through both loops of the edge stitch on Heart A, pull up loop, insert hook through corresponding edge stitch on Heart B, pull up loop and sl st through both loops — work a sl st through paired edge stitches along approx. 8-12 sts around the overlapping area to create a flat join. Fasten off and weave tail. Repeat for each adjacent pair (4 joins total).
Info :
For a stronger join, work a single crochet through paired edge stitches instead of a slip stitch — this will create a small ridge but is very stable. Pin motifs first so seam is even, and count scallop shells to align seams symmetrically.
Round 2 :
Once all pairs are joined tip-to-tip, if there are small gaps between lobes, use mattress stitch with matching yarn on the back to create a flatter seam. Weave the yarn through two adjacent stitches on one motif and through two matching stitches on the adjoining motif, pulling gently to close gap.
Info :
At this stage the five hearts form a long runner. Lay the piece flat and block again lightly with pins to ensure motifs lie flat and the scalloped border sits evenly.
— Continuous Outer Edge (Optional Join & Finish) :
Round 1 :
With Beige and using a 3.0mm hook, join at any outer scallop. Work a continuous round around the entire assembled runner: ch1, sc in seam spaces and sc across edges, placing 3 sc into each shell center to maintain spacing. When you reach the inner seams (where hearts meet), work 2 sc in each joined space to smooth the curve.
Round 2 :
Work a delicate picot scallop: *ch3, sl st to base of chain to create pico-like bump, sc in next 4 sts; rep around. Fasten off and weave ends invisibly on the wrong side.
Info :
This continuous edging unifies the runner and hides join inconsistencies. It also gives a stable perimeter so the runner sits flat on the table. If you prefer a trimmed look, omit and simply weave ends and lightly starch/block the runner.
— Alternate Method: Join by Whip Stitch (If not comfortable with JAYGO) :
Info :
Use a yarn needle and matching beige yarn. With both motifs face up, align seams and whip stitch along the inner seam by picking up 1-2 loops from each motif as you go. Keep stitches small and evenly spaced. After all joins, apply the scallop edge around outer perimeter as described earlier.
— Finishing Touches & Blocking :
Info :
Weave in all ends using the yarn needle, pulling tails through several stitches on the wrong side to secure. Block the entire runner by pinning it flat to desired dimensions and lightly misting with water, then allow to dry fully. Press gently if needed with a dry iron using a cloth over the crochet to protect fibers.
Info :
To launder, hand-wash or machine wash on gentle cycle in a mesh laundry bag with mild detergent and reshape while damp. Cotton may soften over washes; re-block if necessary to maintain shape.
— Tips for Consistent Results :
Info :
Always work the same stitch (sc) tension across motifs. If your mesh rounds are too loose, reduce hook by 0.25-0.5mm. If scallops shrink the heart, add one sc between shells on the scallop foundation round to relax the tension. Keep a reference motif to match size while making subsequent motifs.
Info :
If you want a longer runner, make more hearts and join in the same alternating sequence. The pattern adapts easily to add or subtract motifs.
This heart table runner brings warmth, contrast, and a handmade touch to your table. Each heart motif carries its own personality — dense navy for bold modern lines, and airy cream lattice for vintage charm. Joining the motifs is an enjoyable process: pin, join, and watch the runner take shape. It's a satisfying project that results in a beautiful, usable heirloom piece. 🧶❤️ Lay it down for tea or a cozy meal and enjoy the compliments that follow. Happy crocheting and don't forget to share photos of your finished runner! 🌼✨