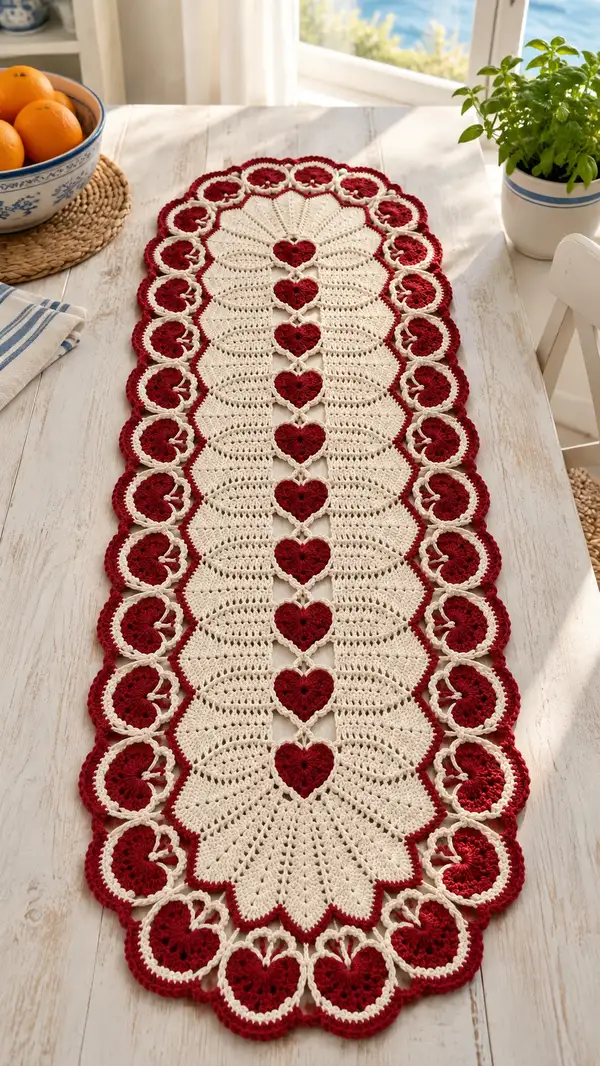
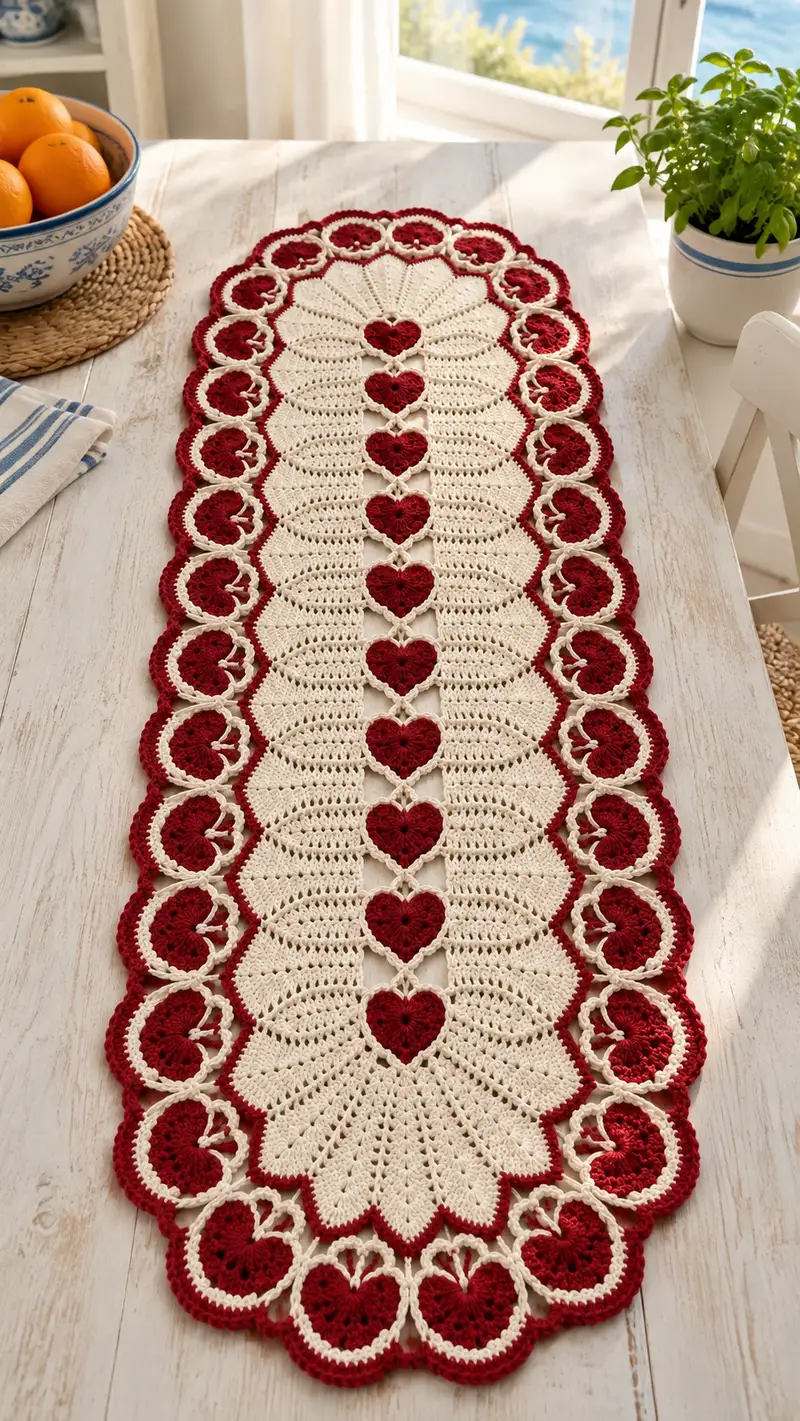
This elegant lace table runner pairs a warm cream background with deep red heart motifs and circular scalloped edging for a romantic vintage look. The runner features a central column of interlinked hearts, flanked by delicate fan panels and a ringed border in contrasting colors. Worked in classic crochet stitches with join-as-you-go motifs, it lays flat and adds instant charm to any dining or console table. A stunning project for gifting or seasonal decor.
Progress Tracker
0% Complete
— Notes & Gauge :
Info :
Gauge is not critical for table runner width but affects final length and motif size. Using worsted weight yarn and 3.5mm hook produces motifs approximately 6.5-7.5 cm (2.5-3 in) across for the roundels and hearts shown. Measure and block for exact sizing. Work loosely enough to create lacy gaps but tight enough that long stitches hold their shape.
Info :
Throughout this pattern you will make: center repeating panel (worked in rounds and repeat units), red heart motifs (make 9), side roundels (make 18, 9 per side), join-as-you-go joining rounds and a scalloped outer edge. I provide detailed rounds for one unit and indicate repeats to reach the pictured length.
— Materials Preparation :
Round 1 :
Prepare all yarn colors: Cream (C), Red (R). Wind small cakes for motifs so color changes are tidy. Use stitch markers to indicate the center line and edges on your work during repeats.
Info :
Make 9 Heart motifs (R), 18 side roundels (R center with C ring), and a single central foundation medallion. After motifs are made, assemble using the join-as-you-go rounds as detailed below. Block each motif lightly before joining for consistent size.
— Central Foundation Medallion (Top End) :
Round 1 :
With C, 8 sc in magic ring (8)
Round 3 :
(1 sc, 1 inc) x 8 (24)
Round 4 :
(2 sc, 1 inc) x 8 (32)
Round 5 :
(3 sc, 1 inc) x 8 (40)
Round 6 :
(4 sc, 1 inc) x 8 (48)
Round 7 :
(5 sc, 1 inc) x 8 (56)
Round 8 :
(6 sc, 1 inc) x 8 (64)
Info :
At this point the medallion is round and will form the oval top of the runner. Use this medallion as the starting cap from which the center repeat units will begin. Place a stitch marker in the stitch that will become the center front of the runner for alignment with the heart column.
Round 9 :
Work 1 sc in each st around (64)
Round 10 :
Ch 3 (counts as dc), *sk 1 st, dc in next 3 sts, ch 2; rep from * around to create 16 dc groups separated by ch-2 loops (64 dc grouped into 16 groups)
Round 11 :
Join at points to form fan bases: sl st to first ch-2 sp, (ch3, 2 dc, ch3, sl st) into same ch-2 sp to create a small fan; *sl st to next ch-2 sp, (ch3, 2 dc, ch3, sl st); rep around (16 small fans)
Info :
These fan shells create a radiating petal that blends into the center panel. Keep tension even. This medallion will be followed by repeatable panel units that extend the runner length.
— Center Panel Repeat Unit (Repeat 9 times to reach pictured length) :
Info :
Each repeat unit comprises Rounds A1–A6 below. Work them sequentially, then repeat the block the specified number of times (9 repeats recommended for the same overall length as pictured). The join-as-you-go stitches for hearts will occur during one of the rounds below.
Round A1 :
Working from medallion edge, ch 3, dc in each sc around across the previous round's fans, placing (3 dc, ch 2, 3 dc) in each fan valley to form large shell petals. Aim for 64 total dc stitches arranged into 16 shells (64)
Round A2 :
Ch 1, sc in same st, *ch 5, skip next 7 sts (approx), sc in next st (creates vertical chain-lattice columns between petals); rep across to create 16 chain arches that form a mesh for heart joins; end with sc into last st (approx 8 sc, 16 ch-five arches)
Info :
These long ch-5 arches will become the ’bridges’ between the central fan columns and the hearts. Adjust spacing so that 9 hearts will align down the center column—mark the approximate heart positions with stitch markers now (space hearts evenly; for 9 hearts you will place 9 marker points equally along the first few arcs).
Round A3 :
Ch 3, dc in each ch-5 arch as follows: (2 dc, ch 1, 2 dc) into each ch-5 arch to create small shell within arch; dc across sc foundations between arches to maintain 64 dc total (64)
Round A4 :
Ch 1, sc in each st around, placing occasional sc decreases opposite fan tops to gently shape sides inward by 8 sts total across the round: perform 8 equally spaced (sc, dec) sequences so new count = 56 (56)
Info :
Begin placing the heart motifs: You will attach the hearts into the vertical column formed by alternating ch arches at the center. Mark the exact stitch positions on this round where each heart will join: approximately every 6–7 rows along the center so hearts align neatly from top to bottom.
Round A5 :
Ch 3, dc across to create 56 dc in round; at each marker position (there are 1 per repeat unit) make a short cluster: dc3tog in the next 3 dc to create a small valley for heart join (56)
Round A6 :
Ch 1, sc in each st around working in BLO for a firm ridge at the connection line (56)
Info :
Repeat Rounds A1–A6 nine times (9 repeats) to elongate the runner to the pictured length. After each repeat, check alignment of heart join markers. If your runner is shorter/longer, increase or decrease the repeat count accordingly.
— Central Column Heart Motifs (Make 9) :
Info :
Hearts are made in Red and joined to the center panel using sl st or single crochet loops into the small valleys created on Round A5 of the panel. Make 9 identical hearts.
Round H1 :
With R, ch 6, join with sl st to form ring (or mr alternative). Ch 3 (counts as dc), work 15 dc into ring—(16 dc) sl st to top of ch-3 to close
Round H2 :
Ch 2, *2 tr in next st, dc in next 2 sts, hdc in next st, sc in next st (center tip), hdc in next st, dc in next 2 sts, 2 tr in next st; rep across to form two lobes, join with sl st (heart shape formed) — keep stitch symmetry (approx 16–20 stitches depending on shaping)
Round H3 :
Ch 1, sc evenly around heart perimeter placing 3 sc in each outer triple-tr cluster to round corners; sl st to join (approx 24 sc)
Round H4 :
Ch 3, dc in same st, (ch 1, dc) around to create a slight raised ridge following the heart outline; sl st to join (24 dc and ch-1 loops)
Round H5 :
Ch 1, sc in each st around placing sps evenly to create a neat edge; do not fasten off—leave long tail for joining (24)
Info :
Center heart tip should be slightly pointed; if too round, add an extra sc decrease at the tip in Round H3. Block each heart lightly to get uniform shape. Join each heart to the center panel by aligning the heart tip with the A5 valley and working sl sts through the heart's back loop and the panel valley so the heart face sits proud on the cream background.
Round H6 :
Optional decorative round: With C, work single crochet into hearts' perimeter stitches to create a cream outline around each heart for contrast—sc around, sl st to join (24)
Info :
Sew or join hearts to the panel centers after making each heart. Use the long tail from Round H5 to stab-stitch through the A5 valley and close; for cleaner joins use a small sc join through both layers.
— Side Roundel Motifs (Make 18; 9 per side) :
Info :
Each roundel is worked in the center in Red, then ringed by cream to make the circular scalloped border. These are joined to the panel edges in a join-as-you-go fashion creating the scalloped border. Make 18 identical roundels.
Round R1 :
With R, mr, ch 2, work 12 hdc into ring, sl st to close (12)
Round R2 :
Ch 3, *2 dc in next st, ch 1; rep around to form 12 small clusters separated by ch-1 (24 dc clusters + 12 ch-1 sps)
Round R3 :
With C, join in any ch-1 sp, ch 2, 3 hdc in same sp, *ch 2, 4 hdc in next ch-1 sp; rep around to form 12 cream clusters separated by ch-2 loops. Sl st to join (48 hdc clusters arranged)
Round R4 :
Ch 1, sc in each hdc around working 2 sc in top of each 3-hdc cluster to round the ring and provide a firm edge (approx 60 sc)
Round R5 :
Edging scallop: *Skip 2 sc, 7 dc in next sc, skip 2 sc, sl st in next sc; rep around to create scallops (8–10 scallops per roundel depending on counts)
Info :
Make 18 roundels. When working Round R3, leave the last sl st open for a join-as-you-go connection to the center panel's side fan shells. Pin roundels in place along both sides of the center panel so that 9 roundels align evenly along each side forming the scalloped border.
— Join Round: Attach Roundels & Hearts to Center Panel :
Round J1 :
Working with C from center panel edge, *position a roundel so that its ch-2 loop aligns with a ch-2 arch on the panel side; join with sl st through both loops, ch 3, sl st back into panel to secure; rep across side until all roundels on one side are joined (approx 9 joins per side)
Info :
Ensure each roundel is joined at 3 points: top, middle, and bottom of its ring to keep it flat. Use blocking pins to hold the roundel in place while joining. Repeat for opposite side matching placement to keep runner symmetrical.
Round J2 :
Return to center of runner, work sc around center column between heart joins to tidy gaps: ch 1, sc evenly across the inner valley between hearts, working through heart join loops where necessary to anchor hearts firmly (approx counts vary across length—aim for even tension)
Info :
At this point the runner will look like a long lace strip with hearts attached down the center and roundels attached along both edges. Check for even spacing—if a roundel sits too close, adjust by removing a join and re-positioning before proceeding to the outer edging rounds.
— Outer Scalloped Border (Full Edge Rounds) :
Round E1 :
With C, join at any roundel outer edge point; ch 3 (counts as dc), *dc 3 around next small loop between roundels, ch 1, sk 1; rep around entire runner to form a continuous outer ridge that connects all roundels and scallops (maintain continuity)
Round E2 :
Ch 1, sc in each st around working around entire runner, placing 2 sc in chain-1 spaces and 1 sc in each dc to smooth transitions (total sc count will vary—aim for smooth continuous edge)
Round E3 :
Scallop round: *Skip 2 sc, (7 dc, sl st) in next sc to form large scallops around outside edge; rep around to create pronounced scallops (scallop count per side equals number of roundels plus end caps)
Info :
If you prefer a two-color edge, switch to R for one round of reverse single crochet or picots here, then return to C for the final scallop to emphasize the red outline as in the pictured runner.
Round E4 :
Finishing ridge: With R (optional), work a tidy reverse sc round (crab stitch) around the entire outer edge to highlight scallops and give a crisp finish—work in opposing direction to create neater ridge (work 1 sc in each sc and sl st in each sl st boundary)
Info :
When working the outer ridges, maintain consistent stitch counts across symmetric points on both sides. Use blocking pins to pin scallops flat and firm while you work the final round to ensure uniform curves.
— End Caps / Bottom Medallion :
Round B1 :
To finish runner bottom end, create a medallion mirroring the top: With C, join into final round edge center and work 1 sc in each st around until you reach approximate 56–64 sc providing a similar circumference to the top medallion
Round B2 :
Repeat fan and shell shaping rounds from the top medallion (ch 3, dc groups, fans) to create a lobed end similar to Round 10–11. Work until the medallion shape flares and then scallop with E1–E3 instructions to match edges
Info :
Ensure the bottom medallion is symmetrical to the top by counting shells and aligning the center heart directly opposite the top center heart. This gives the finished runner a balanced, elegant look.
— Blocking & Final Finishing :
Info :
Weave in all remaining tails using a yarn needle, hiding ends inside stitches. Mist the runner lightly and pin the runner to desired dimensions on a blocking board. Pin each scallop and curve to achieve a uniform scalloped edge. Allow to dry fully. If you prefer a crisper look, use a light starch or fabric stiffener per product directions after blocking.
Round F1 :
Optional: For an extra-defined outer edge, use the 3.0mm hook and with R, work 1 round of single crochet in FLO around the scallop peaks to highlight them (work 2 sc in peak st where needed)
Info :
Final inspection: Check for loose joins at hearts and roundels and re-sew if necessary. Trim excess yarns close to the woven ends. Press gently if desired using a cloth barrier and low heat if fiber allows.
— Pattern Variations & Size Adjustments :
Info :
To make the runner shorter or longer, adjust the number of center repeat units (A1–A6). Each repeat unit adds approximately 5–8 cm (2–3 in) depending on tension. To widen or narrow, alter initial medallion increase rounds by adding or subtracting segments in the increase rounds (work increases in groups of 8 to maintain symmetry).
Info :
For a stronger table-runner suitable for heavier tableware, consider using a slightly thicker yarn and a 4.0mm hook and making fewer repeats to retain proportion. For a more delicate lace, use a sport weight yarn and 3.0mm hook and increase repeats to maintain desired length.
Info :
Color swaps: To create seasonal variations, change the accent heart color (R) to seasonal tones (green for Christmas, pink for spring). You can also alternate roundel colors for a more colorful border.
Finishing this hearts lace table runner is such a rewarding experience! Each joined heart and scallop builds into a romantic, vintage-inspired accent that feels both handmade and heirloom-worthy. The rich contrast of cream and red brings warmth to any table setting and makes a thoughtful gift. Enjoy the calm, satisfying rhythm of crocheting each motif and the joy of blocking everything into a crisp, elegant final piece. 🧶❤️