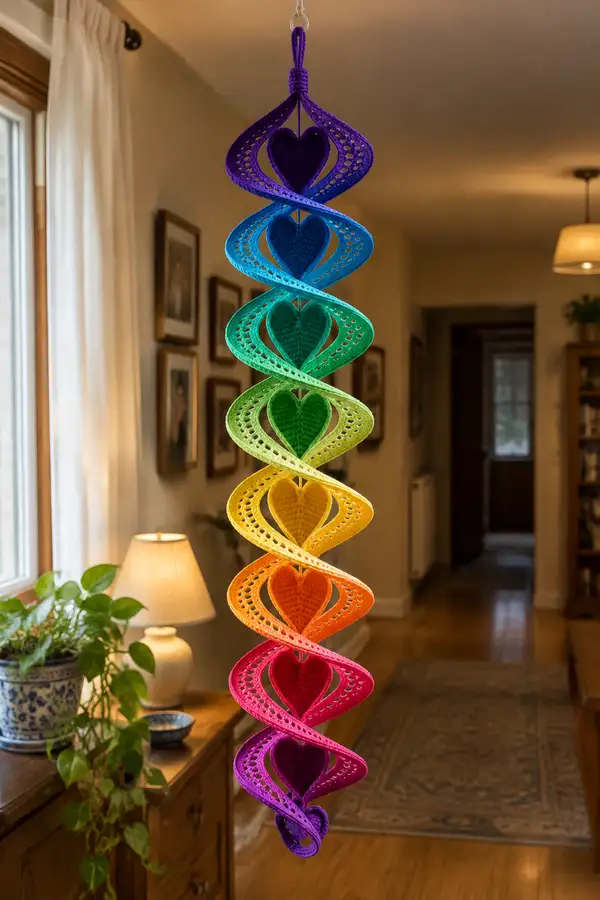
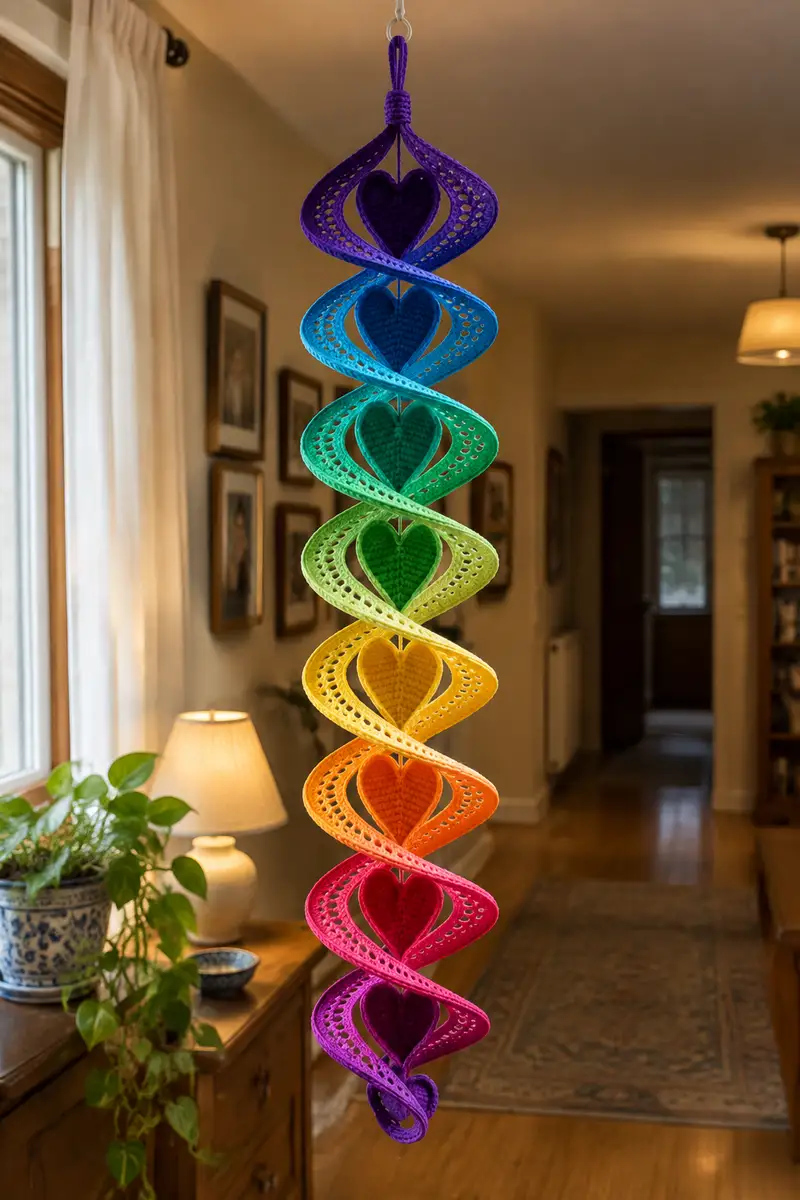
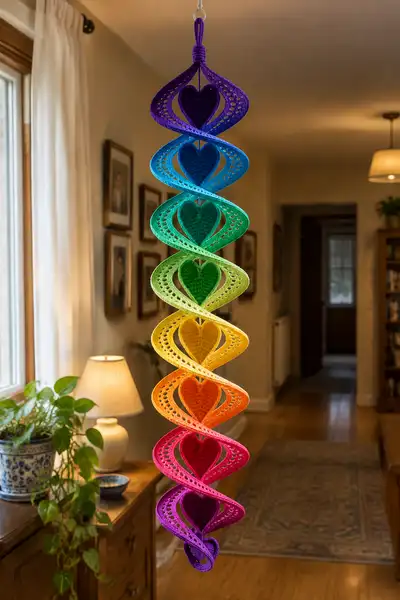
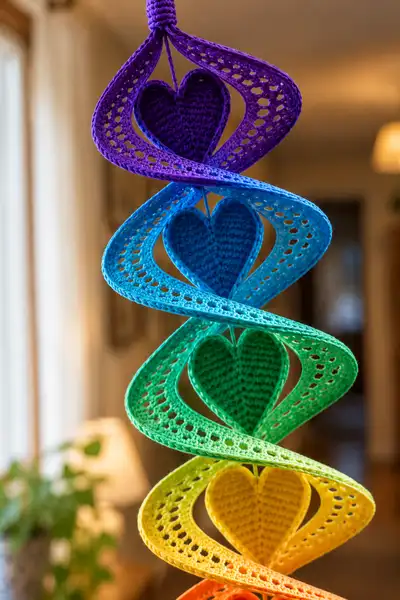
A colorful, layered hanging mobile featuring eight stacked heart motifs nested inside delicate openwork shells that twist into a graceful spiral. Worked in bright rainbow hues and finished with a wrapped hanging loop, this cheerful decor piece brightens any room. Crisp stitches, eyelet accents, and carefully blocked shaping give a lightweight, sculptural finish that's perfect for windows, doorways, or nurseries.
Progress Tracker
0% Complete
— Notes & Gauge :
Info :
This project is constructed from repeating motifs: one stuffed heart (two identical halves) and one openwork shell for each color segment. Gauge is not critical, but for reference a finished heart measures approximately 7-9 cm (2.75-3.5 in) across when using DK cotton and 3.5mm hook. Keep tension fairly consistent to maintain the spiral balance of the stacked shells. Block or stiffen shells lightly for best shape retention.
— Heart (Make 8 complete hearts — 2 halves per heart) :
Info :
Each heart is assembled from two identical halves worked in continuous rounds. Make two halves for a single heart, stuff lightly, then sew together with a neat whip or ladder stitch. Work in the color specified for that segment. The stitch counts below are for one half piece (round numbers and totals listed). Use a removable marker at the start if you prefer to join rounds visually.
Round 3 :
(1 sc, 1 inc) x 6 (18)
Round 4 :
(2 sc, 1 inc) x 6 (24)
Round 5 :
(3 sc, 1 inc) x 6 (30)
Round 6 :
1 sc in each st around (30)
Round 7 :
(4 sc, 1 inc) x 6 (36)
Round 8-10 :
1 sc in each st (36)
Info :
At the end of Round 10 fasten off and change color if making gradient halves, otherwise continue in the same color. Make a second identical half before sewing. If you prefer a slightly flatter heart, stop at Round 9; for a fuller half, continue an extra round of even stitching before beginning decreases.
Round 11 :
(4 sc, 1 dec) x 6 (30)
Round 12 :
(3 sc, 1 dec) x 6 (24)
Round 13-15 :
1 sc in each st (24)
Info :
Begin checking the curve of the half: the rounds above create the top lobe of the heart. If making more domed lobes, add one more even round here before the final tapering. Keep the edges neat for easier seaming later.
Round 16 :
(2 sc, 1 dec) x 6 (18)
Round 17 :
(1 sc, 1 dec) x 6 (12)
Info :
Fasten off leaving a long tail for sewing. Make two identical halves for each heart. Before joining halves, stuff each half lightly at the wider end; do not overstuff — hearts are meant to be shallow and decorative. Two halves sewn together will form a heart approximately 7-9 cm wide depending on tension and yarn.
Info :
Assembly for Heart: Place the two halves right sides together, align edges carefully, and whip stitch around three-quarters of the heart leaving a short gap for additional stuffing. Add a small amount of polyester fill so the heart is slightly padded but not bulky. Finish sewing the seam closed and weave in the tail deeply into the heart to hide it. Add a small loop of contrasting yarn or the same color at the top center of the heart (round 1 area) for hanging on the central cord.
— Decorative Shell (Make 8 shells — one shell per color segment) :
Info :
Each shell is worked as a flat oval worked in rounds around an initial chain foundation. After completing rounds, the oval is folded and the two long edges are seamed together at two opposite points to create a hollow diamond-shaped loop. The shell receives an eyelet/openwork row to add lightness. After finishing, block flat and optionally stiffen to hold its curved 3D shape when stacked.
Round 1 :
Ch 30, join with sl st to form a ring (do not twist). Work 1 sc in each chain around both sides of the chain (work 1 sc in each ch across, 3 sc in last ch to turn, continue sc along opposite side of chain back toward start, then 3 sc in the starting chain to complete the round) — total 66 sc (66)
Round 2 :
(11 sc, 1 inc) x 6 (72)
Round 3 :
(11 sc, 1 inc) x 6 (78)
Round 4 :
1 sc in each st (78)
Round 5 :
1 sc in each st (78)
Info :
These rounds form the oval base width. If you want a larger shell, increase the starting chain by 4 and adjust rounds proportionally. Keep stitch counts accurate when changing chain size. Use stitch markers at the junctions where the chain ends were joined for seaming points later.
Round 6 (Eyelet Setup) :
*1 sc, ch 1* repeat around into each st and ch1 space to create a discrete eyelet bed (78 sc, 78 ch1 spaces counted as placeholders)
Round 7 (Eyelet Row) :
Work 1 sc into each ch-1 space from previous round, and 1 sc in each sc — this returns the piece to 78 sc while forming an even eyelet lattice (78)
Round 8-10 :
1 sc in each st (78)
Info :
The eyelet row will read as small holes along the long edges of the oval. If you'd like larger holes, substitute Round 6 with *2 sc, ch 2* across, then work Round 7 into ch-2 spaces with 2 sc to maintain stitch count. Experiment on a swatch if desired.
Round 11 :
(10 sc, 1 dec) x 6 (72)
Round 12 :
(9 sc, 1 dec) x 6 (66)
Round 13 :
1 sc in each st (66)
Round 14 :
1 sc in each st (66)
Round 15 (Edge Finish) :
Work 1 sc in each st BLO around to create a subtle ridge and clean edge for seaming when folding (66)
Info :
Fasten off leaving long tail for seaming. Lightly block the oval flat on a foam board: spray with water and pin into a gentle elliptical shape so edges are even. Optional: apply a light fabric stiffener to keep shells slightly rigid so they hold the spiral curve once seamed and stacked.
Info :
Folding & Seaming Shell: Fold the oval so the long edges meet and the short ends become the points of a diamond. Align the long edges and seam by sewing the upper quarter of the sides together at two opposite points forming a hollow diamond loop. Leave the center of the long seam open so the heart can be dropped into the hollow. When seamed, the diamond will naturally curve — encourage a slight S-twist while pinning so shells will nest into a spiral when stacked.
— Central Cord & Hanging Loop :
Info :
The central cord is the spine of the mobile. Use a length of strong cord, crocheted chain, or wrapped yarn. For added stability you may insert a thin dowel, wooden skewer, or stiff wire inside the cord. The top finishing is a wrapped coil of yarn that hides the join and forms a neat loop for hanging.
Round 1 :
Make a foundation chain of 120 ch in your chosen hanging cord color (or long enough to accommodate stacking of 8 shells and hearts with 2-3 cm spacing between each piece). Adjust length based on your desired final mobile length (standard layout in photos is about 70-90 cm long finished).
Info :
If using a crocheted cord, consider using 3.5 mm hook and work sc in back bumps to create a round cord, or use a 3-strand braid for a strong central line. Leave 20-25 cm at the top for wrapping and the hanging loop. Mark the center point for balancing purposes.
Round 2 :
Optional: If you want a sturdier cord, single crochet around a length of twine or thin wire: ch the desired cord length, sc into each ch to the end. Fasten off and weave in ends. This yields a stable cord that will not stretch under weight.
Info :
Top Wrapped Loop: Take a 20 cm tail and wrap additional yarn tightly around the cord near the top to form a neat coil and loop. Sew or glue the wrap securely at both ends of the coil to prevent unraveling. Create a small loop above the coil for hanging and secure with several stitches, then tuck and weave in remaining tails.
— Assembly & Stacking Sequence (Layout for 8 segments) :
Info :
Work all hearts and shells in color order before assembly to streamline the build: top to bottom in the photo is Purple, Blue, Teal, Green, Yellow, Orange, Pink, Purple (repeat top color at bottom for visual balance). Each heart has a small hanging loop sewn to its top center. Each shell is folded and seamed so the hollow opening accepts the heart, and the shell provides a subtle twist when layered. Pre-block shells so assembly is straightforward.
Step 1 :
Slide the topmost small wrapped loop over the cord and position at the top coil, secure with a couple of stitches to keep from sliding. You may also add a small bead above the coil to stop movement.
Step 2 :
Working from top to bottom, thread the first shell onto the cord through its central opening so it rests against the top coil. Ensure the shell's seam sits behind the shell so the decorative open edges face forward. Adjust the shell to sit at roughly 3-5 cm below the coil (or as desired).
Step 3 :
Next, hang the matching heart by their small yarn loop inside the shell's hollow center so the heart hangs freely but centered. Use a couple of hidden whip stitches to tack the heart loop to the cord if you want it to stay at exact center and not spin freely.
Step 4 :
Repeat sliding the next shell down the cord and orient it with its seam rotated slightly (about 30-40 degrees) relative to the previous shell to encourage the gentle spiral. Add the corresponding heart to the shell center. Continue stacking shells and hearts with consistent spacing (3-6 cm recommended) until all 8 segments are mounted.
Info :
To form the visible spiral, rotate each shell seam sequentially around the cord so that each shell sits slightly offset from the one above. The offset plus the natural curve of the folded shell creates the cascading spiral visual. Use small stitches through the shell seam and the cord to anchor each shell position if movement is undesirable.
Step 5 :
After all shells and hearts are stacked, adjust spacing visually so the spiral is continuous and balanced. Tie a secure knot at the bottom of the cord or add a small decorative wrapped coil to finish the tail. Trim and weave in all tails neatly and hide knots inside shell seams where possible.
— Optional Tassel, Beads & Embellishments :
Info :
Add a small tassel or bead at the bottom to weigh the mobile slightly and help it hang straight. If you prefer more kinetic movement, add small wooden beads between shells on the cord; ensure they are lightweight and balanced so the mobile hangs evenly.
Round 1 :
Create a tassel by wrapping yarn around a 4 cm card 30 times, tie at one end, cut looped edge, trim to 4-5 cm length, and secure to the cord end with a wrapped coil.
Info :
Always test balance and adjust knot positions slightly until the mobile hangs straight. If a shell leans heavily to one side, reposition or add a few tacking stitches along its seam to rotate it correctly. Keep final assembly lightweight to prevent stretching of the cord.
— Finishing Touches & Care :
Info :
To keep the mobile looking fresh, dust occasionally and avoid direct prolonged sunlight which can fade cotton yarn. If shells were stiffened, the stiffener may soften over time—reapply a light coat if desired. For washing, spot clean only; do not immerse if stiffened. If you used washable cotton and no stiffener, hand-wash gently and reshape while damp, then dry flat.
Finishing this rainbow heart spiral is a joyful moment — watching each colorful heart tuck into its lacy shell to form a slow, graceful spiral is so satisfying. The layered colors and delicate eyelets make it a handmade piece that sparks conversation and warms a window or hallway. Enjoy the meditative stitching and the smile it brings to any room! 🌈🧶