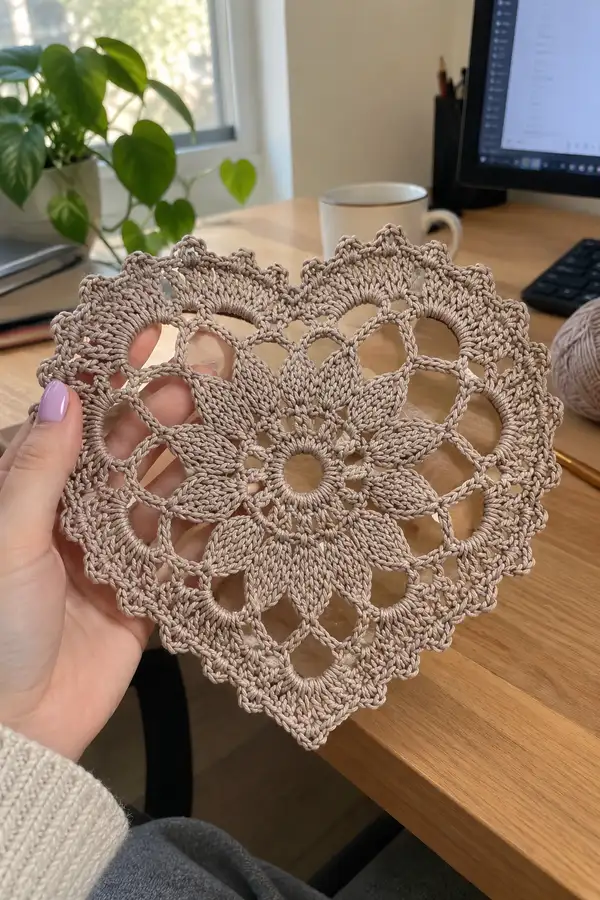
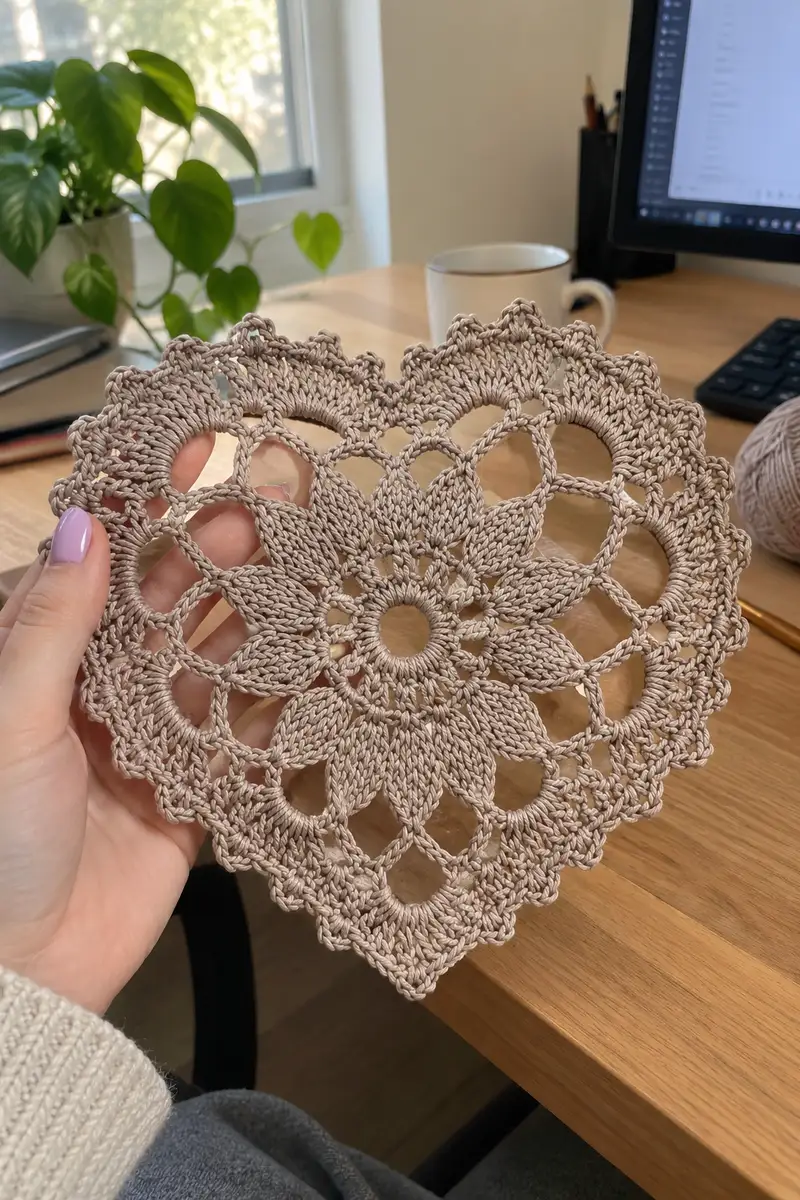
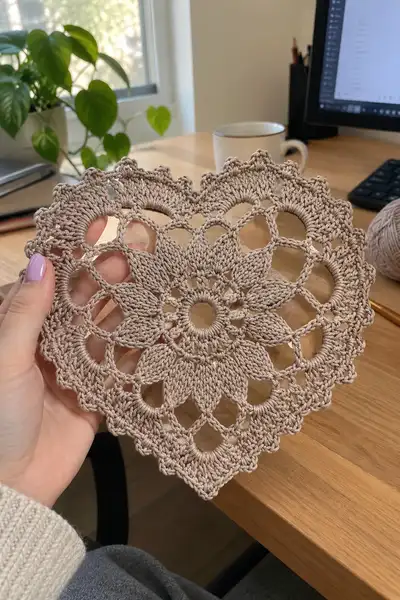
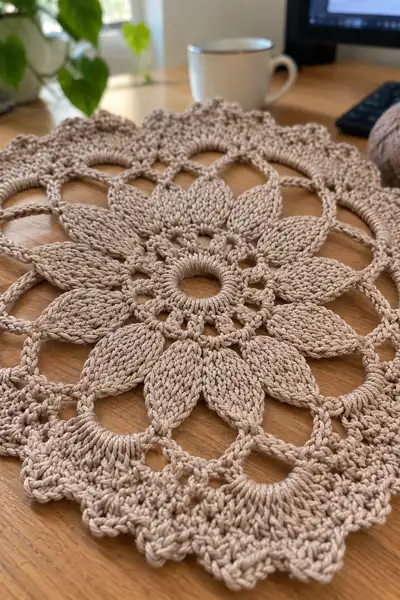
A delicate heart-shaped lacy doily worked in a soft beige cotton. This pattern reproduces a floral-petal center, open mesh arches, and a scalloped picot edge that creates a shallow heart silhouette. Worked flat in rounds with textured petals and chain-spaces, it makes a beautiful coaster, decorative accent, or small wall hanging. The neutral natural cotton shown highlights stitch definition and elegant negative space.
Progress Tracker
0% Complete
— Center Ring :
Round 1 :
6 sc in magic ring (6)
Round 2 :
(1 sc, inc) x 6 (18)
Info :
Keep tension even; mark first stitch of each round with a removable stitch marker. This round establishes 6 small groups that will expand to 12 petal anchors.
Round 3 :
(2 sc, inc) x 6 (24)
Round 4 :
(3 sc, inc) x 6 (30)
Info :
At the end of Round 4 you will have a compact circle; the following rounds will set the anchor points for the later elongated petals. Keep stitches tight so the center remains defined.
Round 5 :
(4 sc, inc) x 6 (36)
Round 6 :
(5 sc, inc) x 6 (42)
Info :
Switch to counting in 12 virtual segments by placing markers every 3 stitches if needed; the motif radiates into 12 petals so thinking in 12 segments helps alignment.
— Petal Base (create 12 petal anchors) :
Round 7 :
*Ch 5, skip 3 sts, sc in next stitch* rep 12 times around, join with sl st to first sc (12 ch-5 loops)
Info :
Each ch-5 loop becomes the base over which a petal will be built. Count loops to ensure 12; adjust if your tension created an extra/less loop.
Round 8 :
Join in first ch-5 loop, (sc, ch3, 3 dc, ch3, sc) in each loop around, join (each loop forms a small fan) — 12 fans
Round 9 :
Working behind the fans, sl st into base stitch to position for petals then sc in next stitch, *ch2, skip fan top, sc in next anchor stitch* rep around to form small connecting arches (12 arches)
Info :
These connecting arches help separate petals and will be hidden behind taller petal stitches. Keep arches even; use a marker at the start of the round.
— Petal Formation (elongated textured petals) :
Round 10 :
Join with sl st at the base of a fan. Ch2 (counts as hdc), work 9 fpdc around the same base area (work front-post double crochets around base stitches of the fan to create raised texture), ch2, sl st to join at petal base. Repeat for each petal (12 raised petals)
Round 11 :
Turn to the top of petal: in front loop of the previous fpdc group work (ch1, 7 tr) across the face of the petal, sl st to top of petal base. Repeat across all 12 petals (12 groups of 7 tr)
Info :
Use taller stitches (tr) for the visible flattened petal surface. Keep the same number of tr per petal so they match in length and width. If a petal becomes too wide or narrow, adjust by substituting one tr for one dtr in the center for subtle shaping.
Round 12 :
In the top loops of each petal group work: sl st, ch3, (dc, dc, dc) all in one stitch to create a small shell top, sl st to next petal top. This rounds the tip of each petal (12 shell tips)
Round 13 :
Working behind the petal tips, ch4, sc into the space between petals to create connecting arches that define open spaces - rep around so you have 12 ch-4 arches
Info :
At this stage the motif shows a clear ring of twelve petals. If petals feel loose, tighten bases by working a round of sc around the base of each petal (see Round 14 option).
Round 14 :
Optional reinforcement: sc evenly around the base of each petal working 3 sc between each ch-arch (36 sc). This creates a sturdy platform for the outer mesh rounds (36)
— Petal Heightening and Decorative Filling :
Round 15 :
Ch1, sc in each sc around base (36 sc) if reinforced, otherwise sc evenly around petal bases and arch joins for even stitch count approximately 36
Round 16 :
(2 sc, inc) x 12 (48)
Info :
By increasing evenly you add a subtle circular band that smooths transition from petals to the open mesh. Keep count accurate — you should now have 48 stitches.
Round 17 :
(3 sc, inc) x 12 (60)
Round 18 :
1 sc in each st (60)
Info :
Begin forming the six large open arches that make the lobes of the top-of-heart shape. Visualize the doily dividing into 12 small arches and six larger arches — we will pair them next.
— Large Arch Formation (six pairs of petals forming heart lobes) :
Round 19 :
*Ch10, skip 9 sts, sc in next st* rep 6 times around (6 ch-10 loops)
Round 20 :
In each ch-10 loop work (sc, ch3, 5 dc, ch3, sc) to create large fans — 6 large fans
Info :
These large fans create the deeper open lobes that will form the upper heart curve. Keep tall stitches upright and consistent so the heart shape reads clearly.
Round 21 :
Behind the large fans, ch6, sc between fans to create tall chain arches (6 ch-6 arches)
Round 22 :
Work a round of sc around the base joining spaces: sc in each sc and 3 sc in each little base space between fans to stabilize (approx 72 sc)
Info :
Use a stitch marker to mark the bottom center of the heart (this will be the point formed later) — mark the fan or anchor that corresponds to the point so you can shape the bottom separately in later rounds.
— Mesh Stabilization and Decorative Bridges :
Round 23 :
Ch4, sc into next sc, *ch4, sc into next sc* rep around forming nine or more ch-4 loops depending on count (approx 18 ch-4 loops if you alternate short/long)
Round 24 :
In each ch-4 loop work (sc, ch3, sc) to make simple looped bridges that hold large fans in place (rep around)
Info :
At this stage the motif begins to breathe — the negative space is purposeful. Keep bridges consistent to maintain symmetry across twelve petal divisions.
Round 25 :
1 sc in each sc around (count should be even, approx 72-84 depending on exact previous loop count). Use this even round to ensure evenness before shaping the heart point.
Round 26 :
(4 sc, dec) x 12 (approx 48) - begin gentle decrease but only across selected segments to start pulling a slight point on the lower center (work decreases evenly across bottom quadrant)
Info :
Be selective with decreases: only perform dec sequences on 4 consecutive segments centered on the marked bottom center to form the heart point. Count carefully so the top lobes remain full.
— Shaping the Heart Point (lower section) :
Round 27 :
On bottom quadrant: (3 sc, dec) x 4 (16 in bottom shaping area). Around remainder of ring work even sc to maintain full lobes (total approx 56)
Round 28 :
Continue selective shaping: on bottom quadrant (2 sc, dec) x 4 (12), elsewhere 1 sc in each st — this gradually draws the lower edge to a point
Info :
Check shape frequently: lay flat to see heart point developing. If point is not pronounced enough, perform one more shaping round focused on the bottom quadrant.
Round 29 :
Bottom quadrant only: (1 sc, dec) x 4 (8), finish with sc around remainder. This should produce a noticeable point at the bottom center.
Round 30 :
Work 1 sc in each stitch around entire motif (approx 56-60 depending on previous exact counts) to even out the row and prepare for outer lace repeats
Info :
At the end of Round 30 your heart-shaped silhouette should be visible. Now we build the outer lace chain arches and scallops found in the original piece.
— Outer Mesh and Openwork Rows :
Round 31 :
*Ch7, skip 4 sts, sc in next st* rep around forming 12 ch-7 loops (12 large loops)
Round 32 :
In each ch-7 loop work (sc, ch3, 7 dc, ch3, sc) making tall open fans that will read as the outer larger arches (12 large fans)
Round 33 :
Between each large fan work ch5 and sc to create connecting arches; adjust chain lengths so the top lobes remain rounded (12 ch-5 arches)
Info :
These large open fans correspond to the wide scalloped areas shown near the heart top. If your fans pull inwards, add extra ch to spacing in this round to open them up.
Round 34 :
Sc around the body establishing a stable band: 1 sc in each sc and 3 sc in each small gap under fan bases (approx 84 sc)
Round 35 :
(2 sc, inc) x 28 (112) - gentle global increase to create room for a deep scalloped edge
Info :
Increasing evenly across the round is important to prevent buckling; count markers every 14 stitches to verify even growth if needed.
— Lace Motif Repeats for Heart Contour :
Round 36 :
*Sc in next 3 sts, ch6, skip 6, sc in next 3 sts* rep around forming shorter arches to break up the large fans (approx 16 ch-6 loops)
Round 37 :
In each ch-6 loop work (sc, ch3, 5 dc, ch3, sc) to create mid fans alternating with earlier large fans (16 mid fans)
Round 38 :
Sl st to join, then sc evenly around (approx 112) to stabilize and hide floats
Info :
Alternate fan sizes and chain lengths to create the layered lacy look observed in the photograph — larger fans paired with smaller mid-fans create depth.
— Pre-Scallop Shaping Rounds :
Round 39 :
(3 sc, dec) x 28 (84) — first shaping round toward scallops; this reduces volume so scallops sit neatly
Round 40 :
1 sc in each st around (84)
Round 41 :
(2 sc, dec) x 28 (56)
Info :
These strategic decreases help the outer scallops form round without overly flaring; they are gentle and symmetrical across the full circumference.
Round 42 :
Sc in each st around (56)
Round 43 :
(1 sc, dec) x 28 (28)
Round 44 :
Sc in each st around (28) - you now have 28 neat anchor points which will receive the scallop clusters
Info :
Counting is crucial here. Insert markers every 7 stitches to keep track of the 28 scallop anchors. These anchors correspond to the delicate scalloped edge in the image.
— Outer Scallop Border (deep scallops with picot points) :
Round 45 :
*In next st work (hdc, 3 dc, hdc), ch3, sl st in next st* rep 28 times forming base scallops separated by ch-3 picot space (28 scallops)
Round 46 :
In each scallop work (sc, ch2, 5 dc, ch2, sc) to deepen scallop and add fullness (28 deepened scallops)
Info :
Work tall stitches centered in each scallop to create the pronounced rounded petals along the edge. Keep tails woven as you go to avoid bulky joins later.
Round 47 :
Between scallops work ch5 loops and sc in scallop peaks to connect (28 ch-5 loops)
Round 48 :
Into each ch-5 loop work (sc, ch3, 7 dc, ch3, sc) - this creates the puffed scallop tops (28)
Round 49 :
Sc evenly around the scallop bases to stabilize (approx 140 stitches distributed across scallops and connectors)
Info :
These rounds emulate the layered scalloped edge shown in the photograph where small picot-like points sit between broader scallops.
— Picot Detailing and Final Points :
Round 50 :
*On scallop peaks: (sc, ch3, sl st into same stitch) to create three small picots per scallop peak* rep 28 times (approx 84 small picots)
Round 51 :
Sc around connecting the picots with 1 sc between each picot; adjust to preserve smooth edge (approx 140 sc)
Info :
Picots add the fine tooth-edge seen in the photo. If you prefer a softer edge omit picots and simply finish with slip stitch rounds.
Round 52 :
Work one final decorative round: *ch2, sl st into the top of each picot* rep around to create a fine looped finishing line
Round 53 :
Fasten off and weave in ends securely; trim tails close to fabric. The motif should be complete and ready for blocking.
Info :
If your doily looks slightly wavy, wet-block to shape and pin the scallops to a heart outline until dry. Use light starch if you want a firm coaster-like result.
— Optional Additional Layers (if you want extra depth) :
Round 54 :
Rejoin at any scallop base, ch1, sc in each st around for one even round (approx 140) — this creates another base for deeper scallops
Round 55 :
Work small clusters between scallops: *ch6, sc in mid-scallop st* rep to create decorative loops (approx 28 loops)
Round 56 :
In each loop work (sc, ch3, 3 dc, ch3, sc) for secondary scallop row — rep around
Info :
Adding layers is optional and will increase finished size. Keep symmetry and count each repeat to preserve heart outline.
Round 57 :
Sc evenly around all new stitches to bind layers (adjust counts accordingly)
Round 58 :
Finish with choice of picot or slip stitch round (see rounds 50-52) and then fasten off.
Info :
Additional layers increase complexity; only add if you want a more three-dimensional, heavily laced look similar to studio samples that have multiple borders.
— Blocking and Finishing :
Info :
Wet-block the finished motif: pin carefully to heart shape on foam mat, stretching scallops gently to even spacing. Allow to dry completely. Spray lightly with starch if a firm finish is desired.
Round 59 :
Optional: after blocking, stitch a few invisible whip stitches on the underside across the bottom point to maintain shape if the point is floppy (3-5 discreet stitches)
Info :
Weave in ends on the wrong side using a tapestry needle. Trim close and hide tails under a row of stitches to maintain flat surface on the right side.
This lacy heart motif is a lovely little project that transforms a few rounds of crochet into a beautiful heart-shaped accent. Whether you use it as a coaster, wall accent, or a thoughtful handmade gift, every stitch brings delicate texture and charm. Block it with care, add subtle starch if you like structure, and enjoy the lovely lace you made by hand. 🧶❤️🌿