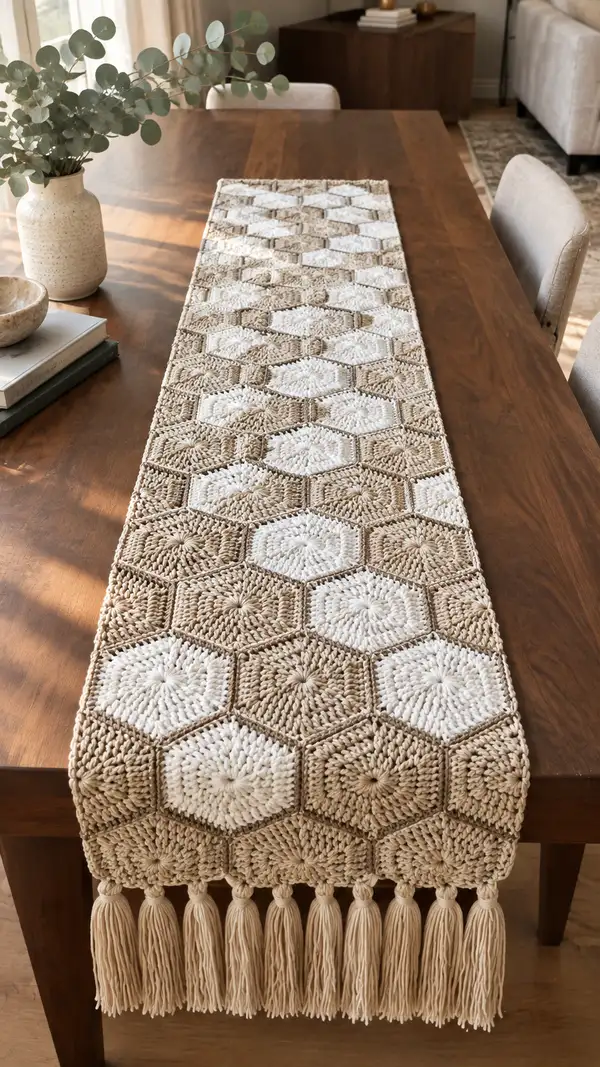
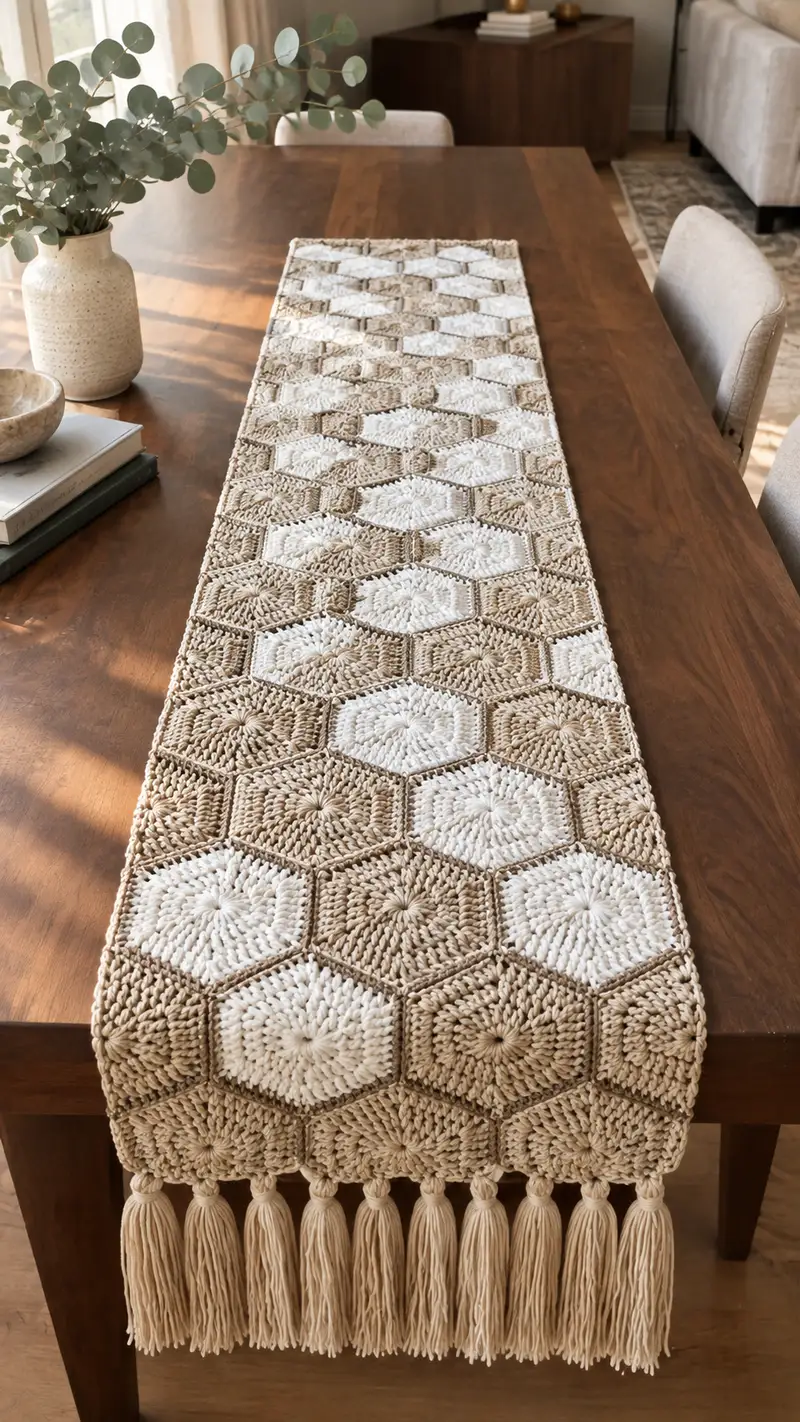
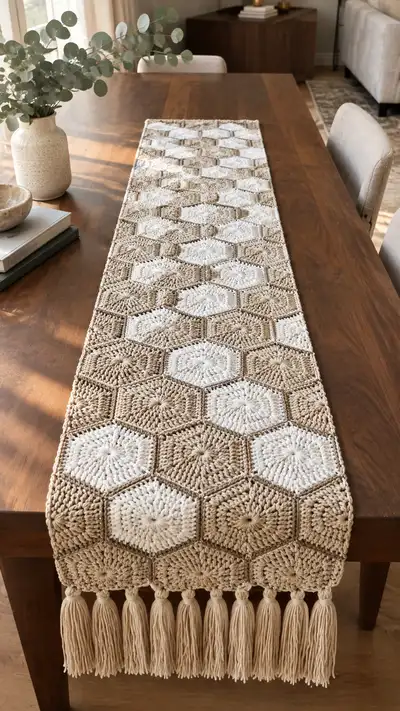
Create a warm, neutral hexagon table runner featuring textured puff centers, alternating cream and sand hexagons, and a neat single-row border with long tassels. The runner shown is long and narrow, woven from bulky cotton for a soft yet structured finish. This pattern uses repeatable hexagon motifs joined as you go and includes a detailed edging and tassel finish for a polished boho look.
Progress Tracker
0% Complete
— Overview :
Info :
This pattern describes how to make one hexagon motif with textured puff center, how to make an alternate center-color motif, how to join motifs as-you-go in rows, how to add a rectangular border around the assembled runner, and how to add long tassels at each short edge. Gauge is motif-based; each completed hexagon measures approximately 4.5" to 5" corner-to-corner when worked with bulky cotton and a 6.5mm hook. The shown runner is constructed from 6 motifs across and 14 motifs long (6x14 = 84 motifs) for a finished length around 66" - 72" and width approximately 27". Adjust motif count for your desired size.
— Hexagon Motif (Textured Puff Center, Main Color) :
Round 1 :
Make a magic ring. Ch3 (counts as dc), work 5 dc into ring. Pull ring closed and join with sl st to top of ch3. (6)
Round 2 :
Ch3, dc in same st (counts as inc), *2 dc in next st; rep from * around. Join with sl st to top of ch3. (12)
Round 3 :
Ch3, dc in same st, *1 dc in next st, 2 dc in next st; rep from * around. Join. (18)
Round 4 :
Ch3, dc in same st, *(2 dc, dc) in next st, 2 dc in next st; rep around keeping count (this round starts to flatten center) — effectively (2 dc, inc)x6 with singles between to total (24). Join. (24)
Info :
The center rounds 1-4 create a small dome to anchor the puff rounds. Keep tension slightly loose in Round 4 to accommodate puff stitches in the next rounds. If your motif is flattening, work Round 4 looser or add a ch space before joining.
Round 5 :
Ch1, sc in same st, *ch2, puff stitch in next st (see puff stitch notes), ch2, sc in next st; rep from * around creating six puff clusters spaced by scs and chains. Join with sl st to first sc. (24 elements including sc positions)
Info :
Puff stitch: yo, insert hook, draw up loop, yo, insert hook, draw up loop, yo, insert hook, draw up loop (3 incomplete dcs), yo and pull through all 7 loops on hook; ch1 to close puff. Use consistent pressure to make uniform puffs. Alternatively, use 2-dc puff if preferred but adjust counts accordingly.
Round 6 :
Ch3 (counts dc), *2 dc in ch2-space, dc in next sc; rep from * around. Join. (36)
Round 7 :
Ch2 (counts hdc), hdc in same st, *hdc in next 2 sts, 2 hdc in next st; rep from * around. Join. (48)
Info :
Switch to BLO for a ridge effect on the first round of the hexagon side shaping if you prefer a more defined hexagon edge. To do so, work Round 8 in BLO. This creates a subtle ridge that helps the shape read clearly when motifs are joined.
Round 8 :
Ch1, sc in same st, *sc in next 7 sts, (sc, ch1, sc) in next st to create a corner picot-space; rep around 6 corners total. Join. (48)
Round 9 :
Ch2, dc in same st, *dc in next 7 sts, (2 dc, ch1, 2 dc) in corner ch1-space; rep around. Join. (60)
Round 10 :
Ch3, dc in same st, *dc in next 9 sts, (2 dc, ch1, 2 dc) in corner ch1-space; rep around. Join. (72)
Info :
Rounds 8-10 begin the flat, six-sided development. The corner spaces (2 dc, ch1, 2 dc) form each of the six corners; keep even counting to ensure hexagon geometry. If you wish a slightly smaller motif, stop at Round 9 and fasten off.
Round 11 :
Ch1, sc in same st, *sc in each dc across until corner ch1-space, sc in corner ch1-space, sc in next st to keep edge even; rep around. Join. (72)
Round 12 :
Change to BLO if more texture desired. Ch2, hdc in same st, *hdc in next 11 sts, (2 hdc, ch1, 2 hdc) in corner ch1-space; rep around. Join. (84)
Round 13 :
Ch3, dc in same st, dc in next 11 sts, (2 dc, ch1, 2 dc) in corner ch1-space; rep around. Join. (96)
Info :
At this stage the motif measures approximately 4.5" - 5" across depending on yarn and tension. When making a swatch, measure corner-to-corner to ensure consistent motif sizes for a neat assembled runner.
Round 14 :
Ch1, sc in same st, *sc in next 35 sts, (sc, ch1, sc) in corner space; rep around. Join. (96)
Round 15 :
Ch2, hdc in same st, *hdc in next 35 sts, (2 hdc, ch1, 2 hdc) in corner; rep around. Join. (108)
Round 16 :
Ch1, sc in same st, *sc in each st around maintaining corner sc-ch1-sc spaces as corners; rep. Join. (108)
Info :
If you prefer a more raised center like the photo, ensure your puff stitches in Round 5 are full and prominent. Blocking motifs lightly after finishing can help even the edges. Weave in the starting tail under Round 1 to avoid a visible hole.
Round 17 :
Ch3, dc in same st, *dc in next 17 sts, (2 dc, ch1, 2 dc) in corner ch1-space; rep around. Join. (132)
Round 18 :
Ch1, sc in same st, *sc across until corner, (sc, ch1, sc) in corner; rep. Join. (132)
Round 19 :
Optional: Sl st around edge to create a tidy frame: sl st in each st around working 6 sl st in corner spaces; join and fasten off leaving tail for weaving. (132)
Round 20 :
Info : Block lightly if desired. Fasten off and weave in ends with yarn needle. Each motif should be flat with six crisp corners and a puff-textured central area for depth.
— Hexagon Motif (Alternate Center Color - Cream) :
Info :
To create the alternating cream-centered hexagons seen in the photo, work Rounds 1-4 in main sand/tan color. Change to cream yarn at the beginning of Round 5 (before working puff round) so the puff center and inner shaping are cream while the outer frame rounds remain sand/tan. Carry tails neatly or fasten off and rejoin color as you prefer.
Round 1-4 :
Work exactly as for the main motif Rounds 1-4 in sand/tan to create the base for color change. (6,12,18,24)
Info :
Change to cream yarn: join with sl st to the first st of Round 5, then work Round 5 in cream to form puff center. Continue Rounds 6-16 in cream for an inner block of color, then change back to sand/tan at Round 17 to frame the hexagon with the same outer size as main motif.
Round 5-16 :
Work puff and inner shaping exactly as motif rounds 5-16 in cream. Join and fasten off as needed. Switch back to sand/tan for outer rounds 17-19 to match size. Final motif will have a cream puff center framed by sand outer rounds.
Round 17-19 :
Work outer frame rounds in sand/tan to reach same overall stitch/counts as main motif. Fasten off and weave ends.
— Puff Stitch Notes and Variations :
Info :
Puff stitch used here is consistent across motifs: yo, insert hook, draw up loop, yo, insert hook, draw up loop, yo, insert hook, draw up loop (three times), yo and pull through all loops on hook, ch1 to secure. If using 2-dc puff, you will need to slightly adjust counts and subsequent rounds to maintain geometry. Consistency is most important — make a small swatch to practice puff size and tension.
— Joining Motifs As-You-Go (JAYG) Method :
Info :
I recommend joining motifs as you go using slip stitches through corresponding edge stitches to reduce sewing at the end. Join on Round 16 or Round 18 (the round before final sl st edge) to give a stable join. Plan your layout in rows of six across by fourteen down (or your preferred arrangement).
Round 1 (Joining step) :
Make the first motif fully and finish the round that will be used to join (Round 16 or 18). Fasten off and start the second motif. When you reach the corresponding join round on the second motif, align it with the first motif and, when working each corner and edge section, sl st through the corresponding st of the first motif in the positions where you want joins. This will create a neat, invisible seam.
Round 2 :
For the second motif, work up to the joining round, then when you get to a stitch that corresponds to the neighboring motif edge, insert hook through the neighbor's stitch, yo and sl st to secure, then complete the stitch on your working motif. Continue across the edge making 6-8 evenly spaced slip stitch joins per side, more around corners. Fasten off when finished. Repeat motif creation and joining for subsequent motifs in a row.
Info :
For the runner in the photo, each motif shares three edges with adjacent motifs in a staggered honeycomb layout — top-left, top-right, and side neighbors. When joining as-you-go, always pin motifs together first to confirm correct alignment, especially around corners. Use a spare stitch or marker to keep counts equal between joined edges.
Round 3 :
When joining motifs in the second and subsequent rows, join the new motif to two or three existing motifs as necessary. Work the join round by alternating between work in the new motif and sl st into the adjacent motif at corresponding stitches. This locks motifs in place and keeps edges flat.
Info :
Take time to block motifs lightly before joining if your yarn allows; this produces the straight edges needed for crisp joins. If your stitch gauge varies, intersperse motifs of varying tension to even the runner width as you progress.
— Assembling the Full Runner Layout :
Round 1 :
Plan layout: for shown runner use 6 motifs across (width) and 14 motifs long (length) arranged in a honeycomb stagger: Row 1: 6 motifs, Row 2: 6 motifs offset, repeat to desired length. Center the cream-centered motifs in alternating positions to create the visual pattern shown.
Round 2 :
Work full first row of 6 motifs joining each motif to the previous one along one side using JAYG. At the end of Row 1, fasten off and begin Row 2 by placing the first motif of Row 2 into the 'valley' created by two motifs in Row 1 and join along two edges to lock it in place.
Info :
Because the honeycomb layout tessellates, each motif in interior rows will be joined on 3 sides: left, right, and the two above or below depending on position. Edge motifs will join to 2 or fewer neighbors. Keep a consistent join count per edge so tension remains even.
Round 3 :
Continue motif placement row by row. Use pins to hold three motifs together at complex joins while you slip stitch for a secure, even join. Work slowly at junctions to maintain correct geometry and flat seams.
Round 4 :
When you reach the final motif of the last row, ensure the total length matches your desired measurement; add or omit a motif row to reach your target length. Fasten off and weave in ends thoroughly across joins to avoid loose tails showing at the surface.
— Runner Border and Edge Rounds :
Round 1 :
Once all motifs are joined into the rectangular runner, rotate the runner so a short edge is at top. Join yarn at a corner stitch on the outer edge. Ch1.
Round 2 :
Work 1 sc in each exposed edge stitch around the entire perimeter of the runner, working (sc, ch2, sc) in each corner space to maintain a rounded corner. This first border round evens the join edges. Join with sl st. (Edge stitch count will vary by runner size — maintain one sc per visible stitch on the motif edge.)
Round 3 :
Ch2, hdc in same st, *hdc in each sc around until corner, work (2 hdc, ch2, 2 hdc) in corner ch2-space; rep around. Join. This builds a soft raised corner to anchor the tassels later.
Info :
If your join seams have small gaps, use a small amount of slip stitch to tighten between motifs on the first border round before proceeding to shaping rounds. Working in BLO for the second border round gives a defined outer ridge if you prefer that look.
Round 4 :
Ch1, sc in same st, *sc in next 3 sts, (sc, ch1, sc) in corner space; rep around. Join. This creates a subtle textured row that will look neat under tassels.
Round 5 :
Optional: Repeat Rounds 3-4 one more time for a slightly wider border. After completing desired border height, fasten off leaving long tail for weaving at final corner attachments. The runner in the photo uses 4 outer rounds total including the initial sc round to achieve a balanced frame.
Round 6 :
Info : If you like a firm edge, add a reverse single crochet (crab stitch) round worked from left to right around the perimeter: sl st to the next stitch, *insert hook in previous st from left to right, sc; rep around. This creates a firm cord-like edge that resists curling.
— Tassels (Attach to Short Edges) :
Round 1 :
Cut multiple lengths of yarn (approx 10"-12" each folded to make a 5"-6" tassel after knotting). For the long tassels shown, use 14-16 strands per tassel for a full look. Use 12 tassels across each short edge spaced to fall in front of each corner and between motif corners (the shown runner has 12 tassels per short edge).
Round 2 :
To attach: fold a small bundle of strands in half. Insert your hook into the edge stitch where tassel will hang, pull the loop of folded strands through edge to form a loop, then pull tassel ends through loop and tighten to create a lark's head knot. Pull snug and trim tassel ends evenly. Repeat for all tassels across both short edges.
Info :
For added polish wrap a single strand of yarn around the top of each tassel several times and knot, hiding the end under wrap. Trim tassels evenly and lightly steam/block to neaten if your yarn allows.
Round 3 :
Optional: Add a small decorative knot above each tassel by creating a small loop with contrasting yarn and tying a square knot around the tassel root for boho detail.
— Finishing Touches and Blocking :
Round 1 :
Weave in all tails using yarn needle, tucking the tails into border rounds or across join seams. Trim ends close to fabric making sure knots are secure. Lightly steam or wet-block the runner as appropriate for the yarn type on a flat surface to flatten joins and even motif geometry; pin corners to maintain straight edges while drying.
Round 2 :
Carefully inspect joins for gaps; whip stitch any open spots from the back side using matching yarn. Reinforce tassels by applying a small dab of fabric glue to the knot only if needed for extra security, let dry completely before use.
Info :
Because bulky cotton can be heavy, avoid stretching while blocking; pin gently and let dry thoroughly. If your runner will be used under hot items, avoid direct heat — use a trivet. The cotton runner is machine washable on gentle in a mesh bag depending on yarn manufacturer's care, but hand-washing and air drying will extend life and maintain tassel shape.
— Alternate Construction Notes (Faster Method) :
Info :
If you prefer fewer motifs and a larger hexagon, work all outer increase rounds an extra time (add two extra increase rounds in the outer frame) to enlarge each motif; this reduces total motif count but keeps the same honeycomb effect. Adjust yarn quantities accordingly — larger motifs use more yarn per motif.
Round 1 :
To make a runner half the number of motifs long but maintaining width, double motif size by adding two additional outer increase rounds and then join as described. This is ideal if you want a shorter production time but chunkier finish.
Info :
Always make a motif gauge swatch and block it before committing to your motif count to ensure the final runner will fit your table properly. Small tension variations add up over many motifs, so consistency matters.
Congratulations — you now have the step-by-step roadmap to create a beautiful honeycomb-inspired table runner with lush puff centers and elegant tassels! This project combines modular satisfaction with a calm, neutral palette, creating a piece that feels both modern and handmade. Take pride in each joined motif — they come together into a stunning long runner perfect for seasonal styling or everyday warmth. 🧶✨ Enjoy the process and display your handmade table accent with joy!