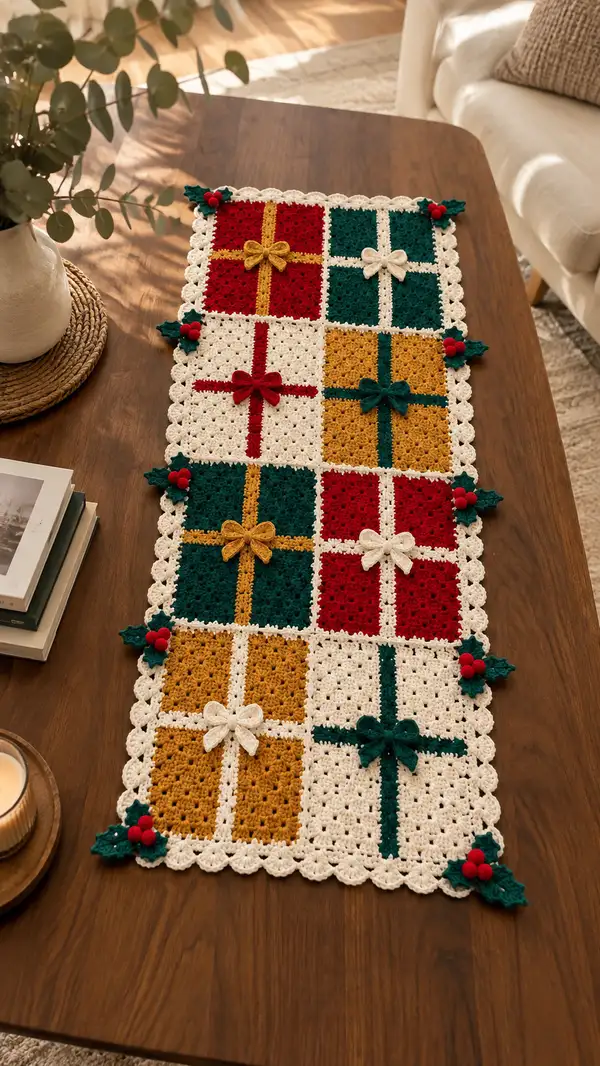
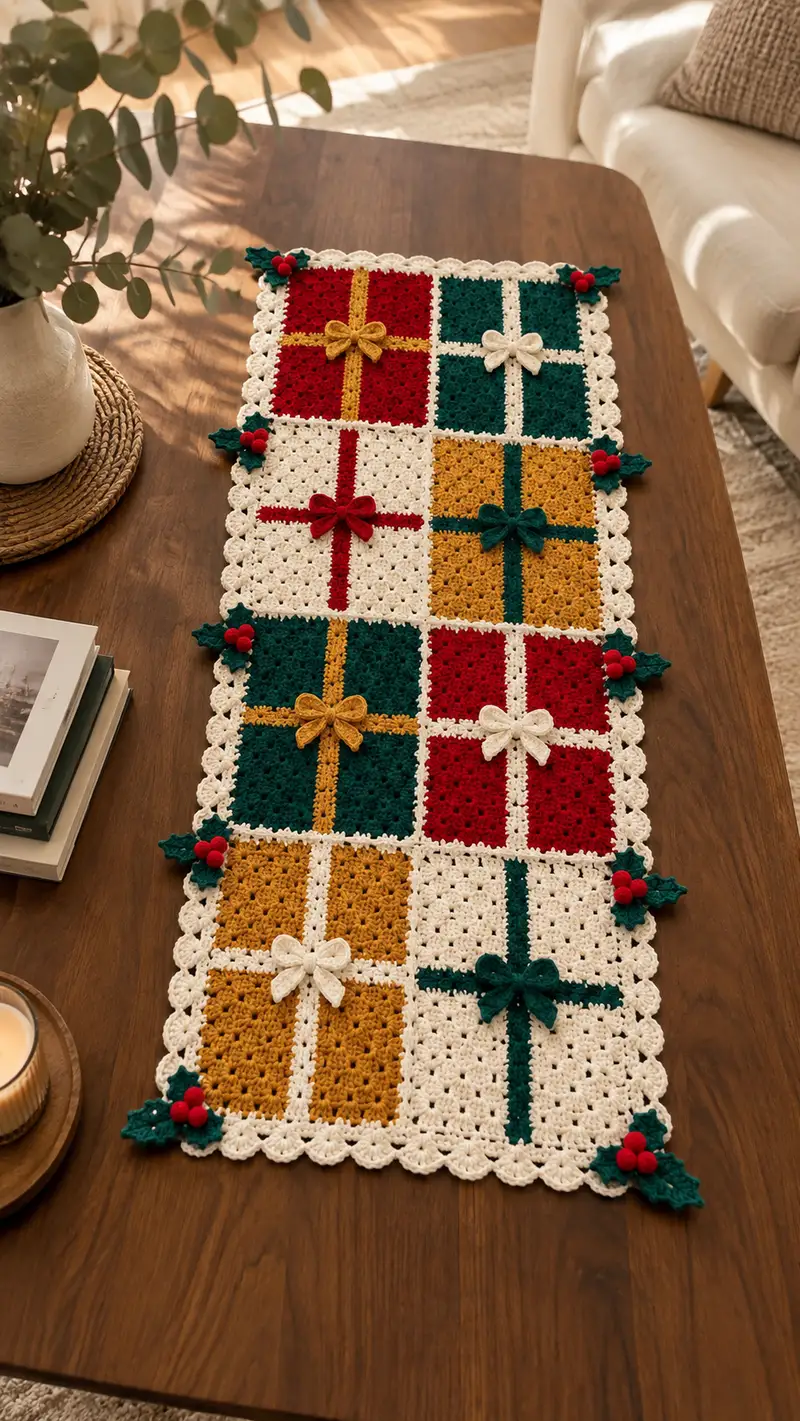
A festive crochet table runner made of connected gift-box granny squares, scalloped edges, crocheted bows and holly accents. Rich holiday colors — deep green, cranberry red, warm mustard and creamy ivory — create a classic seasonal look. This runner is modular: make as many squares as you need to fit your table length. It’s decorative, washable, and perfect for holiday centerpieces or gift table styling.
Progress Tracker
0% Complete
— Notes & Gauge :
Info :
Pattern uses US terms. Gauge is not critical for function, but 12 cm (4.75 in) square size per motif is achieved using worsted yarn and 4.0mm hook with 12 rounds of the granny cluster instructions below. Block squares lightly for best join results.
Info :
Make 8 gift-box squares (or more to extend runner). For this tutorial we describe the square worked in a main color with a final round in Ivory to create the visible separators. Bows, leaves and berries are made separately and sewn in place.
— Main Gift-Box Granny Square (Make 8, each) :
Round 1 :
Begin with a magic ring. Ch3 (counts as first dc), work 2 dc into ring, ch2, (3 dc into ring, ch2) x3; join with sl st to top of beginning ch3. Result: 12 dc and 4 corner ch2 spaces (12 dc, 4 corner ch2).
Round 2 :
Sl st into next ch2 corner sp. In corner sp work (3 dc, ch2, 3 dc) to form a corner shell. *Sk side to next corner, in corner work (3 dc, ch2, 3 dc)* repeat across all 4 corners. Join with sl st. Result: 24 dc grouped into 4 corner shells, 4 corner ch2 spaces (24 dc).
Info :
Round 2 establishes the square corners. Keep tension even and ensure shells sit flat before moving to side shells. Use a light tug to square the work gently.
Round 3 :
Sl st to side space between corner shells. Work (3 dc, ch1) in each side space between corner shells, and in each corner work (3 dc, ch2, 3 dc). Repeat all around. Join with sl st. Result: 36 dc total (24 from corners and 12 added on sides) with 4 corner ch2 and side ch1 spaces.
Round 4 :
Repeat round 3: In each corner work (3 dc, ch2, 3 dc). Along each side work (3 dc, ch1) into each ch1 space. Join with sl st. Result: 48 dc total.
Info :
At this point the square is taking shape. If you want a slightly smaller motif, stop after round 4 and finish with the Ivory separation round. For the runner shown, continue to round 12 for a roomy, 12-round square.
Round 5 :
Repeat the pattern: in each corner (3 dc, ch2, 3 dc); along sides place (3 dc, ch1) into each side ch1 space. Join. Result: 60 dc total.
Round 6 :
Repeat: corners (3 dc, ch2, 3 dc), sides (3 dc, ch1) in each side ch1 space. Join. Result: 72 dc total.
Info :
Check flatness: if edges ripple, block while still damp or adjust tension; if edges ruffle, reduce hook size for next motifs. Keep rounds consistent for all squares to ensure even joins.
Round 7 :
Repeat round 6 pattern. Join with sl st. Result: 84 dc total.
Round 8 :
Repeat. Corners remain (3 dc, ch2, 3 dc) and sides (3 dc, ch1) in each side ch1 space. Join. Result: 96 dc total.
Round 9 :
Repeat same working (3 dc, ch1) along sides and (3 dc, ch2, 3 dc) in corners. Join. Result: 108 dc total.
Info :
Change color now if you prefer the next round in Ivory for visible cross separators. This project shows a final round in Ivory to create the perimeter and the separating lines between adjacent squares.
Round 10 :
Repeat same pattern. Join. Result: 120 dc total.
Round 11 :
Repeat same pattern. Join. Result: 132 dc total.
Round 12 :
Final round in main color: repeat pattern for square body. Join and fasten off leaving tail for later weaving if you will sew a final Ivory border separately. Result: 144 dc total. Block and square motif to measurements before joining.
Info :
If you want the dividing lines in Ivory rather than main color, stop at round 11, change to Ivory, work round 12 in Ivory and continue with the separator and scallop rounds. Decide consistently for all motifs.
— Ivory Separator Round (Optional alternate to round12) :
Info :
To create the classic white grid between boxes, change to Ivory yarn and work a round of single crochet into each stitch around: sl st to join, ch1, sc in same st and in each st around, placing 3 sc in each corner ch2 space. Join and fasten off (sc count = equal to last dc count, for a 12-round square this will be 144 sc). This creates the visible separators once squares are joined.
Round 1 :
Sc in each st around, placing 3 sc in each corner ch2 (maintain corners). Join. Result: 144 sc (if starting from 12-round square)
— Creating the Ribbon/Sash (Make 8 per square as two strips) :
Info :
Two narrow strips are added to form the cross on each gift box. You can either crochet strips and sew them on or make surface slip-stitch ribbons after squares are joined. This pattern describes crocheted strips made in contrasting color (Ivory on colored boxes, colored on Ivory boxes).
Round 1 :
Chain 3, turn. Row 1: 1 dc in 3rd ch from hook, ch1, 1 dc in same ch (creates small ribbon center). Continue along chain: (ch1, dc) to desired length equal to square side. For example, for a 12-round square aim for 34 stitches long (length matching side). Fasten off leaving long tail for sewing.
Info :
Make two strips per square: one to run vertically and one horizontally. Measure against blocked square to ensure even placement. Securely weave ends under the Ivory separator when sewing for invisible joins.
— Bow (Make 8) :
Round 1 :
With accent yarn (same as ribbon), ch12. Row 1: In 2nd ch from hook sc, sc in next 9 ch, 5 sc in last ch to turn corner, continue along opposite side of chain sc in next 9 ch, 2 sc in last ch (creates looped strip)—total approximately 26 sc depending on tail ch. Fasten off leaving long tail for gathering. Make one bow piece per square.
Round 2 :
Pinch the center of the strip and wrap the tail tightly around center several times to gather into a bow shape. Secure by threading the yarn tail through the wraps and tying snugly. Weave tail to back and hide. Optional: create a small knot of cream yarn for bow center for contrast.
Info :
For a fuller bow, make two strips and layer them offset before wrapping center. Keep bows proportional to square size — sample bows are roughly 4-5 cm wide.
— Holly Leaf (Make 8 clusters of 3 leaves each) :
Round 1 :
With dark green yarn, ch6. Row: 1 sc in 2nd ch from hook, hdc in next, dc in next, tr in next, slip stitch in last ch. This creates one pointed leaf (5 working stitches plus turning). Fasten off leaving tail for sewing. (Leaf measures ~2.5-3 cm)
Round 2 :
To create raised serration, return to leaf: join yarn at base, *sc, ch1, sc* along one edge to form small picot-like teeth, repeat on other edge as desired. Fasten off and weave ends. Make 2 more leaves per cluster (total 3 leaves per corner decoration).
Info :
Alternate leaf pattern: for a more sculpted leaf work sc, hdc, dc, hdc, sc along top edge increasing/decreasing to shape. Make leaves mirror each other for neat clusters.
— Berries (Make 8 clusters of 3 berries each) :
Round 1 :
With bright red yarn, 6 sc in magic ring (6). Pull ring tightly closed.
Round 2 :
Inc in each st around (6 inc) making 12 sc total in round. Stuff very lightly with fiberfill to create a tiny bead, but do not overstuff or berry will flatten.
Round 3 :
Sc in each st around (12). Fasten off leaving tail for sewing. Weave tail through back of berry base and secure to hold stuffing in.
Info :
Sew three berries together with yarn tail so they sit snugly to form a cluster; then sew cluster to holly leaf center.
— Joining Squares (Join-As-You-Go or Sew - 2 options) :
Info :
Layout: arrange eight squares in two columns of four (as shown) or adjust layout to your table. The shown runner uses a 2x4 layout. Join squares along long sides first, then join rows to create the runner strip.
Join Option A - Join-As-You-Go :
Align two squares WS together. At the final Ivory separator round, rather than fastening off at the last loop, join with sl st into corresponding loop on adjacent finished square, working sc or sl st through both loops to connect stitches. Use consistent join method across all joins. This yields near invisible joins with Ivory seam lines matching separator round.
Info :
When joining, work slowly for even tension; use stitch markers at corners to ensure squares line up squarely. Pin squares prior to joining if needed.
Join Option B - Mattress Stitch / Whip Stitch:
Block all squares first. Lay squares right sides up and whip stitch through seam edges using tapestry needle and matching Ivory yarn. Mattress stitch through the back loops for an invisible join. This method is sturdy and easy for beginners.
— Outer Scallop Border :
Round 1 :
With Ivory, join yarn at any outer edge. Work 1 sc evenly around entire runner edge placing 3 sc in each outer corner. Join with sl st. Count equals total outer stitches (varies with runner length; maintain uniform spacing).
Round 2 :
Ch3 (counts as dc), *skip 2 sc, 5 dc in next sc (shell), skip 2 sc, dc in next sc* repeat around to create shells. Place shells evenly across runner edges, and in corners work 7 dc shells for nice rounded corner. Join with sl st. This creates a scalloped shell texture.
Round 3 :
To widen scallop, sl st into center of each shell, ch3, 2 dc into same space, ch2, 3 dc into same space (mini shell), sc between shells if needed. Join and fasten off. Block once more after finishing border to open scallops.
Info :
Spacing is key to even scallops. If shells look crowded, reduce number or increase separated sc between shells. Always sample one corner first to get spacing right before completing long edges.
— Sew-On Ribbon and Bow Placement :
Info :
Lay one horizontal and one vertical ribbon across each square centered. The ribbons should meet at the center point of the square. Temporarily pin or baste with contrasting yarn to check placement before sewing.
Round 1 :
Sew ribbon strips using tapestry needle and mattress stitch along the underside of the strips, catching only the Ivory separator round and the body below so the stitch is hidden. Make sure ribbons are taut but not stretched.
Round 2 :
Sew bow to the center where two ribbons cross. For extra security, stitch through bow base several times catching both ribbons and the square body. Weave ends into square until secure.
Info :
Placement tip: Use ruler to measure equal distance from edges to center to ensure repeats are consistent across all squares. For example, with 144-stitch square, center point is at 72nd stitch midline; measure visually or with pins.
— Attaching Holly Clusters :
Round 1 :
Arrange leaf cluster (3 leaves) at each runner corner where squares meet. Tuck berry cluster into leaf center and sew through berry bases to secure. Stitch leaf bases to runner by catching several back loops of outer separator round to keep seam hidden.
Info :
Sew clusters symmetrically on each outer corner of runner. For interior seams (between squares), you may add smaller accent leaves without berries to avoid bulk.
— Finishing Touches & Weaving Ends :
Info :
Weave all yarn tails at least 4-5 cm into fabric using tapestry needle. Trim close to work but avoid cutting too near knot. Lightly steam-block runner for final shaping, pin scallops open and allow to dry.
Round 1 :
Gently hand wash in cool water with mild soap if needed, reshape on flat surface, and dry flat. Avoid high heat to keep shape and color fidelity.
Info :
Optional: Add a small square of felt under each bow center for extra stability if the runner will be handled frequently, especially if glued or machine-washed often.
This cheerful Holiday Gift Box Table Runner brings handmade magic to your table with classic granny clusters, bright ribbon crosses and tiny bows and holly accents 🎁. The modular design lets you scale the runner for any table, and the crisp Ivory scalloped border gives a polished finish. I hope this pattern adds a cozy, crafted touch to your holiday decor — enjoy every stitch and share your festive creation! 🧶✨