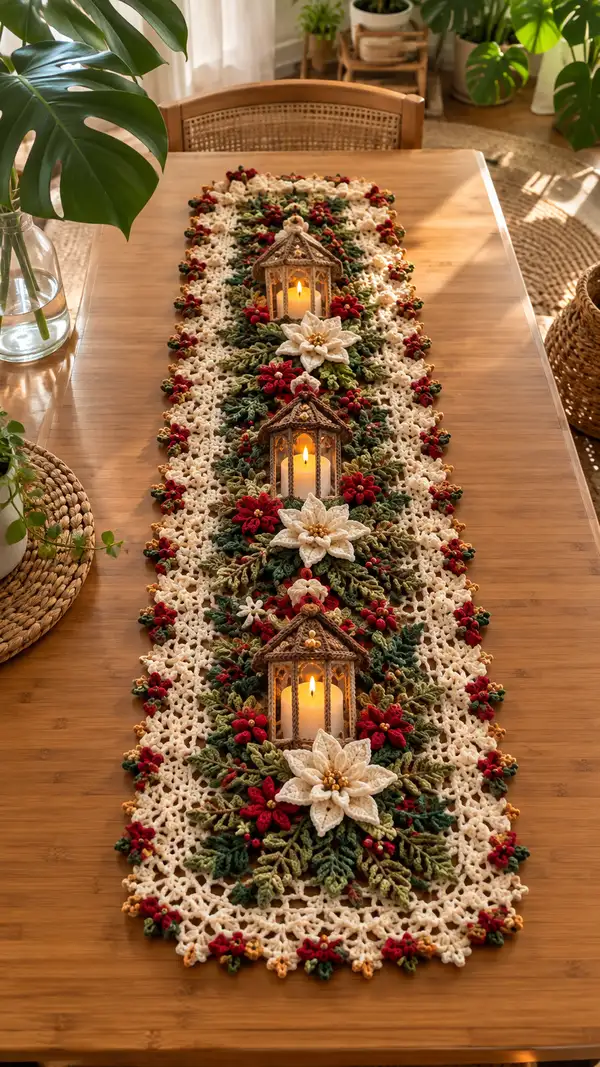
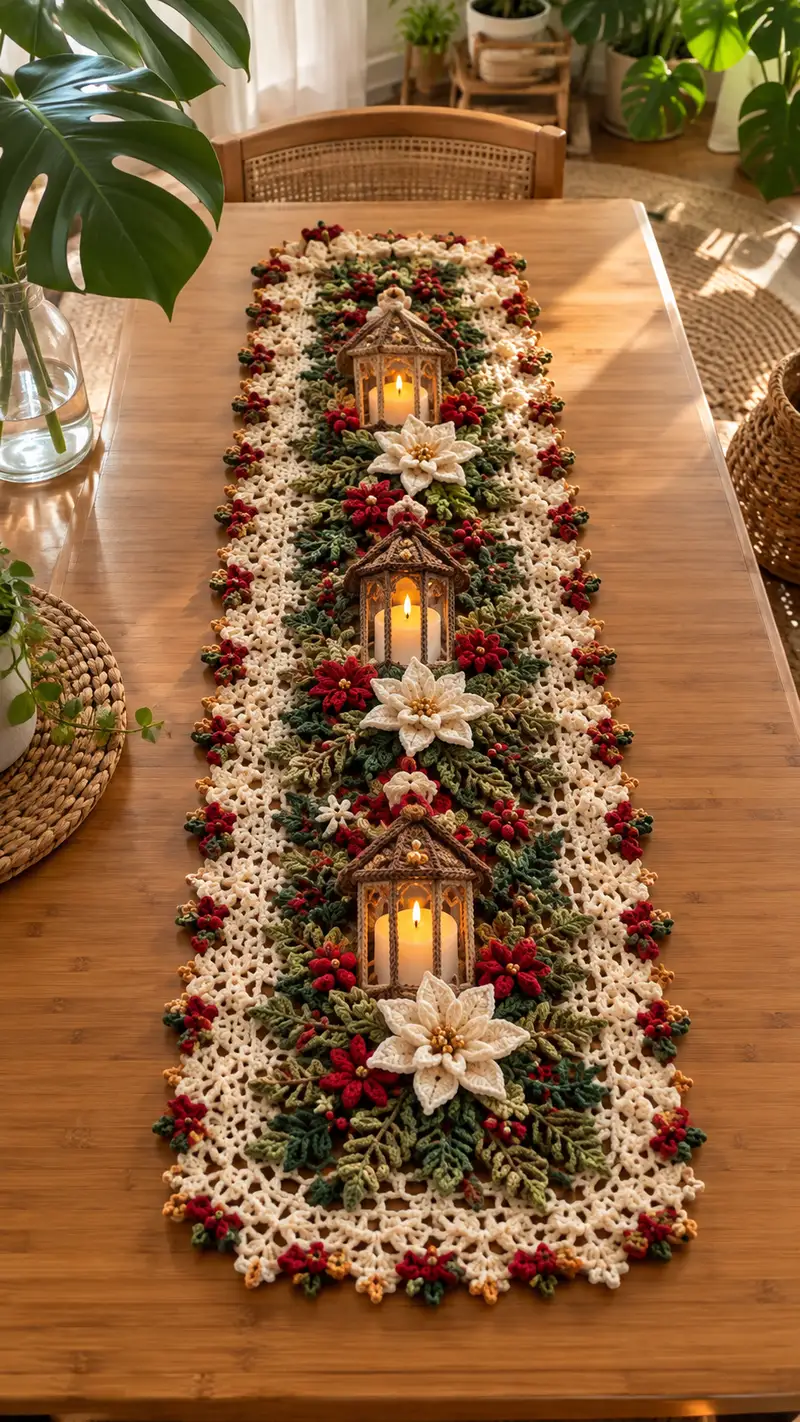
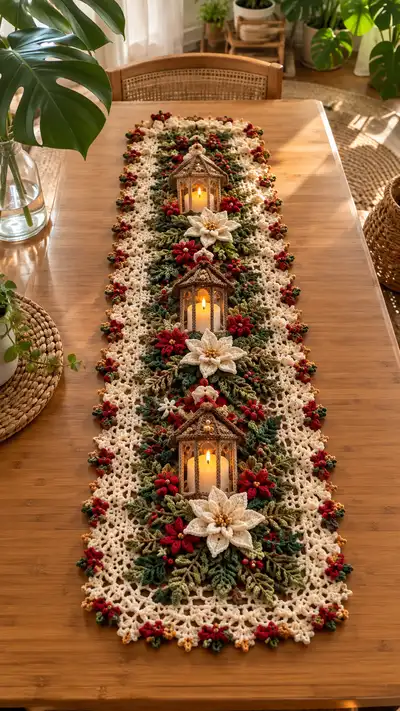
Create an elegant holiday table runner inspired by classic poinsettias. This long ivory lace runner features layered cream poinsettias, deep burgundy blossoms, rich green leaves and tiny golden bead centers, arranged in three striking medallions down the center. The pattern uses a combination of lacy mesh, layered motifs, and three-dimensional leaves and berries for a festive, heirloom-quality centerpiece.
Progress Tracker
0% Complete
— Materials & Gauge :
Info :
Use a smooth worsted-weight cotton-blend for good stitch definition and blocking. Gauge isn't critical for placement but affects finished size; aim for approximately 4 sc = 1 inch in dense motifs. Work tightly for 3D petals and slightly looser for the lacy base.
— Central Lacy Panel (Make 3 identical panels) :
Round 1 :
Ch 42, join with sl st to form loop (or work a foundation chain to desired width); ch 3 (counts as dc), dc into each ch around to first ch (42 dc)
Round 2 :
Ch 1, sc in same st, *ch 3, sk 2 dc, sc in next dc; rep from * around, join with sl st to first sc (14 ch-3 sps and 14 sc)
Round 3 :
Sl st into first ch-3 sp, ch 4 (counts as tr), (3 tr, ch 2, 4 tr) in same sp (shell), *sk next sc, (4 tr, ch 2, 4 tr) in next ch-3 sp; rep from * across; end sk sc, sl st to top of starting ch-4 (7 shells, with 2 shells at ends for symmetry) (approx 7 shells)
Info :
The central panel is worked to be slightly narrower than the final runner to allow for motif placement along each long edge. Adjust ch foundation in multiples of 6+ for shell repeats if you prefer a different width.
Round 4 :
Ch 1, sc in same st, *ch 4, sc in ch-2 sp of next shell; rep from * across, join (keeps spacing for leaves and joining)
Round 5 :
Ch 3, dc in same st, *ch 3, 2 dc in next sc; rep across to create a fi eld of ch-3 loops for lacy join (approx 42 dc total)
Round 6 :
Ch 1, sc in same st, *ch 5, sc in next dc; rep around forming longer picot-ready loops for edge attachments (approx 14 ch-5 sps)
Info :
At this stage all three panels should be identical. Place them side-by-side to check matching shell positions. These panels will become the lacy base where motifs are sewn, staggered into the central channels.
Round 7-10 :
Work 4 rounds of 'mesh' to build height: ch 1, sc in same st, *ch 3, sk ch-3 sp, sc in next ch-5 sp; rep across (keeps stitch count consistent each round) (approx 42 sts)
Round 11 :
Ch 1, sc in same st, *(ch 4, picot, ch 1), sc in next sc; rep across creating a light picot texture for motif anchoring (42 sc and 14 picots)
Info :
Blocking these panels flat before attaching motifs helps keep the lacy background even. Wet-block each panel pinned to the measured width and length and let dry fully.
Round 12-18 :
Work 7 rounds of even sc mesh around the panel edges to stabilize the lacy fabric: ch 1, sc in each stitch and sc into chain spaces as needed (maintain approx 42 sts per round around central repeat sections). These rounds create a firm frame to sew motifs to.
Round 19 :
Change to ivory if you switched colors for edge. Ch 1, sc in same st, *ch 5, sc in next sc; rep around to create long peg loops for joining edge scallops (approx 14 ch-5 loops). Fasten off and weave ends.
Info :
Make 3 panels, block, and position on your work surface with even spacing between them. The photo shows three central lacy panels joined in a continuous runner — we will join and overlap edges with leaf clusters to disguise seams.
— Large Cream Poinsettia (Make 3 — layered petals) :
Round 1 :
With cream yarn, MR, ch 1, 6 sc in MR (6)
Round 3 :
(1 sc, inc) x6 (18)
Info :
This small central disc anchors the layered petals. Keep tension consistent and pull the MR closed but not overly tight — you will sew beads through this center later.
Round 4 :
Ch 1, sc in same st, *ch 3, sk 1 sc, sc in next sc; rep around to create 6 ch-3 sps for petal bases (18 including scs)
Round 5 :
Work First Petal Layer: Into each ch-3 sp work: (sc, hdc, 3 dc, hdc, sc). Repeat x6 — petals are shallow and slightly cupped. Fasten off and weave tail. (Each petal uses 7 stitches)
Info :
Petal shaping: after finishing each petal, pinch gently and steam lightly or add a tiny dab of water to heat-block the curve if you prefer cupped petals. Optionally add a tiny bit of fiberfill under each petal and tack to center for extra lift.
Round 6 :
Make Second Petal Layer (larger): Rejoin cream to a sc between petals, ch 2, (dc, dc, dc) into space between petals to create a ring of taller stitches. Around these spaces work: ch 1, sc, ch 3, into each ch-1 sp work petal: (sc, hdc, 5 dc, hdc, sc). Repeat x6. Fasten off. (Larger petals approx 9 stitches each)
Round 7 :
Third Petal Layer (optional for fullness): Rejoin and work individual elongated petals between the second layer petals: ch 2, sc, (hdc, 7 dc, hdc), sc. Repeat x6 for a 3-layered poinsettia. Fasten off leaving long tail for sewing.
Round 8 :
Center Beads: Thread 6-9 small gold seed beads onto thread or fine yarn. Sew beads to center disc, forming a clustered center. Secure with multiple passes and knot on back. Weave tail into underside of flower.
Info :
Make 3 large poinsettias. Consider making second smaller cream flower with 4 petals to tuck underneath the main flower if you want more depth. Avoid overstuffing petals; make them lightweight and slightly cupped.
— Small Burgundy Flowers (Make 24-30 clusters) :
Round 1 :
With burgundy, MR, ch 1, 6 sc in MR (6). Do NOT pull closed fully — leave a small hole for a tightly cupped bud look.
Round 2 :
Into each sc: (ch 2, 3 dc cluster in same st, sl st to next sc). Repeat around to create 6 petal cluster puffs; finish by sl st to base and pull slightly to shape (6 clusters)
Round 3 :
Optional: add picot edge around each cluster by working ch 3, sl st in first ch to form tiny points around outer petal tips for texture. Fasten off leaving tail for sewing. These small flowers will be used in clusters of 3-6 around leaves and large poinsettias.
Info :
Make approximately 24–30 small burgundy flowers and many tiny single-petal buds in burgundy for scattered accents along the runner edges. These give the rich red color seen in the photo.
— Multi-Leaf Sprig (Make many — 40+ leaves total arranged into sprigs) :
Round 1 :
With deep green, ch 10. Row foundation: Into 2nd ch from hook: sc, hdc in next, 2 dc in next, tr in next, 2 dc in next, hdc in next, sc in last. Turn and work along opposite side of chain same stitches to create leaf round. Join with sl st to first sc. (Leaf outline formed; total approx 14 sts)
Round 2 :
Ch 1, sc evenly around leaf edge working 2 sc in the tip to round it. Work BLO on return if you want a ridge for vein effect; fasten off leaving tail. (approx 18 sc)
Round 3 :
Optional Vein: Rejoin contrasting lighter green in center, ch 1, sc down center of leaf in FLO only to create a raised vein. Fasten off and weave ends. Repeat to make leaves in two sizes: long (ch 12 foundation) and short (ch 8 foundation).
Info :
Make 30–40 leaves in mixed sizes (long and short). For shaping, lightly block leaves over a curved surface or use a tiny bit of starch and shape. You may optionally insert a very thin wire along center vein before sewing to allow shaping on the table.
— Berry Cluster (Make many) :
Round 1 :
With gold or mustard, MR, ch 1, 6 sc in MR (6). Pull tight and finish with a sl st. Leave long tail for sewing bead into center of clusters; these represent tiny golden berries or bud centers.
Round 2 :
Optional: add two small burgundy buds (tiny MR with 3 sc each) around the gold bead to mimic the photo's darker berry clusters. Fasten off and weave ends.
Info :
Use these gold berries to anchor the center of small red clusters, and seed beads for added sparkle. You’ll need approximately 45–60 gold bead clusters for the three large medallions and outer border accents.
— Leaf Sprig Connector & Small White Star Flowers (Make many) :
Round 1 :
With ivory, ch 6, join to form small star base: ch 1, (sc, ch 3, sc) in each ch-2 space to form tiny 5-pointed star. Make 20–30 small white stars to fill spaces and soften contrast against main cream poinsettias.
Info :
These tiny stars are used as filler, tacked lightly onto the base to create lacey negative space between leaves and larger florals.
— Joining Panels & Motif Placement :
Round 1 :
Lay the three blocked central panels in a line on a flat surface with approximately 1" gap between each panel (gaps will be filled with leaf clusters). Using ivory yarn and tapestry needle, join the panels together along adjacent edges using whip stitch through the outermost sc rounds, overlapping the last stabilizing rounds by 1 sc for a neat seam.
Round 2 :
When joining, leave long tails every 6–8 inches for tacking in leaf clusters; do not knot tails; weave them into motifs to anchor leaf clusters and small flowers to cover seams.
Info :
Position the three large cream poinsettias evenly spaced along the runner centerline — approximately one near each panel center — and pin them in place before sewing. Each will be surrounded with leaves, small burgundy flowers and gold berries as in the photo.
Round 3 :
Sew poinsettias to panels by inserting needle through underside of central disc and through base panel. Use long tail of flower to create a secure ‘button’ style attach, then weave tail across several stitches under the disc to hide extra yarn. Repeat for all three large flowers.
Round 4 :
Arrange leaf sprigs radiating from each poinsettia: for each large flower, pin 8–12 leaves in a loose star shape (mix long and short leaves). Using green yarn and mattress stitch, sew leaves to the panel along their base. Attach small burgundy flowers and gold bead berries in clusters of 3–6 between leaves to mimic photo density.
Info :
Stagger small red flowers so they appear natural: clusters of 2–4 grouped more densely near the poinsettia center and more sparse towards edges. Use as many little clusters as needed to match the photo — typically 8–12 per large medallion area.
— Detailed Edge Scallop & Floral Border :
Round 1 :
With ivory, rejoin along outermost ch-5 loop created earlier. Work: *sc in space, ch 3, (picot), ch 3, sc in next space; rep across the long edges to create a scalloped looped border. Approximate stitch density = 14 scallops per short edge and 40 scallops per long edge depending on panel width.
Round 2 :
To each scallop base, add small three-leaf cluster: join green in center, work ch 1, (sc, hdc, sc) in scallop tip, fasten off. In remaining space between scallops, add tiny burgundy cluster: join red, make MR, 6 sc, pull tight, attach to scallop tip with a couple of stitches. Fasten off.
Round 3 :
Work a finishing round in gold/mustard: join yarn in any sc, ch 1, sc around edge, placing a sc into picot tops and into the outer edge of tiny leaves and flowers. Add an optional picot every 6 sts to create a delicate bead-like trim (approx 120 sc around entire runner).
Info :
The border is key to the runner's finished look. Keep your stitches even and use blocking pins after border to open scallops and set shape. If you prefer a stronger edge, work two rounds of sc before adding decorative stitch details.
— Lantern Anchor Motifs (Optional decorative anchors, Make 3) :
Round 1 :
Work a small circular coaster base in taupe or brown to anchor a lantern: MR, ch 1, 6 sc in MR (6)
Round 3-4 :
Work 2 rounds even of sc to make a small flat disc (12 sc). Slipst to center of runner where you will place candle lanterns. Sew in place through disc and base panel using invisible stitches. Embellish around with tiny leaves and red flower clusters for a natural setting for the lanterns.
Info :
These small anchors ensure the lanterns sit centered and secure amid the florals. If using real candles, ensure a protective glass lantern is used and keep fabric well away from flame; LED candles are safest.
— Finishing Touches & Assembly Rounds :
Round 1 :
Do a final pass of sewing to ensure all motifs are secured: run a length of yarn along underside joining seams and weave into adjacent motifs to bury the join. Add extra tack stitches through leaf bases for strength.
Round 2 :
Trim all loose ends, weave into nearby stitches on the underside. Add a second round of gold sc along border if desired for more definition. Check that bead centers are secure; apply a tiny drop of fabric glue on bead knots if necessary.
Info :
Block the fully assembled runner; pin edges and petals in correct positions and mist lightly. Allow to dry fully to keep shapes set on the table. Consider an extra press from the underside with a cloth if necessary.
Round 3 :
Optional: Steam lightly over petals and leaves with steam iron at a safe distance to set shapes. Do not melt beads or synthetic fibers — test on scrap first. Now your runner is complete and ready for display.
Info :
If you plan to launder, hand wash gently in cool water and dry flat on a towel. Avoid high heat and do not tumble dry to preserve beadwork and delicate petals.
This intricate table runner transforms your holiday table into an elegant, handcrafted centerpiece full of seasonal charm and texture. Each layered poinsettia and leaf has been designed to look delicate yet hold together for everyday display. The combination of ivory lace, burgundy blooms and golden centers brings a warm, festive glow to any dining setting. Happy stitching — enjoy the slow, meditative joy of assembling each petal and leaf! 🎄✨