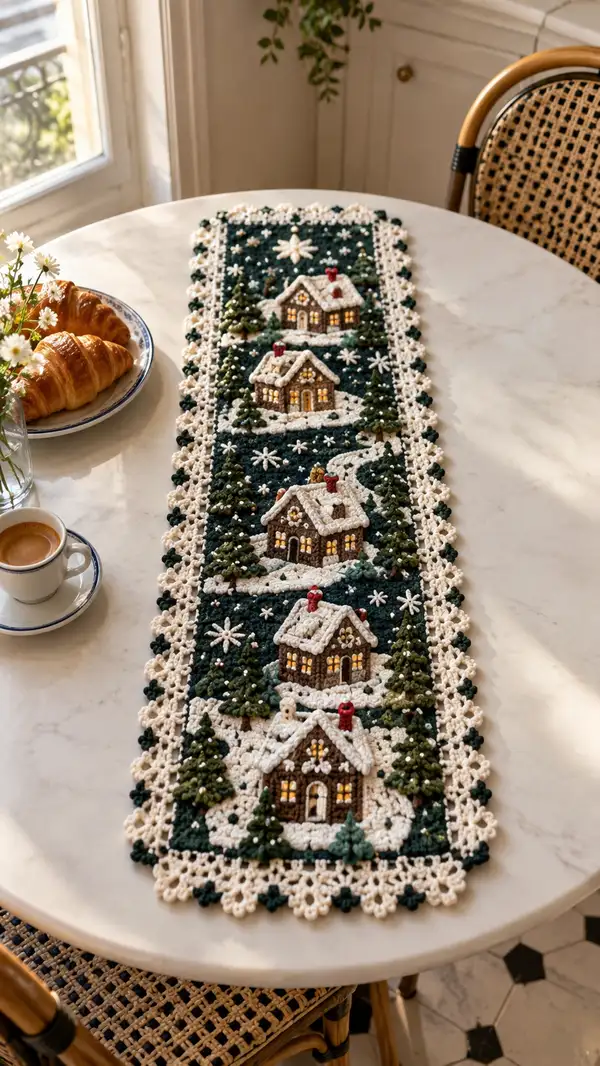
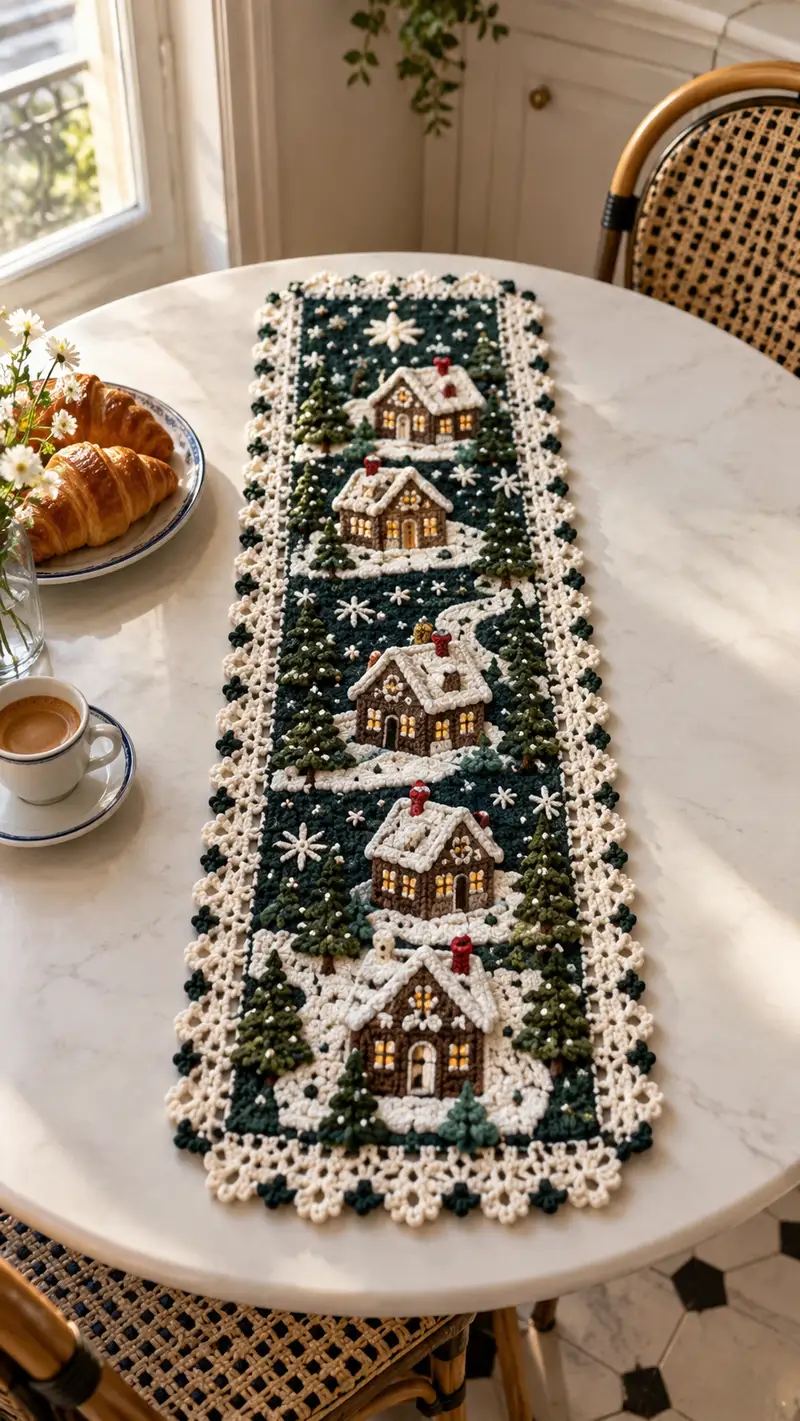
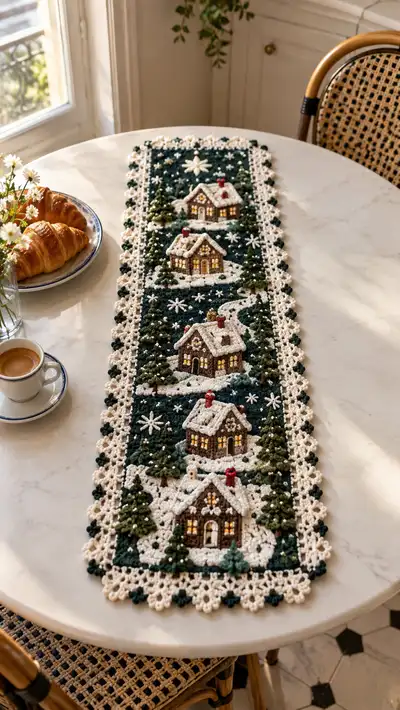
Create a cozy, seasonal table runner featuring stitched winter cottages, snowy trees and a lacy ivory border. This richly textured runner pairs forest green backgrounds with ivory snow, warm brown cottages, tiny red chimneys and golden window highlights. The design is made from repeated motif panels with layered 3D appliques (houses, trees, snowbanks) and a scalloped lacy edge to frame the scene. Ideal for holiday decor or to bring winter warmth to a small dining table or console.
Progress Tracker
0% Complete
— Notes, Gauge & Overview :
Info :
This runner is constructed from 4 identical winter-scene motif panels joined lengthwise, with a continuous lacy ivory border worked after joining. Each panel is worked flat in rounds/rows to form a rectangular background (forest green), then multiple appliques (cottage, trees, snowbanks, snowflakes) are crocheted separately and sewn on. Use a hook that gives a fabric tight enough so stuffing for appliques does not show through — typically 3.5mm with worsted weight yarn. Finished size approximately 10" x 38" (25cm x 97cm) depending on yarn and tension.
Info :
Throughout these instructions rounds/rows are provided for each separate piece. Stitch counts are included and mathematics verified for increases and decreases. Info sections appear frequently with tips on color changes, stuffing, placement, and joining.
— Motif Background Square (Make 4) :
Round 1 :
MR, ch1, 6 sc in MR, join with sl st to first sc (6)
Round 2 :
Inc in each st around (12)
Round 3 :
(1 sc, inc) x6 (18)
Round 4 :
(2 sc, inc) x6 (24)
Round 5 :
(3 sc, inc) x6 (30)
Info :
Change to Forest Green yarn now. Carry tail and weave in later or fasten off and rejoin, depending on your preference for color join neatness; weaving a tail and pulling through creates neater look against dark background.
Round 6 :
1 sc in each st around (30) — work continuous spiral if comfortable, otherwise sl st to join and ch1 to start new round
Round 7 :
(4 sc, inc) x6 (36)
Round 8 :
1 sc in each st around (36)
Round 9 :
(5 sc, inc) x6 (42)
Round 10 :
1 sc in each st around (42)
Round 11 :
(6 sc, inc) x6 (48)
Round 12 :
1 sc in each st around (48)
Round 13 :
(7 sc, inc) x6 (54)
Round 14 :
1 sc in each st around (54)
Info :
We will begin shaping the rectangle now by alternating extended rounds with side-lengthening rows. Use stitch markers to mark the four corner points evenly after Round 14: mark stitches 1, 14, 27, 40 as corner centers (approx.).
Round 15 :
Work 10 sc, ch8, sk next 8 sts, 12 sc, ch8, sk next 8 sts, 10 sc (spacing forms two long sides with chain arches) (approx 54 original sts used; chains become side length)
Info :
The chain-8 arch spaces become the top and bottom extended edges allowing us to work row-like extensions. These arches will be filled on subsequent rounds to create a rectangular motif approximately 9cm x 9cm before border.
Round 16 :
Work sc into each sc and 8 sc into each ch-8 arch to form a smooth edge: 10 sc, 8 sc in arch (8), 12 sc, 8 sc in arch, 10 sc (54 + 16 added = 70)
Round 17 :
1 sc in each st around (70)
Round 18 :
(9 sc, inc) x7 + (finish) adjust to even sides (77)
Round 19 :
1 sc in each st around (77)
Info :
We are building a long rectangular panel rather than a perfect circle. If your numbers differ slightly due to chain tension, adjust last few stitch counts on the round to keep edges even. Aim for panels measuring ~9cm x 9cm (3.5" x 3.5") prior to applique work.
Round 20-24 :
1 sc in each st around (77) — work 5 rounds even to build background height (77)
Round 25 :
(10 sc, inc) x7 (84)
Round 26-30 :
1 sc in each st around (84)
Info :
Mark placement for the cottage: For each panel, count from the bottom center up ~8-10 rows (depending on your tension) to define the cottage base. Use a removable stitch marker or a scrap safety pin to mark the center where appliques will be attached later.
Round 31 :
Working in BLO for a slight ridge that helps seat appliques: 1 sc BLO in each st around (84)
Round 32-36 :
1 sc in each st around (84)
Info :
Fasten off leaving long tail for sewing if you prefer joining panels by whip stitch. Repeat to make 4 identical motif panels. Block each panel flat and square to exact dimensions before proceeding to appliques and join.
— Cottage Applique (Make 4) :
Info :
Each cottage is worked in pieces: front wall panel, side walls (optional two panels for 3D box cottage), roof pieces (2), door, tiny chimney, and small window appliques. These are sewn together to create a small 3D house approximately 3.5cm wide x 2.8cm high. Work in Medium Brown for walls, Ivory for snow on rooftop, Dark Brown for door and trims, Red for chimney, and Golden yellow for window accents.
Front Wall - Round 1 :
With Medium Brown, ch11, sc in 2nd ch from hook and across (10)
Round 2 :
Ch1, turn, 1 sc in each st across (10)
Round 3 :
Ch1, turn, inc at both ends to form slight curve: 2 sc in first st, 1 sc across until last, 2 sc in last (12)
Round 5 :
Ch1, turn, (1 sc, inc) x4, 4 sc (16)
Round 6 :
1 sc across (16)
Info :
We are creating a slightly rounded rectangle for the cottage front; counts are kept small for small applique scale. If you prefer a wider cottage, increase the starting chain accordingly and adjust subsequent rows to maintain aspect ratio.
Round 7 :
Begin roof attachment row: ch1, turn, sc across 16, fasten off (16)
Side Walls (Make 2) - Round 1 :
With Medium Brown, ch7, sc in 2nd ch from hook and across (6)
Round 2 :
1 sc each st (6)
Round 3 :
Ch1, 2 sc in first st, 1 sc across, 2 sc in last (8)
Round 4 :
1 sc each st (8) — fasten off leaving long tail for seaming
Info :
Sew the two side panels to the sides of the front wall using mattress stitch to create a shallow box. Align edges carefully; a single stitch per row will create a neat seam without causing puckering. Do not stuff heavily, just a small dab of fiberfill to give definition if desired.
Roof Panels (Make 2) - Round 1 :
With Ivory, ch11, sc in 2nd ch from hook and across (10)
Round 2 :
Ch1, turn, (1 sc, inc) x3, 4 sc (13)
Round 3 :
1 sc each st (13)
Round 4 :
Ch1, turn, (2 sc, inc) x3, 4 sc (16)
Round 5 :
1 sc each st (16), fasten off leaving long tail for sewing
Info :
Sew both roof panels together along the top center to create a peaked roof, then attach roof to the top edge of the cottage front and side panels with whip stitch. Before fully closing the roof seam, add a small amount of fiberfill between panels to add rounded snowy volume.
Chimney - Round 1 :
With Cherry Red, MR, ch1, 6 sc in MR (6)
Round 2 :
1 sc in each st (6)
Round 3 :
(1 sc, inc) x3 (9)
Round 4 :
1 sc rounds 4-6 in each st (9)
Info :
Fasten off leaving tail. Fold small cylinder slightly and sew to roof near rear corner. Add a tiny white/Ivory picot on top for a snowcap if desired by working 3 ch and sl st into top loop, trimming short tail.
Door Applique - Round 1 :
With Dark Brown, ch4, sc in 2nd ch from hook and across (3)
Round 2 :
Ch1, turn, 1 sc each (3)
Round 3 :
Ch1, turn, dec (1) at top to create arched door top: sc2tog across leaving 1 small rounded base — or shape by slip-stitching top (1)
Info :
Sew door to center bottom of front wall. Add a tiny golden french knot or embroidered dot for a doorknob using Golden Yellow yarn.
Window Applique (Make 2 per cottage) - Round 1 :
With Golden Yellow, MR, 6 sc in MR (6)
Round 2 :
Change to Dark Brown, 1 sc in next 6 sts (6), fasten off, sew into small window apertures cut into front wall or sewn on surface
Info :
To create a 'lit window' effect, sew the golden circle and overlay with a brown frame leaving the golden center visible. Back the window with a tiny scrap of ivory yarn to catch light if desired.
Assembly Cottage :
Sew side panels to the front, attach roof panels, sew chimney to roof, sew door and windows in place. Add tiny embroidered snow edging along roof edges with Ivory using a small backstitch. If you want a fully 3D hollow cottage that sits on the background, leave the bottom side edges open for a peaked 'tent' look and sew the bottom edge onto panel securely with matching yarn.
Info :
Place the cottage on the blocked background panel at the marked center. Pin in place and baste stitch with long yarn tail. For a subtle raised effect, place a piece of thin felt (cut to size) under the cottage base before final sewing to the panel.
— Snowbank & Path Applique (Make 4) :
Round 1 :
With Ivory, ch12, sc in 2nd ch from hook and across (11)
Round 2 :
Ch1, turn, 1 sc across (11)
Round 3 :
Ch1, turn, start shaping path curve by increasing at one end: 1 sc, (inc, 3 sc) across until last 2 sts, 2 sc (13)
Round 4 :
1 sc across (13)
Round 5 :
(1 sc, inc) x4 plus remaining sc to create wider base (17)
Info :
Stagger rows to create a gentle curving snow path that will be sewn from the cottage front toward the lower edge of the panel. Use small amounts of polyester fill under the snowbank to add 3D texture before sewing down.
Round 6 :
1 sc around for final shape (17) — fasten off leaving tail for sewing
— Evergreen Tree Applique (Make approx 12 - 3 per panel varying sizes) :
Info :
Trees are worked as layered triangular flounces stacked to create dense 3D evergreens. Use two tones of green to add depth. Trees here are approx 2.5cm-4cm tall depending on rounds used.
Tree Layer Base - Round 1 :
With Dark Forest Green, ch6, sc in 2nd ch from hook and across (5)
Round 2 :
Ch2 (counts as hdc), turn, hdc across (5 hdc + ch2 = 6 points)
Round 3 :
Ch2, turn, (1 hdc, inc) x2, 1 hdc (8)
Round 4 :
Work shell edge: *sk next st, 5 dc in next st, sk next st, sl st in next* around to create picot-style points; adjust to edge length (creates spiky foliage)
Info :
Make 3-4 layers for each tree, decreasing chain base by 1-2 chains each higher layer so tree tapers. Stack layers and sew together with matching yarn through centers. Add a tiny trunk by working 2-3 sc in brown and sew under the layered foliage.
Decorations :
Sew tiny golden French knots or beads onto tree layers to mimic lights or ornaments. Use small stitches to secure beads so they do not fall off with handling.
— Snowflakes & Star Appliques (Make many) :
Snowflake Tiny - Round 1 :
Ivory MR, ch1, 6 sc in MR (6)
Round 2 :
*Ch3, sl st in next st* x6 to create 6 arms. Fasten off leaving tail for sewing
Snowflake Lacy - Round 1 :
Ivory MR, ch1, 8 sc in MR (8)
Round 2 :
*Ch4, sl st in next st* x8 — creates larger starburst shape (fasten off)
Info :
Sew snowflakes sparingly on the forest green background to mimic falling snow — group some close to trees and cottages, and scatter a few on the top and bottom of each panel for balance.
— Joining Motifs Into Runner :
Info :
Arrange the 4 finished background panels in a vertical column (as photographed), with cottages centered horizontally in each panel and snow paths flowing toward the next panel to create a continuous scene. Pin carefully, ensuring edges align and motifs oriented identically.
Join Method A (Seamless Knit Join) :
Place two panels wrong sides together and use whip stitch through corresponding BLO ridges created earlier (Round 31 on panels) to create a nearly invisible seam. Work across entire seam evenly. Repeat to join all panels into a long strip.
Join Method B (Slip Stitch Join) :
With Forest Green, join yarn in corner of panel, ch1, sc evenly across edges of both panels pairing stitches with sl st into paired st; this creates a visible ridge but is quicker. Choose method based on your preference for appearance.
Info :
After joining panels, weave long tails into seams to secure. Block the entire joined runner flat to smooth any join tension differences. Allow to dry fully before edging.
— Border & Lace Edging :
Info :
Border is worked in Ivory around the entire runner after panels are joined. It has a scalloped lacy motif with small picot points alternating with tiny bobble clusters in Forest Green to echo the design in the photo.
Round 1 :
With Ivory, join yarn at any corner, ch1, sc evenly around outer edge of runner, placing 3 sc in each corner to turn — work so that number of sc along long sides is divisible by 6 for scallop repeats (adjust to suit)
Round 2 :
Ch3 (counts as dc), *skip 2 sc, 5 dc in next sc (shell made), skip 2 sc, dc in next sc* repeat around, 3 dc in corner sts to turn (creates scalloped shells)
Round 3 :
Sl st into center of first shell, ch3, 2 tr in same sp, ch2, 3 tr in same sp (shell peak), sl st to next shell center and repeat around
Round 4 :
Switch to Forest Green for bobble contrast: *in each shell peak work (ch1, 4 sc bobble cluster in same loop, ch1) then sl st into picot valley between shells* repeat around, fastening bobbles firmly
Round 5 :
Return to Ivory: Work chain picot edging: *ch4, sl st into base to form small lacy points along shell edges* between peaks to create lattice-like edging
Round 6 :
Work final row of small sc around to tidy the edges and bind off; weave in ends carefully into the back of the lace to avoid visible tails
Info :
Use blocking to set the scallops evenly: pin each shell peak and picot point to the blocking mat for consistent spacing. Spray lightly and allow to dry fully to hold shape.
— Additional Detail Rounds (Embellishment & Finishing) :
Round 1 :
Embroidered window grids: With Dark Brown and tapestry needle, add 1-2 vertical stitches and 1 horizontal for crossbars on golden windows
Round 2 :
Add tiny seed beads or French knot dots in Ivory around cottages and trees to simulate glistening snow—secure with strong thread
Round 3 :
Sew any applique edges firmly: pass needle around applique base twice for durability. Check under sides to verify no loops are trapped that would distort flatness.
Info :
Trim all tails after weaving them into the work for at least 3-4cm. Use a small amount of fabric glue on stubborn tails if necessary and allow to dry fully before use.
— Final Checklist & Care Instructions :
Info :
Block runner again after all appliques are sewn and embellishments added. Hand wash gently in cool water only for cleaning and lay flat to dry. Avoid machine washing to prevent applique displacement or bobble damage.
Info :
Admire your finished runner and place on a dry, flat table. If using candles or hot dishes, always protect runner from direct heat or open flames. For storage, fold gently with tissue paper to preserve lace scallops.
Finishing this Ivory And Forest Green Cottage Winter Table Runner is pure satisfaction — each tiny house, snowy tree and lacy scallop comes together to create a cozy winter scene that will brighten your table for seasons to come. The process is slow and meditative, perfect for evenings with tea and soft music. Wrap one up as a thoughtful handmade gift or keep it as a seasonal heirloom; either way it will be cherished. 🧶❄️🏡