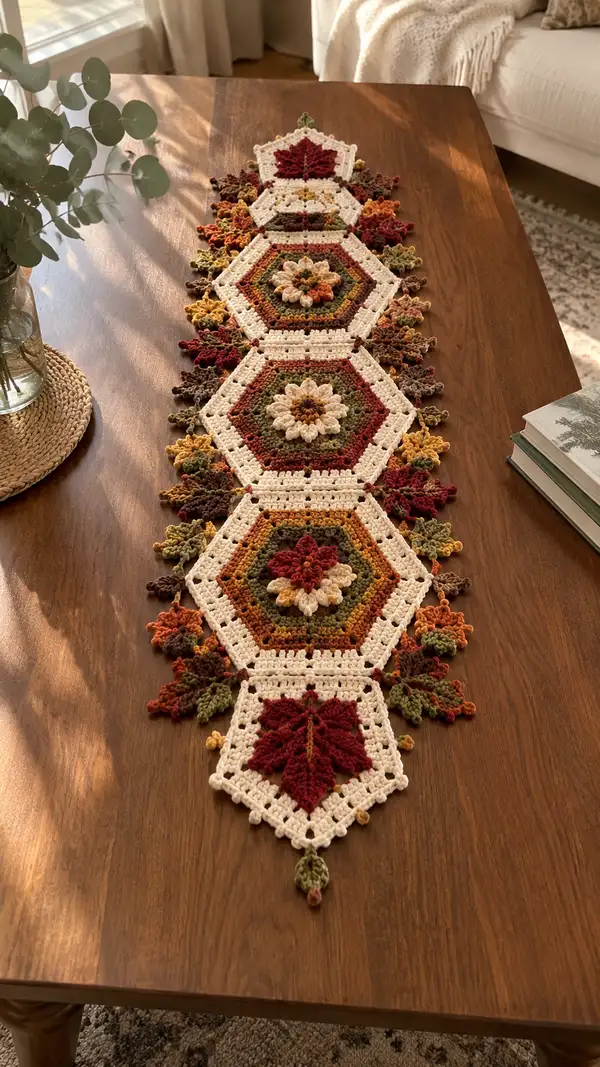
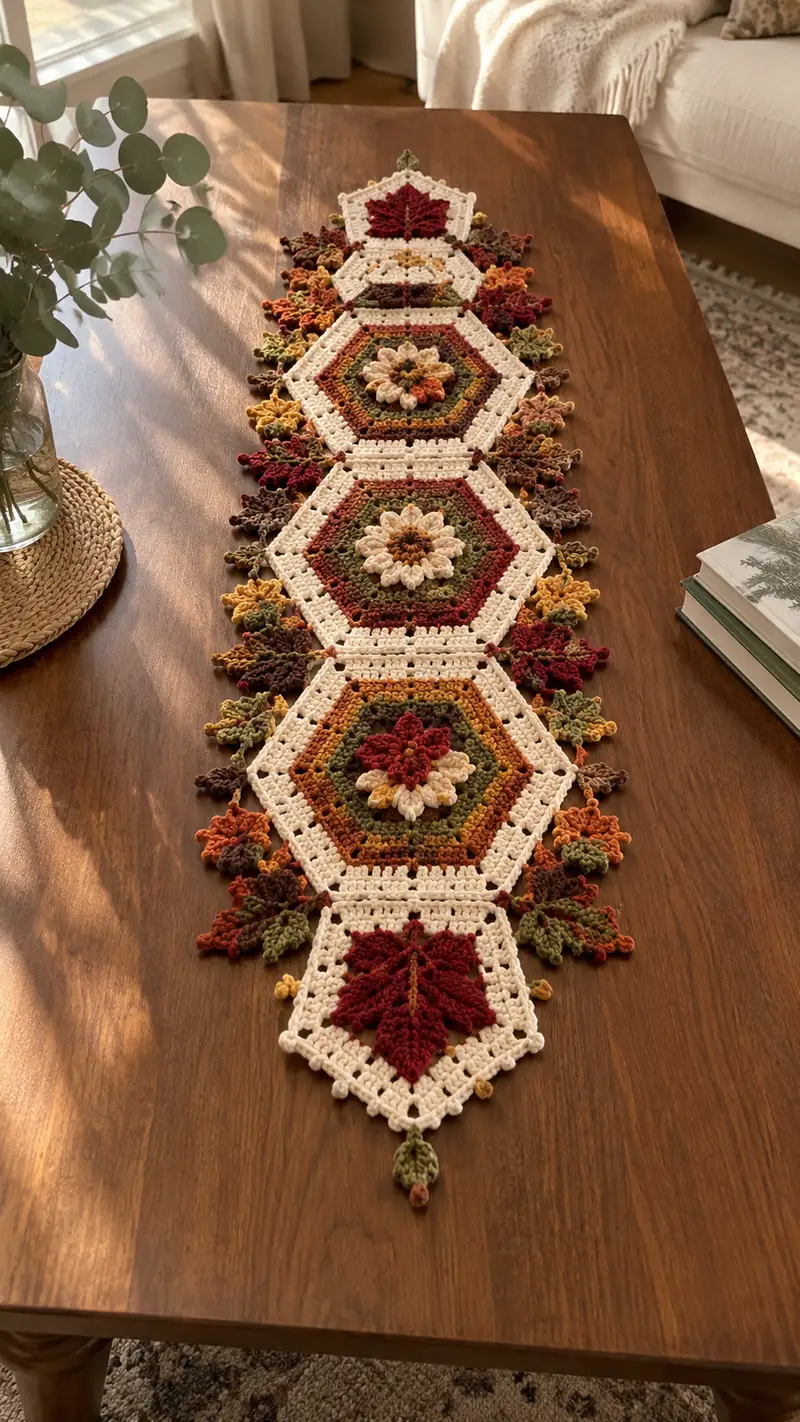
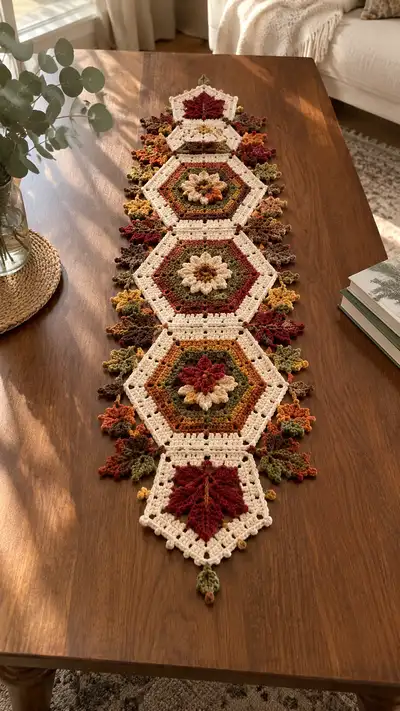
A warm, vintage-inspired table runner worked from connected hexagon motifs and delicate leaf appliques. This runner features layered floral centers, rich autumnal variegated rounds in rust, olive and mustard, and an ivory lattice border with picot edging. Finished with charming leaf clusters along each edge, it brings handmade elegance and seasonal color to any table.
Progress Tracker
0% Complete
— Overview & Gauge :
Info :
Gauge is flexible for a decorative runner. Work feels best with worsted yarn and a 4.0mm hook to achieve a crisp stitch definition. Each finished hexagon motif measures approximately 7.5" (19cm) corner-to-corner after blocking. Adjust hook size to match your tension and target size.
Info :
Abbreviations used: sc, hdc, dc, tr, puff, cluster, ch, sl st, BLO/FLO. For puff stitch: yarn over, insert hook, yarn over pull up loop (repeat required times), yarn over and pull through all loops on hook and ch1 to secure. When an instruction repeats 6 times it refers to the six sides of the hexagon unless specified otherwise.
— Central Floral Hexagon Motif (Make 3) :
Round 1 :
Using Variegated Color A (autumn blend). Make a magic ring, ch 1, work 6 sc into magic ring. Pull ring closed. (6)
Round 2 :
Inc in each st around. (12)
Round 3 :
(1 sc, inc) x 6. (18)
Round 4 :
(2 sc, inc) x 6. (24)
Info :
Maintain even tension; this inner circle is the base for the floral puff rounds. If your magic ring is tight the flower will sit neat and centered.
Round 5 :
(3 sc, inc) x 6. (30)
Round 6 :
Change to Rust Solid (accent color). 1 sc in each st around. (30)
Round 7 :
Change to Mustard (accent). Ch 2 (counts as hdc), *hdc in next 4 sts, ch 2, skip next 2 sts* repeat across until you reach start, join with sl st into top of first ch2. This creates small scallops for the petal base. (Approx established pattern with 6 small ch-2 spaces creating petal wells)
Info :
Prepare for puff stitch petals: the ch-2 spaces are where puff clusters will be anchored. Keep your tension slightly loose on these rounds so puff stitches sit cleanly without distortion.
Round 8 :
Change to Ivory. Working in each ch-2 space from previous round: make a puff: yarn over, insert hook in space, yo pull up loop (repeat 4 times) — you should have 9 loops on hook; yarn over and pull through all loops, ch 1 to secure. Sl st into next established st to anchor. Repeat into every petal well across the circle to form 6 puff petals. (6 puff petals)
Round 9 :
Switch to Variegated Color A. Ch 1, 1 sc in same st, *sc in next 3 sts, (sc, ch 3, sc) in next st (corner made)*. Repeat from * to * 5 more times so you have 6 corners. End by sc in remaining sts as needed to maintain spacing. This round establishes 6 corner chain spaces for hexagon expansion. (St count will remain approximately 30 plus 6 chain-3 corners used for shaping)
Info :
When creating a hexagon from a round, we add chain spaces as corners. These chain-3 corners do not add to stitch count but create points to work into on the next rounds. Use a marker to mark the corner ch-3 space to find it easily in the following round.
Round 10 :
Into each corner ch-3: (sc, ch 3, sc). Between corners work 1 sc in each base stitch. After working around you will have a hexagon with 6 corner ch-3 spaces. (Approx 36 base sc + 6 corner ch-3 spaces)
Round 11 :
Change to Olive. Work (sc, hdc, 3 dc, hdc, sc) into each ch-3 corner space to create a shell corner. Between corner shells work 1 sc in each base stitch; count around and verify you have 6 shell corners with even spacing. (Shells create triangular shaping; base sc count will differ but hexagon geometry preserved)
Info :
Shells in corners give the hexagon depth and also visually frame the central flower. Keep your stitch tension consistent so shells are even on each corner.
Round 12 :
Continue in Variegated Color B (deeper tone). Ch 1, sc in each dc and sc around, working 1 sc into the middle top stitch of each shell to anchor. (Even round — total sc count across round will equal the number of legitimate stitch positions created by previous shells and spaces)
Round 13 :
Change to Burnt Orange. At each corner shell make (2 dc, ch 2, 2 dc) in the top stitch of the shell to broaden the corner. Between corners work 2 dc in each of the designated side stitches to expand sides evenly. This increases the hexagon outward while keeping the six-corner structure.
Info :
Track increases visually: each corner increases with a 4-dc group and each side gets evenly distributed increases. The hexagon should remain flat; if you see cupping, reduce increases on the next round slightly.
Round 14 :
Change to Ivory for contrast. Ch 1, 1 sc in each dc and ch space around, when you reach corner (top of (2 dc, ch2, 2 dc)) work (sc, ch3, sc) in the ch2 space. This introduces a new ch-3 corner for the next round. (Even perimeter count with 6 ch-3 corners)
Round 15 :
Switch to Variegated Color A. Into each corner ch-3 work (sc, dc, tr, dc, sc) to make pointed corners; between corners, work 1 dc in each sc to expand the side. This is an expansion round making the motif reach roughly 7-8" across after blocking.
Info :
Begin visualizing edge join points: we will use two plain ivory rounds later to create an easy join-as-you-go line. Mark the side center of each hexagon side (midpoint between corners) with a removable stitch marker to line up joins perfectly when assembling the runner.
Round 16 :
Change to Mustard. 1 sc in each st around focusing on even tension. (Perimeter sc count matches the number of stitch positions created by previous round)
Round 17 :
Change to Ivory. Ch 3 (counts as dc), *dc in next 6 sts, (dc, ch 2, dc) in corner ch space* repeat around to define side arches and prepare for the final decorative ivory band. This will create neat spaces to join adjacent motifs. (Even structured pattern)
Round 18 :
Repeat Round 16 in Ivory to stabilize edge: 1 sc in each st around working sc into each dc and anchor into corner top. This gives a solid ivory band around the motif. (Consistent perimeter sc count)
Round 19 :
Change to Variegated accent and make a decorative string of shells along each side: into the center of each side (midpoint marker) work (5 dc cluster) separated by ch 1, 1 sc between clusters along the sides. Around corners work 1 sc to anchor. This gives textured bands across each face of the hexagon.
Round 20 :
Change back to Ivory. Work 1 sc in each st BLO around to create a subtle ridge and a clean joining edge for join-as-you-go. (This is an even round; stitch count preserved.)
Info :
Final step: fasten off, leaving a long tail for weaving if you prefer to sew motifs together rather than join-as-you-go. Block motifs flat to shape them perfectly before joining. Make three of these motifs to assemble central runner section.
— End Leaf Hexagon Motif (Make 2) :
Round 1 :
Using Ivory. Make a magic ring, ch 1, 6 sc in ring. (6)
Round 2 :
Inc around. (12)
Round 3 :
(1 sc, inc) x 6. (18)
Round 4 :
Change to Deep Rust. (2 sc, inc) x 6. (24)
Round 5 :
Change to Ivory. Work evenly 1 sc in each st around to prepare for leaf motif placement. (24)
Round 6 :
At three alternating corners (every other corner) work a large leaf silhouette: in ch-3 corner space or designated corner area work: ch 1, (sc, hdc, 2 dc, tr, 2 dc, hdc, sc) - a mirrored leaf shaping for a plump leaf. Between leaf corners keep 1 sc in each st. This shapes the hexagon into an end cap with a prominent leaf motif centered on the face.
Info :
These end hexagons are narrower and have a large leaf covering most of the motif face. Make two and block straight so they mirror each other when attached to the runner ends.
Round 7 :
Change to Olive and work 1 sc in each st around to lock the leaf shape and provide a joining edge for border. Fasten off and weave ends. Make 2.
— Small Leaf Appliques (Make 24-30) :
Round 1 :
Using Olive or Variegated small-skein accent. Ch 6. Sl st into 1st ch to form loop or work starting from a small loop. Ch 1, work 1 sc in loop, ch 2, (dc, tr, dc) in loop, ch 2, 1 sc in loop; fasten off leaving tail for sewing. (Small leaf foundation)
Round 2 :
Optional: Work around foundation: join with sc into base, 1 hdc, 3 dc cluster for the leaf body, hdc, sc. Fasten off. These leaves are intentionally small, about 1" long after blocking.
Info :
Make 24-30 leaves in a mix of rust, olive, mustard and brown. These are sewn along the edges between motifs to recreate the natural tumble of leaves visible in the sample photo. Variation in color and direction gives a lifelike appearance.
— Tiny Bobble Accents (Make 12-18) :
Round 1 :
Using Mustard or Brown. Ch 2, in 2nd ch from hook make 5 dc (a tight bobble), sl st to base to form a tiny puff. Fasten off leaving tail. These add little berries/buds along the leaf clusters.
Info :
Vary size by making 3-5 dc per bobble and change colors to create small accents sewn sporadically near leaf clusters.
— Join-As-You-Go & Connecting Motifs :
Info :
We recommend join-as-you-go (JAYG) along the ivory rounds that were created as a flat band (see Hexagon Round 18 and Round 20). The runner in the sample shows three central floral hexes joined edge-to-edge with two tapered leaf hexagons at the ends. Pin motifs: center-left-center-right in a straight column with end hexagons mirroring each other.
Round 1 (JAYG) :
Place two motifs wrong sides together with edges aligned. With Ivory and working on the active motif, attach yarn in any side mid-stitch using sl st. Ch 1, sc in same st, ch 3, skip the ch-3 corner of the active motif and sl st into corresponding ch-3 space of adjacent motif to join. Continue along the side: for each side-sc on active motif work sc then sl st to adjacent motif side-stitch to create a seam. At corners work (sc, ch3, sc) as needed to align corners. Work across the entire side so each pair of stitched points on the active motif is anchored to the same point on the adjacent motif. Fasten off and weave ends.
Info :
Use this joining technique for two sides per motif where motifs meet (each internal motif will be joined on two opposite sides). The end motifs only join on one side each. Pin motifs carefully before joining and keep tension loose until the first 3-4 join stitches are secure then maintain consistent tension for even seams.
Round 2 (Alternate join technique) :
If you prefer sewing instead of JAYG, arrange motifs flat, mark visible seam points at mid-side and corner, then whip-stitch through the back loops only for a flatter seam. Use the long tails left when fastening off to sew motifs invisibly together.
Info :
Double-check alignment after joining the first seam—if motifs twist slightly, undo and re-pin. Blocking after joining helps motifs settle into place fully flat.
— Side Edge Clusters and Leaf Attachment :
Round 1 :
After joining central motifs into a straight strip, use Ivory and single crochet evenly along the exposed outer edges (the two long sides) to create a neat band to which leaves and bobbles will be sewn. 1 sc in each st along the outer perimeter. Fasten off leaving tails for sewing when necessary.
Round 2 :
Pin leaf appliques in groups of 2-3 between corner points along the outer edges. Sew leaves on using yarn needle and matching colored thread. Alternate direction: some leaves should curl outward, others inward for a natural look. Attach bobbles adjacent to some leaf clusters by sewing through the bobble tail and knotting securely on the wrong side.
Info :
Vary placement density: more leaves near the central motifs and fewer approaching the tapered ends. Step back frequently and check overall visual balance before final sewing.
— Outer Border & Decorative Picot Edge :
Round 1 :
With Ivory, join at any mid-side stitch along the outer edge. Ch 1, sc in same st, *ch 3, skip 2 sts, sc in next st* repeat around full outer perimeter working 1 sc into each corner top to secure corners. This creates a delicate openwork border and forms loops for picot edging. (Evenly spaced loops around entire runner)
Round 2 :
Switch to a contrast color of your choice for subtle accent (optional). Work in each ch-3 loop: (sc, picot, sc) where picot = ch 3, sl st in 3rd ch to create tiny point. Fasten off and weave ends. This creates distinct little points visible in the photo.
Info :
Make picots small and consistent. If your picots look floppy, use a slightly smaller hook for this edge or add a tiny dot of fabric glue on the wrong side to secure the picot knots before finishing.
— Final Blocking & Finishing :
Info :
Pin the finished runner to blocking mats in its intended final dimensions. Gently steam-block or wet-block as recommended for your yarn fiber. Ensure corners are pointed and outer edge is straight. Allow to dry fully.
Round 1 :
Weave in all ends using a tapestry needle. On the wrong side, finish any small gaps by slip-stitching together with fine ivory yarn where needed to ensure no visible holes on the right side.
Info :
Light starch is optional but not recommended if you want the runner to drape naturally. If you prefer a stiffer, centerpiece-like runner, very light spray starch and blocking will give additional body.
Tip :
If you want a longer runner, continue to make additional central floral hexagon motifs and replicate the join sequence. Each additional motif adds approximately 7.5" (19cm) length before blocking.
Completing this runner is a real joy—watching each hexagon and leaf come together is so satisfying! The warm rusts, olive, and mustard glow against the clean ivory, creating an elegant seasonal statement piece. I love how the little leaves tumble along the sides; they add such a handmade charm. Display it proudly on your table or gift it to someone who loves cozy, handmade decor. 🧶🍂