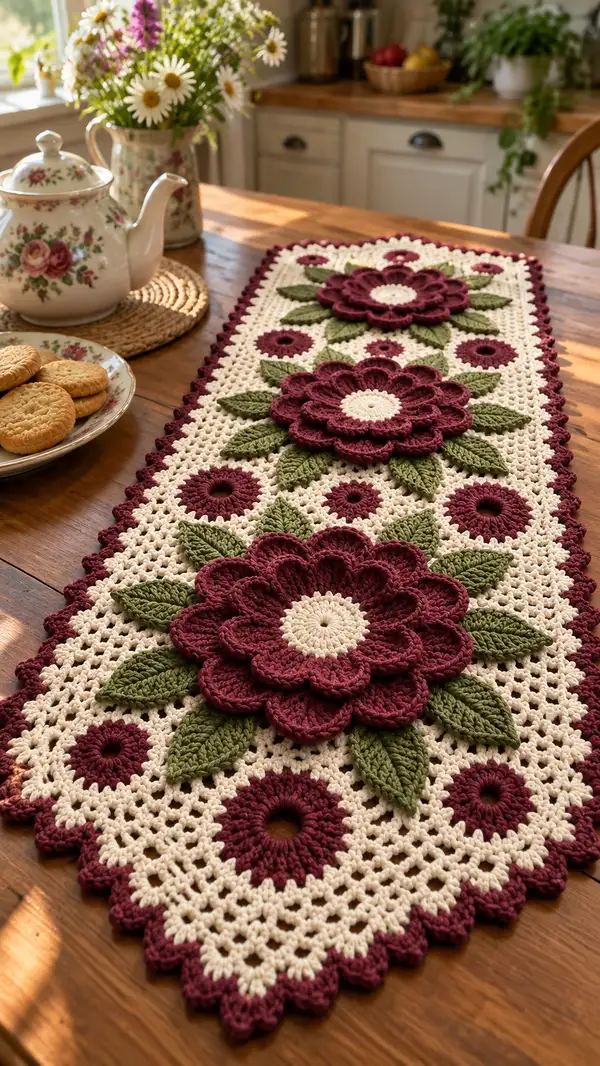
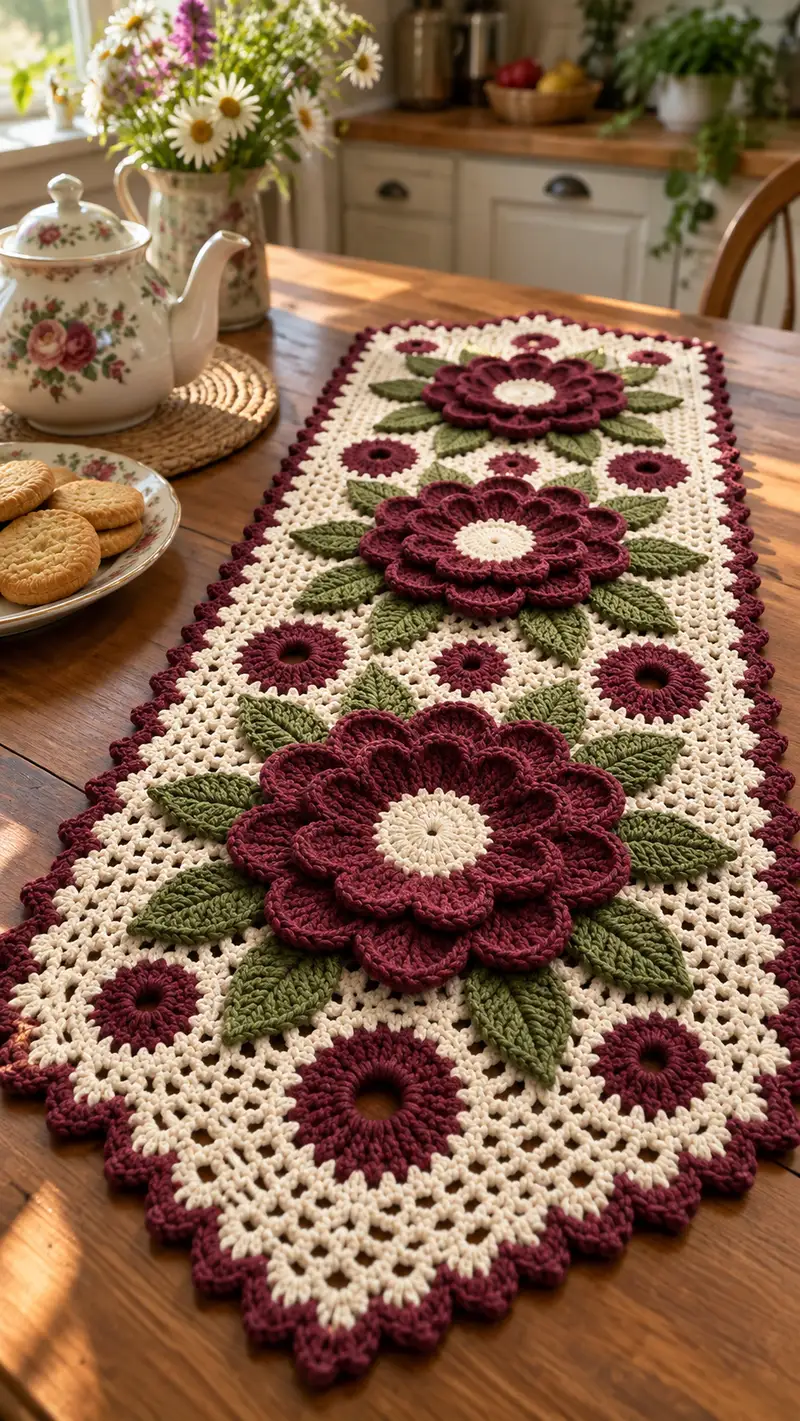
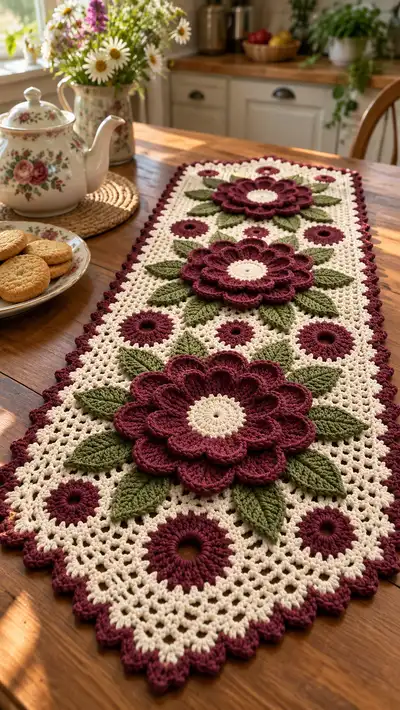
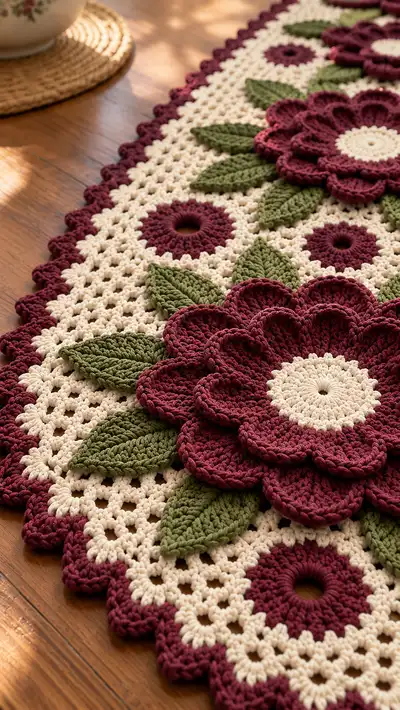
This elegant rectangular table runner features rich burgundy 3D flowers with layered petals, olive green raised leaves and a delicate cream granny-mesh background. The runner is finished with a scalloped burgundy border and small circular motifs that echo the center flowers. Designed to sit beautifully on a wooden table or dresser, the texture and dimensional florals create a vintage-inspired, cozy accent.
Progress Tracker
0% Complete
— Flower Center (make 3 large centers and 6 small centers) :
Round 1 :
With cream, 8 sc in magic ring (8)
Round 3 :
(1 sc, 1 inc) x 8 (24)
Round 4 :
(2 sc, 1 inc) x 8 (32)
Round 5 :
(3 sc, 1 inc) x 8 (40)
Round 6 :
1 sc in each st (40)
Info :
For large centers keep 40 sts to support two petal layers. For small centers stop at Round 4 (32 sts) or Round 5 (40 sts) depending on desired small motif size
Round 7 :
1 sc in each st BLO (40) - creates slight ridge for petal foundation
Round 8 :
Fasten off leaving long tail for sewing large center into petals and to the mesh (do not overstuff, this is flat)
Info :
Make 3 large cream centers and 6 small cream centers. Block flat if needed to get a perfectly round center before adding petals
— Large Flower Petals (make 3 flowers; each flower has two layered petal rounds) :
Round 1 :
Join burgundy to outer ridge of the cream center with sl st, ch1, sc in same st, sc in next 3 sts, *(sc, ch3, sc) in next st to create petal base; rep around to create 10 petal bases (10 ch-3 petals)
Info :
Petal count: we will work 10 petals in the first layer and 10 petals in the second layer offset between first layer petals. Adjust to 8 or 12 for different proportions but keep even spacing.
Round 2 :
In each ch-3 sp: (sc, hdc, 3 dc, hdc, sc) - creates full petal. Work around 10 petals (petal height approx 6 sts)
Round 3 :
Sl st to base, fasten off inner layer leaving tail for sewing. Arrange petals and block slightly if petals flare undesirably
Info :
Place a stitch marker at the petal base where the next round will begin to ensure second layer is offset by half a petal width
Round 4 :
Join burgundy into the base between two petals of the first layer with sl st, ch1, sc in same st; now create second layer of 10 petals staggered between the first layer petals: in each foundation st work (sc, hdc, 5 dc, hdc, sc) for a slightly taller, overlapping petal
Round 5 :
After completing 10 petals, sl st into base and fasten off leaving long tail for sewing to mesh. Arrange petals so second layer sits slightly outward and overlaps first layer
Info :
When sewing petals to the cream center and later to the mesh, stitch through the back loops of the center rounds to keep petals raised and avoid flattening the center
Round 6 :
Optional decorative edge: with burgundy, join in outer edge and work 1 sc in each st around petal tips to neaten (approx 200 sc depending on petal pattern). Fasten off and weave tails
Info :
Block each flower slightly on a flat surface to open petals and keep shape consistent across three flowers
— Small Circular Motifs (make 6) :
Round 1 :
With burgundy, 8 sc in magic ring (8)
Round 3 :
(1 sc, 1 inc) x 8 (24)
Round 4 :
Ch4 (counts as tr), *skip next st, tr in next st keep spacing to create ring texture, rep around resulting in 12 tr (12)
Round 5 :
Finish by sl st in base, pull center slightly to make a neat hole if desired, fasten off leaving tail for sewing to mesh
Info :
Small rings are positioned between large flowers: three pairs across the runner to balance the composition; block gently
— Leaves (make 18-24 leaves in olive green) :
Round 1 :
Ch 8, sc in 2nd ch from hook, hdc in next, 2 dc in next, tr in next, 2 dc in next, hdc in next, sc in next—the chain foundation forms one side of the leaf; now rotate to work down other side: hdc in next, 2 dc in next, tr in next, 2 dc in next, hdc in next, sc in next, sl st to base (approx 16 sts total)
Info :
This creates a flat, pointed leaf in one continuous oval. For a raised central vein we will add post-stitch detailing next rounds
Round 2 :
Work a single row of 1 sc around leaf edge to neaten (approx 18 sc). Fasten off and block slightly curved by pinning the tip down to create natural leaf arch
Round 3 :
Re-join olive to center base and work a central vein: fpdc down the center of the leaf by inserting hook behind the central chain foundation (7 fpdc), turn and work bpdc on return to create ridged vein. Fasten off leaving tail for sewing (approx 7 fpdc + 7 bpdc)
Info :
Make 6 leaves per flower (3 each side) for a full look. Alternate leaf sizes by starting with ch6 for small leaves (approx 12 sts) and ch10 for larger leaves (approx 20 sts)
Round 4 :
Block leaves on a towel using a spray of water and gentle pinning to set shape. Leave until dry before sewing to mesh
— Background Mesh Panel (make 1 rectangular panel to join motifs onto) :
Round 1 :
With cream, ch 101 (or adjust to desired runner width; starting chain count is multiple of 4 + 1 for turning). Row 1: sc in 2nd ch from hook and in each ch across (100 sc), ch1, turn
Info :
Chain length: pictured runner approx 100-105 chains for a 12-13 inch width when using worsted yarn and 4.0mm hook. Adjust for your gauge
Round 2 :
Ch3 (counts as dc), skip first st, *ch1, skip 1, dc in next; rep across ending dc in last st. Ch1 turn (creates first row of mesh)
Round 3 :
Ch3, dc in space above previous dc, *ch1, dc in next dc; rep across. Continue to build classic granny-like open mesh (counts remain approximately consistent with 25-26 dc across depending on chain count)
Round 4-20 :
Repeat Round 3 maintaining even openwork until panel measures desired runner length between flower placements (work approx 17 rows to create enough height to place three large motifs along centerline). Keep edges straight by working 1 sc in first stitch of each row and 1 sc in last stitch if needed
Info :
Measure as you go. The mesh must be slightly firmer than typical airy granny so the heavy appliques have good support. If your mesh sagged, tighten hook or work one additional sc at side edges to stabilize
Round 21 :
Once mesh is full-length, fasten off and weave ends. Block flat and square so appliques sit evenly
Info :
Mark the panel center line with safety pins and chalk to position three large flower assemblies evenly spaced. Suggested spacing: top margin 5 cm, then center-to-center flower spacing approx 20-22 cm depending on runner length
— Petal Detail Round (layer seam reinforcement for each large flower) :
Round 1 :
Place the prepared large flower on mesh with the cream center lying flat on mesh. From wrong side, thread long tail through large-eye needle and take invisible stitches through the back loops of center round 6 into the mesh, spacing stitches evenly (approx 12-16 stitches)
Info :
Sew only through the back layers of the cream center and the inner petal foundation to keep petals free and lifted. Place stitches every 2-4 sts to prevent flaring
Round 2 :
Sew second tier of petals by securing the petal base around the cream center and catch a couple of mesh loops at each petal base (approx 20-24 sewing points). Adjust pressure to keep petals lifted not pinned to mesh
Info :
Use mattress stitch or whip stitch from the wrong side for hidden seams. For added security, add a couple of short stitches from petal edge into the mesh underside where petals overlap so they don't lift permanently away.
— Small Circle Attachment :
Round 1 :
Place each small burgundy circle into the marked positions and sew through the back loops of the last round into the mesh ring using a whip stitch; take 10-12 stitches around each small ring
Info :
Sew small rings tightly; pulling too taut will pucker the mesh, so adjust tension so the small ring lies flat and integrated into the mesh
— Leaf Attachment :
Round 1 :
Arrange leaves around each flower in sets of 6 (three on each side). From wrong side, tack the leaf base into the mesh with 5-6 small stitches capturing a few mesh loops to hold leaf securely. Work from center outward so each leaf's tip sits slightly raised.
Info :
Use pins to position leaves before sewing. Space alternating large and small leaves to get natural layered appearance. When sewing, avoid piercing through the leaf surface; stitch into base/back edge only
— Reinforcing Underlay Round (stabilize heavy appliques) :
Round 1 :
On wrong side of mesh, work a supporting whorl of sc around the sewn petal base by threading contrasting yarn and weaving a running stitch in and out of the mesh loops under each petal base (no formal crochet round required). Tie off and weave securely.
Info :
This invisible underlay prevents the weight of petals from stretching the mesh over time. Use a yarn tail in a matching cream color for invisibility
— Border: Scalloped Edge (working around entire runner) :
Round 1 :
With burgundy, join at one corner with sl st, ch1, sc evenly around the edge of the mesh panel (place 3 sc at corners). Work approx 1 sc per 2 mesh spaces (count will depend on mesh size; typical count ~200 sc around). Sl st to first sc, ch1
Round 2 :
*Skip 3 sc, 7 dc in next sc, skip 3 sc, sl st in next sc; rep around to create scallops (approx 30 scallops around depending on panel perimeter)
Round 3 :
In each 7-dc scallop work: sl st to center, ch1, (sc, hdc, 3 dc, hdc, sc) - this forms a textured rounded petal edge. Fasten off and weave ends
Info :
To get neat corners with scallops, work 2 small scallops in corner 3 sc cluster and continue. Adjust skip counts to keep scallops even
— Decorative Raised Border (optional second border) :
Round 1 :
With cream, join behind scalloped burgundy row and work 1 sc in each dc tip to create a small raised cord. Fasten off and weave ends
Info :
This optional step adds a refined double border and ties cream into the edge visually
— Final Finishing Rounds (blocking, shaping, and final adjustments) :
Round 1 :
Carefully steam block or wet block the entire runner flat. Pin out petals slightly curved upward if desired and allow to dry completely before removing pins
Info :
Check all sewn points again from the wrong side and add reinforcement stitches where appliques feel loose. Trim any stray fibers and weave in ends at least 5 cm into nearby stitches
Round 2 :
Optional: Add small surface embroidery (French knots or chain stitch) to flower centers using matching or metallic yarn to add sparkle
Info :
Place felt pads under the runner corners if used on delicate furniture to prevent slipping or scratching
This floral table runner brings a handcrafted vintage charm to any surface, blending airy cream mesh with bold burgundy blooms and olive leaves. Each carefully worked petal and leaf is a little celebration of texture and color, perfect for special tablescapes or seasonal displays. I hope you enjoy assembling the layers and watching the runner come to life — every stitch adds personality. 🧶🌸✨