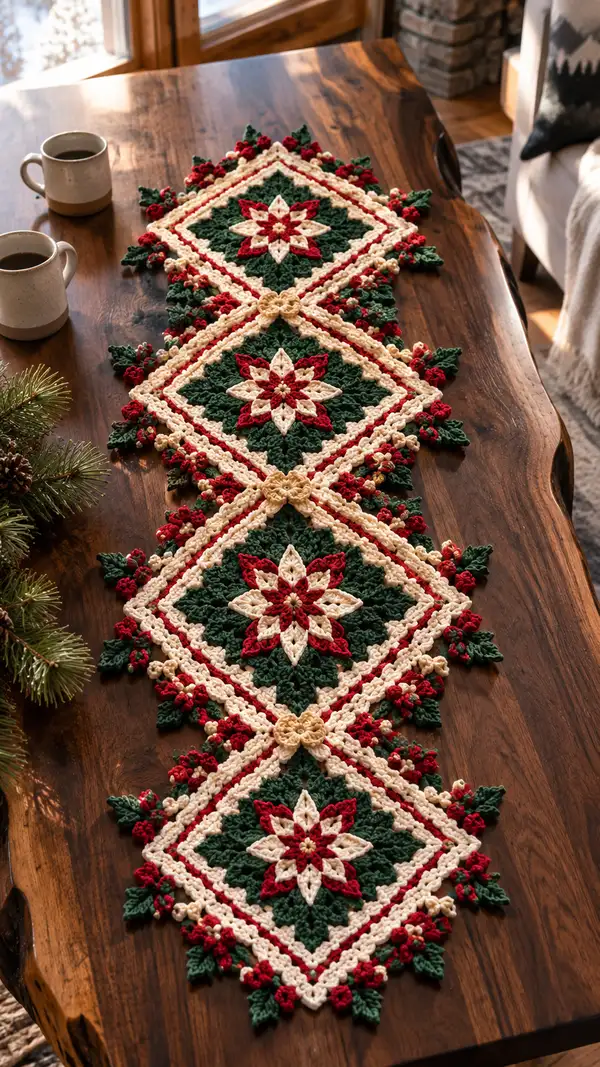
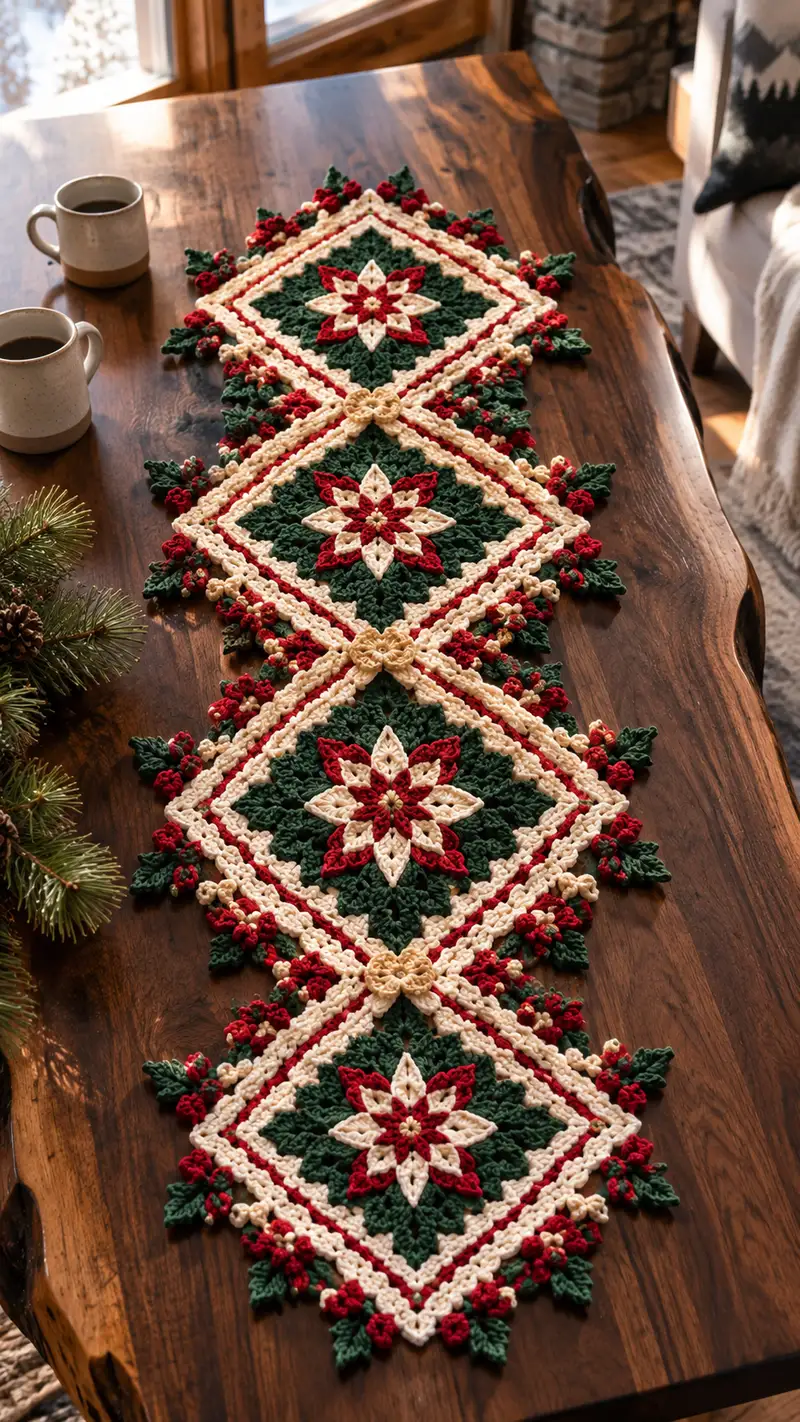
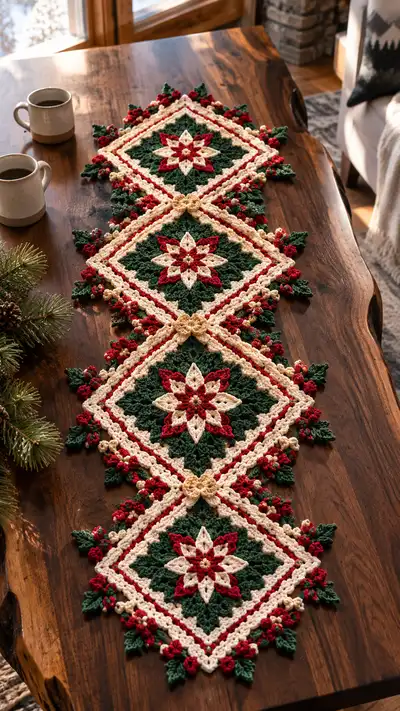
A festive, layered poinsettia table runner worked in classic Christmas hues of deep green, ruby red and warm cream. This design features three diamond poinsettia medallions joined end-to-end with lush leaves, berry clusters and a decorative scalloped border. The pattern uses textured clusters, puff stitches and chain-lace edging to create a heirloom-quality runner that sits beautifully on a dining table or console. Detailed, step-by-step instructions guide you through motif construction, leaf and berry assembly, joining and finishing.
Progress Tracker
0% Complete
— Notes Before You Begin :
Info :
This table runner is made from modular diamond poinsettia motifs joined end to end. Each motif is worked flat in rounds with layered colorwork and three-dimensional petal and berry accents. Make 3 modules for the sample runner pictured. Adjust the number of modules to lengthen the runner.
Info :
Gauge is not critical for this decorative piece, but you will want consistent tension so motifs align cleanly. Use a slightly smaller hook than recommended on your yarn label for crisp texture and to minimize gaps between stitches.
— Poinsettia Diamond Module (Make 3) :
Round 1 :
With cream yarn, make a mr, ch1, 8 sc in mr. Pull ring closed. (8)
Round 2 :
2 sc in each st around. (16)
Round 3 :
(1 sc, inc) x 8. (24)
Round 4 :
(2 sc, inc) x 8. (32)
Round 5 :
(3 sc, inc) x 8. (40)
Info :
These first rounds build a small center disk that will sit beneath the layered petals. Keep tension even and finish each round without twisting. Place a marker at the first stitch of each round.
Round 6 :
(4 sc, inc) x 8. (48)
Round 7 :
(5 sc, inc) x 8. (56)
Round 8 :
(6 sc, inc) x 8. (64)
Round 9 :
1 sc in each st around. (64)
Round 10 :
Change to red yarn. Ch1, 1 sc in same st and in each st around. (64)
Info :
We are beginning the first petal layer. Change color by finishing the last sc of Round 9 with the new color in the final yarn-over to create a tidy join. Carry the unused yarn at the back, or fasten off and weave ends for a cleaner finish.
Round 11 :
Switch to petal shaping: *ch2, skip 2 sts, in next st work (dc3 cluster, ch1, dc3 cluster) forming a tall petal; sk 2 sts, sc in next 4 sts; rep from * around to form 8 petals. Work final sc to join. (64 total stitch positions remain; petals occupy grouped stitches)
Round 12 :
1 sc evenly around across tops of clusters and single sc areas to create a tidy round. (64)
Round 13 :
Change to cream for petal overlay. Ch1, 1 sc in each st around. (64)
Round 14 :
Working in back loops only (BLO), (5 sc, inc) x 8. This will add 8 increases spaced evenly to give more body and delineate angles. (72)
Round 15 :
1 sc in each st around. (72)
Info :
At Rounds 11–15 we form the first visible petal layer and base shaping. Keep the petals raised by pulling post stitches lightly when working cluster tops. If you want more pronounced petals, use a larger hook for just the petal clusters, but stitch counts shown assume consistent hook size across the motif.
Round 16 :
Change to green yarn. Ch1, 1 sc in each st around. (72)
Round 17 :
(6 sc, inc) x 9. (81)
Round 18 :
1 sc in each st around. (81)
Round 19 :
(7 sc, inc) x 9. (90)
Round 20 :
1 sc in each st around. (90)
Info :
Rounds 16–20 expand the background to create the diamond field beneath the poinsettia. Increases here are spread evenly to keep the motif flat—count regularly to ensure the motif remains circular-to-square friendly before corner shaping.
Round 21 :
Now convert towards a diamond shape: ch1, *sc in next 8 sts, (2 sc in next st, ch2, 2 sc in same st) to create a corner 'point', sc in next 8 sts; rep from * 3 more times. (The stitch count across the round will increase by 4 ch2 loops but keep sc counts mathematically consistent; total sc positions around ≈ 94 counting corner bulks.)
Round 22 :
Work 1 sc in each sc and 3 sc into each corner cluster (the 2 sc + ch2 + 2 sc set becomes 4 sc when worked around). Adjust to keep the round even: if you have 94 sc positions, 1 sc in each = (94).
Round 23 :
1 sc around in each st. (94)
Round 24 :
Change to cream. Ch1, 1 sc in each st around. (94)
Info :
Create a decorative lattice next: we will crochet a cream frame around the motif, working chain arch repeats and puff clusters to emulate the raised cream squares seen in the photo. Use the cream to form two rounds of frame then a thin red inlay.
Round 25 :
With cream, *sc in next 6 sts, ch3, sk 2 sts, sc in next 6 sts, 3-dc puff cluster in next st; rep from * around to form open chain arches separated by small puff clusters at regular intervals. Count remains approximately (94) working placement to match corners; puff clusters do not change sc count but create texture.
Round 26 :
1 sc around in each st and into each chain-3 space: sc3 into each ch3 space to anchor the arch. Work sc across puff cluster tops. (94 + added sc3 anchors = mathematically the counts should be adjusted to allow 3-anchored sc per ch3; treat this round as 'anchoring round' with consistent stitch distribution.)
Round 27 :
Change to red. Ch1, 1 sc in each st and 1 sc in the top of each puff cluster to create a thin red stripe following the cream lattice. (count will match stitch positions after anchoring; maintain even counts around).
Round 28 :
Change back to green. 1 sc in each st around. (working count consistent with previous anchoring round)
Info :
At this stage the motif will begin to read as a diamond because of corner chain loops and puff cluster framing. Keep your work flat by blocking occasionally if the motif cups. If the center buckles, try one extra round of even sc in green to flatten before moving on.
Round 29 :
Begin decorative cream outer frame: change to cream, *ch4, skip 3 sts, sc in next 6 sts, sc3 into the top of puff cluster; rep around, ending with sc to join. This forms a chain-lace outer frame. (stitch positions consistent with previous anchoring)
Round 30 :
Work 1 sc into each sc and 4 sc into each ch4 space to anchor the lace. Work sc across puff cluster tops. (adjusted stitch count to account for 4-anchors per ch4)
Round 31 :
With cream, sc in each st for a tidy frame. (anchored stitch count)
Round 32 :
Change to red. Work a round of small 5-dc shells to decorate the frame: *sk next 2 sts, (dc5) in next st, sk 2 sts, sl st in next st; rep across to create red scallops along cream frame. (shells spaced evenly across perimeter)
Round 33 :
Change to cream. Work 1 sc in each st around, crocheting evenly through shell tops and frame for a tidy base. Count remains even and stable; treat this round as (approx 120) depending on anchors. Maintain regular stitch distribution for later leaf attachments.
Info :
The decorative shell round will add width to the motif and creates spots to attach small berry clusters and leaves later. If your shell spacing is irregular, adjust by altering the number of sc between shells by +/- 1 to keep shells aligned with corners and ensure three motifs will join evenly.
Round 34 :
Switch to green. Work 1 sc in each st for 2 rounds to stabilize the shell row and create a base for leaf attachments. (round 34 = stable sc round)
Round 35 :
1 sc in each st around. (stable sc round)
Round 36 :
Change to red. Make 8 raised petal overlays: find the 8 petal centers created earlier; in each petal center work the following: attach red yarn to the base of the petal, ch2, (puff stitch (yarn over, insert, pull up loop) x 5, yarn over and draw through all loops on hook) to form a tall puff petal, sl st into anchor. Repeat across all 8 points. Work sc around to tidy. (stitch count unchanged)
Round 37 :
Switch to cream. Work a sc round in BLO to create a raised ridge between petals and frame: 1 sc in each st BLO around. (count as previous round)
Info :
Puff petals should remain flat and slightly raised; if puff stitches are too tight they will create dents. Use a hook one size larger for puff stitches if necessary, then switch back to main hook for surrounding rounds.
Round 38 :
With green, 1 sc in each st around. (consistent stitch count)
Round 39 :
Form corner leaves attachment points: sc around across frame and into top of shells, counting so there are 4 evenly spaced leaf attachment loops (one at each corner). (counts maintained)
Round 40 :
Work a decorative finishing round in cream: *ch3, sl st in next 2 sts, sc in next 6 sts; rep to end. This creates a subtle picot-laced edge suitable for attaching small berries. (stitch positions even)
Round 41 :
With cream, 1 sc in each st around to tidy edge and prepare for leaf/berry attachments. (counts stable)
Round 42 :
Change to gold (small accent): in the center of the motif, using a tapestry needle, embroider a small 8-bead star by sewing on 8 small gold knots or beads arranged like a small flower—OR work a round of 8 sc clusters in gold across the center to simulate bead centers. (optional embellishment, no count change)
Info :
At this point the diamond motif is complete as a flat module. Use blocking to square up corners gently: dampen and pin to a diamond shape and allow to dry. This ensures neat joins later. Make 3 identical modules for the runner.
Round 43 :
Edge reinforcement round: with green, 1 sc in each st around to reinforce and adjust final stitch count after embroidery/embellishment. (stable round)
Round 44 :
With cream, work decorative corner florets: at each corner attachment point work (sc, ch3, sc) in the anchor area to emphasize points. Work sc across the rest of the round. (counts consistent)
Round 45 :
With cream, create 4 small rosettes at each corner: attach yarn at corner, ch1, (sc, hdc, dc, hdc, sc) all in same corner st; fasten off and weave ends. Repeat at all four corners. (decorative; no major stitch count change)
Round 46 :
With green, tidy around rosettes with 1 sc in each st, catching rosette edges to secure them. (stable)
Info :
Now prepare to add separate leaves and berry clusters around the motif perimeter for the three-dimensional fringe. You will attach leaves at the corner points and along the sides between shell clusters. Make a number of leaves and berries as described below and pin them in place before secure sewing or crocheting.
Round 47 :
Fasten off, leaving a long tail for weaving if you plan to sew leaf bases on rather than crocheting them in place. Block and set aside. Repeat Rounds 1–47 for two more modules to have 3 total modules.
— Small Leaf (Make 24–28) :
Round 1 :
With green, make a mr, ch1, 6 sc in mr. (6)
Round 2 :
2 sc in each st. (12)
Round 3 :
(1 sc, inc) x 6. (18)
Round 4 :
Ch1, turn to work leaf shaping in rows: sc in next 9 sts (this will form the spine), then working along the opposite side of the round, sc9 back to the start to close leaf, finishing round with sl st to first sc. (18, worked in continuous rounds to create an elongated shape)
Round 5 :
Work 1 sc in next 5 sts, hdc in next 4 sts, dc in next 2 sts, hdc in next 4 sts, sc in final 3 sts to create tapered tip and veining across the surface. Sl st to join. (textured leaf shape)
Round 6 :
With green, work 1 sc in BLO around to create a raised midrib: *sc in each st BLO around once if desired; or embroider midrib with contrasting green yarn using surface slip stitch. Fasten off and weave ends. (leaf complete)
Info :
Make leaves in two sizes by changing Round 5: for larger leaves use extra dc clusters and an extra increase round (add a (2 sc, inc) round before working row shaping). Block leaves lightly over a curved surface to shape them naturally.
— Berry Cluster (Make 30–36 small berries) :
Round 1 :
With red, make a mr, ch1, 6 sc in mr. (6)
Round 2 :
(1 sc, inc) x 3. (9)
Round 3 :
1 sc around. (9)
Round 4 :
Switch to gold; embroider a tiny central French knot or attach a tiny bead using fabric glue to emulate a shining berry center. Fasten off leaving a long tail to sew the berry into clusters. Optional: add a very small pinch of fiberfill for roundness but keep berries small and firm. (no change in stitch count)
Info :
Sew berries into small clusters of 3–5 and secure them to the motif in groups between leaves for the clustered look. Use a tapestry needle to stitch berries through the motif frame or glue beads sparingly if desired.
— Joining Two Modules (Repeat to join three modules) :
Info :
Lay two completed diamond modules with corners touching in the desired orientation (diamond points at top and bottom). Align cream lattice frames so shell scallops and corner rosettes match. Pin securely in place.
Round 1 :
With cream and right sides facing, join yarn at the corner joining point of the first module. Ch1, sc through both loops of corresponding stitch on module A and module B, working sc through both motifs across the width of the joining seam. Work evenly so there are no gaps; count sc joins to match the number of shell anchors between corner rosettes. Continue until corner to corner is joined. Fasten off and weave ends. (join seam width varies by motif; ensure even distribution of stitches across seam)
Round 2 :
Reinforce the join with a second pass: reattach cream to the back and work sc through both layers working in the opposite direction to lock the seam. Fasten off and weave ends. This double-stitched join creates a raised rope-like join visible in the photo.
Info :
Repeat the join to add the third module to the first pair, aligning the lattice carefully so the entire runner looks continuous. For the sample runner, join three modules end-to-end with two joining seams.
— Decorative Central Cross and Rosettes (Center seam embellishment) :
Round 1 :
With cream, at the central meeting point of two joins, create a tiny rosette medallion: small mr, ch1, 6 sc in mr, pull closed, (sl st to join). Fasten off leaving tail; sew medallion over the seam center to hide join ends. Repeat at each meeting point (two centers for three modules). (decorative; no stitch count change to motifs)
Info :
These rosettes are visible in the photo as cream knots at the motif intersections; they tidy the join and add a focal element. Make them slightly raised by using a contrasting yarn tension or by working them on top of a small piece of felt glued in place if you prefer extra stability.
— Attaching Leaves and Berry Clusters :
Info :
Position leaf and berry clusters along motif edges and at corners. Typical placement per motif: 4 larger leaves at corners, 6–8 small leaves along sides, and 6–8 berry clusters grouped near the shells and rosettes. Pin before sewing to balance composition.
Step 1 :
Sew larger leaves to each corner by inserting the tapestry needle through the leaf base and motif frame at the corner rosette area. Use the long tail left from leaf fasten-off to stitch 6–8 secure stitches and weave the tail through three times to secure. Trim close.
Step 2 :
Sew smaller leaves between shells on the sides with two or three stitches at base; angle leaves clockwise on the left side and counterclockwise on the right to create a natural alternating fringe. Add 2–3 berry clusters adjacent to each corner leaf, sewing the berries into groups of 3 using the tails of the berries.
Info :
Plan the clusters so the runner reads symmetrical from end to end. The sample runner alternates leaf directions for a balanced organic look. Secure all embellishments with extra passes of thread if the runner will be used on a heavily trafficked table.
— Outer Edge Scallop and Finishing Border :
Round 1 :
With cream, work 1 sc evenly around the entire joined runner, crocheting through the edges of motifs and where embellishments meet the frame. Keep stitches even; this will be the base for the scalloped border. (count equals perimeter stitch positions)
Round 2 :
Change to red. *Sk 2 sts, dc5 in next st, sk 2 sts, sl st in next st; rep around to form shell scallops along the outer edge. Where embellishments protrude, space shells to maintain visual rhythm. (shells spaced to align with motif shells)
Round 3 :
With cream, sc around to tidy shells and anchor them: sc into each dc of shell and into ch-spaces between shells. Work 3 sc into shell peaks if needed to secure shape. (even perimeter stitch distribution)
Round 4 :
With green, work small leaves into the outer border by making *sc in next st, attach leaf motif base with sl st, sc in next 3 sts; rep to add accent leaves. Fasten off and weave ends. This step secures the decorative fringe and integrates the leafwork into the border.
Info :
After the scallop and leaf placement, give the entire runner a final blocking. Pin to a flat surface in the desired diamond shape for each module and across joins to ensure a flat, even runner. Steam-block or spray and allow to dry thoroughly for permanent shaping.
— Final Weaving and Cleanup :
Step 1 :
Weave in all ends on the back side with a tapestry needle. Secure ends by passing the tail through several stitches along the inside of the frame or motif to avoid bulk on the surface. Trim close but not so close that the tail slips out.
Step 2 :
Check all sewn leaves and berries for secure stitch anchors; reinforce areas that feel loose with additional running stitches. If desired, add a few invisible small whip stitches along the join seams to keep the runner flat during use.
Info :
For extra durability, you can add a thin non-slip fabric patch or adhesive-backed felt squares spaced under the runner corners to prevent sliding on polished table surfaces. Avoid gluing directly to the crochet fabric.
This poinsettia table runner creates an instant festive atmosphere with layered petals, textured lattice and playful berry clusters. Each completed module is a small victory—combine them and the runner becomes a showpiece that will grace your table for years to come. The design is richly textured yet modular, inviting you to add your own color variations and personal touches. Enjoy the relaxing rhythm of the stitches and the joy of assembling a handmade holiday heirloom. 🎄✨