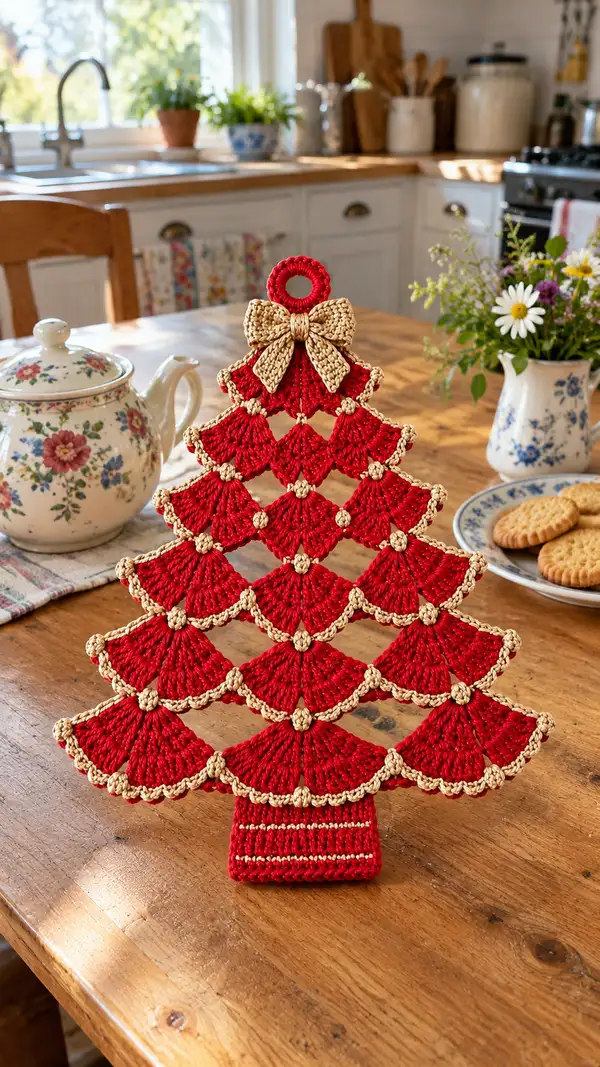
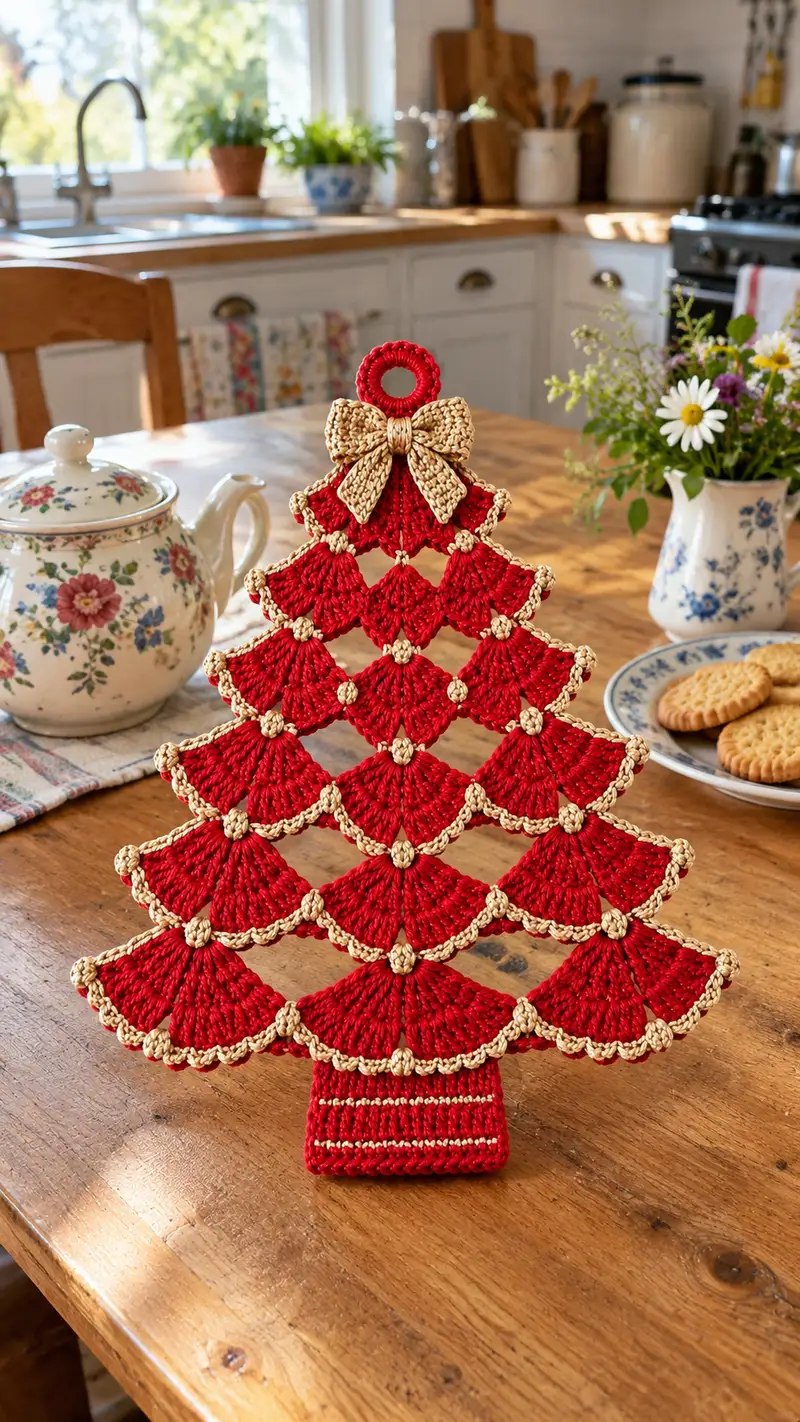
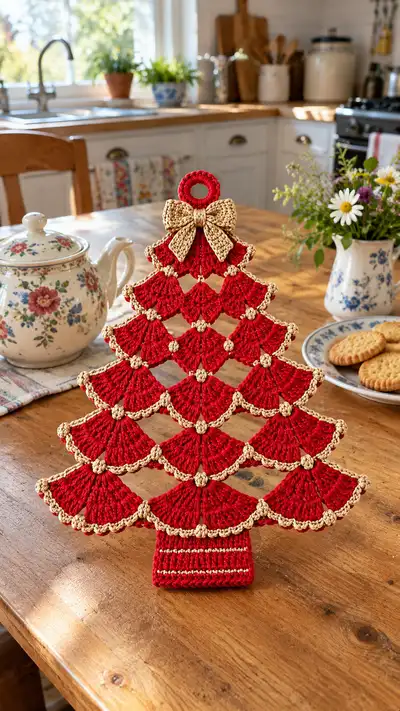
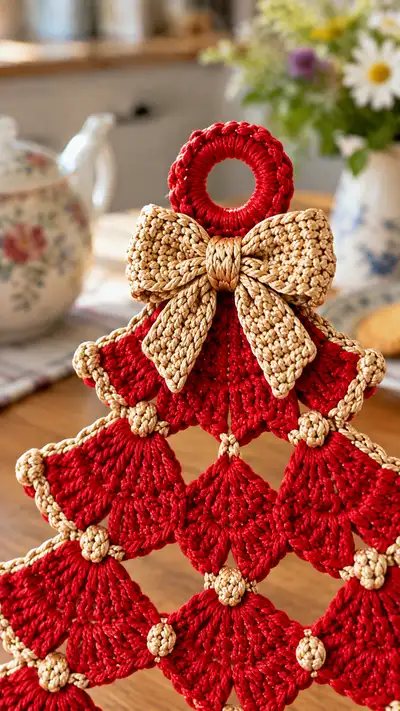
Create a charming tabletop Christmas tree made from layered fan motifs edged in metallic gold. This festive decoration features scalloped tiers, tiny gold bobbles at each join, a matching gold bow and a wrapped hanger ring. Perfect for a holiday centerpiece or mantel décor, the pattern uses simple cluster stitches and joining techniques to build a structured standing tree.
Progress Tracker
0% Complete
— Overview :
Info :
This decoration is built from identical fan motifs arranged in five tiers: bottom tier 5 motifs, then 4, 3, 2, 1 above it to create a triangular tree outline. Motifs are joined at their points with small gold bobbles and the entire edge is finished with a narrow gold scallop. A wrapped ring and a separate crocheted bow top the tree. A rectangular trunk is crocheted separately and sewn to the lower edge. Work motifs flat and block lightly before joining for best results.
— Fan Motif (Make 15 Fans) :
Round 1 :
ch 6, sl st to first ch to form a small loop (or work magic ring); this loop is the point where fans will join (foundation loop)
Round 2 :
ch 2 (counts as first dc), 9 dc into loop, sl st to top of ch-2 (10 dc total) (10)
Round 3 :
ch 3 (counts as dc), turn work so you are working across the 10-dc fan, in first st work: (dc, dc, ch1) then *skip next st, in next st work (dc, dc, ch1)* rep across until you have 5 small clusters separated by ch-1 spaces; end with sl st to top of ch-3. Fans will form curved ridges (5 clusters, 5 ch-1 sps)
Info :
These first rounds create a dense fan base. Keep tension steady; these stitches form the inner arch of the petal.
Round 4 :
Turn work, ch 3, in each ch-1 space work: (2 dc, ch 1, 2 dc) to make 5 outer mini-shells; sl st to top of ch-3 (each mini-shell counts as fan lobe)
Round 5 :
ch 1, sc evenly across the back edge (working into backs or into top loops of the dc row) to produce a firm base edge; work 10 sc evenly (10)
Info :
At this stage, the motif resembles a rounded diamond / scallop half. Each fan motif will be joined to its neighbors at its left and right points with joining bobbles. Block motifs flat to make edges even before joining.
Round 6 :
Flip motif, ch 3, 3 tr into first mini-shell top (work behind the shell to push it forward), *ch 1, 4 tr into next shell top* rep across shells (5 shells x 4 tr each = 20 tr plus initial 3) sl st to top of ch-3. This creates a fuller fan face.
Round 7 :
ch 1, sc in same st, sc across top of tr row making 20 sc (20). This evens the fan surface and prepares a neat edge for gold trim later.
Round 8 :
Edge round: change to gold yarn (Info below) and with gold ch 1, work 'picot edging' across fan scallop top: *(sc in next 3 sts, ch 3, sl st into 3rd ch to make a small picot), sc in next 3 sts* across fan top, sl st to first sc. Fasten off leaving tail for joining. (This builds the gold scallop on each fan tip)
Info :
Change to gold for a crisp metallic border. Carry the red tail into the next fan or weave in later. Work picots loosely so gold scallops lie flat rather than curl.
— Small Join Bobble (Make 10-12) :
Round 1 :
Using gold yarn, ch 4, sl st to form a small ring (or use a magic ring)
Round 2 :
ch 1, 8 sc into ring, sl st to first sc (8)
Round 3 :
ch 1, in same st work sc dec over next 2 sc, rep 2 times, leaving 4 sc (4). Stuff very lightly with a tiny bit of fiberfill if desired.
Round 4 :
ch 1, 4 sc in rnd (4) - finish by sl st to first sc, leave long tail for sewing. These bobbles will be used as join points between adjacent red fan tips and act as decorative knots at each motif intersection.
Info :
These bobbles can be worked denser by using a smaller hook (3.0 mm) for a tighter ball. Leave long tails for sewing through multiple layers where motifs meet.
— Edge Joining Row for Tiers (Worked while assembling tiers) :
Round 1 :
Lay out bottom tier of 5 fans edge-to-edge so their back edges meet; pin into place. With gold yarn and 3.0mm hook, in the bottommost fan sc base, sl st to attach then ch 1, sc evenly across entire bottom row joining where motifs touch with a sc through both motif bases every 4-5 sts to create a continuous lower edge (approx 50 sc across bottom depending on exact tension)
Round 2 :
ch 1, sc in each st across working in BLO for a ridge (50). This creates a base ridge that helps the tree stand up when folded slightly and when the trunk is attached.
Info :
Block the assembled tier flat, then continue joining tiers above with small bobbles at joins. Ensure equal spacing between motifs—pinning first avoids a wavy tree profile.
— Building the Tree: Tier Layout and Join Sequence :
Info :
Arrange tiers on a flat surface in this order from bottom to top: Row A (5 fans), Row B (4 fans), Row C (3 fans), Row D (2 fans), Row E (1 fan). When joining tiers, each fan point meets two fans above it. Use a small gold bobble at each meeting point, stitching through the adjacent red fan tip and fastening tightly to create the small knot visible in the image.
Round 1 :
Start by joining Row B onto Row A: position B above A, aligning points so that the center of B sits over the seam between two A fans; at each intersection, sew a small join bobble (use the long tail from bobble) through both motif points and pull tight to pull motifs together. Repeat across the width (4 joins).
Round 2 :
Attach Row C above Row B in the same manner using bobbles at intersections (3 joins). Continue attaching Row D and Row E. For the topmost single fan (row E) attach a bobble at its lower center point (it will sit neatly at the tree center).
Info :
Sew bobbles through both the gold picot edge of the lower motif and the red fan tip of the upper motif so the gold bobble appears centered at the join. Use small, neat stitches to bury tails and keep joins invisible from the front.
— Top Hanger Ring (Wrapped) :
Round 1 :
Wrap a small wooden/plastic ring (approx 1.25 in/3 cm) with red yarn or with gold for contrast. To crochet over a ring: sl st to ring, ch 1, work 20 sc evenly around ring depending on ring circumference (adjust to fit ring snugly). Sl st to join and fasten off, leaving tail to weave under stitches.
Round 2 :
Optional decorative round: change to gold and work sc in each st across or small picot stitches: *(sc in next st, ch 2, sl st into 2nd ch)* to create ring braid look. Fasten off and weave ends.
Info :
Sew the wrapped ring to the topmost fan at the very top center using the ring tail and small, strong stitches through the fan body. Optionally glue the ring underside to the top fan for extra stability.
— Bow: Two Loops (Make 2 loops and central knot) :
Loop Round 1 :
Using gold yarn and 3.0 mm hook, ch 26, sc in 2nd ch from hook and across (25 sc). Turn - this strip will be folded to form a bow loop.
Loop Round 2 :
ch 1, sc across working 25 sc (25)
Loop Round 3 :
ch 1, sc dec at first two sts, sc across until last two sts, sc dec (23)
Loop Round 4 :
ch 1, sc across (23). Fold this strip lengthwise, then sew edges together with invisible whip stitch leaving both ends open for shaping. Make a second identical loop. These two loops will be layered opposite each other to form the classic bow shape.
Info :
Use a slightly smaller hook for the bow to give a firm, sculpted look. Stuff lightly with a tiny bit of fiberfill for fullness if desired.
Tail Round 1 :
Make two bow tails: ch 18, sc in 2nd ch from hook and across (17 sc), ch 1, turn, sc across for 4 rows decreasing 1 sc each end to shape tails into tapered points. Fasten off leaving long tail to sew to bow base.
Knot Round :
Wrap a short length of gold yarn around the center where loops cross to form a neat knot. Sew the knot securely to the loops and tails, then attach entire bow assembly to the top fan directly under the hanger ring using strong stitches. Hide ends inside bow folds.
Info :
For extra sheen, work the bow in two strands held together if using a thinner ribbon-like yarn. Make sure the bow sits flat against the fan top and that the tails drape gently over the top row.
— Trunk / Base (Make 1) :
Round 1 :
With red yarn and 3.5 mm hook, ch 12, join with sl st to form a ring or work foundation single crochet to achieve a neat rectangle base. This trunk will be worked in rounds to make a hollow standing sleeve that the tree bottom can slide over (or it can be sewn to the base edge).
Round 2 :
ch 1, 12 sc in rnd (12)
Round 3 :
1 sc in each st around for 8 rounds to create height (Rounds 3-10: 1 sc in each st (12))
Info :
For decorative stripes, carry gold yarn and in rounds 4 and 8 change to gold for a stripe row of sc, then return to red. Alternatively, embroider stripes afterwards with gold running stitch.
Round 11 :
Decrease round to form bottom flattening if desired: *(sc, sc dec) x 4 = 8
Round 12 :
sc around (8) - if you prefer a flat base, cut a cardboard circle to fit and insert then stitch base closed with sl st and weave tail to secure.
Info :
Insert light cardboard disc in the bottom of the trunk, or lightly stuff and flatten to create a stable base so the tree will stand upright. Glue the disc in place before closing if desired.
— Assembly and Final Edging :
Round 1 :
After all motifs and bobbles are made and blocked, lay out tiers and baste stitch the seams with long tails. Use the gold picot edges as your front-facing seam; whenever two fans meet, place a bobble at the intersection and sew through both fan tips and the bobble using the bobble tail.
Round 2 :
Once tiers are joined together vertically, work a continuous gold crocheted edging around the entire tree outline: join gold yarn at bottom left edge, ch 1, sc evenly along the edge working a small shell (sc, ch2, sc) at each outward scallop corner. When you reach a previously placed bobble, work sc around the bobble to anchor it. Continue around perimeter and finish at the other bottom edge. Fasten off and weave ends.
Info :
The continuous gold edge both conceals join seams and unifies the shape visually. Keep tension even on the edging so the tree lies flat and does not pucker.
Round 3 :
Sew the wrapped hanger ring to the top fan center with multiple passes through the ring underside and fan body. Sew the bow onto the fan in front of the ring so the ring sits neatly behind the bow loop. Hide all tails inside bow backing or inside the ring wrapping.
Round 4 :
Attach trunk: position trunk at bottom center behind the bottom tier and whipstitch along the lower edge with matching red yarn. Make several passes to ensure trunk is securely attached and vertical. If you made trunk as a sleeve, slide tree over the trunk and adjust position then tack in a few spots to secure.
Info :
Check alignment by standing the tree upright and making minor adjustments. Add gentle blocking with steam if motifs need slight reshaping. Weave in and trim all ends on wrong side.
— Optional Decorative Variations :
Info :
Add tiny seed bead 'ornaments' by sewing beads to the centers of selected fans before joining to create sparkle. Substitute white or green for the fans for different holiday looks. Use a metallic thread held together with the gold for an extra shimmer. Make the tree smaller by using sport weight yarn and a smaller hook or larger by choosing bulky yarn and a correspondingly larger hook.
Final Info :
Care: gently spot clean with mild soap and water, reshape while damp. Store flat wrapped in tissue to protect metallic yarn from abrasion.
Finishing this festive tabletop tree is such a joy — each fan you complete brings the silhouette into focus and the gold trim ties everything together beautifully. Stitch by stitch you'll watch plain motifs transform into a classic holiday accent that fits perfectly on a mantel or kitchen table. 🎄 The bow and wrapped hanger add a handcrafted flourish that feels lovingly vintage yet elegant. I hope this project warms your crafting season and becomes a holiday favorite. Happy crocheting! 🧶✨