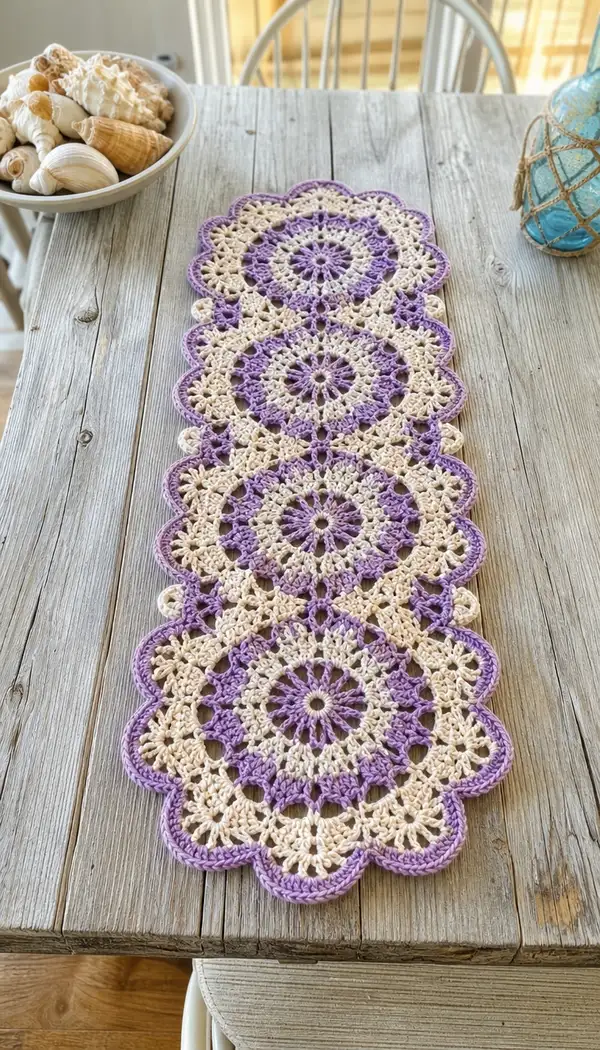
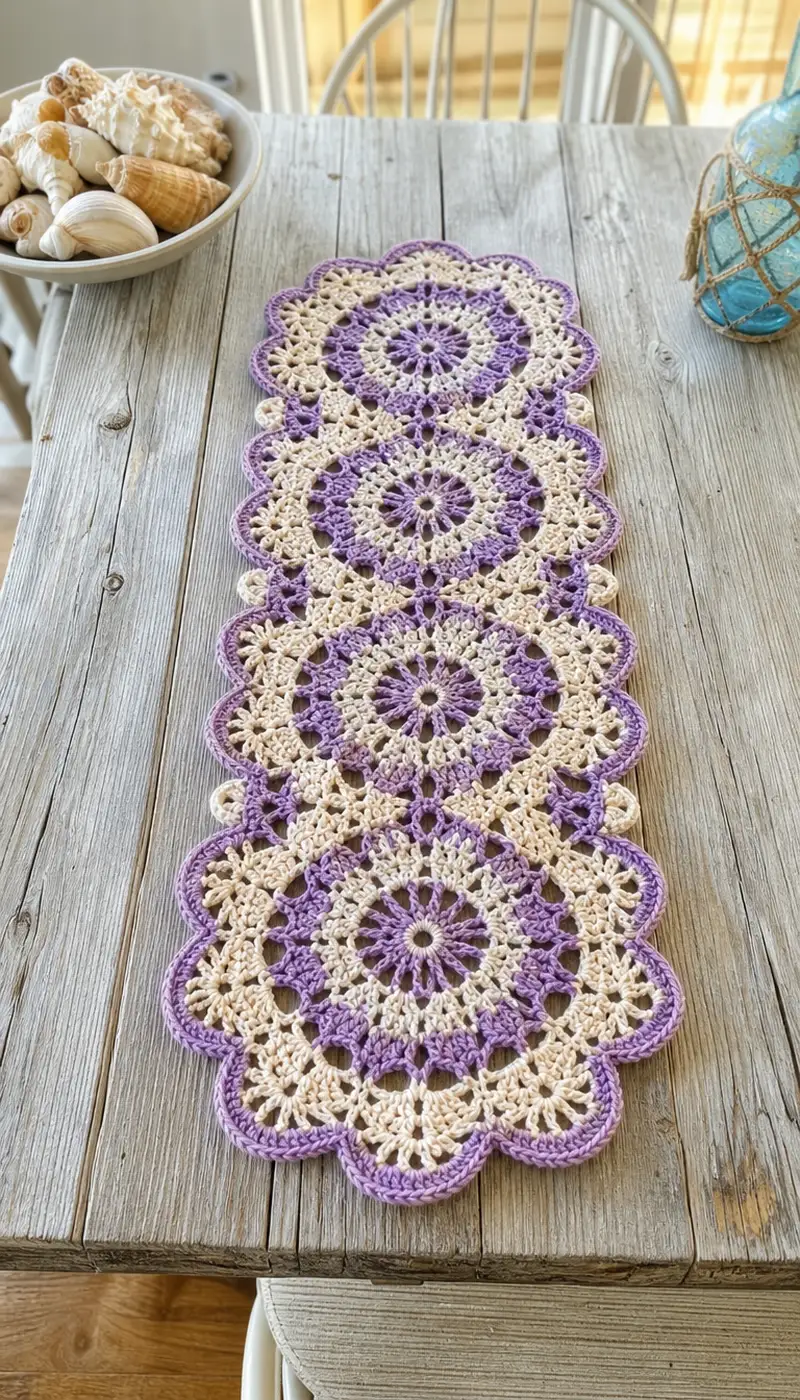
A delicate table runner made of four connected daisy-style crochet motifs in soft lavender and creamy neutral. Each round floral motif features layered petals, openwork lace, and a scalloped lavender edge for a vintage-inspired look. Perfect as a centerpiece for spring or a light, coastal table accent.
Progress Tracker
0% Complete
— Overview :
Info :
This pattern builds one round floral motif in concentric rounds, then repeats it to make four identical motifs which are joined vertically. Finally a continuous scalloped lavender border is worked around the long runner. All rounds are crocheted in the round; place a stitch marker in the first stitch of each round to track round starts. Gauge is flexible; finished runner should measure approximately 36-38in (92-97cm) long and 10-11in (25-28cm) wide using worsted cotton and the recommended hook.
— Motif (Make 4) :
Round 1 :
With Lavender, make a magic ring. Ch3 (counts as dc), 11 dc into ring. Tighten ring and join with sl st to top of beginning ch3. (12)
Round 2 :
Ch1, sc in same st, *ch3, sc in next dc; rep from * around to create 12 ch-3 spaces and 12 sc. Join with sl st to first sc. (12 sc +12 ch-3 sps)
Round 3 :
Change to Cream. Sl st into first ch-3 sp, ch3 (counts as dc), 2 dc in same ch-3 sp, ch2, 3 dc in same ch-3 sp (shell made in ch-3 sp), *sk next sc, in next ch-3 sp work (3 dc, ch2, 3 dc); rep from * around for a total of 12 shells. Join with sl st to top of beginning ch3. (48 dc +12 ch-2 sps)
Info :
Change to Cream by completing the final yarn-over of the last lavender stitch with cream. Carry ends to the back and weave in later. Work shells evenly; shells create petal bases for next rounds.
Round 4 :
Ch1, sc in same st, *ch5, sc in middle of next shell (4th dc of shell); rep from * around to create 12 ch-5 loops. Join with sl st. (12 sc +12 ch-5 sps)
Round 5 :
In each ch-5 space work: (sc, ch1, 7 dc, ch1, sc) — a tall petal cluster. Join with sl st to first sc. This produces 12 tall petal clusters. (12 petals; 84 dc total this round)
Info :
Gently spread petals outward with your fingers to keep shape even. If petals slump, block motifs before proceeding to later rounds.
Round 6 :
Change to Lavender. Sl st to middle top of a petal (center ch-1 between dc). Ch3 (counts as dc), 2 dc in same ch-1 sp, *ch2, sk petal top, in next petal ch-1 sp work (3 dc, ch2, 3 dc); rep from * around for 12 shell clusters sitting between petals. Join with sl st. (48 dc +12 ch-2 sps)
Round 7 :
Ch1, sc in same st, *ch4, sc in top of next petal middle; rep from * around to make 12 ch-4 loops. Join with sl st to first sc. (12 sc +12 ch-4 sps)
Round 8 :
In each ch-4 space work: (sc, 5 dc, sc). This forms secondary petals and expands the motif. Join with sl st. (12 small petals; 60 dc this round)
Info :
At this stage your motif should be opening into a 4-5in diameter circle depending on tension. If motif is smaller/larger slightly adjust hook for future motifs to match sizes.
Round 9 :
Change to Cream. Ch3 (counts as dc), 2 dc in same st, ch3, *in next ch-4 sp work (3 dc, ch3, 3 dc), ch3; rep from * around to create 12 larger fans separated by ch-3 loops. Join with sl st to top of beginning ch3. (72 dc total, 12 ch-3 sps)
Round 10 :
Ch1, sc in same st, *ch6, sc in center of next fan (center ch-3 between fan shells); rep from * around to create 12 ch-6 loops. Join with sl st. (12 sc +12 ch-6 sps)
Round 11 :
In each ch-6 space work: (sc, ch1, 9 dc, ch1, sc) to form fully opened petal-lace sections. Join with sl st. This expands motif to its mid-size. (108 dc this round)
Info :
Keep tension consistent across long chains. If your chains draw in, block motifs later to even spacing. Use stitch marker to mark the 12 o'clock position for easier alignment later.
Round 12 :
Change to Lavender. Sl st into the top of a dc to locate a spacing between petals. Ch3 (counts as dc), 2 dc in same space, *ch4, 3 dc cluster in the ch-1 space between petals, ch4, 3 dc cluster in next petal base; rep from * around forming 12 shell clusters with ch-4 separation. Join with sl st. (72 dc plus chains)
Round 13 :
Ch1, sc in same st, *ch2, sk 3 dc, (sc, ch4, sc) in next cluster top, ch2, sk 3 dc, sc in next ch-4 space; rep from * around to create lacy chain bridges and small picot-like arches. Join with sl st. (24 sc + 12 ch-4 sps + chain bridges)
Round 14 :
Change to Cream. In each (sc, ch4, sc) space work: (sc, 7 dc, sc) to form larger scalloped lace petals outward; where there are ch-2 bridges work sc to maintain spacing. Join with sl st. (84 dc this round)
Info :
At this point the motif should measure roughly 6-7in across. If making motifs to match the photo, maintain the two-color alternation as noted: inner lavenders, outer cream rounds continue to give the runner its alternating look.
Round 15 :
Ch1, sc in same st, *ch5, sc in center top of next large scallop; rep from * around to create 12 ch-5 arches. Join with sl st. (12 sc +12 ch-5 sps)
Round 16 :
Change to Lavender. In each ch-5 space work: (sc, ch1, 11 dc, ch1, sc) — a full lavender petal band. Join with sl st. (132 dc this round)
Info :
These tall petal bands create the pronounced lavender rings visible in the photo. Keep stitches loose enough so the motif lies flat — if it cups, block flat with steam or wet blocking.
Round 17 :
Ch1, sc in same st, *ch3, sc in center of next lavender petal; rep from * around to create 12 ch-3 loops. Join with sl st. (12 sc +12 ch-3 sps)
Round 18 :
Change to Cream. In each ch-3 loop work: (sc, 5 dc, sc) to form a delicate cream lace band separating lavender rings. Join with sl st. (60 dc this round)
Round 19 :
Ch1, sc in same st, *ch4, sc in top of next lace band center; rep from * around to create 12 ch-4 arches. Join with sl st. (12 sc +12 ch-4 sps)
Round 20 :
Change to Lavender. In each ch-4 space work: (sc, 7 dc, sc) creating final lavender petal clusters that will anchor outer scallops. Join with sl st. (84 dc this round)
Info :
Check motif for flatness and symmetry. If a motif is slightly larger or smaller, measure and adjust hook size on subsequent motifs to match all four to within 0.25in (6mm).
Round 21 :
Ch1, sc in same st, *ch6, sc between clusters; rep from * around to make 12 ch-6 loops that will become scallop bases. Join with sl st. (12 sc +12 ch-6 sps)
Round 22 :
In each ch-6 space work: (sc, ch1, 13 dc, ch1, sc) to make pronounced scallop forms. Fasten off, leaving tail for weaving if preferred. Block motif gently to shape outer scallops uniformly. (156 dc this round)
Info :
Make 4 identical motifs following Rounds 1-22. Block all motifs flat and pin to identical measurements (width of one motif across scallops, and spacing between motif centers). Allow to dry completely before joining to get crisp lacework and even joins.
— Joining Motifs (Vertical Join Sequence) :
Info :
Place motifs in a column with scallops alternately aligned so scallops of neighboring motifs nest slightly. Join motifs using slip-stitch or single crochet join through the back loops of scallop top stitches and through the corresponding spacing on adjacent motif. The join described below creates small chain bridges to echo the lace feel of the piece.
Round 1 (Joining Step 1) :
Lay Motif A and Motif B with right sides up where their edges overlap by one scallop depth. With Cream yarn held, work from the wrong side: align a ch-6 scallop of Motif A with the opposing ch-6 scallop of Motif B and insert hook through outermost picot or top of a scallop cluster on both motifs. Sl st through both motifs to join at that point. Work a sl st join every 6th stitch around the overlapping scallop area for a total of 6 secure joins per adjoining scallop pair. Repeat for all scallop pairs where motifs meet. Fasten off and weave ends.
Info :
Alternative join method: use mattress stitch with cream yarn for an almost invisible seam. If you prefer visible decorative joins, use lavender to highlight the joined spots with small slip-stitch loops.
Round 2 (Joining Step 2) :
With motifs laid flat and sequentially aligned (A-B-C-D), work small 3-ch bridges between corresponding chain spaces across the seams to stabilize the runner. Identify the center top of each scallop on Motif A and corresponding center top on Motif B and create a ch-3 loop anchored with sl st on each motif (sl st into the same position on each motif then ch3, sl st into same spot on other motif to create tiny bridge). Repeat for each scallop column join (typically 12 small bridges per motif pair). This adds lacy connections without stiffening the piece.
Info :
Check alignment frequently: motifs should be square to one another with centers in a straight line. If one motif sits higher, gently unpin and re-block slightly to match heights before final sewing.
Round 3 (Stabilizing Row) :
Once all pairs are joined, with Cream yarn, pick up along the seam line and work a round of sc across the seam edge where motifs meet: sc across joins on both sides of the seam to reinforce. When you reach each bridge, work (sc, ch2, sc) in the bridge to keep lacy look. Fasten off and weave ends. This creates a neat internal seam that is also decorative.
— Outer Border and Scalloped Edge :
Info :
With the entire runner assembled and lying flat, the outer border is worked continuously in Lavender around the long rectangle made of four motifs. Work rounding corners by following the outermost scallop shapes and filling gaps with small shells so the outer edge reads as a continuous scalloped lavender border.
Round 1 :
Join Lavender at any outermost scallop top. Ch1, sc in same place, *ch3, sk 3 dc across scallop valley and sc at next scallop tip; rep around the entire runner letting the ch-3s form regular spacing between sc anchors. Join with sl st. (Count depends on runner perimeter — expect approximately 80-92 sc anchors around full runner)
Round 2 :
Ch3 (counts as dc), in same st work 2 dc, *ch2, in next ch-3 sp work (3 dc, ch2, 3 dc) to form shell; rep around making shells nestled over each outer scallop; join with sl st. This creates continuous lavender scallops that echo motif edges. (shells per outer scallop)
Info :
When you reach corners where motifs meet at seams, work extra ch-2 spaces to ease fabric and avoid puckering. Keep shells even size by counting dcs carefully in each shell.
Round 3 :
Ch1, sc in same st, *ch6, sc in center top of next shell; rep around to establish outer scallop loops. Join with sl st. (equal to number of lavender shells)
Round 4 :
In each ch-6 loop work: (sc, ch1, 11 dc, ch1, sc) to create tall scalloped edges. Keep stitches slightly loose so scallops gently fan outward. Join with sl st at end and fasten off. Weave in ends. (11 dc per scallop)
Round 5 :
For a finished ridge, with Lavender, work one final round in BLO: join in any dc, ch1, 1 sc in each st BLO around the entire runner. This creates a tidy ridge that frames the scallops. Join and fasten off. Weave in all ends neatly on the wrong side. (stitch count follows perimeter)
Info :
Pin the runner on a blocking board to final measurements and lightly steam or spray with water to set the scalloped border into place. Allow to dry fully before removing pins; this step brings crisp definition to the scallops and keeps the runner flat.
— Finishing Touches :
Info :
Weave in all remaining ends with a blunt tapestry needle, pulling them through the wrong side and trimming close. If you prefer a softer look, use a small amount of fabric-safe starch and press lightly to keep the runner crisp for display. Store flat to keep scallops in shape.
Measure :
Finished runner measures approximately 36-38in (92-97cm) long by 10-11in (25-28cm) wide with four motifs. Measurements will vary with yarn and tension; change hook size to increase or decrease motif diameter.
Info :
Optional embellishments: add small embroidered centers using a few strands of contrasting thread, or attach tiny crocheted leaves in cream between motif joins for extra botanical detail.
— Notes on Customizing Size & Motif Count :
Info :
To lengthen the runner, add additional motifs following the motif pattern and join sequences. For a placemat, use a single motif and finish with the border instructions. To create a wider runner, make motifs of a larger gauge (use heavier yarn or larger hook) and join in multiple columns, adding additional border rounds to frame the wider piece.
You’ve just made a lovely Lavender and Cream Daisy Motif Table Runner that will brighten any table! Each motif combines airy lace and soft lavender petals for a timeless spring-to-summer centerpiece. Blocking and careful joining make the scalloped edge sing and give the runner a professional finish. 🧶✨ Display it on a console, dining table, or gift it to a friend who loves handmade home touches. Happy stitching — your home will smell like summer in no time! 🌸