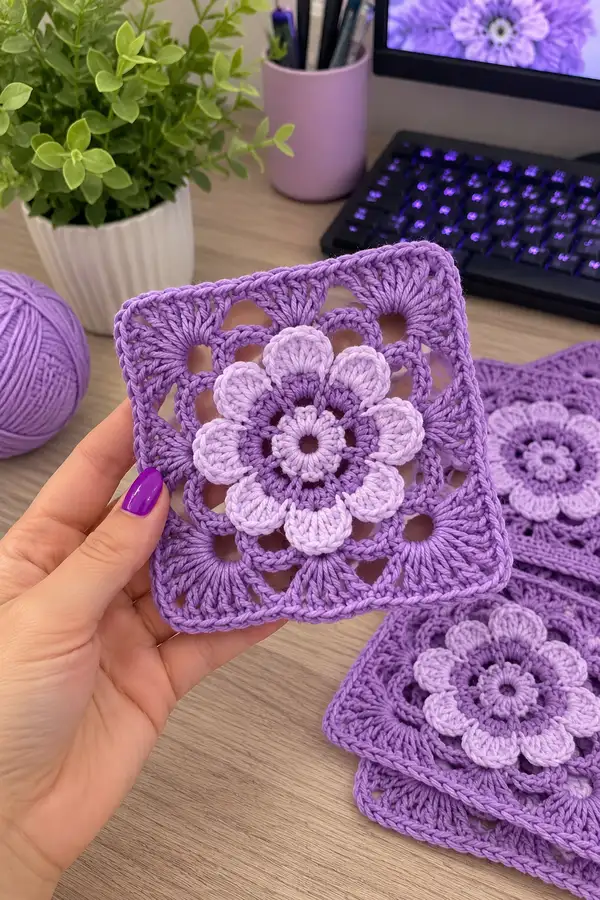
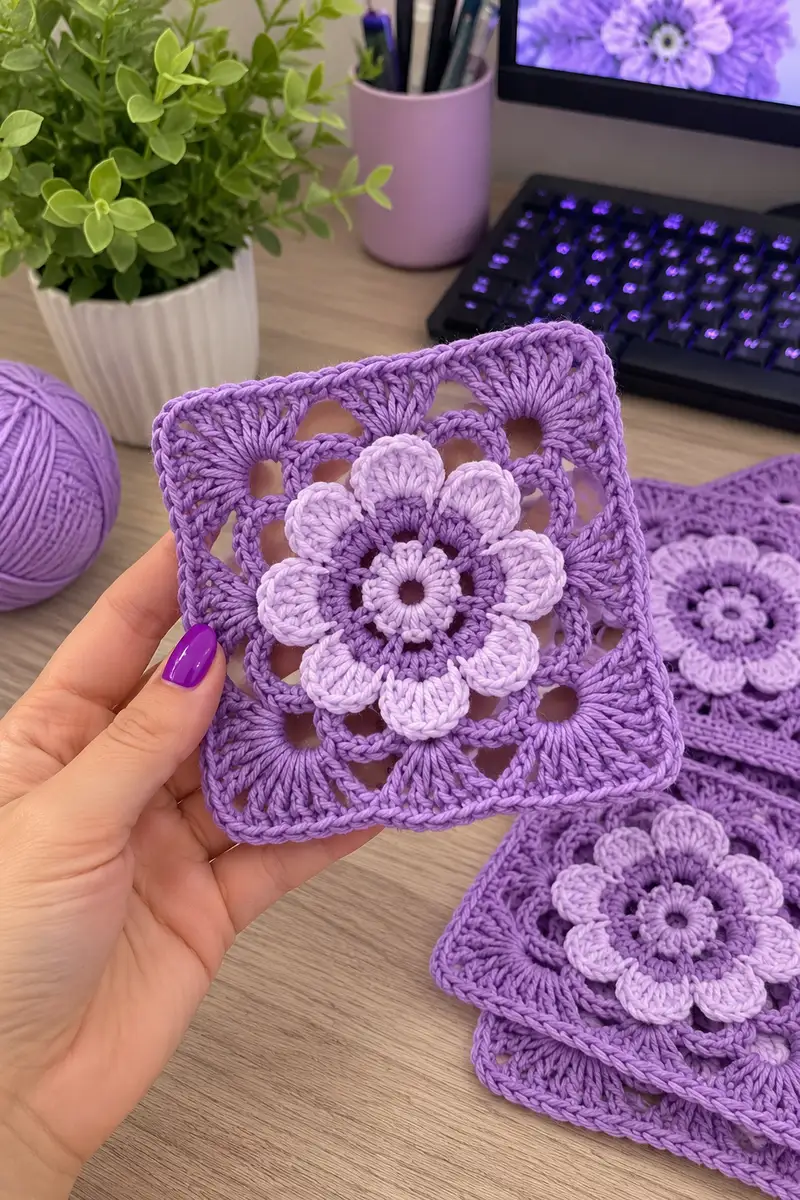
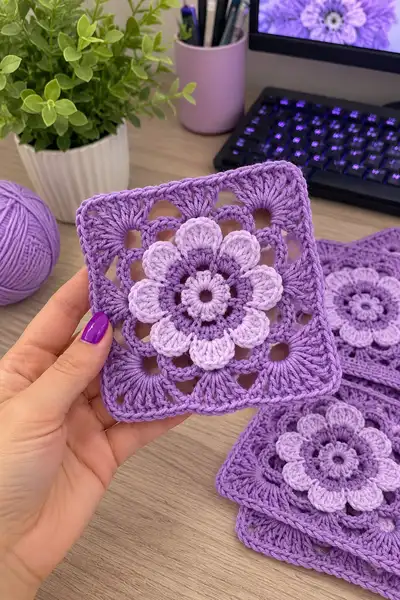
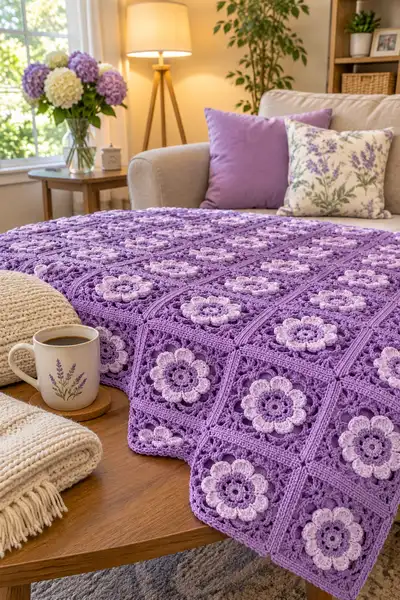
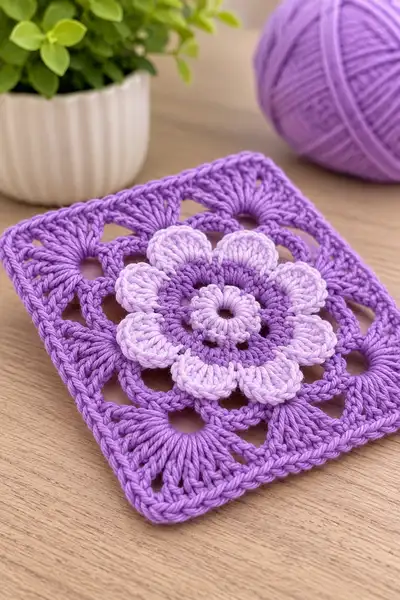
A soothing, floral granny-square blanket worked in layered 3D petals and soft lavender tones. Each square features a raised, double-layered flower that pops off a lattice-style square background. The finished throw is elegant, tactile, and perfect for gifting or styling a cozy bedroom.
Progress Tracker
0% Complete
— Gauge & Finished Size :
Info :
Gauge is not crucial for a blanket but for reference each completed square (as shown) measures approximately 14cm (5.5 in) square when blocked using the yarn and 4.0mm hook recommended. Adjust hook size to match this gauge for the blanket pictured (approx. 7 x 9 squares for a lap/throw size). Each square uses approximately 25-35g of yarn depending on yarn thickness and tension.
— Notes on Construction :
Info :
This motif begins as a round flower worked in two tones (center & lighter petal color), then is converted into a square with a deep lavender background. Petals are made as puff clusters to create a raised 3D petal. The pattern uses repeated rounds of even stitches to square off the round and produce a uniform, joinable square. You will make N squares and join them with a mosaic-style join then work a deep textured border.
— Flower Center & Inner Rounds (Rounds 1-24) :
Round 1 :
6 sc in magic ring (6)
Round 3 :
(1 sc, inc) x 6 (18)
Round 4 :
(2 sc, inc) x 6 (24)
Round 5 :
(3 sc, inc) x 6 (30)
Info :
Change to lighter petal color on the last yarn over of Round 5 if you want the very center to appear paler. Carry tails in or weave them in later. Work Round 6 with the lighter petal color for a bright petal contrast.
Round 6 :
(4 sc, inc) x 6 (36)
Round 7 :
(5 sc, inc) x 6 (42)
Round 8 :
(6 sc, inc) x 6 (48)
Info :
At the end of Round 8 you have a comfortable 48-stitch round that gives eight evenly spaced segments (48/8 = 6). We're going to make eight petal bases so plan anchors every 6 stitches (or use markers at 8 anchor points) to keep petal placement symmetrical.
Round 9 :
1 sc in each st around (48)
Round 10 :
*(3 sc, ch 5, skip next 3 sts)* repeat around — 24 sc groups and 8 ch-5 spaces (24 sc + 8 ch-5 spaces)
Info :
Round 10 creates eight chain loops that will become the bases for the first puff petal layer. Count carefully: each repeat uses 6 stitches (3 sc + 3 skipped), 6 x 8 = 48 sts covered around the round.
Round 11 :
Into each ch-5 loop work: (sl st into loop, ch1, 7 dc into loop, ch1, sl st into same loop) to create a full petal. When finished you will have 8 petals composed of 7 dc each (56 dc) plus the working sl sts used to anchor (8 sl st anchors). Return to main stitch after each petal with 1 sl st. (56 dc in petals + anchoring sl sts)
Info :
Use a slightly smaller hook or keep your tension tighter in this round to make petals pop. When you pull the 7-dc petals up by working all dc into the ch-5 area you automatically create a raised petal - no extra stuffing required.
Round 12 :
Ch 1, sc in each st and around petals working 2 sc into the top of each petal where it joins the base to secure them — this round will result in 24 sc across previous sc positions plus 8 sc spaced over the petals (approx. 32 sc total anchored across the row) (32 sc)
Round 13 :
Switch to the deep lavender background color if you used a lighter shade for petals. Ch 1, 1 sc in each st around to tidy edges and lock petal anchors (32 sc)
Info :
Change color firmly: finish last stitch of previous round but do not cut petal color. Carry the unused petal color along the back if you prefer fewer ends; otherwise fasten off and weave in later. Blocking the flower before squaring off helps petals relax into a uniform shape.
Round 14 :
1 sc in each st around (32)
Round 15 :
*(1 sc, ch 3, skip next st)* repeat around creating 8 ch-3 loops evenly spaced around the petal edge. There will be 8 small ch-3 spaces and 24 sc between them (24 sc + 8 ch-3 spaces)
Round 16 :
Into each ch-3 space work: (sl st, ch1, puff stitch 5 loops, sl st) to create a second, smaller raised petal row. Use the lighter petal color for these smaller puff petals for contrast. Each puff uses 5 yarn-overs pulled through and closed — 8 puffs total (8 puff petals)
Info :
Puff stitch (US style): yarn over, insert hook, yarn over, pull up loop; repeat 4 additional times in same space until 6 loops on hook, yarn over and pull through all loops, ch1 to close puff. Maintain consistent loop tension for even puffs.
Round 17 :
Ch1, sc in each st and in top of each puff stitch (32 sc) — this secures the second layer and gives a neat circle to work outwards toward the square conversion.
Round 18 :
1 sc in each st around (32)
Round 19 :
1 sc in next 2 sts, inc — repeat around creating slight outward shaping (24 sc + 8 inc = 40) (40)
Info :
These gentle increases prepare the motif to be squared off. Verify counts: starting from 32, doing (2 sc, inc) x 8 gives 32 + 8 = 40 stitches.
Round 20 :
1 sc in each st around (40)
Round 21 :
(3 sc, inc) x 8 (40 + 8 = 48) (48)
Round 22 :
1 sc in each st around (48)
Round 23 :
1 sc in next 5 sts, ch 3, skip next 6 sts — repeat around producing 8 ch-3 corner-like loops that will be used to create the four corners of the square. This pattern will cover 8 repeats over 48 sts (40 sc + 8 ch-3 spaces)
Info :
We are now transitioning from a round to a square. Carefully space the ch-3 loops into positions that will become the corners. If desired, place markers at four equally spaced points (every 12 stitches) as the square corner anchors for the next round.
Round 24 :
Change to deep lavender if not already. In each ch-3 space work: (sc, ch2, sc) to form gentle corner anchors. In the sc areas work 1 sc per st. This round will produce 48 sc equivalents distributed as corner clusters and side sc (48)
Info :
After Round 24 your motif is still circular in structure but now has clear corner anchors. We're ready to build corner clusters and square sides in the rounds that follow. Always count to 48 to keep your stitch numbers consistent.
— Squaring Rounds (Rounds 25-48) :
Round 25 :
*(3 dc, ch2, 3 dc) into each ch-2 corner created last round; on side sections: dc in next 6 sts* Repeat for 4 corner clusters and 4 side segments. After completing round you will have 8 corner cluster groups and 32 side-double-crochet stitches — treated as 48 stitch equivalents for placement (visual square forming)
Info :
To create a neat square, place corner clusters exactly at the 4 corner markers (every 12 stitches). The (3 dc, ch2, 3 dc) corner gives the square structure we need. The sides are built with dc groups that will later be turned into tall shell clusters.
Round 26 :
Ch1, hdc in each st and in each dc across sides and corner clusters to regularize height (48 hdc)
Round 27 :
*(1 sc in each hdc for next 4 sts, shell in next 6 sts: (dc3, ch1, dc3))* repeat around so that each side now has decorative shells spaced evenly. This round uses 32 sc and 16 dc shell stitches — shown as consistent side shaping (48 sc equivalent)
Info :
Using hdc and sc rounds helps flatten the round to a squarer silhouette. If your square looks slightly round, press lightly with steam or pin to shape before proceeding.
Round 28 :
1 sc in each st around to tidy shell edges and equalize counts (48)
Round 29 :
*(2 sc, inc) x 12* This round increases by 12 total to add breadth for a final square size (48 + 12 = 60) (60)
Round 30 :
1 sc in each st around (60)
Round 31 :
Work 4 rounds of 1 sc in each st (Rounds 31-34) to stabilize the square edges: Round 31 (60), Round 32 (60), Round 33 (60), Round 34 (60)
Info :
These stabilizing rounds make it easier to join squares without distortion. Keep your tension consistent to prevent wavy edges. If you prefer a slightly larger square for a bigger blanket, repeat one more increase round before stabilizing.
Round 35 :
In BLO: 1 sc in each st around to create a subtle ridge (60)
Round 36 :
1 sc in each st around (60)
Round 37 :
*(3 sc, ch2, skip 1) x repeat around to form spaces for joining later — this round produces 45 sc + 15 small ch-2 spaces (45 sc + 15 ch-2)
Info :
Planned joining spaces at R37 make it easier to see where to attach squares with slip-stitch joins or mattress stitch. Choose your preferred join method and mark corresponding ch-2 spaces so joining rows align across squares.
Round 38 :
1 sc in each st and in each ch-space (60)
Round 39 :
*(1 sc, inc) x 20 = 80 (this round broadens the square slightly to yield a consistent final size if multiple squares will be joined for a blanket) (80)
Round 40 :
1 sc in each st around (80)
Round 41 :
In BLO: 1 sc in each st around to create slight texture (80)
Round 42 :
1 sc in each st around (80)
Round 43 :
*(5 sc, ch3, skip 2) repeat around giving 5-sc side groups separated by ch-3 loops for an airy lattice feel (will produce approx. 64 sc + 16 ch-3 spaces — balanced across round) (64 sc + 16 ch-3)
Round 44 :
Into each ch-3 work (sc, ch1, sc) for firm lattice anchors and 1 sc in each sc across sides to tidy (80 sc)
Info :
These rounds develop the lacey lattice visible in the photographs. If you prefer a denser square, replace ch-3 loops with shorter ch-1 loops and more sc across side groups. Keep counts consistent across all squares so joins match.
Round 45 :
1 sc in each st around (80)
Round 46 :
*(4 sc, inc) x 16 (80 + 16 = 96) (96)
Round 47 :
1 sc in each st around (96)
Round 48 :
Fasten off and weave in ends for the individual square. If you plan to join immediately, leave a 20cm tail for joining and do not fasten off completely (96)
Info :
Your finished single square (as pictured) now has a raised double-layer flower in the center and a squarified outer band approximately 12-14cm wide depending on yarn and hook. Repeat motif for the number of squares desired. For a throw measuring about 110 x 150cm you'd need approximately 7 x 11 = 77 squares; for a lapghan (approx. 70 x 90cm) use 5 x 7 = 35 squares.
— Alternative Petal Detail (Optional Extra Puff Layer Rounds 49-60) :
Round 49 :
If you want an additional petal layer, rejoin lighter petal color at the inner petal base and work *(ch1, sc in top of each petal, ch2) around creating 8 ch-2 loops atop the petals (32 sc + 8 ch-2).
Round 50 :
Into each ch-2 loop make a 6-puff cluster (as described earlier) creating a delicate scalloped petal overlay — 8 small puffs total. After puffs, secure with 1 sc into next sc between petals (32 sc equivalent)
Info :
This optional layer gives extra depth for very 3D blankets. Use this sparingly, as many layers increase yarn usage and bulk when joining squares.
Round 51 :
1 sc in each st around to tidy if you made the optional layer (total stitches will be adjusted to match the outer rounds — aim to reach 96 again through gentle increases) (96)
Round 52 :
Fasten off petal color and weave in ends neatly under the petals to avoid visible tails on the surface.
Info :
If you add this extra layer, ensure you keep the outer rounds in deep lavender to keep the squares visually consistent when joined.
— Making Multiple Squares & Layout :
Info :
Make the number of squares necessary for your desired blanket size. Lay squares in your intended layout and rotate petals for visual interest or alternate light and deep centers for a checkerboard effect. Blocking each square flat before joining yields the neatest finish.
— Joining Squares (Rounds 61-80 join instructions) :
Round 61 :
Choose your joining method. For a neater 'seamless' join, use the flat slip-stitch join or mattress stitch using contrasting or matching deep lavender. If using slip-stitch join, work a join row around the perimeter of each square aligning stitch for stitch in the outer rounds (96 stitches per side reference).
Round 62 :
Slip-stitch join method: Place two squares RS together and insert hook through the outer loop of the first square's ch-3 (or designated join st) and the corresponding place on the second square; sl st through both loops, continue around until edge is joined. Join adjacent squares across the blanket, completing rows then joining rows together. This technique produces a subtle ridge on the wrong side.
Info :
Alternatively, mattress stitch gives almost invisible joins on the RS. Whichever method you choose, be consistent across the blanket for a professional look. Use a long tail from the last round to sew multiple adjacent squares to save time and ends to weave.
Round 63 :
If you prefer, use the 'join-as-you-go' (JAYG) method: On the final round of each square, stop at the corner and slip-stitch into corresponding chain space of neighboring square instead of finishing the round; continue around to attach up to three neighbors per square for efficient joining.
Round 64 :
After joining rows, check for gaps and add extra sc or sl sts into any loosened sections to prevent large holes. Fasten off securely and weave in tails on the wrong side of the blanket.
Info :
Test-join two squares and launder/block them before committing to join method for entire blanket — adjustments to tension at joins are easier on a test pair.
— Border & Finishing (Rounds 81-110) :
Round 65 :
Once all squares are joined, prepare to work a multi-row border in deep lavender. Round 1 of border: join deep lavender at any corner, ch1, 1 sc in same corner space, then sc evenly around edges working 3 sc in each corner space to keep corners square. Aim to place 1 sc approx. every 0.5 cm; count total sc for future reference (estimate will match blanket perimeter — maintain even spacing).
Round 66 :
1 sc in each st around (work 3 sc in each corner) — this evens the border edge and creates a base for textured rows.
Round 67 :
In BLO: 1 sc in each st around to create a raised ridge (this gives the clean lattice look present in the photos).
Round 68 :
*(1 sc in next 3 sts, shell in next 4 sts: (dc3, ch1, dc3))* repeat around to create shell accents along border. Use even spacing; work 3 sc in each corner instead of a shell when you reach a corner to maintain squareness (this decorative round adds texture similar to inner square shells).
Info :
Shells on the border echo the shells used when squaring off each motif. Keep shells balanced: if your blanket is wide, add an extra sc between shells to prevent ripple.
Round 69 :
1 sc in each st around to tidy shells and even row (counts will vary depending on blanket size)
Round 70 :
*(1 sc, ch1, skip 1) around to give a lacy pick-up row for final scallop; when reaching corners do (1 sc, ch3, 1 sc) in corner stitch for a neat finish.
Round 71 :
Final scallop round: In each ch-1 space, work (5 dc) to create small scallops; in corner ch-3 work (dc5, ch2, dc5) for a decorative corner flourish. Fasten off and weave ends. Blocking recommended for perfect scallops.
Info :
For the blanket pictured, the border finished with 3 texture rounds and a scallop row to mirror the petal shapes in the motifs. Adjust number of border rows to taste for a deep or shallow border. Always block at the end to set border and flatten joins.
Round 72 :
Optional: Add a narrow contrast edge in lighter lavender: join on RS and work 1 round of sc followed by 1 round of reverse single crochet (crab stitch) for a rope-like polished edge. Fasten off and weave ends.
Info :
If you used multiple shades in petals, a narrow contrast edge in the lighter shade can help tie the design together visually.
— Care & Blocking :
Info :
Block completed blanket gently: pin to desired size on blocking mats and steam lightly or wet-block if yarn care allows. Cotton often benefits from gentle blocking to smooth joins and set scallops. Follow yarn manufacturer washing instructions; most cotton blends are machine washable on a gentle cycle but dry flat to prevent distortion.
Info :
Washing may soften the petals slightly; reshaping with hands after washing and reblocking will refresh the 3D texture.
Every stitch you make for this blanket brings a little lavender field to life — layered petals, soft lattices, and a cozy border make it a perfect project to savor. Working square-by-square is wonderfully meditative and the end result is a blanket you will be proud to gift or keep. Happy crocheting — take your time, enjoy the bloom of each square, and celebrate the calm lavender vibes you create! 🧶💜