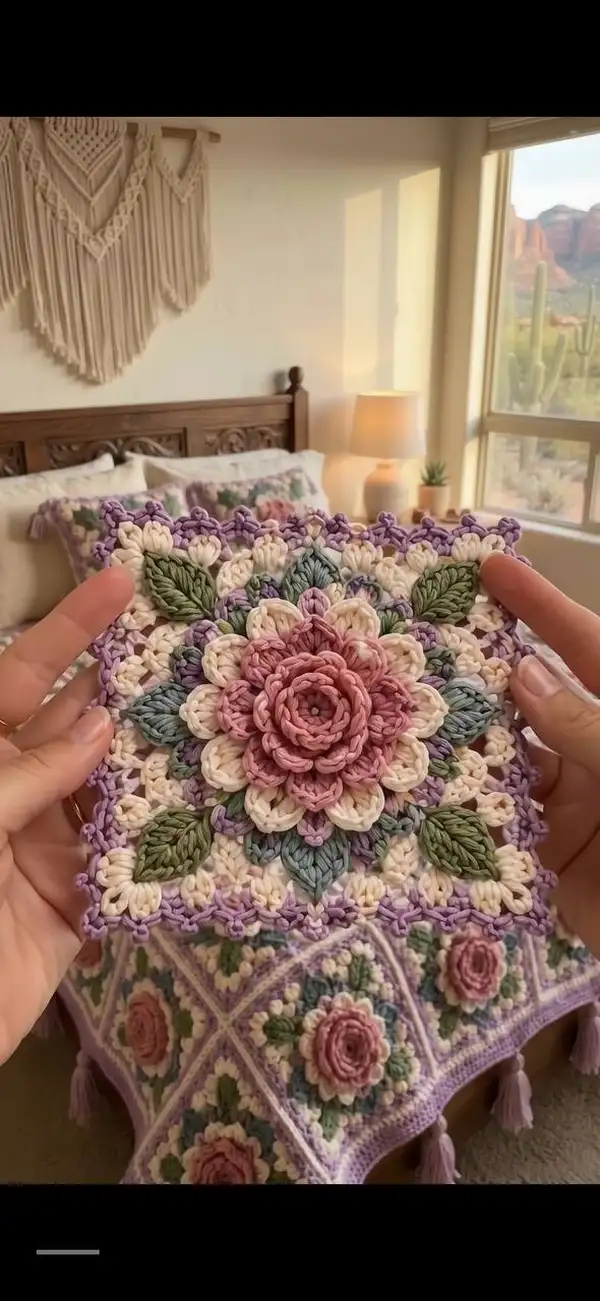
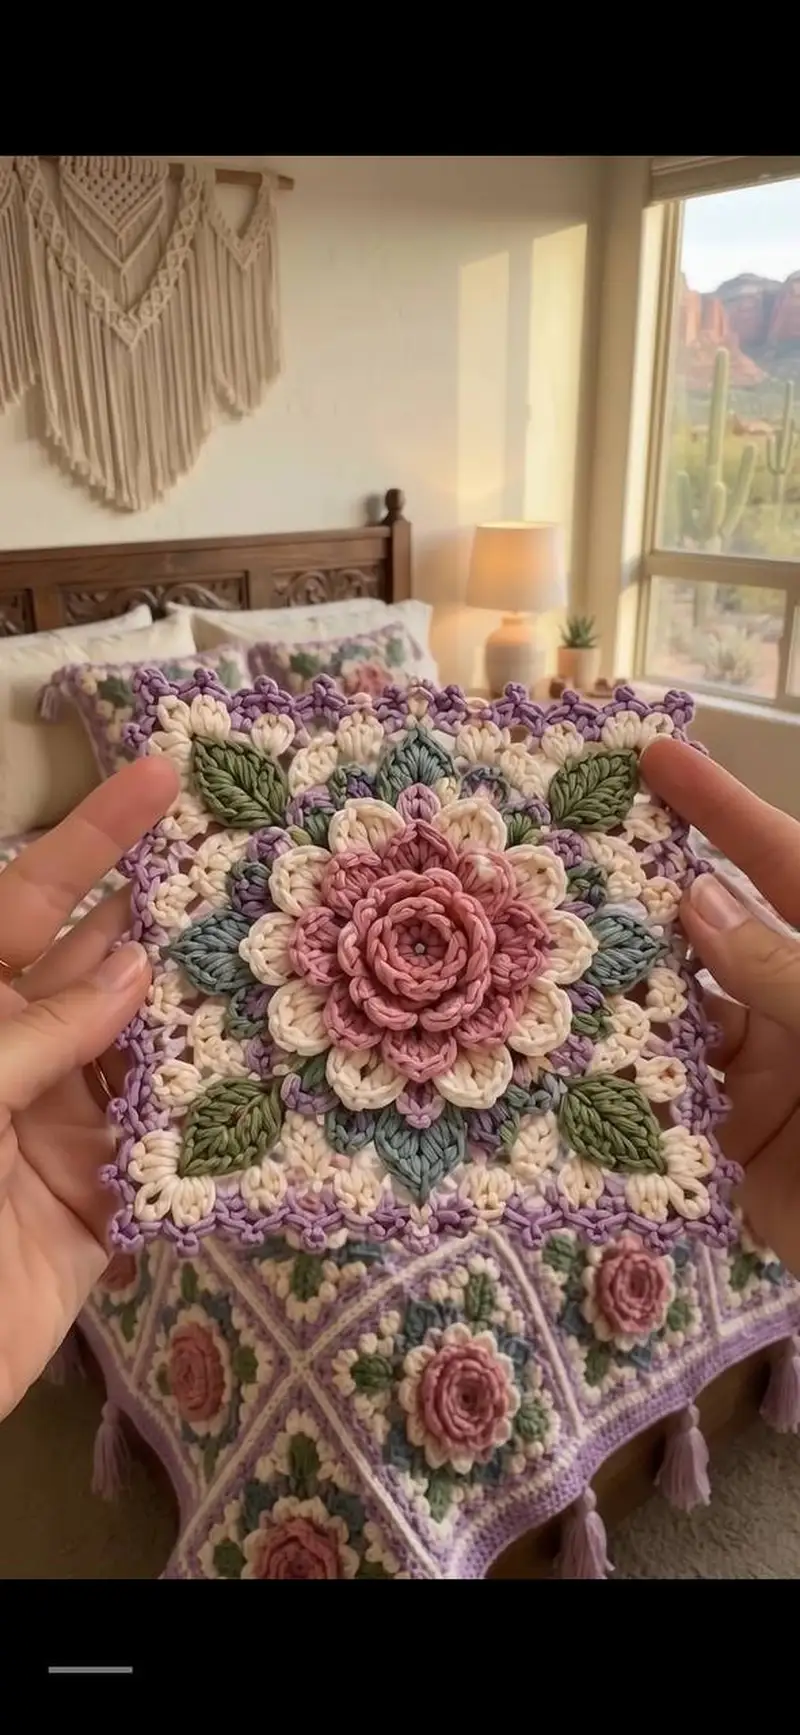
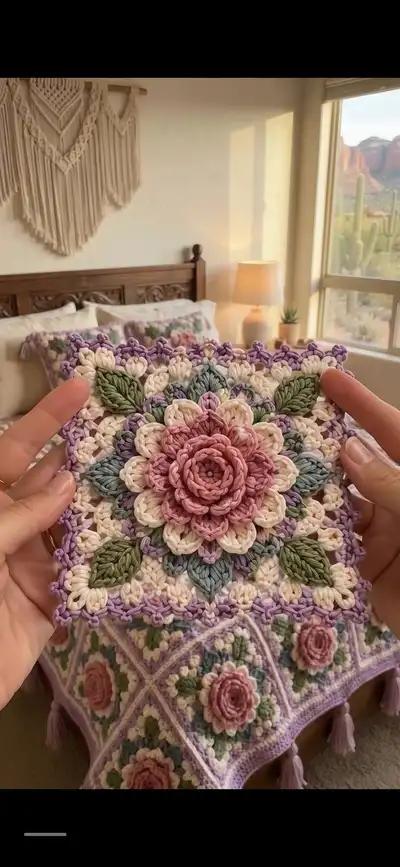
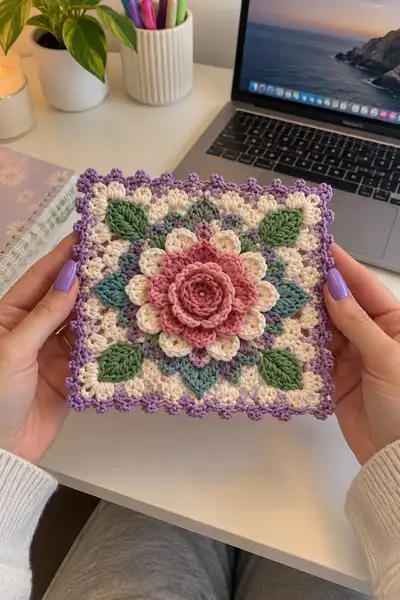
A layered floral granny square that blooms with a three-dimensional rose center, delicate petals and leafy accents. This pattern features soft pastels — dusty rose, cream, sage green, teal-blue and lavender — and a scalloped picot border for a vintage garden look. Perfect for making a full blanket of squares or a single statement cushion panel. Detailed stitch-by-stitch instructions guide you from the center spiral rose to the finished edged square.
Progress Tracker
0% Complete
— Center Rose (rounds 1-12) :
Round 1 :
6 sc in magic ring (6)
Round 3 :
(1 sc, 1 inc) x 6 (18)
Round 4 :
(2 sc, 1 inc) x 6 (24)
Round 5 :
(3 sc, 1 inc) x 6 (30)
Info :
Use dusty rose color for the rose center. Keep tension slightly tighter on these early rounds so the center sits compactly. Place a stitch marker at the first stitch of each round so you can clearly see where rounds begin.
Round 6 :
(4 sc, 1 inc) x 6 (36)
Round 7 :
(5 sc, 1 inc) x 6 (42)
Round 8 :
(6 sc, 1 inc) x 6 (48)
Info :
At 48 sts the center is ready to accept the spiral rosette technique. We'll work a spiral of post stitches and small clusters that will curl in on themselves to form the raised rose. Keep the working yarn attached but mark the first st of the round.
Round 9 :
Ch 1, 1 sc in same st, 1 sc in each st around (48). Join with sl st to first sc. (48)
Info :
Round 9 gives a tidy edge to build the petal base. For the spiral, we will create 12 internal 'petal anchors' spaced evenly: since there are 48 stitches, place one anchor every 4 sts. Use small removable markers in sts 1,5,9 etc to keep track of anchor points if desired.
Round 10 :
Begin spiral petal foundation: *ch 1, in next st work (fpdc, dc, fpdc) all into the same stitch to make a short post cluster; sc in next 3 sts; rep from * around aligning clusters into every 4th stitch (12 clusters, 36 sc between clusters). Total counted as 48 base points (48)
Round 11 :
Working behind the previous clusters for a spiraled effect, into each cluster work (ch 1, 5 tr worked as a closed fan/petal anchored into the same stitch as that cluster). Between petals sc in the 3 sc spaces from previous round. Maintain 48 perceived stitches around (48)
Info :
The 5-tr fan petals will curl slightly. Use your finger to shape each petal as you make it so they stack evenly. If fans flop, reduce tr height to long dc (UK treble = tr) until you get a gentle curl.
Round 12 :
For the inner spiral wrap: ch 1, sc in each st around working into the top of each fan and sc space to lock the petals inward. (48) Fasten off leaving a long tail for weaving under the rose if you want to sew the spiral tighter.
Info :
Use a yarn needle and the long tail to run a spiral gathering stitch around the base of the rose. Pull gently to make the rosette more dimensional, then weave the tail securely on the back. This is optional — some makers prefer the looser rosette look.
— First Petal Layer (rounds 13-28) :
Info :
Change to cream/ivory yarn now. This layer will create the first ring of rounded petals around the central rose. Petals are made as elongated bobble/puff clusters worked into groups spaced every 4 base stitches (12 petals total). Keep the stitch count as 48 base points through these rounds.
Round 13 :
Attach cream in any sc between rose fans, ch 1, sc in same st, *ch 3, skip 3 sts, sc in next st; rep from * around (48 perceived points; ch-3 spaces mark petal locations)
Round 14 :
Into each ch-3 space make a petal: *(bp: yarn over, insert hook, pull up loop, repeat 4 times total to create 5 loops then yarn over and pull through all loops to close; ch 1 to secure) in ch-3 sp; sc in next sc between spaces; rep from * around (12 petals, 12 sc between). Count remains 48 points (48)
Info :
BP = puff/bobble cluster. Keep last pull-through loop loose enough that the puff sits up. Gently tug on each puff to shape so petals look uniform. If your puffs are small, increase to 6 loops for a fuller petal.
Round 15 :
Ch 1, sc in each sc and ch-1 spaces around to lock petals in place (48). Adjust petals with fingers so they lie flat and point outward.
Round 16 :
Work a short pickup round in cream: *sc in next 2 sts, ch 2, sk next 2 sts; rep around. This creates small arches behind petals for the next color to sit into (48)
Round 17 :
Change to muted teal-blue. Into each ch-2 arch, work (3 dc, ch 1, 3 dc) cluster to create a secondary petal point; sc between clusters in the sc spaces. Maintain 48 base visual points (48)
Info :
Carry ends neatly to the back and weave in or braid them into the back fabric; do not carry yarn across the front. If working multiple squares, keep a short tail to sew squares together.
Round 18 :
Ch 1, sc in each st around working into the top of each dc cluster and the sc spaces between (48)
Round 19 :
Repeat Round 14 concept to add a small cream petal on top of each teal cluster: into top ch-1 space work bp (puff of 5 loops) then sc in following sc; rep (48)
Round 20 :
Lock with a sc round: sc in each st around (48)
Info :
Stuffing note: these petals are ornamental and should not be stuffed with fiberfill — shaping is done with stitch tension and gentle steam/blocking if desired. For more dimensional petals, make puffs with 6 loops instead of 5.
Round 21 :
Ch 2, (hdc in next 3 sts, ch 1, sk next st) x 12 around to create small ridge points behind each petal (48)
Round 22 :
Sc in each st around to tidy ridge (48)
Round 23 :
Change to dusty rose for a small decorative ring: *ch 3, sl st into base of next petal (creates tiny loops around center); rep around (48 loops)
Round 24 :
Sc in each loop and between loops as needed to maintain square shaping; aim to stay at 48 base points (48)
Info :
This first petal layer creates the visible rounded petals surrounding the rosette; keep petals evenly spaced and block lightly if required to flatten small irregularities.
— Second Petal Layer (rounds 25-44) :
Round 25 :
Change to cream. Ch 3 (counts as dc), dc in next 4 sts, *ch 1, sk next st, dc in next 5 sts; rep around. (48 points; groups of 5-dc create long petal base)
Round 26 :
Ch 1, sc in top of each dc and ch-1 space to tidy (48)
Round 27 :
Change to muted teal-blue. Into the center of each 5-dc group work a layered petal: (fpdc, fpdc, dc cluster: 3 tr cluster worked together) anchored at center stitch. Sc between petal anchors. Maintain count as 48 anchor points (48)
Info :
Front post stitches (fpdc) push petals forward for a layered look. Work fpdc by inserting hook from front around post of indicated stitch. These stitches make the petals sit above the previous layer.
Round 28 :
Sc around to secure layers (48)
Round 29 :
Change to cream. Work (ch 2, sk 1, sc) in pattern around to create small connecting arches between layered petals (48)
Round 30 :
Work a decorative round: into each arch work (sc, ch 3, sc) making 48 small picot-ready arches (48)
Round 31 :
Change to dusty rose and make 12 raised petals aligned to the original 12 anchors: into every 4th sc work a small 7-loop puff closed and anchored with a sc on either side. Maintain 48 visual points (48)
Info :
If your puffs are merging, separate them gently and block after completing this layer. Use small pins to hold petals in shaped positions while damp-blocking.
Round 32 :
Sc round to tidy (48)
Round 33 :
Change to cream. Work one round of 1 sc in each st (48)
Round 34 :
Decorative ridge: *fpdc around next st, sc in following 3 sts; rep around to draw a ridge behind petals (48)
Round 35 :
Sc in each st to flatten ridge (48)
Round 36 :
Change to lavender accent. Into every 4th st work (ch 3, sl st in same st) to form tiny looped accents around the perimeter of the petal zone (12 loops, integrated into 48 points)
Info :
These little lavender loops will peek out later between layers; keep them small and consistent. Use a slightly smaller hook if your loop size is uneven.
Round 37 :
Sc around in cream to integrate lavender accents (48)
Round 38 :
Add an outer teal scallop: (ch 2, 3 dc in next st, ch 2, sl st in next st) across the round aligning 12 scallops evenly — count remains visually 48 anchor points (48)
Round 39 :
Sc around to tidy (48)
Round 40 :
Work a wide cream round: 1 sc in each st (48)
Round 41 :
Change to dusty rose: work a small decorative spiral of slip stitches and sc across the top of center petals to enhance the rose silhouette (48)
Round 42 :
Sc around in cream to stabilize (48)
Info :
At the end of round 44 we will begin building leaf motifs in the corners. Use this time to weave in any major tails from inner rounds, leaving new color tails long enough to join as needed.
Round 43 :
Ch 1, sc in each st (48)
Round 44 :
Sc around and fasten off the layered petal work for now. Leave tail for sewing if preferred. (48)
— Corner Leaf Motifs (Make 4 - rounds 45-76) :
Info :
Each square has four raised leaves placed approximately at the four compass points. Work each leaf separately and then sew them to the square, or work leaves directly onto the square via joining stitches. Leaves are worked flat with increasing rounds to create a textured, vein-like shape using back post treble and elongated decreases. Make 4 identical leaves in sage green.
Leaf Round 1 :
Make a magic ring in sage green, ch 2 (counts as hdc), 8 hdc in ring. Join (8)
Leaf Round 2 :
Ch 2, (hdc, inc) x 4 (12)
Leaf Round 3 :
Ch 1, sc around (12)
Leaf Round 4 :
Change to back-post shaping: ch 3 (counts as tr), bp tr around next 4 sts, dec over next 2 sts (work 1 tr dec), bp tr around last 4 sts to form tapered leaf point. (12)
Info :
Back post trebles (bp tr) create a raised central vein. Work them consistently on each leaf so veins align when sewn to square. If unfamiliar with bp stitches, practice on a scrap first.
Leaf Round 5 :
Ch 1, sc in first 3 sts, (hdc in next st, 2 hdc in next st) across to widen base, sc last 3 sts (14)
Leaf Round 6 :
Ch 2, fpdc along center stitches to accent vein, sc around edges to tidy (14)
Leaf Round 7 :
Edge round: sc in each st, then 3 sc in tip st to round the point, sc back down the other side to complete leaf shaping (14)
Leaf Round 8 :
Fasten off leaving a long tail for sewing. Block leaf lightly on template if desired and press into shape.
Info :
Make 4 leaves following these 8 rounds each. When placing on the square, position them so their tips point inward toward the center but sit slightly behind the outer petal layers for a natural look. Pin leaves before sewing to check symmetry.
Assembly for Leaves :
Sew each leaf to the square by aligning the leaf base with the cream sc round approximately at the midpoints of the four sides — at roughly rounds 34-38 area. Use whip stitch to catch the base into the square fabric and ladder stitch around the curve for an invisible join. Secure with a few extra stitches at the tip so it does not lift.
— Square Base and Corner Formation (rounds 77-92) :
Info :
Now that the floral center and leaves are in place, build the square background and corner structure. We'll work rounds that gradually turn the circular motif into a square by creating corner chain spaces and filling with v-stitches so corners sit squarely.
Round 77 :
Join cream yarn at a midpoint between two leaves, ch 3 (counts as dc), 2 dc in same st, *sk 3 sts, (3 dc, ch 2, 3 dc) in next st (corner made), sk 3 sts, 3 dc in next st; rep from * around to create 4 corners. At the end join with sl st to top of ch-3. Count measured as 12 groups of 3-dc clusters (48 dc positions) but corners are larger and form the square corners.
Round 78 :
Ch 3, dc in next 2 dc (across cluster), *dc in each of next 3 dc, (dc, ch 2, dc) in corner ch-2 sp; rep around (48 dc positions plus 4 corner ch-2 spaces)
Round 79 :
Ch 1, sc in each dc across and sc 3 in each corner ch-2 sp to maintain corner bulk. This is your first square round; counts vary visually but maintain four distinct corners.
Info :
From now on, treat the square as 4 sides with repeating clusters. Use stitch markers to mark the corner spaces so you can place accent stitches evenly on each side.
Round 80 :
Change to lavender for side accent: *sc in next 8 sts, ch 2, skip 2 sts, sc in next 8 sts; rep for each side and sc 3 in corner to keep the square shape. This places small lavender arches along each side (count per side variable; overall edge remains square)
Round 81 :
Sc in each st around in cream to balance edge and prepare for join rounds (this evens out stitch distribution).
Round 82 :
Work a cluster-into-side pattern: on each side repeat *(3 dc in next 3 sts, ch 1, sk 1) across side; at corners do (3 dc, ch 3, 3 dc) then continue next side. This creates an open, lacy side that frames the central floral motif.
Round 83 :
Sc around in cream to secure lace (use extra sc in corners to keep square: 3 sc in each corner ch-3 sp)
Info :
Periodically check the square with a ruler or against other squares if making a blanket. The corners should measure roughly equal distances from center to corner. Adjust by adding a sc in side rounds if one side is slightly smaller.
Round 84 :
Change to dusty rose and make small decorative slip-stitch spirals across each side by working sl st loops along the side scs. This is purely decorative — keep consistent spacing
Round 85 :
Sc round in cream to lock decorative loops in place (maintain even stitch count)
Round 86 :
Make one round of 1 hdc in each st to add body to the square sides (this evens tension for final border)
Round 87 :
Sc in each st (prepare for picot and final scallop border)
Info :
If making multiple squares, stop here and join with your preferred join method (join-as-you-go, whipstitch, or slip-stitch join). For a joined blanket, use the cream color to match the body seams. For an unjoined single square, continue with the final edging below.
— Final Border and Picot Scallop (rounds 88-114) :
Round 88 :
Change to lavender. Ch 1, sc in same st, *ch 3, skip 2 sts, sc in next st; rep around to create a picot-ready spacing (this creates 16 small arches around the square depending on your stitch distribution)
Round 89 :
Into each ch-3 arch work: (sc, ch 3, sc) making small loops around the edge; at corners work (sc, ch 5, sc) to maintain corner curve
Round 90 :
Sc around in lavender to tidy and create an even base for the final scallops
Round 91 :
Sc in next st, *picot (ch 3, sl st into first ch), sc in next 3 sts; rep across each side. At corners increase picot spacing to keep corner points even. This will create the delicate pointed scallop that frames the square.
Info :
When making picots, keep tension loose on the chain so the picot forms a neat little point; too tight will curl the point inward. If you prefer rounded scallops instead of picots, use (3 dc, sl st) clusters for each point instead.
Round 92 :
Sc in each st around, working 3 sc in corner points to maintain square corners. Fasten off lavender and join cream for a tidy finish round.
Round 93 :
Finishing round: sc in each st in cream to unify colors and weave any remaining tails into this final round so they won’t show on the front. (Final perimeter secured)
Round 94 :
Optional: For an extra-defined edge work a slip-stitch round in contrasting lavender: *sl st in next 2 sts, picot in next, rep around. Fasten off. (This is decorative; counts vary)
Round 95 :
Block the square to shape: pin corners square on a blocking mat and mist lightly or steam-block carefully to set petal shapes and leaves. Allow to dry fully before removing pins.
Info :
If making a blanket, repeat entire square pattern to make as many squares as desired. The design is modular and each square can be made in an alternate colorway while following the same construction.
Round 96 :
Optional tassel/trim: Attach small tassel or fringe to each corner using 6 strands of lavender cut to 10cm, fold in half, and pull through corner loops, secure with a larks head knot. Trim to length.
Round 97 :
Final weave: Using tapestry needle, weave in all ends on the back, taking care to bury tails inside the fabric and between stitches for a clean finish.
Round 98 :
Lightly press with a warm iron through a damp cloth if you need the petals flatter — be careful around puffs to avoid crushing them. Steam blocking is preferred for shaped petals.
Round 99 :
Admire and photograph your finished square! If assembling into a blanket, arrange colorways and sew squares together using a mattress stitch for an invisible join or join-as-you-go for a crocheted seam. (End of pattern)
Info :
Pattern totals: This pattern has been written with many small rounds to allow for detailed shaping, texture and repeated practice. If you prefer fewer rounds, you can combine some sc tidy rounds into longer rounds, but follow the layering order to preserve petal structure.
This lavender rose garden granny square brings cottage-garden charm to every stitch. The layered, sculpted rose center pops beautifully against the cream background while sage leaves and lavender scallops finish the look with soft vintage appeal. Make a single coaster, an elegant pillow, or a whole blooming blanket from repeated squares — each one will feel like a garden treasure. 🌿🌸 Happy stitching and enjoy the slow, satisfying process of making something truly lovely!