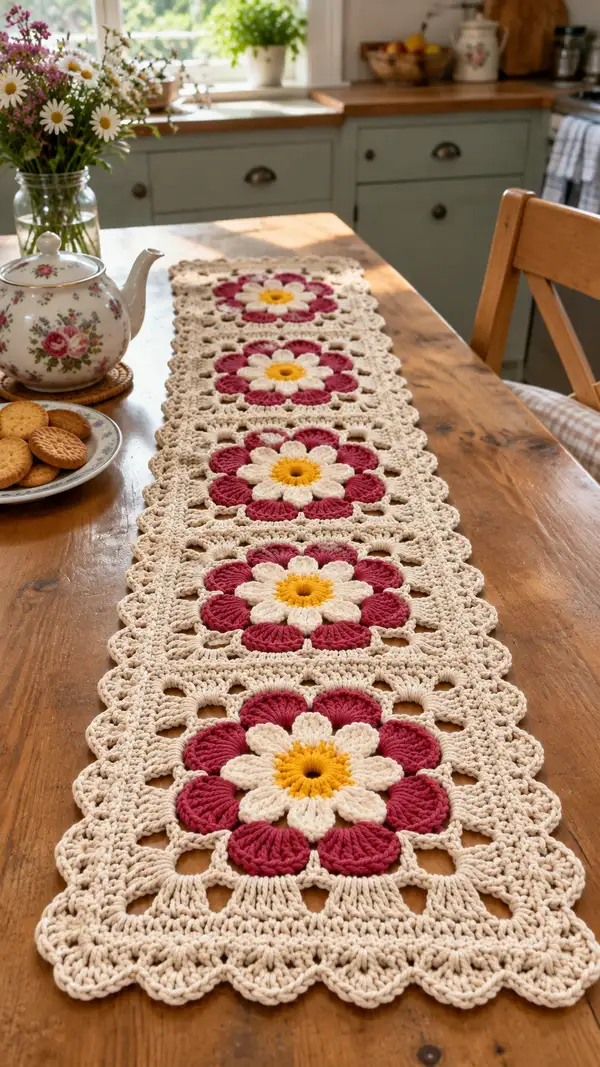
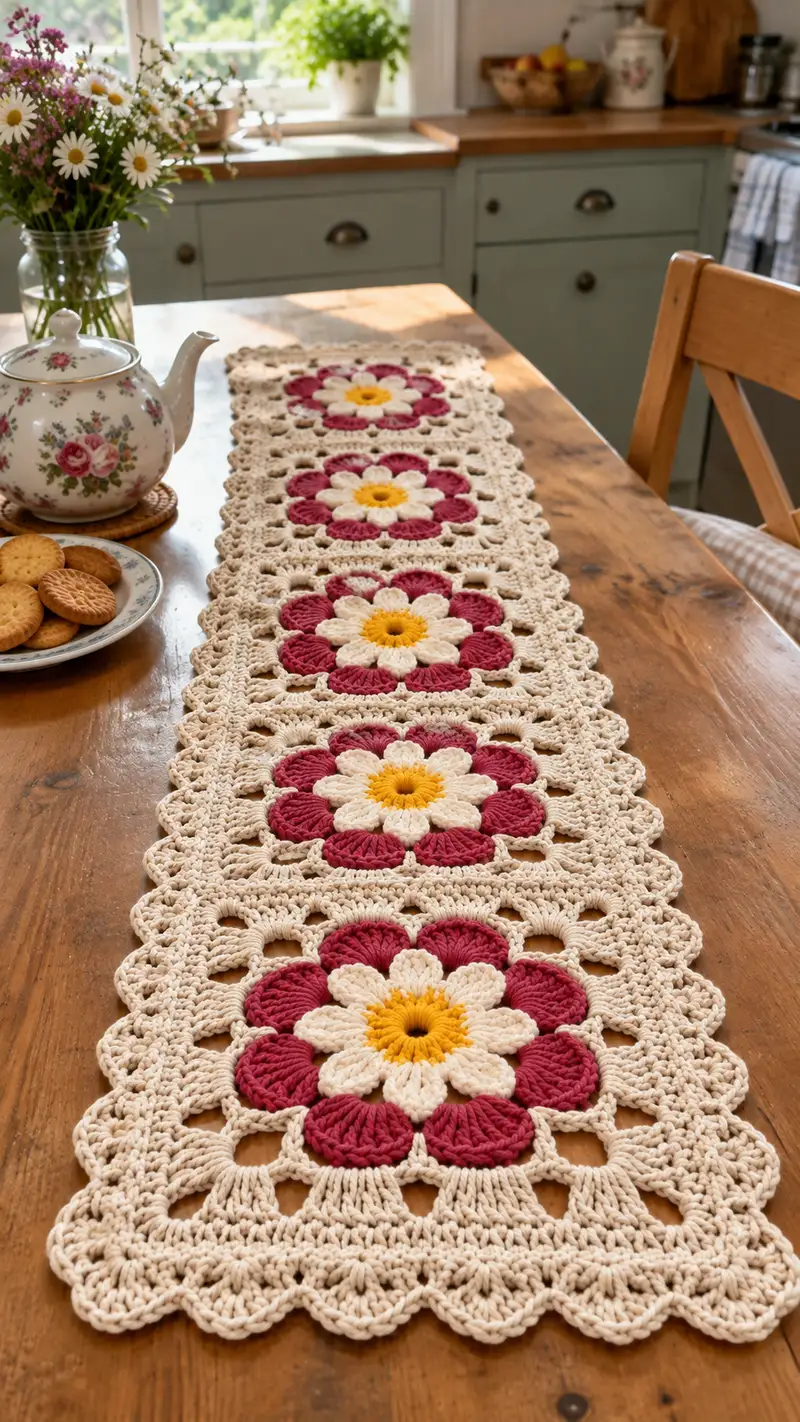
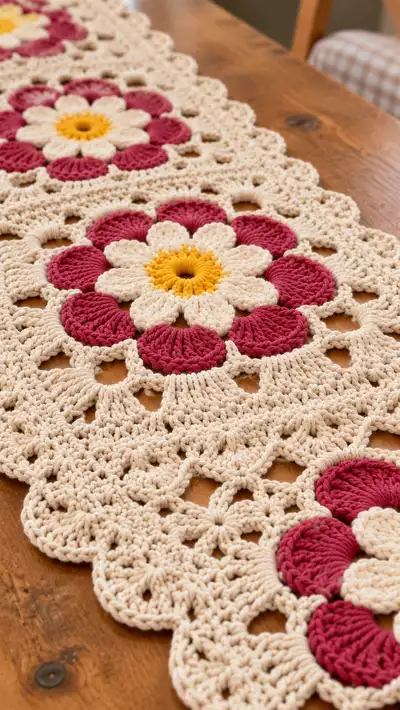
A charming vintage-style table runner made from linked floral granny squares. Each square features a textured yellow center, cream inner petals, deep rose outer petals and a warm neutral background, joined and edged with a scalloped lace border. Designed for a farmhouse kitchen or cozy dining table, this pattern uses cotton-style yarn for a crisp, durable finish and shows off layered petal texture and openwork lace.
Progress Tracker
0% Complete
— Notes & Gauge :
Info :
This pattern is worked in joined floral granny squares. Gauge for one completed motif (before blocking) is approximately 12.5 cm / 5 in across the finished square when using aran/worsted cotton and a 5.0 mm hook. Blocking will increase size slightly. Work tightly enough that puff stitches hold shape, but not so tight they distort texture.
Info :
Throughout this pattern I use standard US crochet terms. Color changes are indicated in Info sections before the round. Use stitch markers to mark round starts. For tidy joins, use the join-as-you-go method described in the Joining section, or sew squares together for a neater seam.
— Motif (Make 5, each motif completed individually) :
Round 1 :
With mustard/yellow, make a magic ring, ch1, 8 sc in ring. Pull ring closed and join with sl st to first sc. (8)
Info :
Pull the magic ring tight to form a small raised center. Do not over-tighten; you want a little depth for the petal base to sit nicely on top of.
Round 2 :
Ch1, work 1 sc in same st, (ch2, skip next st, sc in next st) x3, ch2, skip next st, sc in next st, (ch2, skip next st, sc in next st) x3, ch2, skip next st, sl st to first sc to close round. This creates 8 ch-2 spaces around the center for petal anchors. (8 sc, 8 ch-2 spaces)
Info :
We create chain loops as anchors for the first (inner) petals. The sc stitches between the loops will be used later to maintain an even round count (8 anchors total).
Round 3 :
Change to cream. *Into each ch-2 space: ch2 (counts as first dc), 7 dc into the same chain space, ch2, sl st into same chain space to anchor the petal.* Repeat around to form 8 elongated petals. Fasten off cream if you prefer to join maroon separately. (Petals made on 8 spaces)
Info :
These clusters produce the inner 8 cream petals. Work the cluster loosely enough that the petal has body and sits proud of the center. Each petal is worked into a chain space, not into a stitch.
Round 4 :
Join maroon/rose in a visible spot behind a petal. Ch1, sc in same spot where sl st ended, *ch4, skip to next petal base, sc between petals (on the small sc from Round 2) to create 8 open arches* ; repeat around and join with sl st to first sc. (8 sc anchors, 8 ch-4 arches)
Info :
These ch-4 arches will be the foundation for the larger outer petal clusters. Be consistent with arch sizes so petals line up evenly.
Round 5 :
Into each ch-4 arch: (ch2, 9 dc into arch, ch2, sl st into arch) to form an outer full petal. Repeat around for 8 large maroon outer petals. Fasten off maroon. (8 large petals attached)
Info :
Count petals as you go to ensure you have 8. The 9 dc clusters create broad rounded outer petals that overlap slightly with the inner cream petals for a layered look.
Round 6 :
With ecru (background/main color), join behind any outer petal. Ch1, sc evenly around the entire petal cluster working 1 sc between each petal cluster seam (this will place approximately 48 sc around — count to check). End with sl st to first sc. (approx. 48 sc)
Info :
This round sets the flower into the background and provides a stable round for transforming the motif into a square. Keep stitch count even by working the same number of sc between each petal seam — typically 5 or 6 sc between centers of petals; we standardize at 48 total around.
Round 7 :
Ch3 (counts as dc), dc in each st around (48 dc). Join with sl st to top of ch3. (48)
Info :
Working DC rounds over the sc foundation regularizes your stitch count and builds an even band to work square-forming rounds from.
Round 8 :
Ch1, *sc in next 5 sts, ch3, skip next 2 sts* repeat across to form 8 evenly spaced ch-3 chain spaces; join with sl st to first sc. (Sets 8 corner/chain spaces)
Round 9 :
Change to ecru if not already. In each ch-3 space work: (sc, ch3, 3 dc, ch3, sc) into the space to start building corner shells; between spaces work 1 sc in each of the intermediate 5 stitches. Repeat for 8 corners. Join with sl st. (This round begins to take the work from round to square.)
Info :
At this stage you are creating the corners that will be expanded into a square. Be mindful of keeping 8 evenly spaced corners so the final square is balanced. Count groups to ensure even tension.
Round 10 :
Ch3 (counts as dc), work 2 dc into each of the 3-dc shell stitches of the corners and 1 dc in each sc between shells, creating a wider band. You should now have a more squared outline — approximately 64 dc total (depends on how many dc you placed between shells; aim for even spacing). Join with sl st. (approx. 64)
Info :
If you are using slightly thicker yarn, your stitch counts may be a few stitches less or more; the key is to maintain symmetry. You can always adjust the number of dc between shells to reach an even count divisible by the number of sides.
Round 11 :
Ch1, *sc in next 8 sts, (ch5, skip 2 sts)* around to create a lacy lattice between corner shells; join. (lattice established)
Info :
These chain loops will create the openwork squares seen around each flower motif in the runner. Keep loops consistent for easy joining between motifs later on.
Round 12 :
In each ch-5 loop: (sc, ch3, 7 dc, ch3, sc) to create a raised small shell that echoes the petal look; between loops sc across the straight sections to maintain structure. Join. (This adds texture and raises the motif surface slightly.)
Info :
Use puff or cluster stitches here instead of long dc if you want more texture. For a flatter runner, reduce dc counts marginally and keep stitches lower.
Round 13 :
Ch3, dc evenly around working 1 dc in each of the previous round’s sc and dc stitches. Join to create a sturdy frame. (stitch total variable — aim for even multiple for next round shaping)
Info :
This round gives a solid base for the final square shaping. At this point the motif should read clearly as a square with the flower centered inside.
Round 14 :
Ch1, sc across forming a tidy row: *sc in next 10 sts, (3 sc in next ch-sp to puff out corner)* x4 if needed to emphasize corners. Join. (creates square silhouette)
Info :
The '3 sc in ch-sp' corners are optional and add visual weight to the corners so when motifs are joined the runner edge looks consistent.
Round 15 :
Ch1, reverse single crochet (crab stitch) around the square to provide a neat edge for easier joining later. Work evenly and join with sl st. (neat edge created)
Info :
The crab stitch (reverse sc) is worked left to right and gives a firm, slightly raised edge. This helps the motif keep its shape while you join it to other squares.
Round 16 :
Optional: For motifs that will be linked with join-as-you-go, leave a long tail (approx. 40-60 cm) in ecru to use as a sewing tail. Fasten off and weave in starting tail under previous rounds. Make 5 motifs total following Rounds 1–16.
Info :
Make five motifs for the runner shown (or adapt the runner length by making fewer or more motifs). At this stage block all motifs gently to square them up; pin to measurements and spritz with water or steam-block as your yarn allows.
— Joining Motifs — Seam 1 (Join Motif 1 to Motif 2) :
Info :
We recommend using the join-as-you-go (JAYG) method for a flat, invisible seam. Orient motif 1 face up and motif 2 face down so that the right sides align. Match corners and lattice spaces. The following rounds describe the join performed around the adjacent side; repeat the sequence for each seam between motifs.
Join Round 1 :
With ecru and working from the final round edge, join in the corner st of Motif 1 where you will join with Motif 2. Ch1, sc in same st, sc in next 3 sts along edge. (4 sc so far along seam)
Join Round 2 :
Position Motif 2 to align; sl st through the corresponding edge stitch on Motif 2 to create the first seam stitch, then turn back to Motif 1 and sc in next 4 sts. Continue: sc4 in Motif1, sl st into Motif2 matching stitch; repeat across the adjoining edge until you reach the corner. Fasten off and weave tail. (creates an even ladder of sl st joins between sc groups)
Info :
Work joins with gentle tension so the seam lays flat. If you prefer a very strong seam, use sc through both motifs rather than sl st, but sl st results in a less bulky join.
Join Round 3 :
Repeat the Join Round 2 sequence for the remaining three seams (Motif 2 to Motif 3, Motif 3 to Motif 4, etc.) until all five motifs are connected in a single row. Each seam will have about 8–12 seam points depending on your motif final stitch count — aim for evenly spaced connection points.
Info :
If you want more decorative joining, work a round of sc across the seam on both sides and then a picot or shell edge across the seams to integrate them into the border later.
Join Round 4 :
Once all motifs are joined, work a slow tack row: with ecru, sc evenly across the top edge of the entire runner (the long sides), placing 1 sc in each existing st or equivalent spacing (approx. 8–10 sc per motif side, adjust for your tension). Join. (Creates a continuous top band)
Info :
This band stabilizes the joins and prepares the runner for a uniform outer border. Use stitch markers to mark quarter points and keep edges square.
— Outer Border & Scalloped Edging :
Border Round 1 :
With ecru, attach in any top band stitch. Ch3 (counts as dc), dc in each stitch across the long edge, working 3 dc in each corner to turn. When you reach the end, continue dc across the short sides of each individual motif and along bottom edge to complete a full round around the entire runner. Join with sl st. (This round creates a sturdy frame; stitch total variable)
Info :
Keep the same number of dc on both long sides for symmetry. If needed, adjust by adding or omitting a dc every few inches to avoid buckling. Corners should have 3 dc to square neatly.
Border Round 2 :
Ch1, sc evenly across, placing 3 sc into each corner cluster to keep the corners soft. Join with sl st. (neat sc frame)
Border Round 3 :
Ch3, *skip 1, dc in next 2 sts, ch1, skip 1, dc in next 3 sts* repeat along long edge; work special corner treatment of (dc3, ch1, dc3) at each corner. Join. (adds ornamental vertical ridges)
Info :
These dc clusters and ch-1 spaces create the deeper openings seen in the runner between flower squares. Keep consistent spacing for a lacy look.
Border Round 4 :
Ch1, sc across to stabilize previous round; work 1 sc in each dc and 1 sc in each ch-1 space. Join. (stabilized frame)
Border Round 5 :
Scallop foundation: *skip 2, in next st work (sc, ch2, 5 dc, ch2, sc) skipping two stitches between repeats* around the entire runner to mark scallop arches. Join. (creates scallop arches — count so scallops are even around entire runner)
Info :
Work scallops evenly; you will want the number of scallops on each long side to match so the runner looks balanced. Adjust skip counts slightly if necessary so corners coincide with scallops.
Border Round 6 :
Into each scallop arch: sl st to center top of arch then work: (ch1, sc, ch2, 7 dc, ch2, sc) to make a pronounced scallop with a small picot-style point. Fasten and weave ends. Repeat across all scallops. (produces finished scalloped edge)
Info :
For a lacy vintage finish, you can replace the 7 dc with a series of puff stitches or tall clusters. For a flat finish suitable for table use, keep stitches lower (dc or hdc).
Border Round 7 :
Optional: Work one final row of crab stitch (reverse sc) around the scallops to give a firm, slightly decorative outer finish. This helps the scallops keep shape on the table. Join and fasten off. (final tidy edge)
Info :
After final edging, block the entire runner to shape scallops and flatten seams. Pin each scallop gently and spritz with water or use a low-temperature steam iron, depending on yarn fiber instructions.
— Alternate Decorative Rounds (Optional layering and texture) :
Alt Round A :
Between Round 12 and Round 13 of the motif you can insert a textured row: *fpdc around the petals to make raised ribs* across a full round. Work fpdc in every 2nd stitch around to keep texture subtle. (texture band)
Info :
Front post double crochet (fpdc) worked around previous stitches makes vertical ridges that look like stems between petals — a lovely extra detail if you want a stronger 3D effect.
Alt Round B :
For a decorative join, after joining seam rows, work a round of 'shells into seam points': into every seam sl-st point work (sc, ch3, 5 dc, ch3, sc). This integrates seams into the border and hides join points. (decorative seam shells)
Info :
These decorative rounds are optional and will increase the runner width slightly. They are best applied consistently on all seams and edges so the pattern reads balanced.
— Final Finishing :
Info :
Weave in all tails using a yarn needle, hiding ends along the reverse of dc rows or inside shell clusters. Trim tails close to fabric. Block the runner flat and square, paying special attention to scallop edges. If you want a stiffer look for centerpieces, use a light fabric starch or spray starch before final pressing.
Info :
If you made more or fewer motifs, repeat joining and border rounds proportionally. The border rounds given here scale across linked widths; maintain counts across long edges to keep scallops even.
Completing this runner is such a satisfying journey — the layered petals, the openwork squares and the scalloped edging all come together to create a timeless table accent. Each square is like a small piece of art, and putting them together makes the whole runner sing with cottage charm. Treat yourself to a slow afternoon of crocheting and block with care to get that perfect, even finish. 🧶🌼 Your table will love the warm, handmade touch! 🎀